
Related Manuals for Aerofit AC4050Z

Summary of Contents for Aerofit AC4050Z
- Page 1 23D Rev C CAUTION! Read all precautions and instructions in this manual before using this equipment.
-
Page 2: Table Of Contents
! CAUTION Read all precautions and instructions in this manual before using this equipment. Table Of Contents Important Safety Instructions-------------------------------------------------------------- 3 Main Parts List-------------------------------------------------------------------------------- 6 Warning---------------------------------------------------------------------------------------- 7 Using Method--------------------------------------------------------------------------------- 8 Warm Up Exercises------------------------------------------------------------------------- 9 Power Requirements---------------------------------------------------------------------- 10 Console Information----------------------------------------------------------------------- 11 Moving Instructions------------------------------------------------------------------------ 12 Parts List and Exploded View------------------------------------------------------------ 13 Console Panel Functions----------------------------------------------------------------- 27... -
Page 3: Important Safety Instructions
Impor tant Safety Instructions WARNING - Before using this treadmill or starting any exercise program, consult your physician. This is especially important for persons over the age of 35 and or persons with pre-existing health problems. The manufacturer or distributor assumes no responsibility for personal injury or property damage sustained by or through the use of this product. - Page 4 Impor tant Safety Instructions 6. Hold on to handrail when adjusting speed, incline, or other controls. 7. Always examine your treadmill before using to ensure all parts are in working order. 8. Allow the belt to fully stop before dismounting. 9.
- Page 5 Impor tant Safety Instructions Remember to take the time to review owner's manuals before you start. 1. Before using this treadmill or starting any exercise program, consult your physician and accompanied by specialized person. Adjust the speed not over 8KMH. 2.
-
Page 6: Main Parts List
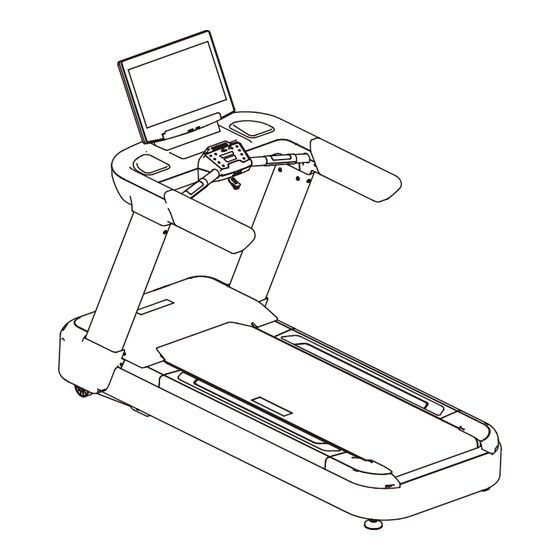
Main parts list ─ 6 ─... -
Page 7: Warning
War ning CAUTION! Before using this treadmill or starting any exercise program, It is important to review this manual and the following precautions. Power switch Precautions 1. Always unplug the treadmill after using to keep the life of treadmill and avoid any risk of injuries. -
Page 8: Using Method
Using Method Please read carefully and using follow the functions: 1. put the plug in the socket, turn on the switch. 2. grasp the handle firmly, stand on the treadmill. 3. Push red safety switch into the casing, tie the safety clip to your cloth, then start the treadmill for exercise. -
Page 9: Warm Up Exercises
War m Up Exercises EXERCISE GUIDELINES WARNING! Before beginning this or any exercise program, you should consult your physician. This is especially important for individuals over the age of 35 or individuals with pre-existing health problems. Warming up prepares the body for the exercise by increasing circulation, supplying more oxygen to the muscles and raising body temperature. -
Page 10: Power Requirements
Power Requirements IMPROPER CONNECTION OF THE EQUIPMENT GROUNDING CONNECTOR CAN RESULT IN A RISK OF AN ELECTRIC SHOCK. CHECK WITH A QUALIFIED ELECTRICIAN OR SERVICE MAN IF YOU ARE IN DOUBT AS TO WHETHER THE PRODUCT IS PROPERLY GROUNDED. DO NOT MODIFY THE PLUG PROVIDED WITH THE PRODUCT. -
Page 11: Console Information
Console Information Before beginning your workout, check your normal resting heart rate. Place your fingers lightly against your neck, or against your wrist over the main artery. After finding your pulse, count the number of beats in 10 seconds. Multiply the number of beats by six to determine your pulse rate per minute. -
Page 12: Moving Instructions
Moving Instructions Caution! In order to protecting your treadmill, spattering water on the machine must be forbidden. To avoid the risk of injury, never attempt to move the treadmill while it is operating. To reduce the possibility of injury while lifting, bend your legs and keep your back straight. -
Page 13: Parts List And Exploded View
Parts List and Exploded View Console assy Part No. Description Grade No. AC40500100 Console Frame AC40502000 Circuit Board Frame AC40502100 Console Back AC40002300 Console Back Cover AC40505400 Console Down Cover AC4050B5500ASSY USB board assy AC4050B5600 Board Fix Plate AC40505900 Cover Fixing Plate GB818M5*12DHS2 Phillip Screw M5*12 1.10... - Page 14 Parts List and Exploded View Console assy ─ 14 ─...
- Page 15 Parts List and Exploded View USB board assy Emergency switch assy Part No. Description Grade No. 1.6.1 AC40505500 usb fix plate 1.6.2 B298-4050B USB board 1.6.3 GB845ST2.9*6.5DS Phillip Screw,ST2.9*9.5 Part No. Description Grade No. 2.5.2.1 RT7504900 The Pressure Spring 2.5.2.2 RT7507400 Upper Casing For Emergency Switch 2.5.2.3 RT7507500 Bottom Casing For Emergency Switch...
- Page 16 Parts List and Exploded View Console base assy Part No. Description Grade No. AC40000200 Console base frame AC40002700V1 Console base up cover AC40002800 Console base down cover AC4050B10WXASSY A-ZONE up cover assy AC40002600ASSY A-ZONE down cover assy AC40002900 Left handle AC40003000 Right handle ECU7P0400...
- Page 17 Parts List and Exploded View Console base assy ─ 17 ─...
- Page 18 Parts List and Exploded View A-ZONE up cover assy A-ZONE down cover assy Part No. Description Grade No. 2.4.1 AC40002400 A-ZONE Circuit Board Frame 2.4.2 AC40002500 A-ZONE up cover 2.4.3 B302-4050B Middle control switch 2.4.4 AC40001200 Start switch 2.4.5 AC40001300 Stop switch 2.4.6 RT7508300...
- Page 19 Parts List and Exploded View Left handle assy Right handle assy Part No. Description Grade No. 2.9.1 AC40003700 Left handle PVC Coated 2.9.2 ECT73800 The cover of the EKG Grip Pulse 2.9.3 ECT73900 The underside cover of the EKG Grip Pulse 2.9.4 GB845ST2.9*13DS Phillip Screw ST2.9*13...
- Page 20 Parts List and Exploded View Fan assy Motor ASSY Part No. Description Grade No. 2.13.1 AC40003400 Fan fix plate 2.13.2 AC40003500 Fan baffle 2.13.3 P07-M35155 2.13.4 GB818M4*40DS2 Phillip Screw M4*40 2.13.5 GB818M5*10DHS2 Phillip Screw M5*10 2.13.6 NM5DS2 Lock Nut M5 2.13.7 NM4DS2 Lock Nut M4...
- Page 21 Parts List and Exploded View Main Frame ASSY Elevating Frame ASSY Part No. Description Grade No. AC4000B06ASSY Elevating Frame ASSY AC4050C05WXASSY Frame ASSY GB5780M10*130DS20 Hex Head Bolt M10*130 NM10DS2 Lock Nut M10 RT7001900 Elevating Frame Fixing Shoulder Bolt DQ10DS2A Washer Φ11*Φ23*2 NM12DS2 Lock Nut M12 DQ12DS2A...
- Page 22 Parts List and Exploded View Left rail assy Part No. Description Grade No. 7.2.19.1 AC40001400ASSY Left rail 7.2.19.2 CRDMJ20*3*1000 7.2.19.3 PT300H5200 Right rail assy Part No. Description Grade No. 7.2.20.1 AC40001600ASSY Right rail 7.2.20.2 CRDMJ20*3*1000 7.2.20.3 PT300H5200 ─ 22 ─...
- Page 23 Parts List and Exploded View Frame ASSY Part No. Description Grade No. AC4000B0500 Frame PT300H0800 Back Cover PT300H5200 End Cap Ground Bumper RT7003000 Switch Fixing Cover AC40004000 Motor Cover AC40004800 Motor Cover Fixing Plate STDP2800 Actuator Antivibration Pad FLPSR-5500 Teflon Washer PT3001400V1 Dust Proof Plate ASSY 7.10...
- Page 24 Parts List and Exploded View Frame ASSY Part No. Description Grade No. 7.38 R60-22M3-RDS Actuator 7.39 AC40004100V1 Front cover 7.40 AC40004400 Left motor cover support base 7.41 AC40004500 Right motor cover support base 7.42 AC40004600 Left End Cap 7.43 AC40004700 Right End Cap 7.44 GB70M8*60*60DHS20...
- Page 25 Parts List and Exploded View Frame ASSY ─ 25 ─...
- Page 26 Parts List and Exploded View General ASSY Part No. Description Item No. AC4050C01WXASSY Console ASSY AC4050B02WXASSY Console Base ASSY AC40000300 Left Upright AC40000400 Right Upright AC4050C07-WXASSY Main ASSY AC40004200 Left Cover AC40004300 Right Cover A01-6 Power Cord AC2970C1100V1 Power cord fixing plate PNLJCM8*20DHS19 Hexalobular Socket Pan Head Tapping Screws W/ Serrated Lock Washer M8*20 GB70JCM10*25DS20...
-
Page 27: Console Panel Functions
Console Panel Functions Rated voltage AC 220-240V 50/60Hz Rated power 2300W Speed range 1.0-20.0km/h Incline range 0-15% HEART RATE, % HEART RATE, TIME, TVG SPEED, Display CAL/HOUR, CALORIES, DISTANCE, STEPS, SPEED, INCLINE, DOT MATRIX (16*32). Other Function USB power supply Home Page and Button Instructions Home page: The home page displays the following functions: START: Press Start to start running. - Page 28 Console Panel Functions Target Press TARGET on the homepage, select the mode from TIME, DISTANCE, and CALORIES. Scroll the red bar or press the +/- button to set the age, weight and running data. Press START to start running. Once user achieves the set goal, the treadmill will automatically stop. Set exercise goals based on time Set exercise goals based on distance ─...
- Page 29 Console Panel Functions Set exercise goals based on calories START Press START on the home page to enter the running page. After pressing, the display will show the countdown of 3, 2, 1, and GO. When the sound ends, the treadmill will enter the running phase. Running page ─...
- Page 30 Console Panel Functions Incline and Speed During the operation of the treadmill, you can press the up and down icons in the lower left of the screen to adjust the incline, in the lower right to adjust the speed, or press the shortcut icons for speed and incline to set with just one click.
- Page 31 Console Panel Functions Cool Down Entering the running page, press STOP to cool down. This program will halve the speed and display a countdown of three minutes. The relaxation time of three minutes is not included in the exercise report. Cool down STOP Enter the running page and press STOP button to stop the treadmill.
- Page 32 Console Panel Functions Exercise report Other Buttons on the Running Page "Home/Back" button: When user go back to the home page, the exercise page will also shrink to display on the home page. User can change language on the home page. You can also switch to other modes, such as HILL, and it will pop up window to hint whether to switch.
- Page 33 Console Panel Functions Press Entertainment icon Volume button: Press the speaker icon to adjust the volume Press volume ─ 33 ─...
- Page 34 Console Panel Functions Other control bar buttons: Press time +/- to adjust the exercise countdown time. Press distance +/- to adjust exercise distance. Press calories, set weight first, then press +/- to adjust exercise countdown calories. Press CHART to display speed/incline in icon mode. Press TRACK to display runway mode.
- Page 35 Console Panel Functions Press CALORIES (set weight) Press CALORIES ─ 35 ─...
- Page 36 Console Panel Functions Press CHART Press TRACK ─ 36 ─...
- Page 37 Console Panel Functions Exercise ending Real-time heart rate, average heart rate, maximum heart rate of this exercise, Real-time speed of this exercise. Swipe left to display the average pace and average speed, Real-time distance of this exercise. Swipe left to display climbed distance, Real-time metabolic rate of this exercise, Real-time calories this exercise burned.
- Page 38 Console Panel Functions Entertainment page - internet connected If you want to display the running page in full screen, press the white " " button to hide the control bar. Press here again and the control bar will appear. ─ 38 ─...
- Page 39 Console Panel Functions Virtual Scenery Press Virtual Scenery on the home page to enter the virtual scenery interface. Virtual scenery is the process of simultaneously playing scenery videos during the running process, allowing users to have an immersive running feeling. Users can choose the running scene according to their preferences.
- Page 40 Console Panel Functions Virtual Scenery Page Press any scenery mode to enter the running page. Video mode PROGRAMS Press Programs to enter the program running page. The system has pre-set five exercise modes: HILL, HEART RATE, INTERVAL, CARDIO, FAT BURN, etc. If you want to make a choice based on your own situation, press Custom to choose the exercise time, speed, and incline according to your personal exercise habits, and set up a exercise program.
- Page 41 Console Panel Functions Pre-set Programs After selection, you can view detailed exercise data, including time, distance, calories burned, incline and speed at different time periods of this exercise. Pre-set program Custom Interval 1. Press Interval to adjust the interval time, maximum/minimum speed, age and weight. According to personal exercise habits, you can choose exercise time and speed to set up an exercise program, which can be composed of multiple exercise segments.
- Page 42 Console Panel Functions FIT TEST Press FIT TEST on the home page, and perform target exercises based on the Marine PET, Army PFT, Air Force PRT, Navy PRT, PEB, IPPT, CTPWT, FIREMAN TEST UK, etc. You can select gender, age, weight, and initial speed to start the exercise. Score will appear at the end of the exercise correspondingly.
- Page 43 Console Panel Functions Screen Mirror Press Screen Mirror on the home page. The left side of the screen mirror page displays Android screen mirroring and the mirroring code, while the right side displays Apple screen mirroring and the mirroring code. For example, press the screen mirror on a Xiaomi phone, search for the Android screen mirroring code, press connected, then a connection message will appear on the screen indicating whether to accept it.
- Page 44 Console Panel Functions Apple screen mirror WiFi Settings Press WiFi to display a WiFi pop-up window, open WiFi; it will display the available WiFi. Press the WiFi that needs to be connected, a pop-up window will appear. After entering the password, the system will automatically connect to the network, and prompt that the network connection is successful.
- Page 45 Console Panel Functions USB icon : When inserting a USB drive, the icon will be displayed. But when removing USB, it will disappear. Bluetooth Settings Press the Bluetooth button at the top of the screen to enter the Bluetooth settings page with one click.
- Page 46 Console Panel Functions Heart Rate Bluetooth Press the HR Bluetooth icon at the top of the screen to enter the heart rate Bluetooth settings page with just one click. Press the HR Bluetooth switch to turn on Bluetooth, and select the device you want to connect to.
- Page 47 Console Panel Functions Volume Settings Press speaker icon to scroll up and down to adjust the volume. If you press other blank spaces, volume adjustment will disappear. Volume adjustment Language Switch Switch language among Chinese, English, French, German, Spanish, Portuguese, Italian, Russian, Japanese, and Korean.
- Page 48 Console Panel Functions Brightness Settings Press the brightness icon on the homepage to scroll up and down to adjust the brightness. If you press other blank spaces, the brightness adjustment will disappear. SETTINGS Continuously pressing above the fixed program will display device information, system reset, factory settings, and software upgrade.
- Page 49 Console Panel Functions Factory settings Press Factory and enter the password 90638818 to enter the factory settings. Enter password Basic Parameters: Units can be selected in metric or imperial systems, and device models can be AC2990, AC4050, or RT970. Incline segment can be set with a minimum of 10 and a maximum of 20. Incline self-check is required, otherwise error 2 (incline error) may occur.
- Page 50 Console Panel Functions Screensaver Settings: Press screensaver settings to set the automatic screensaver advertisement time (30-60 seconds). As long as you don't press the screen, whether you are running, browsing web pages, or checking incline, the treadmill will display the screensaver advertisement. To import the advertisement, insert a USB drive with the advertisement path (file name is screensaver, advertisement format is jpg.
- Page 51 Console Panel Functions Time and Date: Press time and date to choose whether to automatically set the time (internet connection is required). Press Select Time Zone to select the time zone needed. Time and date Select time zone ─ 51 ─...
- Page 52 Console Panel Functions Treadmill Error Messages Malfunction Corrective Action ER01, 1. Check console and the main communication cable connection. Communication Error 2. Check inverter and the main communication cable connection. 3. Inverter check. 4. Console check. ER02, 1. Elevation auto-sense mode. Elevation Error 2.
-
Page 53: Electrical Connection
Electrical Connection ─ 53 ─... -
Page 54: Belt Adjustment And Maintenance
Belt Adjustment and Maintenance 1. Belt Adjustment: Belt adjustment and tension performs two functions: *The distance between belt and motor cover from left to right within +/-5MM, then needed to be adjusted. *Adjust belt by speed not more than 4KMH. A. - Page 55 Belt Adjustment and Maintenance B. The speed for walking belt is 5KMH, hold on the handrail, stand on the side rail, one foot on the belt but without slipping----it's normal. 2. CLEANING: Routine cleaning of your unit will extend extend the life of your unit. Warning! To prevent electrical shock, be sure the power to the treadmill is OFF and the unit is unplugged form the wall electrical outlet before attempting any cleaning or mainteance.
-
Page 56: Maintenance Check List
MAINTENANCE CHECK LIST ─ 56 ─...
Need help?
Do you have a question about the AC4050Z and is the answer not in the manual?
Questions and answers