
Related Manuals for Technische Alternative ESR32


Summary of Contents for Technische Alternative ESR32
- Page 1 ESR32 SIMPLE SOLAR CONTROL UNIT Programmes Operation Installation Manual Version 1.02 English...
- Page 2 Diese Anleitung ist im Internet auch in anderen Sprachen unter www.ta.co.at verfügbar. This instruction manual is available in English at www.ta.co.at Ce manuel d’instructions est disponible en langue française sur le site Internet www.ta.co.at Questo manuale d’istruzioni è disponibile in italiano sul sito Internet www.ta.co.at Estas instrucciones de funcionamiento están disponibles en español, en Inter- net www.ta.co.at.
-
Page 3: Table Of Contents
Table of contents Safety requirements ............4 Maintenance . -
Page 4: Safety Requirements
Safety requirements All installation and wiring work on the controller must only be carried out in a zero volt state. The opening, connection and commissioning of the device may only be carried out by competent personnel. While doing so, they must observe all local safety requirements. This device is state of the art and meets all necessary safety regulations. -
Page 5: Generally Applicable Rules
Generally applicable rules For the proper use of this device The manufacturer’s warranty does not cover any indirect damage to the unit if the technician install- ing the unit does not equip it with any additional electromagnetic modules (thermostat, possibly in combination with a one-way valve) to protect the device from damage as a result of malfunction un- der the following circumstances: •... -
Page 6: Hydraulic Diagrams
In the menu command F CHCK, the mechanic can activate this function check for the ESR32. This is possible for both pro- grams and is disabled ex works. For details, see “Status display Stat”. -
Page 7: Programmes 4-7 - Loading Pump Control
Programmes 4-7 – Loading pump control Programme 4 S3 for programmes 5 and 7 Required settings: max . . . limit cylinder S2 max2 . . see programme 5 diff min1 . . . switch-on temp. boiler S1 min2 . . . see programme 7 diff . -
Page 8: Programme 8, 9 - Air Flap Control For An Earth Collector
Programme 8, 9 – Air flap control for an earth collector Programme 8 A = ON Required settings: S1 max max ..upper switch-on threshold S1 min ..lower switch-on threshold S1 A = OFF S1 min A = ON The output switches, when S1 >... -
Page 9: Programme 12 - Burner Request Via Holding Circuit
Programme 12 – Burner request via holding circuit Required settings: max ..limit S1 ..switch-on threshold S2 The output switches on when S2 < min and only switches off when S1 > max. In other words, ... - Page 10 Generally applicable for programmes 16 and 17: No thermostat function or differential switching function is activated. Calling one of these two pro- grams the measuring speed of the input S2 is automatically increased from AV 1.0 to AV 0.4 (see in the menu MEN under SENSOR).
-
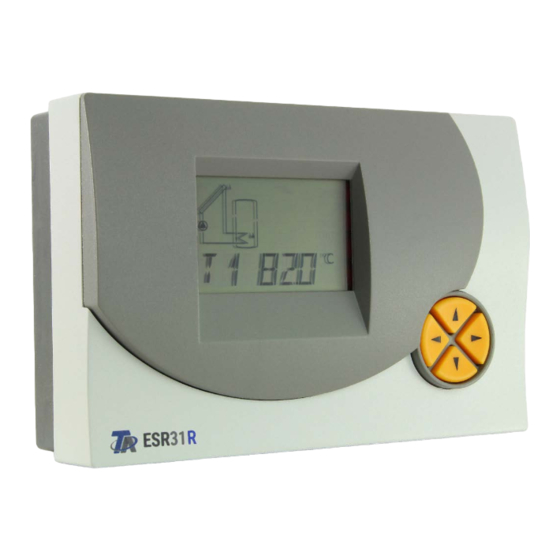
Page 11: Operation
Operation The large display contains all of the icons for all of the important information and a field for plain text. Navigation with the co-ordination keys is adapted to the display structure. = Navigation keys to select the display and change parameters. ... -
Page 12: The Main Menu
The main menu Temperature Temperature Temperature sensor 1 sensor 2 sensor 3 External value 1 Volume flow, only Wind velocity, only Only displayed if displayed if displayed if S3 = WS external DL is acti- S3 = VSG vated ... - Page 13 S1 to S3 displays the value measured at the sensor. The display (unit) depends on the settings of the sensor type. Further sensor display types: Insolation in W/m² Digital status 1 = ON (insolation sensor) (digital input) If in the SENSOR menu (main menu ENTER/Men) one sensor is set to OFF, then the value display of this sensor is displayed in the main level.
-
Page 14: Changing A Value (Parameter)
Stat: Display of the system’s status. Depending on the program selected, various system sta- tuses are monitored. If any problems have occurred, this menu contains all of the infor- mation. Par: The navigation keys on the parameter level ( ) allow you to select the icons under the ... -
Page 15: Parameter Menu Par
Parameter menu PAR Max limit switch-off Code to enter menu Version number threshold Max limit switch-on Min limit switch-on Min limit switch-off threshold threshold threshold Difference switch-on Difference switch- Automatic / Manual threshold off threshold mode ... -
Page 16: Set Values (Max, Min, Diff)
Set values (max, min, diff) The device does not have any switching differentials (difference between temperatures to switch on or off); rather, all of the threshold values are divided into switch-on and switch-off values. In addition, some programs have several similar thresholds such as max1, max2. To make a distinction, the in- dex for max is also displayed in the same line. - Page 17 Schematic representation of setting values...
-
Page 18: Automatic / Manual Mode
Automatic / manual mode O AUTO The output is set to automatic mode and can be switched for test purposes to manual mode (O ON, O OFF). When the manual mode has been selected, an icon appears under the text line. Settings: AUTO the output switches according to the program diagram ON the output switches off... -
Page 19: Menu Men
Menu MEN The menu contains basic settings to specify additional functions such as sensor type, function check, etc. Navigation and changes are done as usual with the keys , while the dialogue is only set up in the text line. As the settings in the menu can change the basic features of the control unit, only a technician who has the code can open this level. -
Page 20: Brief Description
Brief description ENGL Language selection: The entire menu can be switched to the desired user language even before the code is provided. The following languages are available: German (DEUT), English (ENGL). CODE Code number for entering the menu. The rest of the menu items are only displayed once the correct code number is entered. -
Page 21: Sensor Menu Sensor
Sensor menu SENSOR Sensor S3 has been used as example for the sensor settings, since this sensor has the most setting options..* flashes ...** Settings regarding the sensor’s behaviour follow: Set up an offset for sensor correction. The sensor is correct by the entered value (nega- tive input possible). - Page 22 After confirming the choice “VSG”, the scaling in LPI (litre per pulse) can be defined on the left. Wind sensor: Only connected to input S3, to read in the pulses of the wind sensor WIS01 from Technische Alternative (1Hz per 20km/h).
-
Page 23: External Sensors Ext Dl
Due to the relatively high power requirement, the “bus load” must be considered: The controller ESR32 delivers the maximum bus load 100%. For example, the electronic sensor FTS4- 50DL has a bus load of 25%, therefore up to a max. 4 FTS4-50DL can be connected to the DL bus. -
Page 24: System Protection Functions
System protection functions Collector excess Frost protection temperature limiter Collector excess temperature limit OVER T Steam builds up when the system is not circulating. When it automatically switches on again, the pump does not have the pressure to lift the fluid level above the highest point in the system (collector feed line). -
Page 25: Collector Frost Protection Frost
Collector frost protection FROST This function is disabled ex works and is only necessary for solar power systems that run without antifreeze: In the south, the energy from the solar tank suffices to keep the collector at a minimum temperature for the few hours below freezing. At min of 2°C on the collector sensor, the settings in the chart release the solar pump and block it again at min ... -
Page 26: Start Function Startf
Start function STARTF (ideal for tube collectors) Solar thermal systems sometimes start too late in the morning when the collector sensor does not come into contact with the warm heat transfer medium in time. Flat collector fields or vacuum tubes with forced circulation often lack sufficient gravity pull. - Page 27 ON / OFF Start function ON/OFF Indicates a sensor input if a radiation sensor is used. If no radiation sensor is used, the average temperature (long-term mean regardless of the weather) is calculated. Setting range: S1 to S3 Input of radiation sensor E1 to E9 value of the external sensor GBS --...
-
Page 28: Run-On Time
Run-on time During the start phase, the pumps may repeatedly switch on and off for a long time, especially with solar and heating systems with long hydraulic system lines. This response can be reduced by using a speed control or increasing the pump after-run time. If the control output is allocated to the output and no absolute value control, differential control or event control is activated, the analogue level for the maximum speed is additionally issued at the control output. -
Page 29: Control Output Co Out (0-10V Or Pwm)
Control output CO OUT (0-10V or PWM) Different functions of the control output: Control output deac- 0 - 10V output PWM output tivated Error message Error message (inversely switches 5V power supply (switches form 0 to form 10 to 0 V upon 10 V upon error) error) Control output deactivated;... - Page 30 The following settings are only possible in 0-10V and PWM modes Warning! The values in the following description are by way of example only; they must, in all cases, be matched to the system! Functionality of con- General enabling of Absolute value con- trol output control output...
- Page 31 Output mode Integral part Differential part 0-100 or 100-0 Minimum analogue Maximum analogue Delay time stage stage Current analogue Setting a test ana- stage logue stage In this menu the parameters for the control output are specified. As analogue output it can put out a voltage of 0 to10V in 0.1V increments.
-
Page 32: Absolute Value Control
Absolute value control = maintaining a sensor S1 can be kept at one temperature (such as 50°C) very well by using the speed control. If the solar radiation is reduced, S1 becomes colder. The control unit then lowers the speed and hence the flow rate. -
Page 33: Differential Control
Differential control = maintaining the difference between two sensors’ temperatures Keeping the temperature difference constant between S1 and S2, for instance, allow for “shifting” op- eration of the collector. If S1 drops due to lower irradiation, the difference between S1 and S2 thus drops. -
Page 34: Ereignisregelung
Ereignisregelung = If a set temperature event occurs, the speed control starts, thus keeping a sensor constant. If, for instance, S3 reaches 60°C (activation threshold), the collector should be kept at a certain tem- perature. Maintaining a sensor then works as with absolute value control. Example: ... -
Page 35: Stability
Stability The speed control has a PID controller. It ensures an exact and fast adjustment of the actual value to the set point. In applications such as solar power systems or feed pumps, the following param- eters should be left in factory settings. With a few exceptions, the system will run stably. These two values have to be balanced, however, especially for hygienic hot water from the external heat ex- changer. -
Page 36: Output Mode, Output Limits
Output mode, output limits Depending on the pump version, the control mode of the pump can be normal (0 – 100 “solar mode“) or inverse (100 – 0, “heating mode“). There can also be specific requirements for the limits of the control range. -
Page 37: Function Check F Chck
Some countries only offer subsidies for the installation of solar thermal systems if the control units have a function check to detect a sensor defect and a lack of circulation. In the menu command F CHCK, the mechanic can activate this function check for the ESR32. This function check is disabled ex works. -
Page 38: Heat Meter
Heat meter ON/OFF Sensor flow Sensor return line either: No volume flow Fixed volume flow encoder Volume flow encoder Effect of output sta- Anti-freeze percent- Sensor adjustment tus on HM ON/OFF Clear sensor adjust- Clear heat meter ment The heat meter is deactivated by default. - Page 39 ON / OFF Enable/disable heat meter Sensor input for flow temperature Setting range: S1 to S3 Input of the flow sensor E1 to E9 Value from external sensor via DL Sensor input for return temperature Setting range: S1 to S3 Input of the return sensor E1 to E9 Value from external sensor via DL...
- Page 40 If the heat counter has been activated, the following are displayed in the basic menu: • the current output in kW • the amount of heat in MWh and kWh • of the volume flow in litres/hour IMPORTANT: If an error (short circuit, interruption) occurs at one of the two set sensors (supply sen- sor, return sensor) for the heat meter, the current output is set at 0, i.e.
-
Page 41: Step By Step Setup Of The Heat Meter
Step by step setup of the heat meter You have the option of using 2 different volume flow encoders: • the pulse encoder VSG and • the FTS-DL, which is connected to the data link. If you do not use a volume flow encoder, then you can only set a fixed volume flow. In the following, the necessary settings are displayed step by step.. - Page 42 FTS-DL Example: fitting in the return, use of an external sensor for the flow line which is connected to the FTS4-50DL The FTS4-50DL is connected to the data link (external sensor), hence: menu “EXT DL”, setting of the volume flow encoder on the display of the external sensor “E1“: 101 (address 1, index 01) Setting the sensor temperature of the FTS4-50DL for the return: menu “EXT DL”, on the display „E2“: 102 (address 1, index 02)
- Page 43 No volume flow encoder Access to menu “HEAT M”, setting to "ON" Setting of the pre-run sensor in the SFL display, in the example shown, sen- sor S1 Setting of the return sensor in the SRT display, in the example shown, sen- sor S2 Entry of “--”...
-
Page 44: Status Display Stat
Status display Stat The status display provides information in special system situations and problems. It is mostly in- tended for use with solar thermal systems, but can also be useful with other diagrams. The status display can then only operate if an active function check is set off via defective sensors S1 or S2. For solar applications, a distinction has to be made between three status areas: •... - Page 45 Function check activated Collector - excess Function check acti- Function check temperature cut-off vated error no error active (no error occurred occurred) Error sensor 1 Error sensor 2 Sensor 3 no error (interruption) (short circuit) Delete errors (only Circulation error possible once all only displayed when...
-
Page 46: Version Display Vers
Version display VERS The version menu displays device-related information, namely: • Software version • Hardware version • Date of manufacture • Serial number Display date of man- Software version Hardware version ufacture Display serial num-... -
Page 47: Installation Instructions
Installation instructions Sensor installation The sensors must be properly arranged and installed for the system to function correctly. • Collector sensor: Either insert the sensor in a pipe directly soldered or riveted to the absorber and extending out of the collector casing or screw the sensor onto a T piece on the end of the supply line’s collecting tube using an immersion sleeve. -
Page 48: Installing The Device
Installing the device WARNING! Always pull the mains plug before opening the casing! Only work on the inside of the control system when it is without voltage. Loosen the screw on the top of the casing and remove the lid. The electronics for the control unit is in the lid. -
Page 49: Special Terminals
The bi-directional data link (DL-Bus) was developed for the ESR/UVR series and is only compatible with products of the Technische Alternative company. Any cable with a cross section of 0.75 mm² can be used for the data link (e.g. twin-strand) having a max. length of 30 m. For longer cables, we recommend the use of shielded cable. -
Page 50: Tips On Troubleshooting
Tips on troubleshooting In general, all of the settings in the menus Par and Men and the terminal should first be checked if there is a malfunction. Malfunction, but “realistic” temperature values: • Check program number. • Check the switch-on and switch-off thresholds and the set differential temperatures. Have the thermostat and differential thresholds already been reached? •... -
Page 51: Information On The Eco-Design Directive 2009/125/Ec
Max. power con- max. [W] sumption [W] sumption [W] ESR32 1,03 / 1,27 1,3 / 1,6 Definitions according to Official Journal of the European Union C 207 dated 03/07/2014 The classification applied is based on optimum utilisation and correct application of the products. -
Page 52: Technical Data
Technical data Power supply 230V~ 50-60 Hz Power input max. 1,6 W Fuse 3.15 A fast-acting (device + output) Supply cable 3 x 1mm² H05VV-F conforming to EN 60730-1 Case Plastic: ABS, flame resistance: Class V0 to UL94 Norm Protection rating II –... - Page 53 EU Declaration of conformity Document- No. / Date: TA17003 / 02.02.2017 Manufacturer: Technische Alternative RT GmbH Address: A-3872 Amaliendorf, Langestraße 124 This declaration of conformity is issued under the sole responsibility of the manufacturer. Product name: ESR32-R Product brand: Technische Alternative RT GmbH...
- Page 56 Note: The following warranty conditions do not in any way limit the legal right to warranty, but rather expand your rights as a consumer. 1. The company Technische Alternative RT GmbH provides a one-year warranty from the date of purchase for all the devices and parts which it sells. Defects must be reported immediately upon detection and within the guarantee period.
Need help?
Do you have a question about the ESR32 and is the answer not in the manual?
Questions and answers