Advertisement
Quick Links
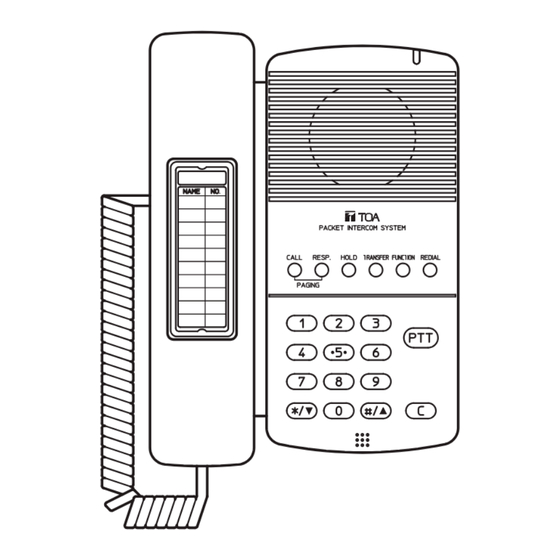
ANALOG STANDARD MASTER STATION
Thank you for purchasing TOA's Analog Standard Master Station.
Please carefully follow the instructions in this manual to ensure long, trouble-free use of your equipment.
1. GENERAL DESCRIPTION
This Master Station is designed to connect to the N-8400RS 4-Wire Substation Interface Unit, and provide
hands-free conversation of high sound quality.
Using an optional YC-280 Wall Mounting Bracket, this station can be mounted on a wall, or tilted for easy key
operation when used on a desktop.
Warning
This is a class A product. In a domestic environment this product may cause radio interference in which case
the user may be required to take adequate measures.
2. WALL MOUNTING
The station can be mounted on a wall using an optional YC-280 wall-mounting bracket.
The YC-280 can be installed to a one gang switch box.
2.1. Mounting Example
N-8410MS
2.2. Installation Completion Drawing
148
YC-280
YC-280 Wall mounting
bracket (optional)
Wall
surface
2
1
Hook
Wood screw 3.5 x 20
(supplied with the YC-280)
Unit: mm
72.1
83.5
Step 1. Install the YC-280 to the wall.
Notes
• U s e t h e a p p r o p r i a t e s c r e w s f o r t h e
construction of wall.
• Wood screws 3.5 x 20 are supplied with
the YC-280.
• No fitting screws for switch box are
supplied with.
Use commercially available screws.
Step 2. Hang the N-8410MS on the YC-280's hook
to install.
Push down the station main body in the
direction indicated by the arrow.
2.3. YC-280 Dimensional Drawing
Rubber foot mounting position
(desk-top application)
YC-280
INSTALLATION MANUAL
N-8410MS
2-ø4.5
60
80
100
4.5 x 10
Unit: mm
4.6 x 6
Advertisement

Related Manuals for Toa N-8410MS

Summary of Contents for Toa N-8410MS
- Page 1 YC-280. • No fitting screws for switch box are supplied with. Use commercially available screws. Step 2. Hang the N-8410MS on the YC-280's hook Hook to install. Wood screw 3.5 x 20 Push down the station main body in the (supplied with the YC-280) direction indicated by the arrow.
- Page 2 3. WALL MOUNTING When mounting the N-8410MS on a wall, the orientation of the handset hook needs to be changed. Step 1. Raise the number directory cover forward tab. Number directory cover tep 2. Remove both the number directory cover and the directory.
- Page 3 N-8400RS Substation interface unit 4P removable terminal plug (supplied with the N-8400RS) Two pairs of twisted pair cable To line 3 To line 2 To line 4 To line 1 RJ-11 modular rosette (commercially available) Connection cable (supplied with the N-8410MS) N-8410MS...
- Page 4 The types of cables are to be determined according to the following conditions. • Twisted pair wires (such as those used for electronic push-button telephone) are to be used for wiring between the N-8400RS and the N-8410MS in principle. • The number of cables pairs laid should be determined considering the possibility of future expansion of the system.
Need help?
Do you have a question about the N-8410MS and is the answer not in the manual?
Questions and answers