Table of Contents
Advertisement
Quick Links
MTR (Microsoft Teams Rooms)
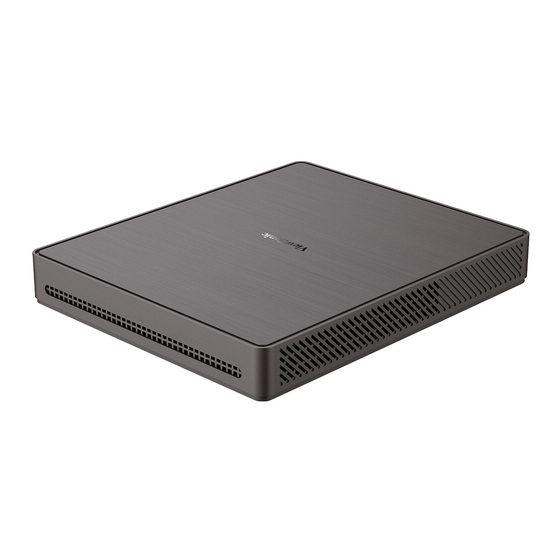
MPC310-W31-TU
Conferencing PC
MRC1010-TN
Touch Console
User Guide
IMPORTANT: Please read this User Guide to obtain important information on installing and using your product in
a safe manner, as well as registering your product for future service. Warranty information contained in this User
Guide will describe your limited coverage from ViewSonic® Corporation, which is also found on our web site at
http://www.viewsonic.com in English, or in specific languages using the Regional selection box of our website.
Model No. VS19796 | VS19799
P/N: MPC310-W31-TU | MPC510-W53-TU | MPC710-W75-TU | MRC1010-TN
Advertisement
Table of Contents

Related Manuals for ViewSonic VS19796


Summary of Contents for ViewSonic VS19796
- Page 1 Warranty information contained in this User Guide will describe your limited coverage from ViewSonic® Corporation, which is also found on our web site at http://www.viewsonic.com in English, or in specific languages using the Regional selection box of our website.
- Page 2 As a world-leading provider of visual solutions, ViewSonic® is dedicated to exceeding the world’s expectations for technological evolution, innovation, and simplicity. At ViewSonic®, we believe that our products have the potential to make a positive impact in the world, and we are confident that the ViewSonic® product you have chosen will serve you well.
-
Page 3: Table Of Contents
Contents Introduction ..............5 Package Contents ....................5 Conferencing PC ...................... 5 Touch Console ......................6 Product Overview ....................7 Conferencing PC ...................... 7 Touch Console ......................8 Initial Setup ..............9 Installing the Conferencing PC ................9 Installing the VESA Mounting Bracket (PC Side) onto the Conferencing PC ... 9 Installing the VESA Mounting Bracket (Wall/Table/Trolley Side) and Conferencing PC .......................... - Page 4 SKU Overview ............28 Conference Room Type ..........29 Appendix ..............31 Specifications ......................31 MPC310-W31-TU ....................31 MRC1010-TN ......................33 Troubleshooting ....................34 Regulatory and Service Information ......37 Compliance Information ..................37 FCC Compliance Statement ................... 37 FCC Radiation Exposure Statement ............... 38 Industry Canada Statement ...................
-
Page 5: Introduction
Introduction Package Contents Conferencing PC Item Quantity Conferencing PC MPC310 VS19796 Conferencing PC Package Contents MPC310 VS19796 Conferencing PC Package Contents (MPC310-W31-TU) I/O Interface HDMI OUT USB 3.0 USB 3.0 FOR CONSOLE FOR DISPLAT PERIPHERAL AC POWER Power bu on... -
Page 6: Touch Console
Touch Console Item Quantity MRC1010-TN VS19799 Touch Console Touch Console Package Contents (MRC1010-TN) I/O Interface Support DP IN, USB downstream (3.0 : HDMI signal, 2.0 : Touch signal) ; PD 20V/1A. HDMI INGEST Support 4K@30Hz input. Connect USB devices such as mobile hard disk, U disk, USB keyboard, mouse, USB devices, ect. MRC1010-TN Audio out 3.5 mm Jack. -
Page 7: Product Overview
FOR CONSOLE FOR DISPLAY Product Overview USB 3.0 HDMI OUT Conferencing PC FOR CONSOLE FOR DISPLAY PERIPHER USB 3.0 USB 3.0 HDMI OUT FOR CONSOLE FOR DISPLAY PERIPHERAL USB 3.0 USB 3.0 HDMI OUT FOR CONSOLE Power bu on FOR DISPLAY AC POWER PERIPHERAL Power bu on... -
Page 8: Touch Console
USB 3.0 USB 3.0 HDMI OUT Touch Console FOR CONSOLE FOR DISPLAY PERIPHERAL HDMI IN USB 2.0 AUDIO OUT Power bu on Power indicator light Item Description Audio output to the external speaker • DP In Power delivery (MAX: 20W), USB3.0 data transmission, DP Out. •... -
Page 9: Initial Setup
Initial Setup Installing the Conferencing PC With the included VESA Mounting Bracket set, the Conferencing PC can be attached to a wall, table, or trolley. Installing the VESA Mounting Bracket (PC Side) onto the Conferencing PC Attach the VESA Mounting Bracket (PC Side) to the Conferencing PC with four Bracket Screws (M3 x 6 mm). - Page 10 Table Mounting 1. Pre-drill four holes into the table and install four Anchors (Ø6.0 x 25 mm). 2. Align the VESA Mounting Bracket (Wall/Table/Trolley Side) with the four Anchors, then secure the VESA Mounting Bracket with four Anchor Screws (T4 x 20 mm). 3.
-
Page 11: Making Connections
Display Display Making Connections Connecting to the Conferencing PC MRC1010-TN MRC1010-TN USB Device USB Device USB Type C USB Type A HDMI OUT HDMI OUT USB 3.0 USB 3.0 USB 3.0 USB 3.0 FOR CONSOLE FOR CONSOLE FOR DISPLAY FOR DISPLA AC POWER AC POWER PERIPHERAL... -
Page 12: Connecting To The Touch Console
Connecting to the Touch Console HDMI IN USB 2.0 AUDIO OUT USB Type C USB Type A HDMI USB 3.0 USB 3.0 HDMI OUT HDMI OUT FOR CONSOLE FOR DISPLAT FOR DISPLAT AC POWER PERIPHERAL MPC310-W31-TU Cable Management Cable fixing bracket Slide cover 1. -
Page 13: Getting Started
Getting Started Prerequisites Required License for Microsoft Teams Room You will need a Microsoft Teams Rooms license to set up your MTR Room System. To learn more about the required licenses, refer to the Microsoft Teams documentation: Microsoft Teams Rooms licenses Required Resource Account for Microsoft Teams Rooms To set up your Microsoft Teams Rooms system, you will also need a Microsoft Teams Rooms account. -
Page 14: Microsoft Teams Rooms (Mtr) Setup Wizard
Microsoft Teams Rooms (MTR) Setup Wizard 1. Select language. 2. Select country or region. - Page 15 3. Select keyboard layout. 4. Add a second keyboard layout. 5. Connect to a network.
- Page 16 6. Check for any updates and finish setting up.
-
Page 17: Microsoft Teams Rooms (Mtr) Account Setup
Microsoft Teams Rooms (MTR) Account Setup 1. To setup a Microsoft Teams Rooms account, review the End user agreement and select Accept. 2. Select Manual setup. - Page 18 3. Enter the account email and password, then select Finish.
-
Page 19: Touch Console
Touch Console Home Screen Description Icon Meet now Start a new meeting. Call Make a phone call. Share Project your laptop by plugging in the cable connected to the console. Depending on the room settings, it may be projected to the room automatically, or you may have to select Share on the Touch Console. -
Page 20: Pir Sensor Setup
PIR Sensor Setup 1. On the Touch Console, select More and then Settings. 2. Enter the Administrator password “sfb” and select Windows Settings and Go to Admin Sign-in. 3. The MTR computer will log out of MTR and the Windows 11 login screen will be presented. - Page 21 5. In Device Manager, select: Sensors > HID Human Presence Sensor Properties > Power Management. 6. Select the checkbox next to Allow this device to wake the computer.
-
Page 22: Wake On Active Ifp Display" Settings
“Wake on Active IFP Display” Settings IFP Display HDMI USB Touch USB Type C Please follow the guidelines below to wake up the IFP display from standby mode to active mode when the MTR PIR sensor makes a detection: • Before adjusting the IFP display settings, make sure the PIR Sensor Setup complete as this allows the device to wake the computer. -
Page 23: Ifp33 Series - Ifp62 Series - Ifp105S
IFP33 Series - IFP62 Series - IFP105S CDE30 Series... - Page 24 NOTE: MTR sleep mode time settings.
-
Page 25: Calibrate The Display For Pen Or Touch
Calibrate the Display for Pen or Touch IFP Display HDMI Cable USB Touch USB Type C MRC1010-TN MPC310-W31-TU USB Type A NOTE: Before starting, make sure a keyboard is connected to the Conference PC. 1. On the Touch Console, select More and then Settings. - Page 26 2. Enter the Administrator password “sfb” and select Windows Settings and Go to Admin Sign-in. 3. The MTR computer will log out of MTR and the Windows 11 login screen will be presented. Select the Administrator account and enter the password “sfb”. 4.
- Page 27 5. In Tablet PC Settings under Display Options select the connected display. Then, under Configure, click Setup and select Touch Input in the pop-up window. 6. A message will appear on each display’s screen (e.g., IFP display and MRC1010- TN) one at a time instructing you to tap the screen with a single finger to identify it as the touchscreen.
-
Page 28: Sku Overview
SKU Overview Items TRS10 (2 in 1) • MPC310-W31-TU • MRC1010-TN MPC310-W31-TU MRC1010-TN TRS10-UB (3 in 1) • MPC310-W31-TU • MRC1010-TN • UMB202 MPC310-W31-TU MRC1010-TN UMB202... -
Page 29: Conference Room Type
Conference Room Type Room Type Scenario Focus Room • CDE30 Series • MPC310-W31-TU • MRC1010-TN • UMB202 Small Room • IFP62 Series • MPC310-W31-TU • MRC1010-TN • UMB202... - Page 30 Room Type Scenario Signature Room • IFP105S • MPC310-W31-TU • MRC1010-TN • UMB202...
-
Page 31: Appendix
Appendix Specifications MPC310-W31-TU Category Item Specifications Intel® Core™ i3-1220P 1.5 GHz Core Turbo boost 4.4 GHz Integrated Intel® UHD Graphics Total Available Graphics Memory: 32 GB Graphic Chipset Max Resolution: up to 3840 x 2160 @ 30 Hz (DP) Slot Type Size 260-pin DDR4 SO-DIMM x 2 (8 GB) 4GB: Major Brand Kingston, DDR4 4GB CBD32D4S2S1KC-4... - Page 32 Category Item Specifications 0~3,048 m Altitude 10,000 ft Relative Operating Conditions 10%~90% (non-condensing) Humidity -10°C~40°C Temperature (14°F~104°F) 0~12,192 m Altitude 40,000 ft Relative Storage Conditions 10%~90% (non-condensing) Humidity -20°C~60°C Temperature (-4°F~140°F) Input Voltage AC 100-240V, 1.5A, 50/60Hz Min 15.6W (start device) Power Rating Consumption Max 90W (full loading)
-
Page 33: Mrc1010-Tn
MRC1010-TN Category Item Specifications 10.1” ELED display Type LCD panel: LLZZN101111810 Resolution 1920 x 1200 Color Depth 8-bit color depth Brightness with glass(typical): 250 cd/m ²~300 cd/m ² Minimum: 800:1 Contrast Typical: 1000:1 Panel Touch Panel PCT10 points touch supported Surface Treatment AG + AF Middle: ±... -
Page 34: Troubleshooting
TN) won’t start. • Check the power outlet with another device (e.g., a table lamp). • If there is still no power, contact ViewSonic support or the reseller from whom the device was purchased. • Verify that the RJ-45 cable is connected properly: ͫ... - Page 35 Problem or Issue Possible Solutions To switch from the MTR account to the administrator account: 1. Go to the MTR settings page. 2. Select Windows Settings. How to Switch 3. Select Administrator and enter the administrator between the MTR password, "sfb". account and the To switch from the administrator account to the MTR administrator account.
- Page 36 Problem or Issue Possible Solutions Switch from the MTR account to the administrator account: 1. Go to the MTR settings page. 2. Select Windows Settings. MRC1010-TN Touch 3. Select Administrator and enter the administrator console built-in PIR password, "sfb". sensor wake-up 4.
-
Page 37: Regulatory And Service Information
Regulatory and Service Information Compliance Information This section addresses all connected requirements and statements regarding regulations. Confirmed corresponding applications shall refer to nameplate labels and relevant markings on the unit. FCC Compliance Statement FCC ID: TX2-RTL8852BE This device complies with part 15 of FCC Rules. Operation is subject to the following two conditions: (1) this device may not cause harmful interference, and (2) this device must accept any interference received, including interference that may cause undesired operation. -
Page 38: Fcc Radiation Exposure Statement
FCC Radiation Exposure Statement This device complies with FCC: radiation exposure limits set forth for an uncontrolled environment. End users must follow the specific operating instructions for satisfying RF exposure compliance. This transmitter must not be co-located or operating in conjunction with any other antenna or transmitter. -
Page 39: Ic Radiation Exposure Statement
IC Radiation Exposure Statement This device complied with IC RSS-102 radiation exposure limits set forth for an uncontrolled environment. This device should be installed and operated with minimum distance 20 cm between the radiator & your body. Cet équipement est conforme aux limits d’exposition aux rayonnements IC établies pour un environnement non contrôlê. -
Page 40: Ce Conformity For European Countries
CE Conformity for European Countries The device complies with the EMC Directive 2014/30/EU, Low Voltage Directive 2014/35/EU and Radio Equipment Directive 2014/53/EU. https://www.viewsonicglobal.com/public/products_download/safety_ compliance/acc/VS19796_CE_DoC.pdf The following information is only for EU-member states: The mark shown to the right is in compliance with the Waste Electrical and Electronic Equipment Directive 2012/19/EU (WEEE). -
Page 41: Declaration Of Rohs2 Compliance
Declaration of RoHS2 Compliance This product has been designed and manufactured in compliance with Directive 2011/65/EU of the European Parliament and the Council on restriction of the use of certain hazardous substances in electrical and electronic equipment (RoHS2 Directive) and is deemed to comply with the maximum concentration values issued by the European Technical Adaptation Committee (TAC) as shown below: Proposed Maximum Actual... -
Page 42: Indian Restriction Of Hazardous Substances
Schedule 2 of the Rule. Product Disposal at End of Product Life ViewSonic® respects the environment and is committed to working and living green. Thank you for being part of Smarter, Greener Computing. Please visit the ViewSonic®... -
Page 43: Copyright Information
Microsoft, Windows, and the Windows logo are registered trademarks of Microsoft Corporation in the United States and other countries. ViewSonic® and the three birds logo are registered trademarks of ViewSonic® Corporation. VESA is a registered trademark of the Video Electronics Standards Association. -
Page 44: Customer Service
For technical support or product service, see the table below or contact your reseller. NOTE: You will need the product’s serial number. Country/ Region Website Country/ Region Website Asia Pacific & Africa Australia Bangladesh www.viewsonic.com/au/ www.viewsonic.com/bd/ 中国 (China) www.viewsonic.com.cn www.viewsonic.com/hk/ 香港 (繁體中文) Hong Kong (English) India www.viewsonic.com/hk-en/ www.viewsonic.com/in/...
Need help?
Do you have a question about the VS19796 and is the answer not in the manual?
Questions and answers