Table of Contents
Advertisement
Quick Links
Advertisement
Table of Contents

Related Manuals for Ricoh fi-890PRF


Summary of Contents for Ricoh fi-890PRF
- Page 1 P3PC-7270-02ENZ0 RICOH fi-890PRF/PRB Imprinter Operator's Guide...
- Page 2 Introduction Thank you for purchasing this product. This product is an option available to be installed on RICOH fi-8950/fi-8930/fi-8820. It can print text (e.g., alphanumeric characters) on a document after scanning. This manual explains the basic operations and regular maintenance of the following two imprinters.
- Page 3 Windows 11 Education (64-bit) PaperStream IP (TWAIN) PaperStream IP driver PaperStream IP (TWAIN x64) PaperStream IP (ISIS) fi-8000 Series RICOH fi-890PRF/PRB Imprinter imprinter RICOH fi-8950/fi-8930/fi-8820 scanner RICOH fi-8950/fi-8930/fi-8820 Operator's Guide Operator's Guide *1:Where there is no distinction between the different versions of the above operating system, the general term "Windows"...
- Page 4 Introduction Screen Examples in This Manual Microsoft product screenshots are reprinted with permission from Microsoft Corporation. The screen examples in this manual are subject to change without notice in the interest of product development. If the actual displayed screen differs from the screen examples in this manual, operate by following the actual displayed screen while referring to the user's manual of the scanner application that you are using.
-
Page 5: Table Of Contents
Contents Preparations Features ..............................6 Parts and Functions........................... 6 External View ...............................6 Under the Front-Side Imprinter Cover ........................7 Inside the Back-Side Imprinter Cover ........................8 Inside the ADF (Front Side) ..........................8 Inside the ADF (Back Side) ...........................8 Basic Operation Installing the Print Cartridge........................10 Front-Side Imprinter............................10 Back-Side Imprinter ............................13 Setting the Position in Which to Print .................... -
Page 6: Preparations
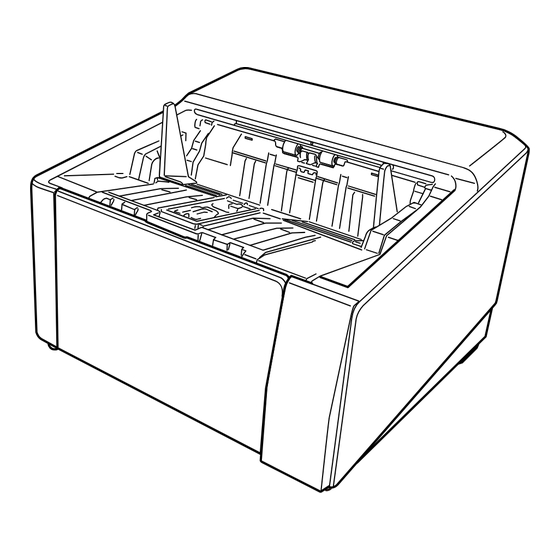
Preparations Features With the Imprinter installed in the scanner, you can print an alphanumerical string on a document scanned with the ADF. This feature helps you to organize the scanned document with a name, date, or a serial number printed on it. The Front-Side Imprinter prints a character string on the front of a document, and the Back-Side Imprinter on the back. -
Page 7: Under The Front-Side Imprinter Cover
Preparations Name Function ADF release tab Push up the release tab to open the ADF. It pulls and feeds the documents loaded on the hopper one at a time. Open the ADF when you replace consumables or clean inside the scanner. Hopper It is a table for loading documents to scan. -
Page 8: Inside The Back-Side Imprinter Cover
Preparations Inside the Back-Side Imprinter Cover Name Function Print cartridge holder The print cartridge is set here for the Back-Side Imprinter. Inside the ADF (Front Side) Name Function Print head This is the print head of the Front-Side Imprinter. Inside the ADF (Back Side) - Page 9 Preparations Name Function Print head This is the print head of the Back-Side Imprinter.
-
Page 10: Basic Operation
Basic Operation Installing the Print Cartridge Install the print cartridge in the following procedure. ATTENTION When installing the print cartridge, make sure that you install it in the correct orientation. Front-Side Imprinter Turn off the scanner and disconnect the power cable. Press down on the tab at the top center of the Front-Side Imprinter cover with your finger, then pull down the cover towards you. - Page 11 Basic Operation Take out the print cartridge from the bag. Remove the protection tape on the print cartridge. ATTENTION ● Do not put the tape back again. ● Be careful not to touch the print head of the print cartridge (the contact part (A) and the nozzle plate (B)) with your hands.
- Page 12 Basic Operation ATTENTION Be careful not to let the print cartridge catch the print circuit film (D) to avoid damaging the film. Gently close the print cartridge holder cover on the left side until it locks into place, then press part (E) to fix the print cartridge in place.
-
Page 13: Back-Side Imprinter
Basic Operation Back-Side Imprinter Turn off the scanner and disconnect the power cable. Press down on the tab at the top center of the Back-Side Imprinter cover with your finger, then pull down the cover towards you. Be careful not to touch any hot internal parts when opening the Back-Side CAUTION Imprinter cover, as this can lead to burns. - Page 14 Basic Operation Open the cover to the right. Take out the print cartridge from the bag. Remove the protection tape on the print cartridge. ATTENTION ● Do not put the tape back again. ● Be careful not to touch the print head of the print cartridge (the contact part (A) and the nozzle plate (B)) with your hands.
- Page 15 Basic Operation With the tab (C) on the print cartridge facing left, put the print cartridge into the holder. ATTENTION Be careful not to let the print cartridge catch the print circuit film (D) to avoid damaging the film. Gently close the print cartridge holder cover on the left side until it locks into place, then press part (E) to fix the print cartridge in place.
-
Page 16: Setting The Position In Which To Print
Basic Operation Setting the Position in Which to Print Set the position in which to print in the following procedure. Front-Side Imprinter Press down on the tab at the top center of the Front-Side Imprinter cover with your finger, then pull down the cover towards you. -
Page 17: Back-Side Imprinter
Basic Operation Back-Side Imprinter Press down on the tab at the top center of the Back-Side Imprinter cover with your finger, then pull down the cover towards you. Be careful not to touch any hot internal parts when opening the Back-Side CAUTION Imprinter cover, as this can lead to burns. - Page 18 Basic Operation The print cartridge will click into place. ATTENTION ● Make sure to align (A) with (B) when setting the print cartridge. Not doing so may cause printing errors or ink smudges. ● Place the document on the stacker, making sure that the print cartridge is positioned within the document width.
-
Page 19: Imprinter Settings
Basic Operation Imprinter Settings You can configure settings for the imprinter in the scanner driver. For details about how to configure the settings, refer to the help for the scanner driver. Also, actually scan a document to check the printed character string and its position. ●... -
Page 20: Replacing The Print Cartridge
Basic Operation Replacing the Print Cartridge The print cartridge is a consumable. Replace the print cartridge in the following procedure. ATTENTION ● When the following message appears, replace the print cartridge as soon as possible. If you continue to print without replacing the cartridge, your print output will be faded. ●... - Page 21 Basic Operation Press the release tab to release the lock. Open the cover to the right. Pinch and remove the old print cartridge with your fingers. Reinstall the new print cartridge. (Refer to steps Front-Side Imprinter Installing the Print Cartridge.) ATTENTION When installing the print cartridge, make sure that you install it in the correct orientation.
- Page 22 Basic Operation Windows 11 Click [Start] menu → [All apps] → [fi Series] → [Software Operation Panel]. Click [Device Setting] from the list on the left, and then click the [Clear] button of [Remaining Ink]. The value of the counter is set to 100. Click the [OK] button on the [Software Operation Panel] window.
-
Page 23: Back-Side Imprinter
Basic Operation Back-Side Imprinter Turn off the scanner and disconnect the power cable. Press down on the tab at the top center of the Back-Side Imprinter cover with your finger, then pull down the cover towards you. Be careful not to touch any hot internal parts when opening the Back-Side CAUTION Imprinter cover, as this can lead to burns. - Page 24 Basic Operation Open the cover to the right. Pinch and remove the old print cartridge with your fingers. Reinstall the new print cartridge. (Refer to steps Back-Side Imprinter Installing the Print Cartridge.) ATTENTION When installing the print cartridge, make sure that you install it in the correct orientation. Close the Back-Side Imprinter cover.
- Page 25 Basic Operation Click [Device Setting] from the list on the left, and then click the [Clear] button of [Remaining Ink]. The value of the counter is set to 100. Click the [OK] button on the [Software Operation Panel] window. A message appears asking you whether to apply the changes to Software Operation Panel.
-
Page 26: Daily Care
Daily Care ● The inside of the ADF becomes very hot when the scanner is being used. WARNING Before you start cleaning the inside of the ADF, make sure to turn off the power, unplug the power cable and wait for at least 15 minutes for the inside of the ADF to cool down. - Page 27 Daily Care ATTENTION Be careful not to touch the print head of the print cartridge (the contact part (A) and the nozzle plate (B)) with your hands. Printing may be out of order. Make sure that the excess ink is removed and then reinstall the print cartridge. (Refer to Replacing the Print Cartridge (page 20).)
-
Page 28: Cleaning The Imprinter
Daily Care Cleaning the Imprinter Frequent use of the imprinter will cause ink to adhere to the area surrounding the print cartridge holder, which may transfer onto the paper. Clean the area surrounding the print cartridge holder according to the procedure below as part of regular daily maintenance of the imprinter. - Page 29 Daily Care Grab the ADF release tab and lift it up to open the ADF. Gently wipe the print head by using a cloth moistened with Cleaner F1. Print Head Hold the ADF with both hands and push it down slowly. Push the ADF until it locks.
-
Page 30: Back-Side Imprinter
Daily Care ATTENTION ● Make sure there is no foreign matter caught inside the ADF when closing the ADF. ● Be careful not to get your fingers caught. Put the hopper back up. Reinstall the print cartridge. (Refer to steps Front-Side Imprinter (page 10) Installing the Print Cartridge.) - Page 31 Daily Care Grab the ADF release tab and lift it up to open the ADF. Gently wipe the print head by using a cloth moistened with Cleaner F1. Print Head Hold the ADF with both hands and push it down slowly. Push the ADF until it locks.
- Page 32 Daily Care ATTENTION ● Make sure there is no foreign matter caught inside the ADF when closing the ADF. ● Be careful not to get your fingers caught. Put the hopper back up. Reinstall the print cartridge. (Refer to steps Back-Side Imprinter (page 13) Installing the Print Cartridge.)
-
Page 33: Cleaning Materials
Daily Care Cleaning Materials Name Part No. Notes Cleaner F1 PA03950-0352 Volume: 100 ml Cleaning Wipe PA03950-0419 24 packets (*1) *1:Pre-moistened with Cleaner F1. It can be used instead of moistening a cloth with Cleaner F1. ATTENTION In order to use the cleaning materials safely and correctly, read the precautions on each product thoroughly. -
Page 34: Error Messages
Error Messages This section explains the imprinter error messages. Error messages are displayed on the operator panel of the scanner. Refer to the displayed error codes and error messages for troubleshooting. ATTENTION For details about the error messages other than the ones shown below, refer to the Operator's Guide for your scanner. - Page 35 Error Messages Error Error Message Action Code L4:15 Sensor error An error has occurred with the sensor. If the problem persists after turning Turn the scanner off then back on. the power back on, inform your If the problem still persists, write down the service provider of the error code.
- Page 36 Error Messages Error Error Message Action Code section if provided in Safety Precautions supplied with this product, and then make an inquiry.
-
Page 37: Checking The Product Label
Checking the Product Label This section explains about the product label on the scanner. The label is located on the back of the scanner. Label (example): Shows the imprinter information. Scanner Name Part No. Serial No. Date of Manufacture... -
Page 38: Specifications
Specifications Item Specification Front-Side Imprinter (RICOH Back-Side Imprinter (RICOH fi-890PRB) fi-890PRF) Printing method Thermal inkjet printing Printing type Post-imprinter (printing after image scanning) Front-side printing Back-side printing Printing Alphabet: A to Z, a to z characters Numeric characters:0, 1 to 9 Symbols: ! "... - Page 39 Specifications Item Specification Front-Side Imprinter (RICOH Back-Side Imprinter (RICOH fi-890PRB) fi-890PRF) ATTENTION ● The following types of documents must not be scanned: An imprinting error occurs because ink does not easily dry on or pass through documents. In addition, ink makes the inside of the imprinter dirty, so the cleaning cycle will be shortened.
- Page 40 Specifications Item Specification Front-Side Imprinter (RICOH Back-Side Imprinter (RICOH fi-890PRB) fi-890PRF) Printing area Shaded sections are printable. Other Shaded sections are printable. Other sections are not printable because of sections are not printable because of the Imprinter structure. the Imprinter structure.
- Page 41 Specifications Item Specification Front-Side Imprinter (RICOH Back-Side Imprinter (RICOH fi-890PRB) fi-890PRF) Suggested replacement cycle: 4,000,000 characters or half a year from the time the package is opened (A print cartridge has a specific expiration date, and the expiration period differs whether the package is opened or not. Start using the print cartridge before the expiration date that is written on the package.)
Need help?
Do you have a question about the fi-890PRF and is the answer not in the manual?
Questions and answers