
Related Manuals for Haier GE APPLIANCES FUF14QRRAWW


Summary of Contents for Haier GE APPLIANCES FUF14QRRAWW
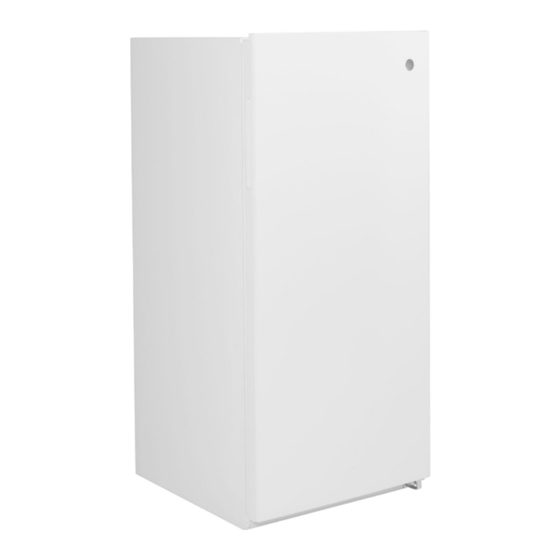
- Page 1 Technical Service Guide September 2021 14, 17, and 21 Cu. Ft. ADA Upright Freezers FUF14QRRAWW FUF17QRRAWW FUF21QRRAWW 31-9364...
-
Page 2: Safety Information
5. Locate the Warranty page. GE Appliances, a Haier Company Copyright © 2021 All rights reserved. This service guide may not be reproduced in whole or in part in any form without written permission from GE Appliances, a Haier Company. – 2 –... -
Page 3: Table Of Contents
Table of Contents Safety Information ........................2 Warranty ............................2 Table of Contents ..........................3 Safety Requirements ........................6 Nomenclature ..........................7 Specifications ..........................8 Electrical Specifications ......................8 No Load Performance ......................8 Refrigeration Sealed System ....................8 Installation ............................9 Power Cord ...........................9 Use of Extension Cords ......................9 Freezer Location ........................9 Clearances ...........................9 Level Freezer ........................9... - Page 4 Freezer Door ..........................17 Door Handle .........................17 Door Gasket .........................17 Door Bins ..........................17 Door Removal ........................17 Bottom Hinge Bushing ......................18 Door Stop ..........................18 Bottom Door Hinge .......................19 Freezer Compartment ........................20 Wire Shelves ........................20 Wire Basket ..........................20 LED Board Cover .........................21 LED Board ..........................21 Temperature Control Board ....................21 Air Tower ..........................22 Freezer Thermistor ......................23...
- Page 5 Auxiliary Condenser ......................36 Hot-Wall Condensers ......................36 Refrigeration System ........................37 Replacing R600a Sealed System Components ................38 Evacuation and Charging Procedure ..................38 LOKRING .............................39 LOKRING Rules ........................39 Connection Locations ......................40 Service Mode ..........................41 Diagnostic Tests........................41 Fault Codes ..........................42 Main Control Board Connector Locator ..................43 Schematic .............................44 Index .............................45 –...
-
Page 6: Safety Requirements
Safety Requirements GEA Factory Service Employees are required to use safety glasses with side shields, safety gloves and steel toe shoes for all repairs. Plano Type Safety Glasses Prescription Safety Glasses Safety Glasses must be ANSI Z87.1-2003 compliant Cut Resistant Sleeve(s) Electrically Rated Glove and Dyneema®Cut Resistant Dyneema®... -
Page 7: Nomenclature
Nomenclature Model Number F U F 1 4 Q R R A W W Brand GE: Freezer Color Configuration WW: White U: Upright Engineering Digit Defrost Mode F: Frost-Free Door Swing Capacity R: Right 14: 14.2 cubic foot 17: 17.3 cubic foot Model Year 21: 21.3 cubic foot R: 2021... -
Page 8: Specifications
Specifications No Load Performance Electrical Shock Hazard WARNING Death or serious injury can result from failure Control Position Coldest to Cold for Frozen to follow these instructions. Food at • Service by a qualified service technician Ambient 70°F to 90°F -6°... -
Page 9: Installation
Installation Power Cord Clearances The power cord of this appliance is equipped On all models, allow 3-inches (76-mm) clearance with a 3-prong (grounding) plug that mates with on top, back and sides for proper air circulation. a standard 3-prong (grounding) wall outlet to Clearance must be provided for air circulation: minimize the possibility of electric shock hazard from this appliance. -
Page 10: Operating Instructions
Operating Instructions Coldest Setting Indicator LED Colder Setting Indicator LED Cold Setting Indicator LED Turbo Freeze Indicator LED Settings pad Control Lock Turbo Freeze Turbo Freeze will keep the freezer running for The temperature control board will automatically 8-hours and will exit Turbo Freeze after 8-hours lock. -
Page 11: Airflow
Airflow AIRFLOW Air Tower Evaporator Evaporator The freezer fan pulls air across the evaporator coil and up through the air tower to direct the air out above the wire shelves. The air then circulates down and is pulled back to the evaporator through the return openings in the bottom of the evaporator cover. -
Page 12: Defrost Cycle Operation
Defrost Cycle Operation The defrost cycle operation is achieved by the observation of several factors. The main control board collects data to include: monitoring of the total compressor run time; freezer internal temperature, and (in the case of a power outage) the temperature of the evaporator thermistor. The main control board records the accumulated compressor run time. -
Page 13: Hinge Cover Components
Hinge Cover Components Hinge Cover Component Locator* Door Switch Hinge Cover* Ambient Thermistor *Underside of the hinge cover shown. Top Hinge Cover The top hinge cover is located above the door on the right side. Top Hinge Cover Removal 1. Remove one 5/16-in. hex-head screw. 2. -
Page 14: Ambient Thermistor
Ambient Thermistor Thermistor Values Temperature Temperature Resistance The ambient thermistor is located under the top Degrees Degrees in Kilo- hinge cover. The thermistor is attached to the (°F) (°C) Ohms cover within a set of plastic clips. 121 kΩ 33.8 kΩ 25.2 kΩ... -
Page 15: Door Switch
3. Press release tab in push door switch through Door Switch top hinge cover. The door switch is located under the top hinge cover. Door Switch Release Tab Top Hinge The top hinge is located under the top hinge cover. The switch has normally closed (N.C.) contacts. -
Page 16: Top Hinge Bushing
Top Hinge Bushing The top hinge pin will only fit into the larger of the two half-moon sections of the top hinge bushing. Top Hinge Bushing Removal 1. Remove top hinge cover. 2. Keep door closed and supported for remaining steps. Tape door shut if necessary to prevent injury or damage to consumer's floor. -
Page 17: Freezer Door
Freezer Door Door Handle Door Bins The door has no externally mounted handle. The Three bins are mounted to the door. The door liner appears to have a lower location for a handle is a pocket style handle built into the left side of the door. -
Page 18: Bottom Hinge Bushing
Bottom Hinge Bushing Door Stop The door stop prevents the door from opening The bottom hinge bushing is installed into the bottom of the door through the door stop. into the side of the cabinet. Bottom Hinge Bushing Removal Door Stop Removal 1. -
Page 19: Bottom Door Hinge
Bottom Door Hinge The bottom door hinge attaches to the freezer case and engages with the right leveling leg for additional support. Bottom Door Hinge Removal 1. Remove all items and door bins from door. 2. Remove top hinge cover. 3. -
Page 20: Freezer Compartment
Freezer Compartment LED Cover / LED Board Air Tower Wire Shelves Temperature Control Board Evaporator Cover Partial-Depth Wire Shelf Freezer Thermistor Full-Depth Wire Shelf Wire Basket Wire Shelves Wire Basket Four wire shelves are used for food storage. The The wire basket slides across the floor of the top two shelves are interchangeable. -
Page 21: Led Board Cover
LED Board Cover Temperature Control Board A LED board is located in the ceiling concealed The temperature control board is located in the under the LED cover. right wall of the freezer liner to allow the user to adjust temperature settings. The temperature LED Board Cover Removal control board will also display fault codes when an error has been detected. -
Page 22: Air Tower
Main Control Board CN5 Connector 3. Grasp and carefully pull on suction cup to remove temperature control board from liner. • Pin 2 (gray) to pin 1 (brown): 5 VDC • Pin 2 (gray) to pin 3 (purple): 5 VDC* (*while pressing Settings pad) •... -
Page 23: Freezer Thermistor
Freezer Thermistor Thermistor Values Temperature Temperature Resistance The freezer thermistor is located on the right Degrees Degrees in Kilo- interior wall, approximately 1/3 up from the (°F) (°C) Ohms bottom. The thermistor is mounted to the inside 121 kΩ of the sensor cover. The main control board uses 33.8 kΩ... -
Page 24: Evaporator Cover Assembly
3. Carefully split shrink wrap that encases Evaporator Cover Assembly connector and discard. Shrink wrap will not need to be replaced. The evaporator cover assembly is a single panel that covers the evaporator, defrost heater, evaporator thermistor, current fuses, and defrost fuses. -
Page 25: Evaporator Fan
5. Remove three Phillips-head screws. NOTE: Evaporator Fan Ensure the plastic washers for the three Phillips-head screws are reused when the The evaporator fan motor is mounted on the rear motor is remounted. of the evaporator cover. The evaporator fan motor is covered by an evaporator fan shroud. -
Page 26: Evaporator Components
Evaporator Components Evaporator Component Locator Current Fuses Evaporator Thermistor Evaporator Defrost Heater Heat Probe Thermal Fuses – 26 –... -
Page 27: Evaporator Thermistor
Evaporator Thermistor Thermistor Values Temperature Temperature Resistance The evaporator thermistor is located on the right Degrees Degrees in Kilo- side of the evaporator and is part of the defrost (°F) (°C) Ohms heater assembly. The thermistor is clipped to the 121 kΩ... -
Page 28: Current Fuses
Current Fuse Removal Current Fuses The evaporator thermistor, current fuses, thermal The current fuses are located in the defrost heater fuses, and defrost heater are all one part and harness. cannot be replaced separately. 1. Remove all items from shelves and basket. 2. -
Page 29: Defrost Heater
Thermal Fuse Diagnosing Defrost Heater Check for an open defrost circuit. The defrost A Calrod-style heater is used to defrost the heater circuit can be checked at the main control evaporator. The main control board supplies 120 board or at the defrost harness connector. If an VAC to the heater during defrost cycle operation. -
Page 30: Evaporator
Evaporator The evaporator is an aluminum set of coils which contains the refrigerant to pull heat energy from the air circulated across it by the evaporator fan, causing the air to become cold. Evaporator Removal 1. Remove R600a refrigerant from system (follow Evacuation and Charging Procedure under Replacing R600a Sealed System Components in this service guide). -
Page 31: Machine Compartment
Machine Compartment Machine Compartment Component Locator Process Tube Main Control Board Compressor Drain Tube Auxiliary Enclosure Condenser Filter Drier Suction Jumper Tube Drain Pan Base Pan Compressor Electrical Components – 31 –... -
Page 32: Drain Tube
Drain Tube Main Control Board The drain tube is not a replaceable part. If The main control board is found inside the main needed, the tube can carefully pulled off and control board enclosure, mounted to the left side cleaned. Ensure the drain tube is fully seated of the machine compartment. - Page 33 Main Control Board Removal 5. Disconnect AC and DC connectors from main control board. AC connectors have an 1. Disconnect power to appliance. additional LOCKING TAB/CAP which must be removed before press-to-release locks will 2. Remove two Phillips-head screws to function.
-
Page 34: Compressor Electrical Components
PTC Starter/Overload Removal Compressor Electrical Components 1. Disconnect power to appliance. The PTC starter and overload are located under a cover and attached to pin of the compressor. 2. Remove one Phillips-head screw securing compressor electricals cover to compressor. A PTCR (or PTC Starter) is a Positive Temperature Coefficient Resistor (relay). -
Page 35: Drier
7. Disconnect wiring connection to desired If the resistance is not correct or a winding is component. open or shorted to the case of the compressor, replace the compressor. Use test 1 (100% run time test) from Service Mode will force compressor operation. Voltage can be checked at the main control board and overload/relay wiring. -
Page 36: Auxiliary Condenser
Auxiliary Condenser Hot-Wall Condensers The auxiliary condenser sits in the bottom of The appliances use three hot-wall condensers the drain pan. The purpose of the auxiliary to exchange the heat energy from inside the condenser is to evaporate water collected in the freezer compartment out to the area around the drain pan after defrost cycles. -
Page 37: Refrigeration System
Refrigeration System Capillary Evaporator Suction High Side Tube Process Tube Drier Hot Gas Loop Right Hot-Wall Condenser Auxiliary Suction Jumper Condenser Tube Back Discharge Left Hot-Wall Low Side Hot-Wall Condenser Process Condenser Tube Compressor The compressor compresses R600a refrigerant, increasing both pressure and temperature. Refrigerant vapor is pumped out the compressor discharge, through the auxiliary condenser, left hot-wall condenser, around the hot gas loop, through the back hot-wall condenser, right hot-wall condenser, the drier, and into the evaporator. -
Page 38: Replacing R600A Sealed System Components
Replacing R600a Sealed System Components The following information covers the evacuation and charging procedures for R600a sealed system work. • Factory service technicians should NEVER use a torch when servicing sealed systems which use R600a refrigerant. • The use of LOKRING is the recommended and preferred method to repair R600a systems by GE Appliances, should it be necessary. -
Page 39: Lokring
LOKRING The LOKRING repair method utilizes a tool with a ratchet action that provides proper compression on the LOKRING connector to connect tubing instead of brazing. The repair method requires the use of a solution called LOKPREP. LOKPREP is a sealant that will fill any scratches, grooves, or imperfections on the surface of the tubing. -
Page 40: Connection Locations
Connection Locations Capillary Evaporator Suction High Side Tube Process Tube Drier Hot Gas Loop Right Hot-Wall Condenser Auxiliary Suction Jumper Condenser Tube Back Discharge Left Hot-Wall Low Side Hot-Wall Condenser Process Condenser Tube Compressor Component Location Size GEA Part # A (*) Compressor Process Stub (suction) 8.5-mm x 6-mm... -
Page 41: Service Mode
Service Mode Enter Service Mode by pressing and holding Settings pad for 10-seconds. The temperature control board display will flash all setting indicator LED's when Service Mode has successfully been entered. Three test modes are available within Service Mode. To advance test modes, press and release the Settings pad. -
Page 42: Fault Codes
Fault Codes Fault codes are displayed on the temperature control board to the consumer. A fault code will remain displayed until the fault has been corrected. Display Fault Definition Product Behavior Cold and Colder FZ* Thermistor is out of Compressor will be on with fixed on/off flash 0.5-sec. -
Page 43: Main Control Board Connector Locator
Main Control Board Connector Locator – 43 –... -
Page 44: Schematic
Schematic – 44 –... -
Page 45: Index
Index Abnormal Defrost 3, 12 LED Board 4, 8, 20, 21 Air Tower 4, 11, 20, 22 LED Cover 20 Ambient Thermistor 3, 13, 14, 42 Leveling leg 9, 19 Auxiliary Condenser 5, 31, 36, 37, 40 LOKPREP 39 LOKRING 5, 38, 39, 40 Base Pan 31 Basket 4, 20 Main Control Board 4, 5, 14, 15, 21, 22, 23, 25, 27, 28, 29, 31,...
Need help?
Do you have a question about the GE APPLIANCES FUF14QRRAWW and is the answer not in the manual?
Questions and answers