
Related Manuals for Beko HII64401QT


Summary of Contents for Beko HII64401QT
- Page 1 Built-in Hob User Manual HII64401QT 185262551/ EN/ R.AA/ 02/04/2024 11:45 7757182127...
- Page 2 Welcome! Dear Customer, Thank you for choosing the Beko product. We want your product, manufactured with high quality and technology, to offer you the best efficiency. Therefore, carefully read this manual and any other documentation provided before using the product.
-
Page 3: Table Of Contents
Table of Contents 1 Safety Instructions......Intended Use ......... Child, Vulnerable Person and Pet Safety ..........Electrical Safety ......Transportation Safety ....Installation Safety......Safety of Use......... Temperature Warnings....Cooking Safety......Induction ........1.10 Maintenance and Cleaning Safety ..........2 Environmental Instructions..10 Waste Directive ...... -
Page 4: Safety Instructions
1 Safety Instructions • This section includes the Intended Use safety instructions necessary • This product is designed to be to prevent the risk of personal used at home. It is not suitable injury or material damage. for commercial use. •... -
Page 5: Electrical Safety
• This product should not be 3. Take precautions to prevent used by people with limited children from entering the physical, sensory or mental product. capacity (including children), 4. Do not allow children to play unless they are kept under su- with product when it is in idle pervision or receive the neces- mode. -
Page 6: Transportation Safety
• (If your product does not have • If the power cable is damaged, a mains cable) only use the it must be replaced by the connecting cable described in manufacturer, an authorized the "Technical specifications" service or a person to be spe- section. -
Page 7: Installation Safety
• When you need to transport • Direct sunlight and heat the product, wrap it with sources, such as electric or bubble wrap packaging mater- gas heaters, must not be ial or thick cardboard and tape present in the area where the it tightly. -
Page 8: Safety Of Use
• Flammable objects must not Safety of Use be kept in and around the • Ensure that the appliance is cooking area. Otherwise, these switched off after every use. may lead to fire. • If you will not use the product •... -
Page 9: Induction
fire with water; disconnect the • Close the, zone from its con- product from the mains, and trol panel after use, do not rely then cover the flames with a on the pot sensor. cover or fire cloth (etc.). • Metal objects such as knives, •... -
Page 10: Environmental Instructions
2 Environmental Instructions 2.1 Waste Directive 2.2 Package Information Packaging materials of the product are 2.1.1 Compliance with the WEEE Dir- manufactured from recyclable materials in ective and Disposing of the accordance with our National Environment Waste Product Regulations. Do not dispose of the pack- This product complies with EU WEEE Dir- aging waste with the household or other ective (2012/19/EU). -
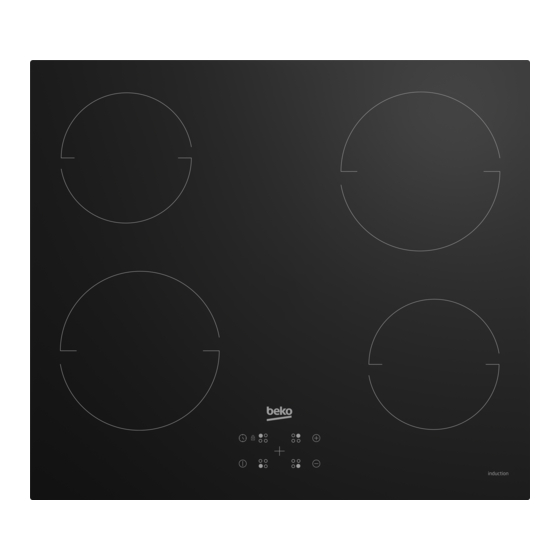
Page 11: Your Product
3 Your product 3.1 Product introduction 1 Glass cooking surface 2 Lower housing 3 Induction cooking zone 4 Induction cooking zone 5 Induction cooking zone 6 Induction cooking zone EN / 11... -
Page 12: Technical Specifications
3.2 Technical Specifications General specifications Product external dimensions (height/width/depth) (mm) 50 /590 /520 * Hob installation dimensions (width / depth) (mm) 560 (+2) /490 (+2) Voltage/Frequency 1N~220-240 V /2N~380-415 V; 50 Hz Cable type and section used/suitable for use in the min. -
Page 13: First Use
4 First Use Before you start using your product, it is NOTICE: Some detergents or cleaning recommended to do the following stated in agents may cause damage to the surface. the following sections respectively. Do not use abrasive detergents, cleaning powders, cleaning creams or sharp objects 4.1 Initial Cleaning during cleaning. - Page 14 • The fact that the heat transfer stops and • Steel and stainless steel pots/pans (with the cooking surface is not heated dir- label or warning indicating that it is in- ectly when the cooking pots/pans is re- duction compatible) moved from the cooking surface Unsuitable pots/pans: provides a safer use against possible...
-
Page 15: Hob Control Unit
• Some cooking pots/pans have a base Equal distribution of the cookware that contains non-ferromagnetic materi- on the right and left and center als such as aluminium. These types of hobs for the selection of hobs af- cooking pots/pans may not heat ad- fects the cooking performance equately or may not be detected by the positively while cooking multiple... - Page 16 Residual heat indicator Rear left cooking zone selection key “H” symbol that appears on the cooking Front left cooking zone selection key zone display indicates that the hob is still Front right cooking zone selection key hot and may be used to keep a small amount of food warm.
- Page 17 The outer section of the 280 mm induction hob cooking zone (if your product is equipped with a 280 mm induction hob cooking zone) is ac- tivated only when a saucepan large enough to cover the cooking zone is placed on the cooking zone and the temperature is set to a level higher than 8.
- Page 18 Deactivating the keylock Timer function This function facilitates cooking for you. It 1. When the keylock is active, touch will not be necessary to attend the oven for keys simultaneously. the whole cooking period. Cooking zone ð Keylock will be de activated and the will be turned off automatically at the end of the time you have selected.
- Page 19 Using induction cooking zones safely and Repeat the above procedures for efficiently the other cooking zones for which you wish to set the timer. Operating principles: Induction hob heats directly the cooking vessel as a feature of its operating principles. Therefore, it has Timer cannot be adjusted unless various advantages when compared to the cooking zone and the temper-...
-
Page 20: General Information About Baking
Temperature level Automatic turning off periods - hours 20-30 minute P (Booster) 5-10 minute* (*) The hob will drop to level 9 after 5 minutes Table 1: Table-1: Automatic turning off Precise power setting periods Induction hob reacts the commands im- mediately as a feature of its operating Overheating protection principles. - Page 21 vented from burning when the product is • Remove lime, oil, starch, milk and protein used again later. Thus, the service life of stains on the glass and inox surfaces the appliance extends and frequently immediately without waiting. Stains may faced problems are decreased.
-
Page 22: Cleaning The Hob
• Ensure that the joints of the components • Do not use cleaning agents for cleaning of the product are not left damp and with operations you perform while the hob is detergent. Otherwise, corrosion may oc- hot, otherwise permanent stains may oc- cur on these joints. - Page 23 • An object may have covered the touch Possible noises and reasons control panel. >>> Remove the object on • Fan noise: The cooker is equipped with the panel. a fan that activates automatically ac- cording to the temperature of the appli- Although the hob zone is turned on, the ance.
- Page 24 Error codes Error reasons Possible solutions Turn the induction hob off and oper- Communication error on induction ate again after 30 seconds. Contact E 1 – E 15 hob. the authorized dealership if the issue is resumed. Turn the induction hob off and oper- Temperature sensor error on induc- ate again after 30 seconds.
Need help?
Do you have a question about the HII64401QT and is the answer not in the manual?
Questions and answers