
Related Manuals for APstorage ELS Series


Summary of Contents for APstorage ELS Series
- Page 1 APstorage Sea Family ELS Series PCS Installation & User Manual (For North America) Rev1.0 2024-01-09 © All Rights Reserved...
-
Page 2: Table Of Contents
4. Off-Grid AC Coupling Installation ....................22 4.1 Frequency Shift Power Control ..........................22 4.2 PV System Switch ..............................23 4.3 PV System to APstorage Pairing ..........................23 5. APstorage User Interface ........................ 25 5.1 Configure APstorage with EMA Manager .......................25 5.2 Home Page ................................ -
Page 3: Important Safety Instructions
This manual contains important instructions to be followed during installation and maintenance of the APstorage PCS. To reduce the risk of electrical shock and ensure the safe installation and operation of the APstorage PCS, the following symbols appear throughout this document to indicate dangerous conditions and important safety instructions. -
Page 4: Communication Disclaimer
EMC and is authorized to energize, ground, and tag equipment, systems, and circuits in accordance with established safety procedures. The inverter and storage system may only be commissioned and operated by qualified personnel. APstorage Installation / User Manual... -
Page 5: Apstorage Pcs Introduction
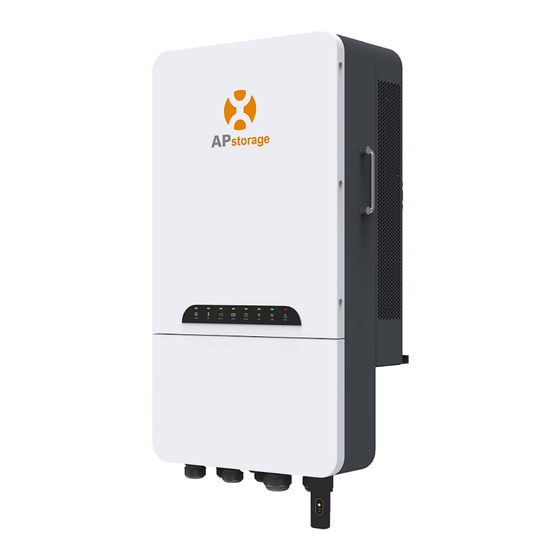
2. APstorage PCS Introduction ELS series PCS is APstorage's Sea family product and the PCS is a battery Power Conversion System. APstorage PCS, together with a compatible battery ( not offered by APstorage), becomes a complete and independent AC coupling storage solution for residential PV installations. It can be used with any new or already installed PV systems without changing equipment in place. -
Page 6: Basic System Architecture
2.2 Basic System Architecture A typical APstorage system includes three main elements: APstorage PCS, which is a smart battery Power Conversion System. The PCS includes an AP Dongle to ensure monitoring of the overall system once up and running. -
Page 7: Back-Up Load Configuration
2 following the conditions above NOTE: In a Storage System with APstorage PCS, the battery is one of the key components. Therefore, it is necessary to keep the installation environment well ventilated, please refer to Battery user manual. 2.3 Back-up Load Configuration Case1. -
Page 8: Pcs Power On/Off
Once the pcs has been properly installed and the batteries are connected well, simply press On/Off button (located on the left side of the case) to turn on the pcs and press On/Off button(ON/OFF button is switched off) to turn off the pcs. 2.5 Cable Inlet Layout APstorage Installation / User Manual... -
Page 9: Led
Fault has occurred FAULT Light flashing Back up output overload Light off No fault NOTE: Light flashing 1: Every 5 seconds light on for 1 second. Light flashing 2: Every 2 seconds light on for 1 second. APstorage Installation / User Manual... -
Page 10: Installation
The expansion screws are applicable only to cement concrete walls. For other types of walls, install expansion screws based on the wall type. NOTE: The customer will need to purchase a combiner box for parallel connection of the batteries. Combiner box requirements: rated current of each connector≧240A. APstorage Installation / User Manual... -
Page 11: Select Mounting Location
(like snow, rain, lightning, etc). Fully shielded installation locations are preferred. 4. Install the APstorage vertically on the wall. 5. Make sure that the PCS is mounted “face-up”: Product logo is visible after installation. 6. Leave enough space around APstorage. The specific requirements are as follows: 150mm 100mm... -
Page 12: Pcs Installed On The Wall
Make sure that the wall mounting bracket is horizontal after installation. ③ Lift the PCS to hang it into the wall mounting bracket, and fix the PCS on wall mounting bracket with the M6×22mm screw. M6×22 screw APstorage Installation / User Manual... -
Page 13: Interface Layout
When wiring, you need to remove the lower cover first, just unscrew the 2 locking screws at the Bottom of the PCS. Interface Layout BAT+ /BAT- Backup Load L1/L2/N Off-Grid Input/Gen AC Grid L1/L2/N Communication L1/L2/N Grounding AP Dongle APstorage Installation / User Manual... - Page 14 PCS has been installed with cable glands before delivery. If connection is required through pipe (prepare pipe yourself), remove cable glands on the casing first. PIPE 1/2/3/4 size: 1" PIPE 5/6 size: 1 1/2" NOTE: Do not drill holes in the casing by yourself. APstorage Installation / User Manual...
-
Page 15: Dc Wiring
3.5.1 Connect the backup Load cables to the PCS through the cable gland. As shown, connect wire L1 , wire L2 and N to the terminal block , and connect wire PE to the earth terminal Block. L1-Black; L2-Red; N-White; PE-Green Backup Load L1/L2/N/PE APstorage Installation / User Manual... - Page 16 3.5.3 Connect the AC Grid cables to the PCS through the cable gland. As shown, connect wire L1 , wire L2 and N to the terminal block , and connect wire PE to the earth terminal Block. L1-Black; L2-Red; N-White; PE-Green AC Grid-PE L1 L2 N APstorage Installation / User Manual...
-
Page 17: Communication Wiring
3.6 Communication Wiring 3.6.1 Internet Communication AP Dongle is an intelligent communication expansion module used in conjunction with PCS to achieve wireless communication between PCS and the management system through WLAN and Bluetooth. AP Dongle APstorage Installation / User Manual... -
Page 18: Ct Wiring
Connect the Battery's RJ45 port to PCS's RJ45 port. Battery 3.7 CT Wiring Connect the Production CT cables to the port of the PCS. Connect the Consumption CT cables to the port of the PCS. APstorage Installation / User Manual... - Page 19 The arrows on the GRID CT should point from grid to distribution box and the arrows on the PV CT from distribution box to PV. Arrow pointing PCS Arrow pointing PV CT1/CT2 (200A) CT3 (80A) CT4 (80A) Grid Distribution box Distribution box Distribution box APstorage Installation / User Manual...
-
Page 20: Install The Lower Cover
When there are two or more cables passing through the same gland, please use sealing putty to seal the gaps between the cables and the gland to prevent moisture from entering (prepare sealing putty yourself). 3.8 Install the Lower Cover Complete wiring, screw the two screws back. APstorage Installation / User Manual... -
Page 21: Wiring Diagram
③ Battery Breaker: 300A DC Breaker ④ GEN Breaker: 100A AC Breaker ⑤ PV Breaker 2: 100A AC Breaker ⑥ PV Breaker 1: Depends on PV system 1 ⑦ Grid Load Breaker: Depends on Grid Load APstorage Installation / User Manual... -
Page 22: Start-Up Sequence
WARNING: The installer is responsible for providing overcurrent protection.To reduce the risk of fire, install a circuit breaker or overcurrent device on both positive(+) and negative(-) conductors to protect the system. APstorage Installation / User Manual... -
Page 23: Off-Grid Ac Coupling Installation
PV module 2 is correctly connected to the Production CTs, the PV inverter function is enabled, and is set according to the APstorage over-frequency load reduction parameter setting table. Example PV Inverter Function showing Power vs Delta Frequency In the graph above, the horizontal axis is variation of the frequency, 0 is the rated frequency. -
Page 24: Pv System Switch
D) When the battery SOC is lower than the upper limit of off-grid charging SOC recovery, PCS will wake up PV module 2 which will supply power to the energy storage system. 4.3 PV System to APstorage Pairing 1. Determine the maximum single load power rating (kW) to be backed up and select the absolute minimum number of PCS units required to meet the requirements of 2017 NEC 690.10->710.15(A). - Page 25 1. Battery Power = 7.5kW 1. Battery Power = 14.4kW 2. ELS Power =11.4kW 2. ELS Power = 11.4kW 3. 7.5kW is smaller 3. 11.4kW is smaller 4. 7.5kW*1.25= 4. 11.4kW*1.25= 9.375kW of Off-grid PV 14.25kW of Off-grid PV APstorage Installation / User Manual...
-
Page 26: Apstorage User Interface
EMA Manager. Click “Local access” to enter this function. Enter Local access You will be noticed if your smartphone or tablet is not enable Bluetooth or is too far away from the APstorage PCS. APstorage Installation / User Manual... - Page 27 Step1: Open Bluetooth setting in your smartphone,and enable Bluetooth. Step 2: Open EMA Manager. Step 3: Click “Local access” You can use this APP to connect the APstorage PCS to the router via Wlan. (Please refer to chapter 5.5.3) APstorage Installation / User Manual...
-
Page 28: Home Page
5. APstorage User Interface 5.2 Home Page 5.2.1 After selecting the ID of APstorage PCS, you can access the homepage. If you have multiple APstorage PCS, you can switch by clicking on the dropdown menu. APstorage Installation / User Manual... - Page 29 5. APstorage User Interface 5.2.2 You can view the system ID, charge and discharge status, real-time power, SOC, today's charged energy, total charged energy since installed, and CO₂ reduction. APstorage Installation / User Manual...
-
Page 30: Workbench
5. APstorage User Interface 5.3 Workbench The workbench displays the latest communication time, and currently supported function catalog. Click the corresponding button to enter the function page. APstorage Installation / User Manual... - Page 31 5. APstorage User Interface 5.3.1 Automatic System Check Enter the Automatic System Check interface, you can check the APstorage information. If there is an alarm, you can click to view the detailed information. APstorage Installation / User Manual...
- Page 32 Emergency power supply (EPS) mode, the system charge when grid connected and discharge when off grid. Self-Consumption mode: APstorage charges when solar power is produced more than home requires, and the power is used for household appliances when your home requires more power than your solar system can provide.
- Page 33 Click “Time-Based Control”, you can view the list of peak times and off-peak times currently set. You can edit the time ranges by clicking on it. Click on the "Add" button to select the peak time or off-peak time to be added. Click to add Click to edit APstorage Installation / User Manual...
- Page 34 5. APstorage User Interface 5.3.3 Network Setting Click the button to enter the WLAN Settings page. APstorage Installation / User Manual...
- Page 35 5. APstorage User Interface 5.3.3.1 WLAN Settings This interface will display the WLAN connection status of the APstorage PCS. Scroll down the screen and the available SSID will be displayed. Click SSID, and enter the password. APstorage Installation / User Manual...
- Page 36 5. APstorage User Interface 5.3.4 Data Settings After entering this page, the time will be displayed on the right. Click on the date, time to modify. APstorage Installation / User Manual...
- Page 37 5. APstorage User Interface 5.3.5 Device Information The device information page displays the device ID, device type, PCS number, battery capacity, DCM version number, Module version number , wireless network MAC, currently connected router SSID, IP address. APstorage Installation / User Manual...
- Page 38 5. APstorage User Interface 5.3.6 Battery saver Enter this page, you can enable the "battery saver" function. After enabling the "battery saver" function, if APstorage doesn't charge or discharge for an hour, it will go to sleep. APstorage Installation / User Manual...
- Page 39 5. APstorage User Interface 5.3.7 Wakeup Settings When system enters into sleeping mode, you can wake it up by clicking on "Wake Up Immediately". APstorage Installation / User Manual...
- Page 40 5. APstorage User Interface 5.3.7.1 Timed Wake Up On this page, you can set the wake-up time period and interval. APstorage Installation / User Manual...
-
Page 41: Settings
5. APstorage User Interface 5.4 Settings Select "Language" to set the APP language, and "About" to view the APP introduction. APstorage Installation / User Manual... -
Page 42: Technical Data
Specifications subject to change without notice please ensure you are using the most recent update found at web : APsystems America usa.APsystems.com 8701 N. Mopac Expy, Ste 160, Austin, TX 78759 Mail: info.usa@APsystems.com Web: usa.APsystems.com APstorage Installation / User Manual...
Need help?
Do you have a question about the ELS Series and is the answer not in the manual?
Questions and answers