
Related Manuals for Hesai OT128


Summary of Contents for Hesai OT128
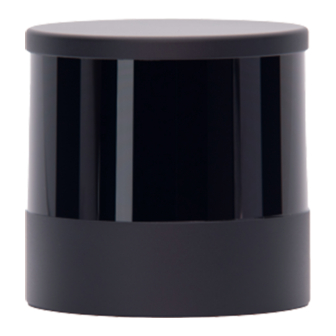
- Page 1 OT128 128-Channel Mechanical Lidar User Manual Classification: Confidential Doc Version: O01-en-231210...
-
Page 2: Table Of Contents
Table of Contents Revision history ......................... ... - Page 3 2.2.2. Connector use ....................... . ...
-
Page 4: Revision History
Revision history Date Doc Ver. Major Changes 2023-9-28 O01-en-230920 Corrected: Section 1.6 Specifications: • Corrected "point cloud data rate". Section 3 Data structure: • Changed the byte size of point cloud UDP data from 893 to 861. Section B.4 Laser firing time of each channel: •... - Page 5 Date Doc Ver. Major Changes Updated: Section 3.1.2.5 Tail Section B.4 Laser firing time of each channel: • ◦ Azimuth State Changed "Range: 0 to 1" to "Range: 0 to 3 (High Resolution mode)" in the field. ◦ Energy Saving Operational State Removed the option in the...
- Page 6 Date Doc Ver. Major Changes 2023-12-22 O01-en-231210 Corrected: Section 1.3 Lidar structure: • Replaced the top view with bottom view to illustrate the azimuthal position and the coordinate system more clearly. Updated: Section 1.6 Specifications: • Changed the weight from 2.3 kg to 2.2 kg. Added the drawings of a new lidar exterior.
-
Page 7: About This Manual
Access to this manual To obtain the latest version, please do one of the following: Contact your sales representative of Hesai. • Contact Hesai technical support team: service@hesaitech.com... -
Page 8: Safety Notice
Should there be other agreements with specific users, the other agreements shall apply. • Before using a product, please confirm with Hesai the development maturity of the product in a timely manner. For products still in development, • Hesai makes no warranty of non-infringement nor assumes any responsibility for quality assurance. -
Page 9: Operating Environment
If any device or equipment in the nearby environment malfunctions. • Meanwhile, contact Hesai Technology or an authorized Hesai Technology service provider for more information on product disposal. Prohibition of disassembly Unless expressly agreed to in writing by Hesai Technology, do NOT disassemble the product. - Page 10 Vibration If significant mechanical shocks and vibration exist in the product's operating environment, please contact Hesai's technical support team to • obtain the shock and vibration limits of your product model. Exposure to over-the-limit shocks or vibration may damage the product.
-
Page 11: Personnel
The product should be operated by professionals with engineering backgrounds or experience in operating optical, electrical, and mechanical instruments. Please follow the instructions in this manual when operating the product and contact Hesai technical support if needed. Medical device interference Some components in the product can emit electromagnetic fields. - Page 12 • To prevent breakdowns, turn off the power source before connection and disconnection. • If abnormalities already exist (such as bent pins, broken cables, and loose screws), stop using the product and contact Hesai technical support. • Eye safety The product is a Class 1 laser product. It satisfies the requirements of: IEC 60825-1:2014 •...
- Page 13 • immediately and contact Hesai technical support. Do NOT squeeze or pierce the product. If the product enclosure is broken, stop using it immediately and contact Hesai technical support. • Certain product models contain high-speed rotating parts. To avoid potential injuries, do NOT operate the product if the enclosure is loose.
- Page 14 Using off-spec or unsuitable devices may result in product damage or even personal injuries. Firmware and software upgrading Make sure to use only the upgrade files provided by Hesai Technology. Make sure to observe all the instructions provided for that upgrade file. Customized firmware and software Before using a customized version of firmware and software, please fully understand the differences in functions and performance between the •...
-
Page 15: Repair And Maintenance
For product repair or maintenance issues, please contact Hesai Technology or an authorized Hesai Technology service provider. Repair Unless expressly agreed to in writing by Hesai Technology, do NOT by yourself or entrust any third party to disassemble, repair, modify, or retrofit the product. Such a breach: can result in product damage (including but not limited to water resistance failure), property loss, and/or injuries;... -
Page 16: Introduction
1. Introduction 1.1. Applicable versions This manual applies to the following versions: Software 1.4.02a or later Firmware of Sensor 1.4.1t10 or later Firmware of Controller 1.4.1t3 or later 1.2. Operating principle Distance measurement: Time of Flight (ToF) A laser diode emits a beam of ultrashort laser pulses onto the target object. The laser pulses are reflected after hitting the target object. -
Page 17: Lidar Structure
1.3. Lidar structure Figure 1. Partial cross-sectional diagram Figure 3. Lidar azimuthal position (bottom Figure 2. Coordinate system (isometric view) view) The figures above use Exterior 1 as an example; see Section 2 Setup. The basic structure is shown in Figure 1. -
Page 18: Channel Distribution
1.4. Channel distribution All channels are unevenly distributed, as illustrated in Figure 4. Channel vertical distribution. Vertical resolution: See Section 1.6 Specifications. • The design values of each channel's angular position: See Appendix A Channel distribution data. • Channel Number counts from 1, top to bottom. •... -
Page 19: Laser Firing Position
1.5. Laser firing position Figure 5. Front view (unit: mm) Figure 6. Side view (unit: mm) The figures above use Exterior 1 as an example; see Section 2 Setup. -16-... - Page 20 Each channel has an intrinsic angle offset, both horizontally and vertically. These angles are recorded in the angle correction file of this lidar, which is provided when shipping. Angle correction file In case you need to obtain the file again, please do one of the following: Send PTC command 0x05, as described in the TCP API Reference Manual (see Section 4 Communication protocol).
-
Page 21: Specifications
1.6. Specifications SENSOR Scanning method Mechanical rotation Number of channels Instrumented range 0.3 to 230 m Ranging capability ① 1 to 200 m (at 10% reflectivity) Range accuracy ② ±3 cm (3 to 200 m, typical) Horizontal FOV 360° Horizontal resolution Configurable on-the-fly 0.1°/0.2°... - Page 22 MECHANICAL/ELECTRICAL/OPERATIONAL Wavelength 905 nm Laser class Class 1 Eye Safe Ingress protection IP6K7 & IP6K9K Dimensions Height: 132.3 mm Top/bottom: Φ111.4/116.0 mm or Φ111.4/118.0 mm Rated voltage range DC 9 to 32 V Power consumption ③ 29 W Operating temperature –40℃...
- Page 23 Specifications are subject to change. Please refer to the latest version. Notes to specifications ① Ranging capability (typical value) Measured under 100 klux ambient illuminance, PoD (probability of detection) • > 70%. The ranging capability of each channel is listed in Appendix A Channel •...
-
Page 24: Setup
2. Setup Before operating the lidar, strip away the protective cover on the cover lens. 2.1. Mechanical installation 2.1.1. Lidar Exterior OT128 is switching from "Exterior 1" to "Exterior 2". Please check the delivery notice. -21-... - Page 25 Figure 7. Front view (Exterior 1, unit: mm) -22-...
- Page 26 Figure 8. Bottom view (Exterior 1, unit: mm) -23-...
- Page 27 Figure 9. Front view (Exterior 2, unit: mm) -24-...
- Page 28 Figure 10. Bottom view (Exterior 2, unit: mm) -25-...
-
Page 29: Recommended Installation
2.1.2. Recommended Installation Figure 11. Recommended installation (Exterior 1) The installations method for Exterior 1 and 2 are the same. The figures above use Exterior 1 as an example; see Section 2 Setup. -26-... -
Page 30: Notes On Screw Installation
2.1.3. Notes on screw installation Screw type SEMS screws (with pre-attached flat washers and lock washers) are recommended. Property class should be at least 4.8. Threadlocker Before fastening a screw, apply 1 or 2 dots of threadlocker in the thread fit area. LOCTITE® 263 Threadlocker is recommended. To ensure curing it in place, wait for at least 12 hours before operating the lidar. -
Page 31: Electrical Interface
2.2. Electrical interface TE Connectivity part number: 2387351-1 (male socket, on the lidar) Figure 12. TE connector (male socket) 2.2.1. Pin description Signal Voltage 9 to 32 V Reserved Index 0 ~ 3.3 V Reserved Encoder 0 ~ 3.3 V MDI-P MDI-N -28-... -
Page 32: Connector Use
2.2.2. Connector use Connection Turn off the power source. Make sure the plug's red locking clip is on the same side as the socket's latch. Push the plug straight into the socket until a click is heard. Push down the red locking clip to the bottommost position until a click is heard. Disconnection Turn off the power source. -
Page 33: Cables (Ethernet)
• connectors' shells, or even damage the contacts. If the connector's shell is accidentally pulled off, stop using the connector and contact Hesai technical support. • DO NOT attempt to assemble the connector's shell and cable collet; DO NOT connect a connector without its shell. Doing so may damage •... -
Page 34: Connection Box (Optional)
2.3. Connection box (optional) Users may connect the lidar directly or using the connection box. The connection box has a power port and a standard Ethernet port. Figure 15. Connection box (unit: mm) -31-... - Page 35 An additional cable is used for connecting the lidar (on the left) and the connection box (on the right), as shown below. One cable's head cannot connect to another cable's tail, so each lidar can only use one cable. Figure 16.
-
Page 36: Connection Box
2.3.1. Connection box ports Figure 17. Connection box (front) Port No. Port name Description Standard Ethernet port RJ45, 1000 Mbps Ethernet Power port Connects to a DC-005 DC power adapter. Reserved port Do not connect this port to external signals. -33-... - Page 37 Figure 18. Connection box (back) Port No. Port name Description Trigger port Outputs external trigger signals for multi-sensor synchronization. Power Output port See CNT3 connector in Figure 16. Cable between Lidar and connection box. Automotive Ethernet port See CNT2 connector in Figure 16.
-
Page 38: Connection
2.3.2. Connection Figure 19. Connection with PTP (software simulation) -35-... - Page 39 Figure 20. Connection with PTP (hardware device) The figures above use Exterior 1 as an example; see Section 2 Setup. -36-...
-
Page 40: Network Settings On The Receiving Host
To record and display point cloud data, see PandarView 2 User Manual. • To set parameters, check device info or upgrade firmware/software, use either LidarUtilities or PTC commands. • To obtain the SDKs (Software Development Kits) for your product model, please visit Hesai's official GitHub page: https://github.com/ • HesaiTechnology... -
Page 41: Data Structure
3. Data structure Unless otherwise specified, all the multi-byte fields are unsigned values in little-endian format. Ethernet header: 42 bytes Pre-Header: 6 bytes Header: 6 bytes Lidar data Point Cloud Data Packet: 903 bytes UDP data: 861 bytes Body: 776 bytes Functional safety: 17 bytes Tail: 56 bytes Figure 21. -
Page 42: Point Cloud Data Packet
3.1. Point Cloud Data Packet 3.1.1. Ethernet header Default IP address: Source IP 192.168.1.201 Destination IP 255.255.255.255 Point Cloud Data Packet: Ethernet header Field Bytes Description Ethernet II MAC Destination MAC: xx:xx:xx:xx:xx:xx (FF:FF:FF:FF:FF:FF for broadcast) Source MAC: xx:xx:xx:xx:xx:xx Ethernet Data Packet Type 0x08, 0x00 Internet Protocol Protocol parameters... -
Page 43: Point Cloud Udp Data
3.1.2. Point cloud UDP data 3.1.2.1. Pre-Header Field Bytes Description 0xEE Start of Packet 0xFF Start of Packet Protocol Version Major Main class of the point cloud UDP packet structure Current value: 0x01 Protocol Version Minor Subclass of the point cloud UDP packet structure Current value: 0x04 Reserved -40-... - Page 44 3.1.2.2. Header Field Bytes Description Channel Num Number of laser channels Fixed: 0x80 (128) Block Num Number of block(s) per packet Fixed: 0x02 (2) First Block Return Reserved Dis Unit Fixed: 0x04 (4 mm) Return Num Maximum number of returns per channel 0x02 (2) Flags [7] to [4] are reserved...
- Page 45 3.1.2.3. Body Field Bytes Description Azimuth 1 For Block 1: Current reference angle of the azimuth Unit: 0.01° Block 1 For Block 1: Measurements made by each channel (starting from Channel 1) Refer to Each block in the body. Azimuth 2 For Block 2: Current reference angle of the azimuth Block 2 For Block 2: Measurements made by each channel (starting from Channel 1)
- Page 46 Each block in the body: 3 × 128 = 384 bytes Field Bytes Description Channel 1 Distance Reflectivity Measurements of Channel 1 ( Field Description 2-byte Distance Definition of the Distance field (when Up-Close Blockage Detection is OFF). 1-byte Reflectivity Range: 0 to 255 Reflectivity Reflectivity =...
- Page 47 Definition of the Distance field (when Up-Close Blockage Detection is ON) Distance Description ≥ 75 Distance Dis Unit Object distance = ≥ 0.3 m Dis Unit : See Section 3.1.2.2 Header. No laser emission. Return signal is received. Object distance: < 0.3 m (below the lower limit of the lidar measurement range) Therefore, no valid point cloud output.
- Page 48 3.1.2.4. Functional safety Field Bytes Description FS Version Version number of the functional safety module (currently 0x00) Lidar State [7:5] is the current Lidar State. d-0 (b-000) Initialization d-1 (b-001) Normal d-2 (b-010) Warning d-3 (b-011) Pre-Performance Degradation d-4 (b-100) Performance Degradation d-5 (b-101) Pre-Shutdown d-6 (b-110) Shutdown or Output Untrusted d-7 (b-111) Standby...
- Page 49 3.1.2.5. Tail Field Bytes Description Reserved Azimuth State [15:14] is the azimuth state of Block 1, and [13:12] the azimuth state of Block 2. Used for looking up the laser firing time, see Section B.4 Laser firing time of each channel.
- Page 50 Field Bytes Description Date & Time Absolute UTC of this data packet, accurate to the second. In big-endian format: Each byte Range (decimal) Year (current year minus 1900) ≥ 70 Month 1 to 12 1 to 31 Hour 0 to 23 Minute 0 to 59 Second...
- Page 51 Field Bytes Description IMU Acceleration Unit Conversion factor of acceleration Data type: unsigned integer Current value: 244 (0x00F4) Unit of acceleration: 0.001mg * 244 = 0.244mg (g : standard gravity) IMU Angular Velocity Unit Conversion factor of angular velocity Data type: unsigned integer Current value: 1750 (0x06D6) Unit of angular velocity: 0.01 mdps * 1750 = 17.5 mdps (millidegree per second) IMU Timestamp...
- Page 52 Field Bytes Description IMU X Axis Angular Velocity Angular velocity of the X-axis, measured by the IMU. Data type Signed integer Measurement ±500 dps range Unit of angular IMU Angular Velocity Unit See the field; currently 17.5 mdps. velocity Example When this field is 5, X-axis angular velocity = 5 ×...
-
Page 53: Point Cloud Data Analysis
3.1.3. Point cloud data analysis Take Channel 5 in Block 2 as an example: 3.1.3.1. Analyze the vertical angle of a data point The designed vertical angle of Channel 5 is 9.836°, according to Appendix A Channel distribution data. The accurate vertical angles are recorded in the angle correction file of this lidar, see Section 1.4 Channel distribution. - Page 54 3.1.3.2. Analyze the horizontal angle of a data point The Y-axis of the lidar coordinate system is 0°. The counterclockwise direction (as viewed from below) is defined as positive, see Figure 3. Lidar azimuthal position (bottom view). Horizontal angle = ① + ② ①...
- Page 55 3.1.3.3. Analyze the distance of a data point Distance See the field of Block 2: Channel 5 in Section 3.1.2.3 Body. 3.1.3.4. Draw the data point in a spherical or rectangular coordinate system 3.1.3.5. Obtain the real-time point cloud data by analyzing and drawing every data point in each frame -52-...
-
Page 56: Protocol
4. Communication protocol PTC (Pandar TCP Commands) API can be used to communicate with Hesai lidars. To acquire the API reference manuals, please contact Hesai technical support. With cybersecurity enabled, the encrypted PTCS (PTC over TLS) API is also available: Data format: Same as the cleartext PTC API. -
Page 57: Sensor Maintenance
5. Sensor maintenance Stains on lidar's cover lens, such as dirt, fingerprints, and oil will negatively affect point cloud data quality. Before cleaning the cover lens, please notice: Turn OFF the power source before cleaning. • To avoid damaging the optical coating, do NOT apply pressure when wiping the cover lens. •... -
Page 58: Troubleshooting
6. Troubleshooting If the following procedures cannot solve your problem, please contact Hesai technical support. Points to check Symptoms Make sure that the following conditions are met: The power adapter is properly connected and in good condition; • Indicator light is off on the The connection box is intact;... - Page 59 Wireshark but not on LidarUtilities or PTC commands; PandarView 2 The latest PandarView 2 is installed on the PC (see Download page of Hesai's official website or contact Hesai • technical support). Power on again to check if the symptom persists.
- Page 60 Symptoms Points to check Make sure that the following conditions are met: Ethernet cable is properly connected (by unplugging and plugging again). • The lidar's IP is in the same subnet with the PC's (WireShark may be used to check the lidar's IP that broadcasts •...
- Page 61 If no packet is missing and the point cloud flashes, please update PandarView 2 to the latest version (see Download page of Hesai's official website or contact Hesai technical support); and then restart the PC. If the point cloud is still abnormal, connect the lidar to another PC and power on again to check if the symptom persists.
-
Page 62: Appendix A: Channel Distribution Data
Appendix A: Channel distribution data Notes to the table Channel Number Counts from 1, top to bottom. Angular position The design values of each channel's horizontal (azimuth) angle offset and vertical (elevation) angle. The accurate values are recorded in this lidar unit's angle correction file. •... - Page 63 Channel Angular position Instrumented Max. range Far-field Min. detectable High- range @ 10% reflectivity enhanced? res? reflectivity at max. instrumented Horiz. offset Vertical range 0.186° 14.985° 0.3 m 130 m 60 m 100% 0.185° 13.283° 0.3 m 130 m 80 m 1.335°...
- Page 64 0.127° 3.921° 1.4 m 130 m 100 m 0.127° 3.558° 0.3 m 130 m 100 m 0.107° 3.194° 1.4 m 130 m 100 m 0.106° 2.829° 1.4 m 130 m 100 m 0.105° 2.463° 1.4 m 130 m 100 m 0.105°...
- Page 65 0.103° 0° 1.4 m 230 m 200 m 2.935° –0.125° 1.4 m 230 m 200 m –1.517° –0.250° 1.4 m 230 m 200 m 0.103° –0.375° 1.4 m 230 m 200 m 2.937° –0.500° 1.4 m 230 m 200 m –1.519°...
- Page 66 2.948° –2.751° 1.4 m 230 m 200 m –1.526° –2.876° 1.4 m 230 m 200 m 1.324° –3.001° 1.4 m 230 m 140 m 4.570° –3.126° 1.4 m 230 m 140 m –3.155° –3.251° 0.3 m 230 m 140 m 1.325°...
- Page 67 –3.167° –5.502° 1.4 m 230 m 140 m 1.329° –5.626° 1.4 m 230 m 140 m 4.588° –5.752° 1.4 m 230 m 140 m –3.168° –5.877° 1.4 m 230 m 140 m 0.102° –6.002° 0.3 m 130 m 100 m 0.103°...
- Page 68 0.109° –12.709° 1.4 m 130 m 100 m 0.109° –13.075° 1.4 m 130 m 100 m 0.130° –13.439° 0.3 m 130 m 100 m 0.131° –13.803° 1.4 m 130 m 100 m 0.131° –14.164° 1.4 m 130 m 100 m 0.132°...
-
Page 69: Appendix B: Absolute Time Of Point Cloud Data
Appendix B: Absolute time of point cloud data B.1. Source of absolute time The lidar retrieves the current absolute time by connecting to an external clock source. B.1.1. PTP as the clock source The lidar connects to a third-party PTP master to obtain the absolute time. PTP can be configured using either LidarUtilities or PTC commands. -
Page 70: Absolute Time Of Point Cloud Data Packets
B.2. Absolute time of Point Cloud Data Packets The Absolute time of Point Cloud Data Packets is t , where: Date & Time • is the whole second part (see the field). Timestamp • is the microsecond part (see the field). - Page 71 High Resolution mode and Standard mode Mode Frame rate Horizontal Resolution of Far Field Measurement Standard 10 Hz 0.2° for all channels High Resolution 10 Hz 0.1° for the high-res channels (Channel 25 to Channel 88) 0.2° for the other channels 20 Hz 0.2°...
-
Page 72: Laser Firing Time Of Each Channel
B.4. Laser firing time of each channel Given the start time (see Section B.3 Start time of each block) of Block m is T(m), m ∈ {1, 2}, the laser firing time of Channel n: Block m is t(m, n) = T(m) + Δt(n), n ∈ {1, 2, …, 128} Steps to look up firing time offsets Δt(n) Operational State Check the... - Page 73 In the ascending order of channel number (High Resolution) Azimuth State Azimuth State Channel No. Channel No. 18.867 18.867 14.231 14.231 16.375 14.231 6.289 6.289 16.549 16.549 18.693 16.549 18.867 21.011 20.52 20.52 22.664 20.52 6.289 6.289 7.942 7.942 7.942 7.942 12.578 12.578...
- Page 74 6.289 6.289 22.838 22.838 24.982 22.838 12.578 12.578 1.653 1.653 1.653 1.653 3.971 3.971 3.971 3.971 12.578 14.722 20.52 20.52 22.664 20.52 22.838 22.838 24.982 22.838 20.52 20.52 22.664 20.52 18.867 18.867 16.549 16.549 18.693 16.549 6.289 6.289 10.26 10.26 10.26 10.26 18.867...
- Page 75 16.549 16.549 18.693 16.549 6.289 6.289 20.52 20.52 22.664 20.52 18.867 21.011 7.942 7.942 7.942 7.942 6.289 6.289 10.26 10.26 10.26 10.26 12.578 12.578 16.549 16.549 18.693 16.549 1.653 1.653 1.653 1.653 12.578 14.722 3.971 3.971 3.971 3.971 10.26 10.26 10.26 10.26 18.867...
- Page 76 22.838 22.838 24.982 22.838 -73-...
- Page 77 In the ascending order of channel number (Standard) Azimuth State Azimuth State Channel No. Channel No. 46.645 46.645 14.231 16.375 34.067 34.067 16.549 18.693 18.867 21.011 20.52 22.664 6.289 6.289 7.942 7.942 40.356 40.356 10.26 10.26 27.778 27.778 16.549 18.693 12.578 14.722 1.653...
- Page 78 6.289 6.289 22.838 24.982 40.356 40.356 1.653 1.653 27.778 27.778 3.971 3.971 12.578 14.722 20.52 22.664 22.838 24.982 20.52 22.664 46.645 46.645 16.549 18.693 34.067 34.067 10.26 10.26 18.867 21.011 16.549 18.693 6.289 6.289 20.52 22.664 40.356 40.356 3.971 3.971 27.778 27.778 14.231...
- Page 79 16.549 18.693 34.067 34.067 20.52 22.664 18.867 21.011 7.942 7.942 6.289 6.289 10.26 10.26 40.356 40.356 16.549 18.693 27.778 27.778 1.653 1.653 12.578 14.722 3.971 3.971 10.26 10.26 46.645 46.645 22.838 24.982 34.067 34.067 14.231 16.375 18.867 21.011 3.971 3.971 6.289 6.289 20.52...
- Page 80 22.838 24.982 -77-...
-
Page 81: Appendix C: Nonlinear Reflectivity Mapping
Appendix C: Nonlinear reflectivity mapping Reflectivity By default, the field in Point Cloud Data Packets (see Section 3.1.2.3 Body) linearly represents target reflectivity. Reflectivity • Range of the field value: 0 to 255 Range of target reflectivity: 0 to 255% •... - Page 82 Nonlinear mapping 1# Reflectivity Actual Reflectivity Actual Reflectivity Actual Reflectivity Actual field reflectivity % field reflectivity % field reflectivity % field reflectivity % 0.01 0.02 0.03 0.04 0.05 0.08 0.11 0.13 0.15 0.19 0.23 0.26 0.29 0.34 0.39 0.44 0.56 0.61 0.67 0.75...
- Page 83 Reflectivity Actual Reflectivity Actual Reflectivity Actual Reflectivity Actual field reflectivity % field reflectivity % field reflectivity % field reflectivity % 10.17 10.5 10.83 11.12 11.37 11.62 11.87 12.12 12.37 12.62 12.87 13.17 13.5 13.83 14.17 14.5 14.83 15.12 15.37 15.62 15.87 16.17 16.5...
- Page 84 Reflectivity Actual Reflectivity Actual Reflectivity Actual Reflectivity Actual field reflectivity % field reflectivity % field reflectivity % field reflectivity % 38.75 39.17 39.5 39.83 40.5 41.25 41.75 42.25 42.75 43.25 43.75 44.25 44.75 45.25 45.75 46.25 46.75 47.25 47.75 48.25 48.75 49.5 50.25...
- Page 85 Reflectivity Actual Reflectivity Actual Reflectivity Actual Reflectivity Actual field reflectivity % field reflectivity % field reflectivity % field reflectivity % 87.75 88.5 89.25 89.75 90.5 91.5 92.5 93.25 93.75 94.5 95.5 96.25 96.75 97.5 98.5 99.5 -82-...
-
Page 86: Nonlinear Mapping 2
C.2. Nonlinear mapping 2# This mapping increases the resolution of low-reflectivity objects, especially lane markings. Figure 23. Nonlinear mapping 2# -83-... - Page 87 Nonlinear mapping 2# Reflectivity Actual Reflectivity Actual Reflectivity Actual Reflectivity Actual field reflectivity % field reflectivity % field reflectivity % field reflectivity % 2.89 4.08 5.77 6.45 7.07 7.64 8.16 8.66 9.13 9.57 10.41 10.8 11.18 11.55 11.9 12.25 12.58 12.91 13.23 13.54...
- Page 88 Reflectivity Actual Reflectivity Actual Reflectivity Actual Reflectivity Actual field reflectivity % field reflectivity % field reflectivity % field reflectivity % 53.05 54.18 55.3 56.43 57.56 58.69 59.82 60.95 62.08 63.21 64.33 65.46 66.59 67.72 68.85 69.98 71.11 72.23 73.36 74.49 75.62 76.75 77.88...
- Page 89 Reflectivity Actual Reflectivity Actual Reflectivity Actual Reflectivity Actual field reflectivity % field reflectivity % field reflectivity % field reflectivity % 143.34 144.47 145.6 146.73 147.86 148.98 150.11 151.24 152.37 153.5 154.63 155.76 156.88 158.01 159.14 160.27 161.4 162.53 163.66 164.79 165.91 167.04 168.17...
- Page 90 Reflectivity Actual Reflectivity Actual Reflectivity Actual Reflectivity Actual field reflectivity % field reflectivity % field reflectivity % field reflectivity % 233.63 234.76 235.89 237.02 238.15 239.28 240.41 241.53 242.66 243.79 244.92 246.05 247.18 248.31 249.44 250.56 251.69 252.82 253.95 255.08 -87-...
-
Page 91: Appendix D: Legal Notice
HESAI and HESAI logo are registered trademarks of Hesai Technology. All other trademarks, service marks, and company names in this manual or on Hesai's official website are properties of their respective owners. - Page 92 Hesai Technology Co., Ltd. Phone: +86 400 805 1233 Business Email: info@hesaitech.com Website: www.hesaitech.com Service Email: service@hesaitech.com Address: Building L2, Hongqiao World Centre, Shanghai, China...
Need help?
Do you have a question about the OT128 and is the answer not in the manual?
Questions and answers