Table of Contents
Advertisement
Quick Links
Advertisement
Table of Contents

Related Manuals for Nireeka REVENANT Series


Summary of Contents for Nireeka REVENANT Series
- Page 1 R E V E N A N T S E R I E S USER'S MANUAL O R I G I N A L I N S T R U C T I O N S...
- Page 2 We encourage you to visit our website reg- ularly at www.nireeka.com. There, you will find the latest updates, helpful tips, and the support section on our dashboard.
- Page 3 Thank you for choosing NIREEKA ebikes. We hope you will take as much pleasure from riding with it, as we have taken from developing it. We have dedicated all our effort and know-how to your bike, but we are open to your comments.
-
Page 9: Table Of Contents
CONTENTS Brakes Maintenance ..........................34 ABS Instructions ..........................35 Components Bike Parts ..........................10 ..........................36 Overall Observations Regarding This Manual Stem ..........................12 ..........................37 Purpose Of Use Saddle / Seat Post ..........................13 ..........................37 Seat Post Dropper General Information / Frame ..........................16 ..........................38 General Information / Fork Holder Motor ..........................17 ..........................38... - Page 10 Your bicycle and this manual meet the requirements of international safety standards. Important! Assembly instructions are provided in the Quick Start Guide. The Quick Start Guide is also available on our website, www.nireeka.com Please take a moment to read pages 19 to 24 of this manual before your first ride. Perform...
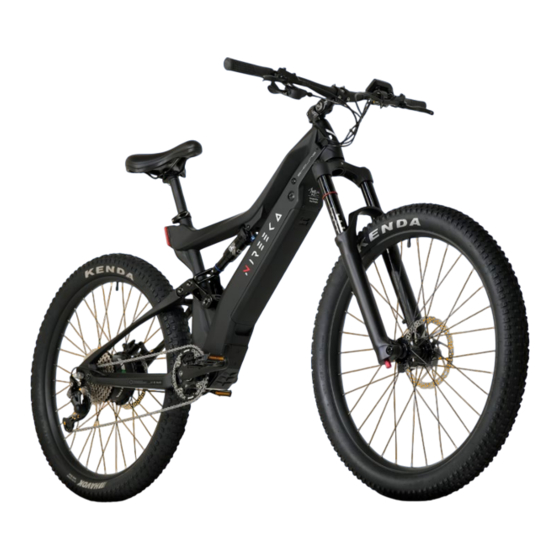
- Page 11 1 . REAR BRAKE 12 . DISPLAY 2 . GEAR SET 13 . BRAKE SHIT/LEVER 3 . REAR TIRE 14 . GEAR SHIFT 4 . TAILLIGHT 15 . FORK 5 . SEAT POST 16 . REAR DERAILLEUR 6 . SADDLE 17 .
-
Page 12: Overall Observations Regarding This Manual
DEAR NIREEKA CUSTOMER, In this manual, we have compiled a series of In this manual, you will find a series of tips on how to use your Nireeka Revenant, maintenance and repair routines described maintenance and care instructions, as well in detail. -
Page 13: Purpose Of Use
The manufacturers included category can be identified by markings on with your new Nireeka. the frame, corresponding to specific sym- bols that determine the suitable surfaces for cycling and the intended actions for your road bike. - Page 14 In no case shall NIREEKA E-BIKES, our direc- tors, officers, employees, affiliates, agents, Check wheels are installed securely on the contractors, interns, suppliers, service pro- bike before commencing riding.
- Page 15 You further agree that your comments will NIREEKA is not responsible for any direct, not contain libelous or otherwise unlawful, incidental, or consequential damages, in- abusive, or obscene material, or contain...
-
Page 16: General Information Frame
GENERAL INFORMATION FRAME FRAME NUMBER/SERIAL NUMBER All the Nireeka bikes come with a unique frame number printed on the frame. You will need this frame number along with your order number for various purpos- es such as registering your bike in your country and getting insurance for your bike. - Page 17 According to the frame size chart below, the right frame of your own easily could be chosen: FRONT REAR BIKE HEIGHT FRAME SIZE WHEEL WHEEL SIZE SIZE SIZE 5'1" to 5'5" 17 Inch / 43.18 cm 155 to 165 cm 5'5"...
-
Page 18: Quick Installation
QUICK INSTALLATION... -
Page 19: Unboxing
UNBOXING Check the box carefully for any damage. Put the box on the ground and pull the package out by grabbing the frame and rear wheel. The package includes: Nireeka Revenant fully-assembled bike Front-wheel Pedals Saddle Battery Charger Battery key (Inside... -
Page 20: Installing The Front Wheel
INSTALLING THE FRONT WHEEL The front wheel hub is the thru-axle model. REMOVE IT 1. Pull out the brake's pad protector gently. 2. Locate the rotor inside the brake caliper and align the hub in the front fork dropout. NOTE: When installing the front wheel in the fork, make sure the brake pads aren't dislodged. -
Page 21: Installing The Pedals
INSTALLING THE PEDALS 1. There is a small letter on each pedal indi- cating on which side it should be installed. You need to install each pedal on the cor- rect side of the Crank Arm. “L” stands for Left and “R” stands for Right. Which side it should be installed. -
Page 22: Installing The Handlebar
INSTALLING THE HANDLEBAR 1. Adjust the handlebar in the proper and 2. Insert the screws straight position. 3. Fasten the bolts on the back of the stem 4. Finish tightening the other two bolts respectively Allen Key Nº 4. Use the X pat- respectively. -
Page 23: Installing The Display
INSTALLING THE DISPLAY 1. Open the clamp band’ s screw and install 2. Adjust the angle of the display so that it it in the correct place over the handlebar. is easy to be seen while riding, and then use a Allen Key Nº... -
Page 24: Installing The Bottle Holder (Optional)
INSTALLING THE BOTTLE HOLDER The bottle holder/cage doesn’t come as a standard extra with the bike but the Nireeka bike has a standard mounting point on the frame where you can install your bottle cage on the bike frame using the below structures. -
Page 25: Start Riding
START RIDING... -
Page 26: Turning On/Off The Bike
NOTE: You need to turn the battery off when you’re not using the bike to prevent the battery drain. The model of the display depends on the user's choice. You can find the manual for the display in the Nireeka Display User Manual. -
Page 27: Battery And Charger
BATTERY AND CHARGER... -
Page 28: The Main Battery
THE MAIN BATTERY 1. Power Button: Unlike the other Niree- 2. Charge Connector: This connector plugs ka models, the power button of the bat- into the male side of the battery bracket tery is located on the frame, next to the when the battery is installed on the bike. -
Page 29: Removing The Battery
3. After turning the key, the battery will fall into your hand. *NIREEKA REVENANT bike has been fitted with a quick-release battery post-fitting, which has a separate door, and without using any key the door can be opened and close. By removing the battery... -
Page 30: Reinstalling The Battery
REINSTALLING THE BATTERY 1. Insert the bottom side of the battery into the frame. 2. Push the battery into the frame to hear the click sound. 3. Insert the bottom side of the battery cover into the frame. 4. Push the battery cover into the frame to hear the click sound and lock. -
Page 31: Charging The Battery
CHARGING THE BATTERY CHARGER LEDS: When green, either the battery is not connected or the battery is fully charged. When red, it means the battery is charging. The charger has a smart cut-off system. When the battery is fully charged, it turns off automatically. - Page 32 SECOND WAY: CHARGE THE BATTERY INSIDE THE BIKE 1. Connect the charger power plug to the 2. Remove the waterproof socket cover on outlet. the battery's charging port. 3. Insert the charging plug into the bat- 4. Wait until the Led 2 turns green. Full tery's charging port.
-
Page 33: Brakes
BRAKES... -
Page 34: Brakes Maintenance
BRAKES MAINTENANCE Since the brakes on all the Nireeka bikes, including your Revenant, are hydraulic, you need to inspect the bike time to time for oil leaking. When you receive your bike, make sure to inspect it for any liquid leak. Adjusting hydraulic brakes on a bicycle involves making sure that the brake pads are in the correct position and that the brake calipers are properly aligned with the rotor. -
Page 35: Abs Instructions
ON, you need to start riding gently and squeeze the brake lever a few times In a Nireeka bike with ABS, when the brakes at a speed less than 8 km/h or 5 mph. If are applied in an emergency situation, the light doesn’t turn off, it means the... -
Page 36: Bike Parts
BIKE PARTS... -
Page 37: Stem
STEM Nireeka Revenant comes with two types of stems: 3. Adjusting adjustable stem. 1. Adjustable. 2. Regular. 4. Use the wrench number 5. ADJUSTING ADJUSTABLE STEM: Loosen the screws on the right side with an Allen key, then adjust the height to the desired degree, and finally tighten the screw. -
Page 38: Seat Post Dropper
MOTOR The Nireeka REVENANT ebike comes with the most powerful hub motor made by the Bafang 1000W Hub-motor on Nireeka Revenant 1000 model and a 250W motor on Nireeka Revenant v1 model. -
Page 39: Full Suspension Geometry
NIREEKA all-track full suspension trail electric bikes bring to you a perfect sense of professional riding together with a high level of safety. - Page 40 The process to set the SAG on your shock is; that you simply need to follow these steps: 1. Place the rubber O-ring against the 2. Sit on the bike in a normal position and shock’ s body. wear your usual riding kit (helmet, bag, and accessories…).
- Page 41 B. FOR RIDERS WHO WEIGH BETWEEN 120-140 LBS (55-64 KG), THE RECOMMENDED AIR PRESSURE IS BETWEEN TYPICALLY 120-140 PSI. C. FOR RIDERS WHO WEIGH BETWEEN 140-160 LBS (64-73 KG), THE RECOMMENDED AIR PRESSURE IS BETWEEN TYPICALLY 140-160 PSI. D. FOR RIDERS WHO WEIGH BETWEEN 160-180 LBS (73-82 KG), THE...
-
Page 42: Adjusting The Tire Air Pressure
ADJUSTING THE TIRE AIR PRESSURE There are many considerations and factors is because while we ride, 40% of our body as to how much pressure you should put in- weight is distributed toward the front tire, side your bike tires. and 60% is toward the rear tire. -
Page 43: Adjusting The Suspension Fork
Compression (LSC) damping or adjust its sagging, rotate the knob in the direction indicated. 3. The proper air pressure for a Nireeka fork 2. The Lockout* setting prevents the fork depends on the rider's weight. Generally, a from compressing until a significant im- heavier rider will require more air pressure pact occurs. - Page 44 C. FOR RIDERS WHO WEIGH BETWEEN 140-160 LBS (64-73 KG), THE RECOMMENDED AIR PRESSURE IS TYPICALLY BETWEEN 70-80 PSI. D. FOR RIDERS WHO WEIGH BETWEEN 160-180 LBS (73-82 KG), THE RECOMMENDED AIR PRESSURE IS TYPICALLY BETWEEN 80-90 PSI. E. FOR RIDERS WHO WEIGH BETWEEN 180-200 LBS (82-91 KG), THE...
-
Page 45: Maintenance
MAINTENANCE... -
Page 46: Bike Cleaning
BIKE CLEANING 1. After each ride, you should clean your 2. Doing this will also enable you to carry bike with soapy water. We also advise you out a visual check of the tubes of your bike to wash the battery and the display sepa- (useful to check for the start of any possi- rately using a damp cloth. -
Page 47: Battery
BATTERY The battery must be well cared for to optimize useful life and range. It is the responsibility of the user to ensure the battery is looked after properly. Incorrect use or storage of your battery may cause damage and void the warranty. After a ride, fully recharge your battery as soon as it has cooled to room temperature. -
Page 48: Chain
CHAIN The chain of your bike is an important part of it, so take the time to regularly check that no link has become deformed or open as it could break while riding and cause a fall. The chain should be lubricated. -
Page 49: Torque
In case of an accident or severe crash, where structural integrity is compromised, our Crash Replacement (CR) program ensures you can replace your damaged Nireeka frame at a reduced cost. Valid for up to three years from the date of purchase, this program offers peace of mind to original owners. -
Page 50: Motor
MAINTENANCE SCHEDULE Keep your Nireeka Revenant performing at its best with regular service and maintenance. Following the bedding-in period, it's recommended to have your bike serviced by a knowl- edgeable expert at specified intervals. The intervals outlined below serve as a guideline for cyclists covering 1,000 to 2,500 km (620 to 1,550 miles), or approximately 40 to 100 hours per year. - Page 51 While these guidelines are helpful for routine maintenance, they do not replace the importance of regular visits to your bike mechanic. Professional oversight ensures thorough maintenance of your Nireeka Revenant, keeping it in optimal condition for peak performance and longevity.
-
Page 52: Warranty: Terms & Conditions
WARRANTY: TERMS & CONDITIONS Thanks for joining the Nireeka family. Below you can find all the situations you might need to get help from the warranty agreement. GENERAL QUESTIONS. REFERS TO ALL THE PARTS AND COMPONENTS DESIGNED AND BUILT BY NIREEKA, NOT AN OEM. - Page 53 WHAT VOIDS YOUR BIKE'S WARRANTY? LIKE ANY CONTRACT, YOUR NIREEKA WARRANTY CAN BE BROKEN IF YOU DON'T HOLD UP YOUR END OF THE BARGAIN, SO IT IS IMPORTANT TO KNOW WHAT CIRCUMSTANCES CAN VOID YOUR WARRANTY. 1. SALVAGE TITLE If your bike was in a severe accident and was given a salvage title or declared a total loss, your entire warranty is voided.
- Page 54 All warranty claims must be through our support system by opening a ticket in the warranty category. You need to include enough clear photos and videos requested by the Nireeka team and do the testing requested by the Nireeka team.
- Page 55 WWW.NIREEKA.COM/EN-CA/CONTACT Customer support: Get after-sales services from the Nireeka authorized team. Monday - Friday - 9 A.M to 5 P.M. EST Saturday - 9 A.M to 1 P.M. EST...
- Page 56 SUPPORT support@nireeka.com www.nireeka.com/help-center www.nireeka.com...
Need help?
Do you have a question about the REVENANT Series and is the answer not in the manual?
Questions and answers