
Related Manuals for Nireeka Revenant Series


Summary of Contents for Nireeka Revenant Series
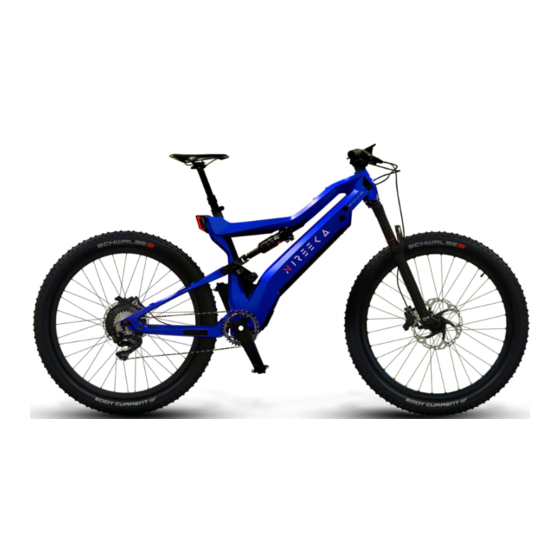
- Page 1 Nireeka Smart Electric Bike User's manual Revenant Series Original instructions User's manuals in other languages are available at https://www.nireeka.com...
-
Page 2: Table Of Contents
Nireeka Revenant User’s Manual ENGLISH GENERAL INFORMATION............................8 - FRAME NUMBER/SERIAL NUMBER........................9 - FRAME SIZE..............................10 QUICK INSTALLATION............................. 11 UNBOXING................................12 INSTALLING THE FRONT WHEEL........................13 INSTALLING THE HANDLEBAR..........................15 INSTALLING THE HANDLEBAR..........................16 INSTALLING THE DISPLAY..........................18 INSTALLING THE BOTTLE HOLDER (Optional)....................19 START RIDING................................ - Page 3 Nireeka Revenant User’s Manual ENGLISH...
- Page 4 ENGLISH - INTRODUCTION Thank you for choosing NIREEKA ebikes. We hope you will take as much pleasure from riding with it, as we have taken from developing it. We have dedicated all our effort and know-how to your bike, but we are open to your comments. Please don’t hesitate to send us your comments and feedback which will help us to improve our products.
- Page 5 ● Use the product according to local laws and regulations. ● The Bluetooth® word, mark, and logo are registered trademarks owned by Bluetooth SIG, Inc., and any use of such marks by Nireeka Technologies Inc. is under license. Other trademarks and trade names are those of their respective owners.
- Page 6 ● When installing this product, be sure to follow the instructions given in the user's manual. Furthermore, it is recommended that you use only genuine Nireeka parts at these times. If bolts and nuts are left loosened or the product is damaged, the bike may suddenly fall over and serious injury may result.
- Page 7 Guide may not always reflect real-world conditions. Nireeka Technologies Inc. is not responsible for personal injury or damage to personal property arising in conjunction with using this Guide. Sound judgment and proper preparation are essential to travelling by bike.
- Page 8 Nireeka Revenant User’s Manual ENGLISH replacements for repair and replacement. NIREEKA is not responsible for any direct, incidental, or consequential damages, including, without limitation, damages for personal injury, property damage, or economic losses due to tampering.
-
Page 9: General Information
Nireeka Revenant User’s Manual ENGLISH GENERAL INFORMATION... -
Page 10: Frame Number/Serial Number
- FRAME NUMBER/SERIAL NUMBER All the Nireeka bikes come with a unique frame number printed on the frame. You will need this frame number along with your order number for various purposes such as registering your bike in your country and getting insurance for your bike. -
Page 11: Frame Size
Nireeka Revenant User’s Manual ENGLISH - FRAME SIZE Getting the correct size bike is very important. The frame is the most expensive and hardest to replace part of your bike. Frame size generally refers to frame height, the length of the seat tube from the bottom bracket (crank bearing) to the top tube. -
Page 12: Quick Installation
Nireeka Revenant User’s Manual ENGLISH QUICK INSTALLATION... -
Page 13: Unboxing
- Extras (Any other parts and accessories that you've ordered such as taillight, helmet, backpack, etc) *Your upgrades are included. ATTENTION: Every NIREEKA E-bike is delivered in a custom E-bike box already almost fully assembled. The only part that needs to be assembled in the front wheel, the handlebar, and the display. -
Page 14: Installing The Front Wheel
Nireeka Revenant User’s Manual ENGLISH INSTALLING THE FRONT WHEEL The front wheel hub is the thru-axle model. 1. Pull out the brake's pad protector gently. (See photo No.1) 2. Locate the rotor inside the brake calliper and align the hub in the front fork dropout. - Page 15 Nireeka Revenant User’s Manual ENGLISH 3. Insert two pieces of bushings on the right, and left sides. (See photo No.3) 4. Insert the thru-axle shaft from the rotor side. (See photo No.4) 5. Fasten the shaft nut using a 7/8"...
-
Page 16: Installing The Handlebar
Nireeka Revenant User’s Manual ENGLISH INSTALLING THE HANDLEBAR 1. Adjust the handlebar in the proper and straight position. (See photo No.1) 2. Fasten the bolts on the back of the stem respectively. (See photo No.2) -
Page 17: Installing The Handlebar
Nireeka Revenant User’s Manual ENGLISH INSTALLING THE HANDLEBAR 1. There is a small letter on each pedal indicating on which side it should be installed. You need to install each pedal on the correct side of the Crank Arm. “L” stands for Left and “R”... - Page 18 Nireeka Revenant User’s Manual ENGLISH 3. If you’re standing on the left side of the bike, the left pedal should be tightened anticlockwise using a 6mm Allen key, as shown in the picture. Note: You can also use a 15mm open-end wrench instead of an Allen key.
-
Page 19: Installing The Display
Nireeka Revenant User’s Manual ENGLISH INSTALLING THE DISPLAY 1. Open the clamp band’s screw and install it in the correct place over the handlebar. 2. Adjust the angle of the display so that it is easy to be seen while riding, and then use a 3mm Allen key to tighten the clamp bolt. -
Page 20: Installing The Bottle Holder (Optional)
INSTALLING THE BOTTLE HOLDER (Optional) The bottle holder/cage doesn’t come as a standard extra with the bike but the Nireeka bike has a standard mounting point on the frame where you can install your bottle cage on the bike frame using the below structures. - Page 21 Nireeka Revenant User’s Manual ENGLISH WOODEN BEAM This beam is designed to protect the fork steerer when the shipping companies put the box on the wrong side! You can easily remove the wooden beam of the front axle, where the front wheel should be installed thru-axle.
-
Page 22: Start Riding
Nireeka Revenant User’s Manual ENGLISH START RIDING... -
Page 23: Turning On/Off The Bike
Nireeka Revenant User’s Manual ENGLISH TURNING ON/OFF THE BIKE When the battery is inserted and charged, there are two power buttons on the bike that should be pressed to turn the bike on. 1. Frame Power Button: There is a round power button on the frame next to the battery lock. It should be pressed in to turn the battery on. -
Page 24: Battery And Charger
Nireeka Revenant User’s Manual ENGLISH BATTERY AND CHARGER... -
Page 25: The Main Battery
Nireeka Revenant User’s Manual ENGLISH THE MAIN BATTERY 1. Power Button: Unlike the other Nireeka models, the power button of the battery is located on the frame, next to the battery lock. 2. Battery LEDs: There is no LED indicator on the battery. - Page 26 (See photo No.2) *Your NIREEKA REVENANT bike has been fitted with a quick-release battery post-fitting, which has a separate door, and without using any key the door can be opened and close. By removing the battery door, the bike can be ridden as a conventional bike ⚠...
- Page 27 Nireeka Revenant User’s Manual ENGLISH REINSTALLING THE BATTERY 1. Insert the bottom side of the battery into the frame. 2. Push the battery into the frame to hear the click sound. ⚠ WARNING Check carefully if the battery is secured. Dropping the battery while riding can cause serious...
-
Page 28: Charging The Battery
Nireeka Revenant User’s Manual ENGLISH CHARGING THE BATTERY 1. Connect the charger power plug to the outlet. 2. Remove the waterproof socket cover on the battery. 3. Insert the charging plug into the battery's charging port. ATTENTION: Charge the battery on a flat surface indoors, and do not leave it where you cannot see it during charging. -
Page 29: Display
Nireeka Revenant User’s Manual ENGLISH DISPLAY... -
Page 30: Dp C01.Uart (Standard Display)
Nireeka Revenant User’s Manual ENGLISH DP C01.UART (STANDARD DISPLAY) Power/Mode Button 1. "+" button 2. "-" button Press and hold the power button to turn on the display/bike. 1. Battery capacity indication 2. General mode indication 3. Indication for support level 4. -
Page 31: Dp C18 (Upgraded Display)
Nireeka Revenant User’s Manual ENGLISH DP C18 (UPGRADED DISPLAY) 1. Power button 2. Menu 3. Light 4. "+" button 5. "-" button Press and hold the power button to turn on the display/bike. - Page 32 Nireeka Revenant User’s Manual ENGLISH 1. Time indicator: The time is represented in the 24-hour system and shows the current time, time can be set in the “Set clock” menu. 2. USB charging indicator: When an external device connects to the display, it shows the USB symbol.
-
Page 33: Brakes
Nireeka Revenant User’s Manual ENGLISH BRAKES... -
Page 34: Adjusting The Brakes
ENGLISH ADJUSTING THE BRAKES Since the brakes on all the Nireeka bikes, including your Revenant are hydraulic, you need to inspect the bike time to time for oil leaking. When you receive your bike, make sure to inspect it for any liquid leak. - Page 35 If the above steps do not solve the problem, it may be necessary to take your bike to a professional mechanic for further inspection and repair, if the Nireeka support team suggests. A professional mechanic can check for more complex issues such as air in the brake lines or damaged brake pistons, which may require specialized tools and knowledge to repair.
-
Page 36: Abs Instructions (Optional)
8 km/h or 5 mph. If the light doesn’t turn off, it means the ABS doesn’t work but still the brakes work properly and you can continue to ride the bike. In this case, you need to contact the Nireeka... -
Page 37: Bike Parts
Nireeka Revenant User’s Manual ENGLISH BIKE PARTS... -
Page 38: Stem
Nireeka Revenant User’s Manual ENGLISH STEM Nireeka comes with two types of stems: 1. Adjustable 2. Normal ADJUSTING ADJUSTABLE STEM: Loosen the screws on the right side with an Allen key, then adjust the height to the desired degree, and... -
Page 39: Saddle / Seatpost
Nireeka Revenant User’s Manual ENGLISH SADDLE / SEATPOST 1. Install your Seatpost by loosening the Allen bolt where the Seatpost slides into the frame. 2. Twist the seat to raise or lower the post as needed and then tighten the bolt. -
Page 40: Seatpost Dropper (Optional)
Nireeka Revenant User’s Manual ENGLISH SEATPOST DROPPER (Optional) A seatpost dropper allows you to adjust the saddle height without requiring you to get off your bike or even stop moving by pushing a lever on the handlebar, exactly like your gear shifter. -
Page 41: Motor
The motor position is on the rear wheel. THROTTLE Nireeka REVENANT may come with a thumb throttle installed on the left side of the handlebar. It is connected to the controller through the wire. When the display is on, push the throttle trigger gently to... -
Page 42: Full Suspension Geometry
NIREEKA all-track full suspension trail electric bikes bring to you a perfect sense of professional riding together with a high level of safety. Equipped with the high-end suspension system, it gives you a significant travel range of 160mm on the front and 140-150mm on the rear shock. -
Page 43: Adjusting The Rear Shock
Nireeka Revenant User’s Manual ENGLISH ADJUSTING THE REAR SHOCK Check the movement of your rear shock by releasing all air and moving the swing arm through its complete stroke. Make sure that there is sufficient clearance between the rear shock and all other components. Also, keep in mind to check the clearance between your rear shock and a lowered seat post. - Page 44 Nireeka Revenant User’s Manual ENGLISH 4. For riders who weigh between 160-180 lbs (73-82 kg), the recommended air pressure is typically between 160-180 psi. 5. For riders who weigh between 180-200 lbs (82-91 kg), the recommended air pressure is typically between 180-200 psi.
-
Page 45: Adjusting The Tire Air Pressure
Nireeka Revenant User’s Manual ENGLISH ADJUSTING THE TIRE AIR PRESSURE There are many considerations and factors as to how much pressure you should put inside your bike tires. For instance, the rider’s weight can come into play because a rider with lighter weight requires a different amount of tire pressure to keep them balanced. -
Page 46: Adjusting Suspension Fork
Nireeka Revenant User’s Manual ENGLISH ADJUSTING SUSPENSION FORK 1. To increase or decrease Low-Speed Compression (LSC) damping or adjust its sagging, rotate the knob in the direction indicated. 2. The Lockout* setting prevents the fork from compressing until a significant impact occurs. - Page 47 Nireeka Revenant User’s Manual ENGLISH The proper air pressure for a Nireeka fork depends on the rider's weight. Generally, a heavier rider will require more air pressure in the fork to achieve the correct amount of sag, which is the amount of compression the fork undergoes when the rider is seated on the bike.
-
Page 48: Maintenance
Nireeka Revenant User’s Manual ENGLISH MAINTENANCE... -
Page 49: Battery
Nireeka Revenant User’s Manual ENGLISH After each ride, you should clean your bike with soapy water. We also advise you to wash the battery and the display separately using a damp cloth. Dry them with the aid of a soft cloth. -
Page 50: Chain
Nireeka Revenant User’s Manual ENGLISH CHAIN The chain of your bike is an important part of it, so take the time to regularly check that no link has become deformed or open as it could break while riding and cause a fall. To check the chain tension, hold the chain in the middle section between the front and rear sprockets. -
Page 51: Derailleurs
Nireeka Revenant User’s Manual ENGLISH DERAILLEURS The pivot points on your derailleurs should be lubricated. Apply a small drop of oil to each pivot point and wipe off the excess. *In the end, of course, your maintenance requirements will be determined by everything from your riding style to your geographic location.
Need help?
Do you have a question about the Revenant Series and is the answer not in the manual?
Questions and answers