Advertisement
Quick Links
Safety Information
English
Important Information
MAINS CONNECTIONS
MAINS OUTLET POWER SUPPLY: 230V ~50Hz
Note: Power is fed to the unit even when it is not functioning. To
cut the power supply off, the power cable must be unplugged.
Note: The mains plug is used as the disconnect device and it shall
remain readily operable and easily accessed by the user during the
apparatus is in intended use.
CAUTION - LASER RADIATION WHEN OPEN. DO NOT STARE INTO BEAM.
CAUTION
This appliance has been designed and manufactured with high quality materials and
CLASS 1
RISK OF ELECTRIC SHOCK
DO NOT OPEN
components that can be recycled and reused.
LASER PRODUCT
T H E
L I G H T N I N G
CAUTION: TO REDUCE THE
THE EXCLAMATION
FLASH AND ARROW-
RISK OF ELECTRIC SHOCK,
POINT WITHIN THE
HEAD WITHIN THE
D O N O T R E M O V E C O V E R
T R I A N G L E I S A
T R I A N G L E I S
A
( O R B A C K ) . N O U S E R -
WARNING
SIGN
Electrical and electronic appliances are liable to contain parts that are necessary in order for
W A R N I N G
S I G N
ALERTING YOU OF
S E RV I C E A B L E PA R T S I N -
ALERTING YOU OF
S I D E . R E F E R S E RV I C I N G
I M P O R T A N T
the system to work properly but which can become a health and environmental hazard if
" D A N G E R O U S
T O Q U A L I F I E D S E R V I C E
I N S T R U C T I O N S
they are not handled or disposed of in the proper way. Consequently, please do not throw
VOLTAGE" INSIDE
PERSONNEL.
A C C O M PA N Y I N G
THE PRODUCT.
T H E
P R O D U C T.
out your inoperative appliance with the household waste.
SEE MARKING ON BOTTOM / BACK OF PRODUCT
WARNING:
TO PREVENT FIRE OR ELECTRICAL
If you are the owner of the appliance, you must deposit it at the appropriate local
SHOCK HAZARD, DO NOT EXPOSE THIS PRODUCT
collection point or leave it with the vendor when buying a new appliance.
TO RAIN OR MOISTURE.
• If you are a professional user, please follow your supplier's instructions.
• If the appliance is rented to you or left in your care, please contact your service provider.
Help us protect the environment in which we live!
HELPLINE
You can contact THOMSON by dialling: 0871 712 1312
(for United Kingdom, £0.10/mn inc VAT)
www.thomson-europe.com
The descriptions and characteristics in this owner's manual are for the purpose of general reference only and not
as a guarantee. In order to provide you with the highest quality product, we may make changes or modifications
without prior notice. The English version serves as the final reference on all product and operational details
should any discrepancies arise in other languages.
Basic Connections
Other Connection Options
1. Basic connections (DVD player + TV + video recorder)
2. VIDEO OUT socket
1. Connect the DVD player Scart socket (TV AUDIO VIDEO OUT) to the television set's Scart
This socket (yellow) is also known as a composite video socket. The video cable (not supplied)
socket (AV1, EXT1, AUX1) using a Scart lead (not provided).
usually comes with two audio cables (white and red). The picture quality obtained using a
video connection is poorer compared to that obtained using a Scart connection.
- OR -
3. AUDIO L (left) and AUDIO R (right) sockets
1. If your television set does not have two Scart sockets, connect the DVD player to the
These are analogue audio output sockets. The AUDIO L socket and cable are white, while the
video recorder's AV2 socket using a Scart lead (not provided). If you have a satellite or
AUDIO R socket and cable are red. Connect the DVD player's AUDIO L and R sockets to the
cable receiver you can also connect the DVD player to the receiver's second Scart socket.
television set's AUDIO L and R sockets using audio cables (not supplied).
GEFAHR EINES
ELEKTRISCHEN SCHLAGS
Note: If your video recorder only has one Scart socket, but has a modulator, use the aerial
cable to connect the video recorder to the television set, adjust the video recorder's
modulator, then connect the DVD player to the video recorder's Scart socket.
4. Coaxial digital audio output (COAXIAL)
2. Connect the video recorder (or satellite receiver) to the television set as shown in the
This socket offers a higher level of sound quality compared to that provided using an
video recorder's (or satellite receiver's) user guide.
analogue audio connection. For 6-channel multichannel sound, connect the audio/video
3. Connect the DVD player to the mains socket using the mains lead.
amplifier or receiver to this socket using a coaxial cable (not supplied).
4. Switch on the devices.
Note: If one of the devices is not working, check that all the cables have been inserted
properly into the sockets which they should be connected to.
1
3
2
4
Basic Playback Operations
Play Modes
Repeat playback
Frame advance (all discs except audio CD, mp3, WMA and DivX)
1. While the disc is playing, press PAUSE once.
While the disc is playing, press the REPEAT button repeatedly to select a play mode:
2. Press PAUSE a number of times to advance forward image by image.
DVD: Repeat Chapter, Repeat Title, Repeat Off;
3. Press PLAY to resume normal playback.
VCD and audio CD: Repeat Track, Repeat All, Repeat Off;
Variable slow motion (DVD and VCD only)
1. While the disc is playing, press PAUSE once.
A-B repeat
2. Press the REV or FWD button a number of times to vary the speed and direction of the
slow motion.
To repeat a sequence between two points A and B, press A-B at the beginning of the
sequence you want to repeat. Then press A-B again at the end of the sequence.
3. Press PLAY to resume normal playback.
The sequence is played repeatedly until you press A-B to resume normal playback.
Note: Reverse slow motion is not possible with a Video CD.
Changing chapter/track
While the disc is playing, press the
/
button to go immediately to the next or previous
chapter, or to the next or previous track.
For audio CD and VCD only: enter the track number with the number buttons and then
press ENTER.
Zoom (DVD, VCD, DivX and JPEG discs only)
1. While a disc is playing, press ZOOM until you reach the zoom size you require.
2. Move from one area to another using the
buttons.
Note: for JPEG discs, press ZOOM and then REV or FWD until you reach the zoom size
you require. Press ZOOM again to quit the zoom function.
Connections & Setup
Some points to check before you connect your TV set
In accordance with the rating plate of the unit, this unit complies with current
• Ensure that the mains supply in your house complies with that indicated on the
standards concerning electrical safety and electromagnetlc compatibillity.
identification sticker located on the back of your appliance.
• Install your appliance horizontally, away from any source of heat (fireplace) or appliances
generating strong magnetic or electric fields. The components of this appliance are
Please respect the environment. Before throwing any batteries away, consult your
sensitive to heat. The maximum ambient temperature should not exceed 35° Celsius.
distributor who may be able to take them back for specific recycling.
• Leave sufficient space around the appliance to allow adequate ventilation: 10 cm on
either side and at the back, as well as 7 cm above it are ideal.
• The humidity of the room should not exceed 75%. If you have to use the appliance
This symbol means that your inoperative electronic appliance must be collected
outdoors, do not expose it to rain or splashing water. The appliance should not be
separately and not mixed with the household waste. The European Union has
exposed to dripping or splashing and no objects filled with liquids, such as vases, should
implemented a specific collection and recycling system for which manufacturers
be placed on top of it.
are responsible.
• Moving it from a cold environment to a warm one is likely to cause condensation on
some components inside the appliance. Let the condensation disappear of its own accord
before turning the appliance on again.
• Before moving the player, make sure the disc tray is empty.
Remote Control
ON/STANDBY
CLEAR
DISPLAY
MUTE
0 - 9
REPEAT
A-B
PAUSE/STEP
OPEN/CLOSE
Note: If your television set only has one audio socket connect it to the DVD player's left
REV
socket (white).
FWD
STOP
ANGLE
ZOOM
ENTER/PLAY
SEARCH
SETUP
SUBTITLE
TITLE
Video cable
Audio cable (red
Coaxial cable
PBC
(yellow)
and white)
AUDIO
DVD MENU
Advanced Functions
Audio (DVD, VCD and audio CD)
Some discs have several audio tracks used for different languages or different audio formats.
To change the language or audio format during play, press the AUDIO button one or more
times to select one of the available audio formats or languages.
Note: This option is only available if the disc offers a number of dialogue languages or
audio formats.
Status menu
Press the DISPLAY button a number of times during playback to show in turn:
DVD: Title elapsed time, Title remaining time, Chapter elapsed time, Chapter remaining
time, Display Off.
VCD and audio CD: Single elapsed time, Single remaining time, Total elapsed time, Total
remaining time, Display Off.
mp3 and DivX: Single elapsed time, Single remaining time.
THOMSON
46, quai Alphonse Le Gallo
92648 Boulogne
Cedex FRANCE
5639 6410 (EN)
www.thomson.net
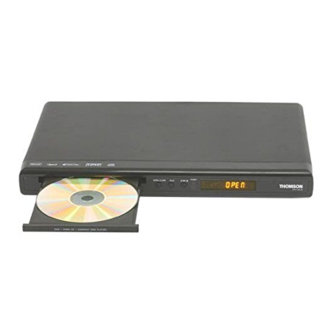
Front Panel Controls
ON/OFF Function
Clears some functions.
Provides playback status.
Lowers and restores the volume.
Number entry.
Accesses the Repeat playback mode.
Accesses the A-B repeat playback
mode.
Freezes frame, frame advance.
Opens and closes the tray.
Searches back through the disc.
Searches forward through the disc.
1 SENSOR - Remote sensor. Point the remote control here.
Stops playback.
2 OPEN/CLOSE - To open and close the disc tray.
Accesses the camera angle.
3 STOP - To stop disc playback. To switch the appliance on and off.
Accesses the Zoom feature
4 PLAY - To start playing a disc.
(if available).
Navigates through the menus.
Advances to the next/ preceding
chapter or track.
Selects item highlighted in menu.
Starts playing a disc.
Goes to a specific play time or track
Accesses and exits the General
Setup (main) menu.
Turns the subtitle on and off.
Accesses the title of the disc
For VCD Disc, selects PBC
Inserting batteries in the remote control
Selects the audio language.
Accesses the disc's menu (if available).
Insert a CR2025 battery in the remote control.
To access the PBC menu for VCD disc.
• Observe the polarities indicated inside the battery compartment. Replace only with
the type of batteries specified above. Do not dispose of them in a fire or recharge
them.
• If you are not using the remote control for a long period of time, remove the
batteries.
• Please respect the environment and prevailing regulations. Before you dispose of
batteries or accumulators, ask your dealer whether they are subject to special
recycling and if they will accept them for disposal.
Advanced Functions
PBC (VCD)
The Playback Control function offers scenes and information which can be selected
interactively via a menu. It can also be used to display high-resolution pictures, if the disc
contains any.
Press the DVD MENU button to access the PBC menu and the PBC button to turn the PBC
function on and off.
Search function
Press SEARCH and then directly input with the number entry keys to select track, chapter or
file for playback. Press ENTER to confirm.
For DVD disc :
TT --- CH--- (input desired title and chapter)
For VCD /CD disc:
Disc go to --:--:-- (input desired time of disc)
Track go to--:--:-- (input desired time of track)
Select track -- (input desired track number)
For MP3/JPG disc:
--- (input desired file number)
DVD Player
DTH160E
DTH161B
EN
It is important to read this instruction book prior to using your new product for the first time.
Basic Playback Operations
Operating the DVD player
1. Switch on your TV set.
2. Press the ON/STANDBY button on the remote control or press and hold the STOP button
located on the DVD player's front panel.
Playback
1. Press the OPEN/CLOSE button on the front of the appliance or on the remote control to
open the disc tray.
2 4 3 1
2. Put the disc in with the printed side upwards (in the case of a single-sided disc).
3. Press OPEN/CLOSE again to close the disc tray. Play starts automatically. If a menu
appears, one of its options can be selected to start playing the disc. Select it and press
ENTER.
4. Press STOP to stop playback.
Notes: The player stores the point where playback was interrupted. If you press PLAY
again, playback resumes from this point. To stop playback completely or to start again
from the beginning, press STOP twice.
If the player is left in STOP mode for more than five minutes without any user interaction,
a screen saver is activated.
Accelerated play
While the disc is playing, press the REV or FWD button one or more times to vary the speed
and direction of the accelerated play.
Still image
While the disc is playing, press PAUSE once for freeze frame.
Note: After five minutes in PAUSE with no user interaction, the player goes into screen
saver mode.
mp3, WMA, JPEG & DivX Files
mp3 is an audio file format which compresses recorded music. It was developed in
collaboration with THOMSON . The main advantage of the mp3 format is that it means CD-
quality music tracks can be stored on a personal computer in user-friendly compressed files.
WMA (Windows Media Audio) is another audio file format developed by Microsoft.
JPEG files are image files. Make sure that they have a resolution of less than 5 megapixels.
Your player is an Official DivX Certified™ product that plays DivX®5, DivX®4, DivX®3, and
DivX®VOD video content, in compliance with DivX Certified™ technical requirements.
Displaying JPEG files or playing mp3 or WMA or DivX files
Before inserting a disc, check that it is compatible with the player.
1. Open the tray by pressing the OPEN/CLOSE button.
2. Place the disc with the printed side facing up and close the tray. The disc's contents are
displayed.
3. Select a folder using the
buttons on the remote control, then press ENTER to see
the folder's contents.
4. Select a file using the
buttons on the remote control, then press ENTER to start
playback.
5. Press the STOP button to stop playback.
6. To go back to the folder list, press the
button in stop mode.
Note: During playback you can use the
/
go on to the next one.
u s e r
m a n u a l
button to go back to the previous file or
Advertisement

Related Manuals for THOMSON DTH 161


Summary of Contents for THOMSON DTH 161
- Page 1 The descriptions and characteristics in this owner’s manual are for the purpose of general reference only and not 5639 6410 (EN) as a guarantee. In order to provide you with the highest quality product, we may make changes or modifications without prior notice. The English version serves as the final reference on all product and operational details It is important to read this instruction book prior to using your new product for the first time.
- Page 2 1. Select the rating level using the buttons. • Do not close the tray with two discs in it or with a disc not sitting correctly in the holder. equipment. THOMSON does not accept any liability if the appliance is used in any way supply so that it is not damaged by electrical or electromagnetic surges.
Need help?
Do you have a question about the DTH 161 and is the answer not in the manual?
Questions and answers