
Related Manuals for HOME PILOT RolloTron smart flush-mounted belt winder pure


Summary of Contents for HOME PILOT RolloTron smart flush-mounted belt winder pure
- Page 1 RolloTron smart flush-mounted belt winder pure Translation of the Original Operating and Assembly Manual Item No.: 10122345 UM B103-2...
-
Page 3: Table Of Contents
Preparation for installation ..........21 22. Simplified EU Declaration of Conformity ....47 Safety instructions for the electrical connection ...23 23. Accessories ..............47 Connecting the connecting cable to the RolloTron smart flush-mounted belt winder pure ...24 10. Drawing in and fastening the belt ......25... -
Page 4: These Instructions
1. These instructions..describes how to install, connect the electrical system and operate your RolloTron smart flush-mounted belt winder pure. 1.1 Application of this manual Before you begin, please read these instructions When passing the RolloTron smart flush-mounted belt winder ‹... -
Page 5: Levels Of Danger And Signal Words
2.1 Levels of danger and signal words CAUTION! DANGER! This hazard may result in minor or moderate injury if This hazard will result in serious injury or death if not not avoided. avoided. WARNING! WARNING! ATTENTION! This hazard may result in serious injury or death if not This hazard may lead to property damage. -
Page 6: Safety Instructions
3. Safety instructions Watch the moving roller shutter and keep other peo- ‹ The use of defective equipment can lead to personal ple away from the area to avoid injury in the event injury and damage to property (electric shocks, short the shutters suddenly slip. - Page 7 If the running time limit is triggered, then the ‹ 0.15 m/s. RolloTron smart flush-mounted belt winder pure must be left for at least 12 minutes to cool down. During this period, the indicator light flashes rapidly. Full operational availability is re-established after...
-
Page 8: Intended Use
3.1 Intended use Only use the RolloTron smart flush-mounted belt wind- Operating conditions er pure for opening and closing roller shutters with a Only operate the RolloTron smart flush-mounted belt ‹ permissible belt. winder pure in dry rooms. Mechanical locks of any kind are not suitable A 230 V / 50 Hz power supply, together with a site- ‹... -
Page 9: Improper Use
3.1 Improper use Using the RolloTron smart flush-mounted belt winder There is a risk to life caused through short circu- pure for purposes other than previously mentioned is iting and electric shocks if the RolloTron smart impermissible. flush-mounted belt winder pure is used outside. Never install or operate the RolloTron smart ‹... -
Page 10: Technical Term - Definition
" Running Time Limit - Transient Operation (KB) This standard determines the performance require- ‹ The RolloTron smart flush-mounted belt winder pure ‹ ments that externally attached shutters and blinds is not designed for continuous operation. Transient must fulfil. -
Page 11: Included In Delivery
4. Included in delivery Included in delivery 1 x RolloTron smart flush-mounted belt winder pure 2 x Assembly screws (4 x 55 mm) 1 x Disengaging bracket (in housing) 1 x Connecting cable with Euro plug 1 x Reel compartment cover 1 x Cover plate 1 x Traction relief mechanism incl. -
Page 12: Overview Rollotron Smart Flush-Mounted Belt Winder Pure
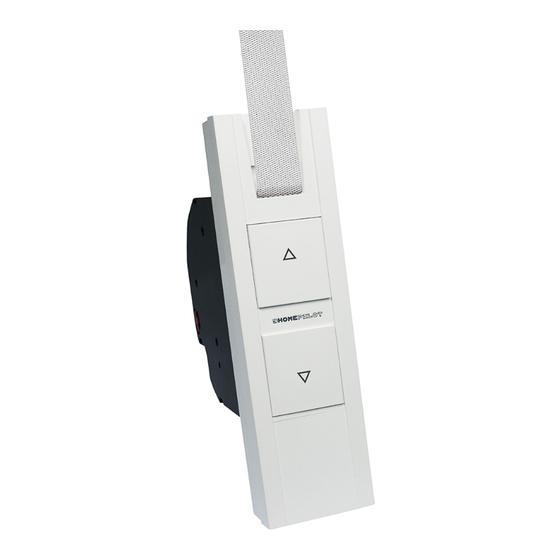
5. Overview RolloTron smart flush-mounted belt winder pure Front cover Fastening holes Reel compartment Deflection roller cover Belt inlet Up button Type plate Down button Reel Indicator light Fastening hook DuoFern button Set button (connect / dis- Traction relief connect) -
Page 13: Operating Buttons And Indicator Light
5.1 Operating Buttons and Indicator Light Pos. Symbol Description Up/Stop button + Down/Stop button The roller shutters travel up / down or stop Indicator Light - Status Display green flashes Connection is active ‹ briefly When configuring the sunshine position ‹... -
Page 14: Functional Description
6. Functional description The RolloTron smart flush-mounted belt winder pure is Features and an electric roller shutter belt winder designed for use control options: inside. The unit is installed as a flush-mounted device. The Manual operation ‹ power supply is provided via the enclosed connecting ca- Switching automatic mode on/off ‹... -
Page 15: Description Of The Safety Functions
6.1 Description of the safety functions Obstacle detection Overload cut-off The movement of the belt is monitored. If the roller shut- The RolloTron smart flush-mounted belt winder ters hit an obstacle in the DOWN ( ) direction, the belt pure is equipped with an overload cut-off system. will stop moving and the RolloTron smart flush-mounted If the drive jams in the UP ( ) direction (for example, due... -
Page 17: Technical Specifications
7. Technical Specifications Power supply Operating conditions 4 minutes Supply voltage: 230 V ~ / 50 Hz Transient operation (KB): (maximum running time) Nominal power: 70 W Protection class: Consumption: Standby: < 0.7 W IP20 (only for use in dry Protection type: rooms) Mechanical capacity:... -
Page 18: Dimensions
7.1 Dimensions RolloTron smart flush-mounted belt winder pure Item no.: 10122345 All dimensions in mm... -
Page 19: Permissible Roller Shutter Belts
ATTENTION! The specifications are intended for guidance only and apply to an ideal installation situa- The RolloTron smart flush-mounted belt winder pure tion. may be damaged if excessively long belts are used. The actual values may vary due to local Only use belts of the permissible lengths. -
Page 20: Safety Instructions For The Installation
8. Safety instructions for the installation Poor routing of the belt can cause the belt to fail and In order to ensure optimal operation, the leads to unnecessary loads on the RolloTron smart RolloTron smart flush-mounted belt winder flush-mounted belt winder pure. pure should not be installed near metal object. -
Page 21: Preparation For Installation
8.1 Preparation for installation Take measurements Check that the belt box has suffi- cient space to house the RolloTron smart flush-mount- ed belt winder pure. Remove the old belt winder, if you are carrying out a conversion to an existing roller shutter system. Let the roller shutter move fully down, until the slats are completely closed. - Page 22 8.2 Preparation for installation Prepare the belt. Cut the belt off approx. 20 cm under the belt box. Fold the end of the belt over by approx. 2 cm and cut a short slit in the centre. This enables you to subsequently hook the belt onto the reel.
-
Page 23: Safety Instructions For The Electrical Connection
9. Safety instructions for the electrical connection The electrical connection can be made either DANGER! with the supplied connecting cable or via a There is a risk of fatal electric shock when touching fixed laid cable on site. electrical components. Carry out all installation and connection work in an ‹... -
Page 24: Connecting The Connecting Cable To The
RolloTron smart flush-mounted belt winder pure. Lay the connecting cable in the cable duct of the RolloTron smart flush-mounted belt winder pure. Finally, screw on the traction relief mechanism with the screws provided. Cable duct... -
Page 25: Drawing In And Fastening The Belt
10. Drawing in and fastening the belt Insert the mains plug into the socket. CAUTION! There is a risk of injury from the reel. Never reach into the reel compartment when the motor is running. Press the Up button until the fastening hook are easily accessible in the reel compartment. - Page 26 10. Drawing in and fastening the belt Next, draw-in the belt into the RolloTron smart Belt path flush-mounted belt winder pure from the top. in the device Feed the belt into the device, as shown in the image, and slide it over the fastening hook from above. Re-insert the mains plug into the socket.
-
Page 27: Installing The Rollotron Smart Flush-Mounted Belt Winder Pure
11. Installing the RolloTron smart flush-mounted belt winder pure Mount the RolloTron smart flush-mounted belt winder pure as straight as possible, so that the belt can wind correctly. Ensure that the RolloTron smart flush-mounted belt winder pure sits freely in the belt box and that it is not in contact with the masonry, otherwise this may cause noise during operation. -
Page 28: End Point Adjustment
12. End point adjustment Additional information about configuring the end If the RolloTron smart flush-mounted belt win- points der pure is operated without an end point set- ting, the drive will continue to run for as long The end points must be configured for the roller shutters as one ofthe two control buttons is actuated. - Page 29 12. End point adjustment Set the lower end point Simultaneously press and hold the Please ensure that the belt is not excessively buttons. slack when reaching the lower end point. (red) The roller shutter travels downwards and the indicator light flashes red. Release the buttons, as soon as the roller shutter reaches the desired position for the lower end point.
-
Page 30: Manual Operation
13. Manual operation Manual operation is possible in any of the modes and has priority over the programmed automatic functions. Open the roller shutters. By briefly pressing the button, the roller shutters will move to the upper end point. Stop the shutters in the interim. Close the roller shutters. -
Page 31: Instructions For Logging Duofern Transmitters On / Off
DuoFern transmitter. site under: www.homepilot-smarthome.com Maximum number of connected devices You can assign a maximum of 20 DuoFern transmitters to a single RolloTron smart flush-mounted belt winder pure. -
Page 32: Login For Duofern Transmitters
14.1 Login for DuoFern transmitters Activate registering mode. Registering the next DuoFern transmitter. Simultaneously press and hold the For this, repeat points 1 to 2 or terminate the registration. buttons for 4 seconds. Cancelling the registering process (green) The indicator light flashes rapidly. You can cancel the registering process at any Registering mode remains active for approx. -
Page 33: Logging Off Duofern Transmitters
14.1 Logging off DuoFern transmitters Activate the logout mode. Log off the next DuoFern transmitter. Simultaneously press and hold the but- For this, repeat points 1 to 2 or terminate the log-off. tons for 4 seconds. (red) The indicator light flashes red. Cancelling the logging off process The logout mode remains active for You can cancel the logging off process at any... -
Page 34: Clearing The Duofern Network
14.2 Clearing the DuoFern network This function enables you to clear all DuoFern transmit- Activate the clear function. AUTO ters from the RolloTron smart flush-mounted belt winder Simultaneously press and hold the but- pure which are no longer accessible via radio. tons for 4 seconds. -
Page 35: Automatic Operation
DuoFern controller, see page 32, and Executing a random function the functions were activated in said DuoFern controller. If the RolloTron smart flush-mounted belt winder pure Note for switching the automatic functions on/off receives a control signal from a DuoFern transmitter with... - Page 36 15. Automatic operation AUTO The ventilation position Automatic dawn function If you do not want the roller shutters to close fully to the The automatic dawn function causes the roller shutters lower end point, you can use this function to configure to open automatically to the upper end point.
-
Page 37: Switch All Automatic Functions On / Off Simultaneously
15.1 Switch all automatic functions on / off simultaneously AUTO Press and hold the AUTO button for one Switch-over the automatic status AUTO second. Press and hold the AUTO button longer AUTO than one second. Pay attention to the indicator light: flashes red Call up the automatic status Return signal when pressing the button. -
Page 38: Setting The Sunshine Position
15.1 Setting the sunshine position Move the roller shutters to the desired It is also possible to set the sunshine posi- position. tion via the DuoFern network. Save the sunshine position. Press and hold both buttons for approx. 4 seconds. Release the buttons again after 4 seconds and pay attention to the indicator light: flashes green... -
Page 39: Erase All Settings, Software Reset
16. Erase all settings, software reset If necessary, you can erase all of your settings and Remove the cover plate from the lower assembly return the RolloTron smart flush-mounted belt winder screws and setting buttons. pure system to its original factory settings. Simultaneously press and hold the AUTO buttons for 4 seconds. -
Page 40: Removing The Rollotron Smart Flush-Mounted Belt Winder Pure (E.g. In The Event Of A Move)
17. Removing the RolloTron smart flush-mounted belt winder pure (e.g. in the event of a move) Remove the cover plate from the lower assembly screws and setting buttons. Erase all settings. AUTO Simultaneously press and hold the buttons for 4 seconds. - Page 41 17. Removing the RolloTron smart flush-mounted belt winder pure (e.g. in the event of a move) Remove the reel compartment cover. Check the position of the fastening hook. If necessary, move the fastening hook into an easily accessible position. CAUTION! There is a risk of injury from the reel.
-
Page 42: Removing The Belt In The Event Of Unit Failure
18. Removing the belt in the event of unit failure In the event that the RolloTron smart flush-mounted belt Release the drive with the help of the supplied disen- winder pure unit fails and the motor no longer runs, you gaging bracket. -
Page 43: What To Do If
19. What to do if... ? Fault Possible cause / solution ... the RolloTron smart flush-mounted belt winder Check the power supply incl. connecting cable and plug. pure indicates no functions? ... the RolloTron smart flush-mounted belt winder The end points may not be configured. Reconfigure the end points, pure no longer reacts in the morning at the con see page 28. - Page 44 1 hour..the RolloTron smart flush-mounted belt winder The RolloTron smart flush-mounted belt winder pure is no longer pure fails to react properly either manually or operational. Carry out a software reset in accordance with the in-...
-
Page 45: Information About Maintenance And Care Of Your Equipment
20. Information about maintenance and care of your equipment Maintenance Care CAUTION! You can clean the RolloTron smart flush-mounted belt winder pure using a damp cloth. Please do not use A lack of maintenance can lead to personal in- aggressive or abrasive cleaning agents. jury through damage to your RolloTron smart flush-mounted belt winder pure and the roller shutter system. -
Page 46: Tractive Force Diagram
21. Tractive force diagram Lifting weight [Kg] Belt thickness 1.0 mm Belt thickness 1.3 mm Belt thickness 1.5 mm Belt length [m]... -
Page 47: Simplified Eu Declaration Of Conformity
The full text of the EU declaration of conformity is DELTA DORE RADEMACHER GmbH hereby declares that included with the product and is kept on file by the the RolloTron smart flush-mounted belt winder pure manufacturer. comply with the Directives 2006/42/EC (Machinery... - Page 48 DELTA DORE RADEMACHER GmbH Buschkamp 7 46414 Rhede (Germany)
Need help?
Do you have a question about the RolloTron smart flush-mounted belt winder pure and is the answer not in the manual?
Questions and answers