
Subscribe to Our Youtube Channel
Related Manuals for AEG FSE73407P


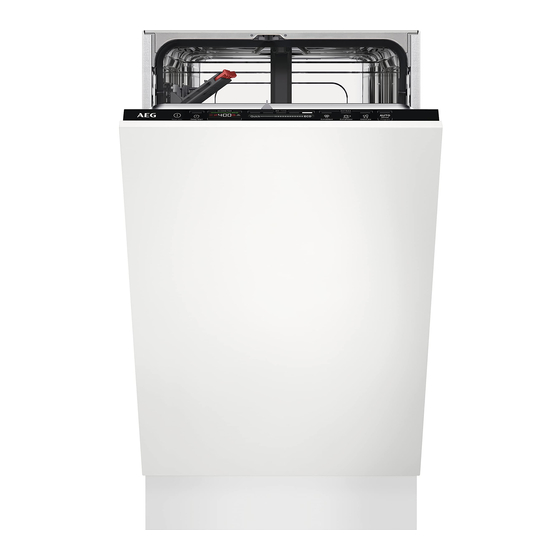
Summary of Contents for AEG FSE73407P
- Page 1 FSE73407P Gebruiksaanwijzing Afwasautomaat User Manual Dishwasher USER MANUAL...
-
Page 2: Table Of Contents
14. MILIEUBESCHERMING................... 30 VOOR PERFECTE RESULTATEN Bedankt dat je voor dit AEG-product hebt gekozen. We hebben het gecreëerd om jarenlang onberispelijke prestaties te leveren, met innovatieve technologieën die het leven eenvoudiger maken – functies die je wellicht niet op gewone apparaten aantreft. -
Page 3: Veiligheidsinformatie
NEDERLANDS VEILIGHEIDSINFORMATIE Lees zorgvuldig de meegeleverde instructies voor installatie en gebruik van het apparaat. De fabrikant is niet verantwoordelijk voor verwondingen of schade die voortvloeit uit de onjuiste installatie of het onjuiste gebruik. Bewaar de instructies altijd op een veilige, toegankelijke plek voor toekomstig gebruik. - Page 4 Dit apparaat is bedoeld voor binnenshuis • huishoudelijk gebruik. Dit apparaat kan worden gebruikt in kantoren, • hotelkamers, bed & breakfast-kamers, boerderijgasthuizen en andere soortgelijke accommodaties waar dergelijk gebruik de (gemiddelde) huishoudelijke gebruiksniveaus niet overschrijdt. De specificatie van dit apparaat niet wijzigen.
-
Page 5: Veiligheidsvoorschriften
NEDERLANDS 2. VEILIGHEIDSVOORSCHRIFTEN 2.1 Installeren • Trek niet aan het netsnoer om het apparaat los te koppelen. Trek altijd WAARSCHUWING! aan de stekker. Alleen een erkende 2.3 Wateraansluiting installatietechnicus mag het apparaat installeren. • Beschadig de waterslangen niet. • Indien buizen lang niet zijn gebruikt, •... -
Page 6: Installeren
“Veiligheid voorafgaand aan 3.1 Gebouw in de installatie”. Zie de installatie-instructies die bij het www.youtube.com/electrolux apparaat zijn geleverd voor www.youtube.com/aeg gedetailleerde installatie-informatie. How to install your AEG/Electrolux Alleen geldig voor Duitsland: Raadpleeg 45 cm dishwasher voorafgaand aan de installatie het... - Page 7 NEDERLANDS 820-900 818-898 3.2 Veiligheidsdoppen Als het meubelpaneel niet is geïnstalleerd, open dan voorzichtig de deur van het apparaat om het risico op letsel te vermijden. Zorg er na de installatie voor dat de plastic afdekkingen op hun plaats vastgezet zijn. Beschadiging of verwijdering van de plastic afdekkingen aan de zijkanten van de deur kan de werking van het apparaat nadelig...
-
Page 8: Productbeschrijving
4. PRODUCTBESCHRIJVING Bovenste sproeiarmen Bestekmand Onderste sproeiarm Onderste korf Filters Bovenste korf Typeplaatje De afbeelding is een algemeen overzicht. Zoutreservoir Raadpleeg voor meer details Luchtventilatie andere hoofdstukken en/of Glansmiddeldoseerbakje documenten die bij het Afwasmiddeldoseerbakje apparaat zijn meegeleverd. 5. BEDIENINGSPANEEL... -
Page 9: Programmakeuze
NEDERLANDS 5.1 Display 5.2 ECOMETER De ECOMETER geeft aan hoe de programmakeuze het stroom- en waterverbruik beïnvloedt. Hoe meer balken er aanstaan, hoe lager het verbruik is. geeft de milieuvriendelijkste A. ECOMETER programmakeuze aan voor een normaal B. Indicatielampjes bevuilde lading. C. - Page 10 ExtraSilent en het drogen van zwaar bevuilde voorwerpen. E. ECO is het langste programma en ExtraSilent vermindert het geluid dat biedt het meest efficiënte water- en door het apparaat wordt gegenereerd. energieverbruik voor normaal bevuild Als deze optie wordt geactiveerd, werkt serviesgoed en bestek.
- Page 11 NEDERLANDS Program‐ Lading vaat‐ Mate van Programmafasen EXTRAS wasser bevuiling 2h 40min Serviesgoed, Standaard • Voorspoelen • ExtraPower bestek, pot‐ tot grondig, • Afwassen bij 60 °C • GlassCare ten, pannen volledig ge‐ • Tussentijdse spoeling droogd • Laatste spoeling 60 °C •...
-
Page 12: Basisinstellingen
Informatie voor testinstituten Raadpleeg voor andere vragen betreffende je vaatwasmachine het Om de nodige informatie te ontvangen serviceboekje dat met je apparaat is over het uitvoeren van prestatietesten meegeleverd. (bijv. volgens: EN60436 ), stuur je een e- mail naar: info.test@dishwasher-production.com... - Page 13 NEDERLANDS 7.1 Instellingsmodus • De balk van de ECOMETER die bij de gekozen instelling hoort, knippert. Navigeren in de • Het display toont de huidige instellingenmodus instelling. 2. Druk op OK om de instelling te U kunt met gebruik van de keuzebalk bevestigen.
- Page 14 Waterhardheid Duitse gra‐ Franse gra‐ mmol/l mg/l (ppm) Clarke Niveau water‐ den (°dH) den (°fH) graden ontharder 47 - 50 84 - 90 8.4 - 9.0 835 - 904 58 - 63 43 - 46 76 - 83 7.6 - 8.3...
- Page 15 NEDERLANDS de regeneratie de totale duur van een Om het glansspoelmiddeldoseerbakje en programma met nog eens 5 minuten. -lampje te deactiveren, stelt u het niveau van glansspoelmiddel in op 0A. Vervolgens kan het spoelen van de waterontharder wat 5 minuten duurt, 7.4 Eindsignaal beginnen in dezelfde cyclus of aan het begin van het volgende programma.
-
Page 16: Voordat U Het Apparaat Voor De Eerste Keer Gebruikt
TimeBeam geeft op de vloer onder de LET OP! deur van het apparaat de volgende Als kinderen toegang tot het informatie aan: apparaat hebben, adviseren • de programmaduur als het we AirDryte deactiveren. Het programma begint. automatisch openen van de •... -
Page 17: Dagelijks Gebruik
NEDERLANDS procedure voltooid is. De procedure LET OP! wordt regelmatig herhaald. Water en zout kunnen uit het 8.1 Het zoutreservoir zoutreservoir stromen als u het bijvult. Om corrosie te LET OP! voorkomen, vult u het Gebruik alleen zoutreservoir en start u regeneratiezout voor onmiddellijk een volledige vaatwassers. - Page 18 3. Vul het zoutreservoir bij als het leeg Raadpleeg de instructies van de fabrikant op de 4. Vul het glansspoelmiddelreservoir bij verpakking van het product als het leeg is. voor informatie over de 5. Ruim de korven in. dosering van het 6.
- Page 19 NEDERLANDS Tijdens het aftellen is het niet mogelijk de Standaard moeten opties uitsteltijd en de programmakeuze te elke keer u een programma wijzigen. start worden geactiveerd. Nadat het aftelproces voltooid is, wordt Indien de laatste het programma gestart. programmakeuze wordt ingeschakeld, worden de 9.6 De uitgestelde start opgeslagen opties...
-
Page 20: Aanwijzingen En Tips
9.9 De Auto Off-functie 9.10 Einde van het programma Deze functie bespaart energie door het apparaat uit te schakelen als het niet in Nadat het programma is voltooid, werking is. verschijnt het volgende op het display: 0:00. De functie gaat automatisch aan: •... - Page 21 NEDERLANDS van het wasmiddel kan leiden tot • Er regenereerzout en glansmiddel is slechte reinigingsresultaten en toegevoegd (tenzij u gecombineerde hardwaterfilmen of vlekken op de afwastabletten gebruikt). voorwerpen. Het gebruik van te veel • De positie van de voorwerpen in de wasmiddel met zacht of verzacht korven correct is.
-
Page 22: Onderhoud En Reiniging
11. ONDERHOUD EN REINIGING Als het programma is voltooid, gaat WAARSCHUWING! lampje uit. Schakel het apparaat uit en trek de stekker uit het 11.2 Interne reiniging stopcontact voordat u onderhoudshandelingen • Reinig de binnenkant van het verricht (met uitzondering... - Page 23 NEDERLANDS • Gebruik geen schuurmiddelen, schuursponsjes of oplosmiddelen. 11.5 De filters reinigen Het filtersysteem bestaat uit 3 delen. 5. Zorg ervoor dat er geen etensresten of vuil in of rond de rand van de opvangbak zitten. 6. Plaats de platte filter (A) terug op zijn plaats.
- Page 24 LET OP! Een onjuiste plaatsing van de filters kan leiden tot slechte wasresultaten en het apparaat beschadigen. 11.6 De onderste sproeiarm reinigen We raden u aan om de onderste sproeiarm regelmatig schoon te maken, om te voorkomen dat de gaten verstopt raken met vuil.
-
Page 25: Probleemoplossing
NEDERLANDS 4. Steek om de sproeiarm terug te plaatsen het bevestigingselement in de sproeiarm en bevestig deze in de toevoerleiding door deze naar links te draaien. Zorg ervoor dat het bevestigingselement op zijn plek dicht klikt. 3. Reinig de sproeiarm onder stromend water. - Page 26 Probleem en alarmcode Mogelijke oorzaak en oplossing Het programma start niet. • Controleer of de deur van het apparaat gesloten is. • Als de optie uitgestelde start is ingesteld, annuleer je de instelling of je wacht totdat het aftellen voorbij is.
- Page 27 NEDERLANDS Probleem en alarmcode Mogelijke oorzaak en oplossing Het apparaat stopt en begint • Dat is normaal. Het zorgt voor optimale reinigingsresul‐ meerdere keren tijdens de taten en energiebesparing. werking. Het programma duurt te • Als de optie uitgestelde start is ingesteld, annuleert u de lang.
- Page 28 12.1 De productnummercode 1. Druk tegelijkertijd op (PNC) houd ze ongeveer 3 seconden ingedrukt. Als je contact opneemt met een erkend Het display toont de PNC van uw servicecemtrum, dient u de apparaat. productnummercode van uw apparaat te 2. Om de weergave van de PNC te geven.
- Page 29 NEDERLANDS Probleem Mogelijke oorzaak en oplossing De binnenkant van het appa‐ • Dit is geen defect van het apparaat. Vochtige lucht raat is nat. condenseert op de wanden van het apparaat. Opvallend veel schuim tijdens • Gebruik de vaatwasmiddelen die specifiek zijn be‐ het wassen.
-
Page 30: Technische Informatie
Raadpleeg Voor het eerste gebruik, Dagelijks gebruik, of Tips en advies voor andere mogelijke oorzaken. 13. TECHNISCHE INFORMATIE Afmetingen Breedte / hoogte / diepte (mm) 446 / 818 - 898 / 550 Spanning (V) 220 - 240 Elektrische aansluiting... -
Page 31: Safety Information
14. ENVIRONMENTAL CONCERNS..............58 FOR PERFECT RESULTS Thank you for choosing this AEG product. We have created it to give you impeccable performance for many years, with innovative technologies that help make life simpler – features you might not find on ordinary appliances. Please spend a few minutes reading to get the very best from it. - Page 32 Always keep the instructions in a safe and accessible location for future reference. 1.1 Children and vulnerable people safety This appliance can be used by children aged from 8 •...
-
Page 33: Safety Instructions
ENGLISH The operating water pressure (minimum and • maximum) must be between 0.05 (0.5) / 1 (10) MPa (bar). Follow the maximum number of 9 place settings. • The appliance door should not be left in an open • position to avoid the tripping hazard. If the supply cord is damaged, it must be replaced by •... - Page 34 2.4 Use • Do not use multi-plug adapters and extension cables. • Do not put flammable products or • Make sure not to cause damage to items that are wet with flammable the mains plug and to the mains products in, near or on the appliance.
-
Page 35: Installation
"Rückschlagventil" in the German user cause an injury. If the plastic cover is manual. damaged, contact the Authorized Service Centre to replace it with the new one. 3.1 Building in www.youtube.com/electrolux www.youtube.com/aeg How to install your AEG/Electrolux 45 cm dishwasher 820-900 818-898... -
Page 36: Product Description
5 mm 4. PRODUCT DESCRIPTION Upper spray arms Cutlery basket Lower spray arm Lower basket Filters Upper basket Rating plate The graphic is a general overview. For more details, Salt container refer to other chapters or Air vent documents provided with the Rinse aid dispenser appliance. -
Page 37: Control Panel
ENGLISH 5. CONTROL PANEL On/Off button / Reset button Option buttons (EXTRAS) Delay start button AUTO Sense program button Display MY TIME program selection bar 5.1 Display 5.2 ECOMETER The ECOMETER indicates how the programme selection impacts energy and water consumption. The more bars are on, the lower the consumption is. -
Page 38: Programme Selection
6. PROGRAMME SELECTION 6.1 MY TIME The appliance senses the degree of soil and the amount of dishes in the baskets. MY TIME selection bar allows to select a It adjusts the temperature and quantity of suitable dishwashing cycle based on water as well as the wash duration. - Page 39 ENGLISH 6.4 Programmes overview Pro‐ Dishwasher Degree of Programme phases EXTRAS gramme load soil Quick Crockery, Fresh • Dishwashing 50 °C • ExtraPower cutlery • Intermediate rinse • GlassCare • Final rinse 45 °C • AirDry Crockery, Fresh, lightly • Dishwashing 60 °C •...
-
Page 40: Basic Settings
Consumption values Water (l) Energy (kWh) Duration (min) 1)2) Programme Quick 0.604 0.697 1h 30min 0.826 2h 40min 0.948 0.628 AUTO Sense 0.952 Machine Care 0.440 1) The pressure and the temperature of the water, the variations of the mains supply, the options, the quantity of dishes and the degree of soil can change the values. - Page 41 ENGLISH Number Settings Values Description Display on floor On (default) Activate or deactivate the TimeBeam. 1) For more details, refer to the information provided in this chapter. How to enter setting mode You can change the basic settings in setting mode. You can enter setting mode before When the appliance is in setting mode, starting a programme.
- Page 42 Your local water authority can and on the appliance. advise you on the hardness of the water in your area. Set the right level of the The higher the content of these minerals, water softener to assure good washing the harder your water is.
- Page 43 ENGLISH In case of the high water softener setting, and the indicator. However, for best it may occur also in the middle of the drying performance, always use rinse aid programme, before the rinse (twice and keep the rinse aid indicator active. during a programme).
-
Page 44: Before First Use
TimeBeam displays the following CAUTION! information on the floor below the If children have access to appliance door: the appliance, we advise to • The programme duration when the deactivate AirDry. The programme begins. automatic opening of the • 0:00 and CLEAN when the door may pose a danger. - Page 45 ENGLISH 8.1 The salt container 8.2 How to fill the rinse aid dispenser CAUTION! Use only regeneration salt for dishwashers. Do not use kitchen salt. The salt is used to recharge the resin in the water softener and to assure good washing results in daily use.
-
Page 46: Daily Use
9. DAILY USE 1. Open the water tap. Do not fill the compartment 2. Press and hold until the appliance (A) with more than 30 ml of is activated. gel detergent. 3. Fill the salt container if it is empty. - Page 47 ENGLISH 9.7 How to cancel a running Not all options are programme compatible with each other. Press and hold for about 3 seconds. Activating options often The appliance returns to the programme increases the water and selection. energy consumption as well as the programme duration.
-
Page 48: Hints And Tips
10. HINTS AND TIPS 10.1 General 10.2 Using salt, rinse aid and detergent Follow the hints below to ensure optimal cleaning and drying results in daily use • Only use salt, rinse aid and detergent and to protect the environment. -
Page 49: Care And Cleaning
ENGLISH 4. When the programme is completed, ornamented porcelain and adjust the water softener according unprotected carbon steel. This can to the water hardness in your area. cause them to crack, warp, discolour, 5. Adjust the released quantity of rinse pit or rust. - Page 50 11.5 Cleaning the filters 2. Press and hold simultaneously for about 3 seconds. The filter system is made of 3 parts. The indicators flash. The display shows the programme duration. 3. Close the appliance door to start the programme.
- Page 51 ENGLISH 11.6 Cleaning the lower spray We recommend to clean the lower spray arm regularly to prevent soil from clogging the holes. Clogged holes can cause unsatisfactory washing results. 1. To remove the lower spray arm, pull it upwards. 5. Make sure that there are no residues of food or soil in or around the edge of the sump.
- Page 52 3. Wash the spray arm under running water. Use a thin pointed tool, e.g. a toothpick, to remove particles of soil from the holes. 11.7 Cleaning the upper spray arms We recommend to clean the upper spray arms regularly to prevent soil from clogging the holes.
-
Page 53: Troubleshooting
ENGLISH 12. TROUBLESHOOTING to contact an Authorised Service WARNING! Centre. Improper repair of the Refer to the below table for information appliance may pose a on possible problems. danger to the safety of the user. Any repairs must be With some problems, the display shows performed by qualified an alarm code. - Page 54 Problem and alarm code Possible cause and solution The temperature of the wa‐ • Make sure that the temperature of the inlet water does ter inside the appliance is not exceed 60°C. too high or malfunction of • Switch the appliance off and on.
- Page 55 ENGLISH Problem and alarm code Possible cause and solution The appliance trips the cir‐ • The amperage is insufficient to supply simultaneously all cuit-beaker. the appliances in use. Check the socket amperage and the capacity of the meter or turn off one of the applian‐ ces in use.
- Page 56 Problem Possible cause and solution Poor drying results. • Tableware was left for too long inside the closed appli‐ ance. Activate the function AirDry to set the automatic opening of the door and to improve the drying perform‐ ance.
-
Page 57: Technical Information
ENGLISH Problem Possible cause and solution Limescale deposits on the ta‐ • The level of salt is low, check the refill indicator. bleware, on the tub and on the • The cap of the salt container is loose. inside of the door. •... -
Page 58: Environmental Concerns
It is possible to find information related to For more detailed information about the the performance of the product in the EU energy label, visit EPREL database using the link https:// www.theenergylabel.eu. eprel.ec.europa.eu and the model name and product number that you can find on the rating plate of the appliance. - Page 60 www.aeg.com/shop...
Need help?
Do you have a question about the FSE73407P and is the answer not in the manual?
Questions and answers