Table of Contents
Advertisement
Quick Links
Advertisement
Table of Contents

Related Manuals for WYETECH LABS Pearl


Summary of Contents for WYETECH LABS Pearl
- Page 1 Owner’s Manual Pearl Preamplifier...
-
Page 2: Table Of Contents
Muting switch................................7 Back panel.................................. 7 Periodic Maintenance..........................7 Cleaning the surfaces..............................7 Removing top cover..............................7 Replacing tubes................................8 Diagnosing problems with signal tubes........................8 Troubleshooting – Tube Swap Sequence......................9 Specifications............................10 Limited Warranty............................11 Pearl preamplifier – owner’s manual... -
Page 3: Introduction
Introduction Thank you for purchasing the Wyetech Labs Pearl preamplifier. You are in possession of one of the best sounding, most ruggedly constructed preamplifiers on the consumer market. This unit has been completely hand crafted using precision quality components. Our goal was to duplicate the sound of the Opal in a one box configuration. -
Page 4: Circuit Boards
To change the gain settings, you must remove the top cover (see instructions on page 7). The analog board on the left contains the left and right channel switches to select high or low gain. Pearl preamplifier – owner’s manual... -
Page 5: Installation / Setup
LED (MUTE) will turn off allowing the music to play. Remember if you left the muting switch in the on position the green LED will not come on even though the power up sequence is completed. Pearl preamplifier – owner’s manual... -
Page 6: Automatic Muting
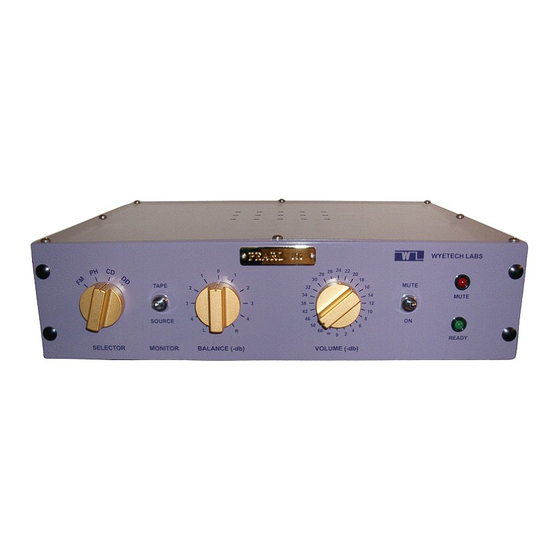
Muting of the output on power up prevents any noises or thumps from reaching the speakers and it is disengaged after a 45 second time-out. The preamp remains quiet at all times. Front panel of the Pearl (left to right): Source sector, tape/source switch, balance control, volume control, mute switch, indicator lamps. -
Page 7: Muting Switch
Back panel The back panel of the Pearl has the on/off power switch, the fuse, the power cable connector, the voltage selection switch (60hz/115V or 50Hz/230V), and a bank of RCA connectors. The connectors include: two preamp outputs, a line level out, a tape input and output, and four line level source inputs. -
Page 8: Replacing Tubes
3 tubes can be interchanged since they of the same type. To troubleshoot, you can swap tubes between positions. If problem moves to other channel you should replace faulty tube. In the unlikely event you are experiencing other problems consult your dealer for help. Pearl preamplifier – owner’s manual... -
Page 9: Troubleshooting - Tube Swap Sequence
L M R Swap tubes: R M L Did problem move to other channel? Swap tubes: M R L Replace tube R M L Did problem move to other channel? Consult dealer / return for repair Pearl preamplifier – owner’s manual... -
Page 10: Specifications
Switch selectable 115/230 Volt 50/60 Hz 35 Watts Net Weight lbs / 18.7 Shipping Weight lbs / Dimensions Width: 17” / 43.18 cm Depth: 14 ¼” / 36.195 cm Height: 4 ¼” / 10.795 cm Pearl preamplifier – owner’s manual... -
Page 11: Limited Warranty
In no event will Wyetech Labs be responsible or liable for other than is stated herein, such as incidental or consequential damage, interrupted operation or other causes.
Need help?
Do you have a question about the Pearl and is the answer not in the manual?
Questions and answers