Advertisement
Available languages
Available languages
Quick Links
Advertisement

Related Manuals for V7 IFP7503-V7PROM


Summary of Contents for V7 IFP7503-V7PROM
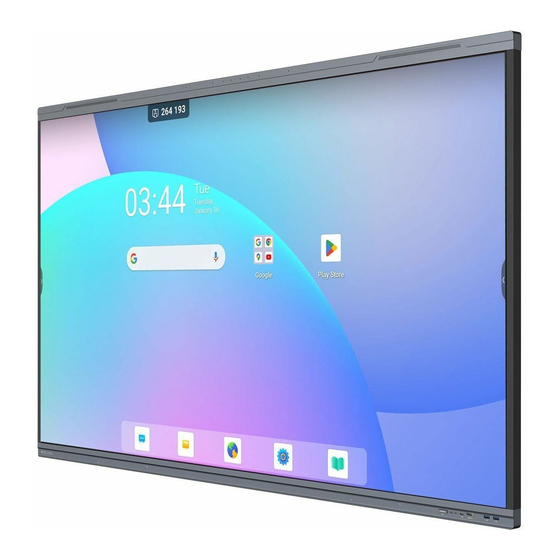
- Page 1 Interactive Display IFP7503-V7PROM IFP8603-V7PROM www.v7world.com...
- Page 2 TABLE OF CONTENTS English German Italian French Spanish...
- Page 3 INTRO Copyright This document contains proprietary information protected by copyright. All rights reserved. No part of this manual may be reproduced by any mechanical, electronic or other means, in any form, without prior written permission of the manufacturer. Trademarks All trademarks and registered trademarks are the property of their respective owners or companies.
- Page 4 IMPORTANT • Check www.v7world.com for the latest documentation and downloads for this product Safety Warning • Do not place heavy objects on top of the unit. • Do not put the unit near appliances that generate magnetic • Do not expose the unit to direct sunlight and other sources of heat •...
- Page 5 • Never use any hard or sharp objects to replace the touch pen • To ensure long life and display performance, do not keep brightness on high setting for long periods of time • Do not place the unit near or over a radiator or a heater •...
-
Page 6: Energy Star
ENERGY STAR ENERGY STAR is a U.S. Environmental Protection Agency voluntary program that helps businesses and individuals save money and protect our climate earn the ENERGY STAR prevent greenhouse gas or requirements set by the U.S. Environmental Protection Agency. “Standard mode” setting and this is the setting in which power savings will be achieved. -
Page 7: Getting Started
GETTING STARTED 1. Plug the power cable into the wall socket 2. Plug the power cable to the power supply connector on the bottom of this product this product near the plug (“I” = power on, “O” = power 4. Remove the cover on the rear of the remote control and insert two AAA batteries 5. - Page 8 DISPLAY VIDEO FROM EXTERNAL DEVICES For optimal results, make sure your source is using a resolution compatible with the device and make sure the cables you are using are working correctly. Side Panel Inputs AUDIO IN USB-C OUT AUDIO OUT USB 3.0 HDMI OUT USB TOUCH 1...
- Page 9 Bottom Panel Inputs USB 2.0 SPDIF TOUCH 2 RS232 Front Panel Inputs USB-C IN HDMI 4 USB 3.0...
- Page 10 PORTS HDMI IN 4 (Up to 4K@60Hz, HDCP 2.3, CEC) HDMI OUT 1 (Up to 4K@60Hz) USB 2.0 1 (Managing system upgrades) USB 3.0 4 (Front×2, Rear×2 / auto switch to current channel USB Type-C IN 2 Video, Audio , Touch, LAN Network, Sharing Front, PD 100, Rear: PD 15W) USB Type-C OUT 1 (4k@60Hz)
- Page 11 EINFÜHRUNG Copyright Dieses Dokument enthält rmeneigene, urheberrechtlich geschützte Informationen. Alle Rechte vorbehalten. Kein Teil dieses Handbuchs darf ohne vorherige schriftliche Genehmigung des Herstellers mechanisch, elektronisch oder durch andere Mittel in irgendeiner Form reproduziert werden. Trademarks Alle Marken und eingetragenen Marken sind Eigentum ihrer jeweiligen Besitzer oder Unternehmen.
- Page 12 WICHTIG: • Informieren Sie sich auf www.v7world.com über die aktuelle Dokumentation und die neuesten Updates für dieses Produkt. Sicherheits- und Warnhinweise • Keine schweren Gegenstände auf das Gerät stellen. • Gerät nicht in Nähe anderer Geräte aufstellen, die magnetische Felder erzeugen. •...
- Page 13 • Niemals anstelle des Touchpens andere harte oder scharfkantige Objekte verwenden. • Bildschirm für eine lange Lebensdauer und Leistung nicht über längere Zeiträume mit hoher Helligkeit betreiben. • Gerät nicht in der Nähe von Heizkörpern oder Heizlüftern aufstellen. • Wird das Gerät von einem kalten an einen warmen Standort gebracht, die Stromversorgung trennen und das Gerät mindestens 2 Stunden ausgeschaltet lassen, damit Feuchtigkeit im Inneren verdampfen kann.
-
Page 14: Erste Schritte
ERSTE SCHRITTE 1. Stecken Sie das Netzkabel in die Wandsteckdose ein. 2. Verbinden Sie das Netzkabel mit dem Anschluss für die Stromversorgung an der Unterseite des Geräts. 3. Den Ein-/Aus-Schalter unten am Gerät neben dem Netzkabelanschluss drücken („I“ = Ein, „O” = Aus). 4. - Page 15 VIDEO WIEDERGABE VON EXTERNEN GERÄTEN Zur optimalen Wiedergabe muss die verwendete Au ösung des Quellgeräts kompatibel mit der Au ösung des Interactive Flat Panel sein. Darüber hinaus müssen geeignete Kabel verwendet werden. Eingänge seitlich AUDIO IN USB-C OUT AUDIO OUT USB 3.0 HDMI OUT USB TOUCH 1...
- Page 16 Eingänge unten USB 2.0 SPDIF TOUCH 2 RS232 Eingänge vorne USB-C IN HDMI 4 USB 3.0...
- Page 17 USB 2.0 USB 3.0 2 HINTEN 2 X USB 3.0 SPDIF WLAN HOTSPOT RS232 1 X DB9...
- Page 18 INTRODUZIONE Copyright Il presente documento contiene informazioni proprietarie protette da copyright. Tutti i diritti riservati. Nessuna parte di questo manuale può essere riprodotta mediante qualsiasi mezzo meccanico, elettronico o di altro genere, in qualsiasi forma, senza previa autorizzazione scritta del produttore. Marchi commerciali Tutti i marchi commerciali e i marchi registrati sono di proprietà...
- Page 19 IMPORTANTE • Consultare www.v7world.com per la documentazione più recente le ultime versioni disponibili per il download di questo prodotto Avvertenza di sicurezza • Non posizionare oggetti pesanti sopra l'unità. • Non posizionare l'unità accanto ad apparecchiature che generano campi magnetici. •...
- Page 20 • Non utilizzare oggetti duri o appuntiti in sostituzione della penna touch. • Per garantire una lunga durata del display e prestazioni massime, non impostare la luminosità su livelli elevati per lunghi periodi di tempo. • Non posizionare l'unità accanto o sopra a radiatori o termosifoni. •...
-
Page 21: Operazioni Preliminari
OPERAZIONI PRELIMINARI 1. Collegare il cavo di alimentazione alla presa a muro. 2. Collegare il cavo di alimentazione al connettore di alimentazione nella parte inferiore del prodotto. 3. Premere il pulsante On/O sulla parte inferiore dell'unità, accanto al cavo ("I" = dispositivo attivo, "O"... - Page 22 VISUALIZZAZIONE DI VIDEO DA DISPOSITIVI ESTERNI Per risultati ottimali, assicurarsi che la sorgente utilizzi una risoluzione compatibile con il dispositivo e che i cavi utilizzati funzionino correttamente. Ingressi pannello laterale AUDIO IN USB-C OUT AUDIO OUT USB 3.0 HDMI OUT USB TOUCH 1 HDMI 1 HDMI 2...
- Page 23 Ingressi pannello inferiore USB 2.0 SPDIF TOUCH 2 RS232 Ingressi pannello anteriore USB 3.0 USB-C IN HDMI 4...
- Page 24 HDMI IN USB 2.0 USB 3.0 + 2 POSTERIORI TOUCH OUT 2 X USB 3.0 VGA IN AUDIO IN AUDIO OUT SPDIF HOTSPOT SWITCH AUTOMATICO LAN IN ENTRATA E USCITA RS232 1 X DB9...
- Page 25 INTRODUCTION Droit d’auteur Ce document contient des informations protégées par des droits d’auteur. Tous droits réservés. Aucune partie de ce manuel ne peut être reproduite par moyen mécanique, électronique ou sous toute autre forme, sans l’autorisation écrite préalable du fabricant. Marques Toutes les marques et les marques déposées sont détenues par leurs entreprises ou propriétaires respectifs.
- Page 26 IMPORTANT • Rendez-vous sur www.v7world.com pour obtenir les derniers documents et téléchargements pour ce produit. Avertissements de sécurité • Ne placez pas d’ o bjets lourds sur le dessus de l’unité. • Ne placez pas l’unité à proximité d’appareils qui génèrent des champs magnétiques.
- Page 27 • N’utilisez jamais un objet dur ou pointu à la place du stylet tactile. • Pour une durée de vie plus importante et de meilleures performances d’a chage, ne maintenez pas l’ é cran sur une luminosité élevée pendant une durée prolongée. •...
- Page 28 DÉMARRAGE 1. Branchez le câble d’alimentation dans la prise murale. 2. Branchez le câble d’alimentation au connecteur d’alimentation électrique situé sous le produit. 3. Appuyez sur le bouton Marche/Arrêt de l’unité situé sous le produit, près de l’embase (« I » = Marche et «...
- Page 29 AFFICHAGE VIDÉO DEPUIS DES APPAREILS EXTERNES A n d’obtenir des résultats optimaux, veillez à ce que la résolution de votre source soit compatible avec l’appareil et assurez-vous que les câbles utilisés fonctionnent correctement. Ports d’entrée latéraux de l’écran AUDIO IN USB-C OUT AUDIO OUT USB 3.0...
- Page 30 Ports d’entrée sous l’écran USB 2.0 SPDIF TOUCH 2 RS232 Ports d’entrée à l’avant de l’écran USB-C IN HDMI 4 USB 3.0...
- Page 31 ENTRÉE HDMI + 2 À L’ARRIÈRE SORTIE TACTILE ENTRÉE VGA ENTRÉE AUDIO SORTIE AUDIO S/PDIF POINT D’ACCÈS RS232...
- Page 32 INTRODUCCIÓN Copyright Este documento contiene información con dencial protegida por copyright. Todos los derechos reservados. Ninguna parte de este manual podrá reproducirse de forma mecánica, electrónica o de cualquier otro modo sin la previa autorización por escrito del fabricante. Marcas comerciales Todas las marcas comerciales y marcas comerciales registradas pertenecen a sus respectivos propietarios o empresas.
- Page 33 IMPORTANTE • Visite www.v7world.com para ver la documentación y las descargas más recientes de este producto. Advertencia de seguridad • No coloque objetos pesados encima de la unidad. • No coloque la unidad cerca de aparatos que generen campos magnéticos. •...
- Page 34 • No utilice nunca ningún objeto duro o a lado en lugar del lápiz táctil. • Para garantizar una vida útil más larga y un mejor rendimiento, no utilice la pantalla con un brillo elevado durante largos períodos. • No coloque la unidad cerca de un radiador o un calentador ni encima de ellos.
- Page 35 INICIO 1. Enchufe el cable de alimentación a la toma de corriente. 2. Enchufe el cable de alimentación al conector de alimentación que hay en la parte inferior de este producto. 3. Pulse el botón on/o (encendido/apagado) de la unidad que hay en la parte inferior de este producto, cerca del enchufe (“I”...
- Page 36 VISUALIZACIÓN DE VÍDEO DESDE DISPOSITIVOS EXTERNOS Para obtener resultados óptimos, asegúrese de que su fuente está utilizando una resolución compatible con el dispositivo y de que los cables que está usando funcionan correctamente. Entradas del panel lateral AUDIO IN USB-C OUT AUDIO OUT USB 3.0 HDMI OUT...
- Page 37 Entradas del panel inferior USB 2.0 SPDIF TOUCH 2 RS232 Entradas del panel frontal USB-C IN HDMI 4 USB 3.0...
- Page 38 ENTRADA HDMI USB 2.0 USB 3.0 SALIDA TÁCTIL 2 USB 3.0 ENTRADA VGA ENTRADA DE AUDIO SALIDA DE AUDIO SPDIF INTERRUPTOR INALÁMBRICO DE ENTRADA Y RS232 1 DB9...
Need help?
Do you have a question about the IFP7503-V7PROM and is the answer not in the manual?
Questions and answers