Table of Contents
Advertisement
Quick Links
Advertisement
Table of Contents

Related Manuals for Sunless VersaSpa Pro

Summary of Contents for Sunless VersaSpa Pro
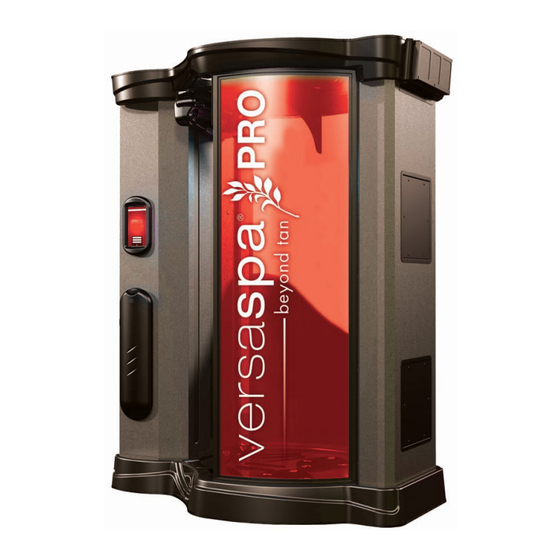
- Page 1 versaspa beyond tan Owner’s Manual! www. .com Version .0 Rev...
- Page 2 RCBO power switch. Please use this serial number when calling for service or replacement parts. Serial Number:____________________________ Installation Date:___________________________ Versa Pro™ Heated Sunless Spa Series™ Sunless, Inc. 8909 S. Freeway Drive Macedonia, OH 44056 © Copyright 20 Sunless, Inc. All Rights Reserved...
- Page 3 Your safety and the safety of others are very important. We have provided important safety information in this manual. Please read and obey all safety messages before operating the Versa Heated Sunless Series Spa. It is the responsibility of the owner and operator of the Versa Heated Sunless...
- Page 4 Always disconnect the Versa from electrical power supply before servicing, wiring, or opening internal covers. Risk of electrical shock could occur when panels are opened while the unit is plugged in. Do not modify the Versa plug in any manner. U.S. installations: Always plug the power cord into a properly configured 230-volt Nema L630 outlet only as shown below in Figure A.
- Page 5 Severe Injury or harm could occur due to moving parts and electrical features of the Versa booth. Use this product only as intended per the instructions in this manual. Do NOT use solutions that are not recommended by Sunless, Inc..
- Page 6 Move slowly and use caution to avoid slipping after applying barrier cream to hands and feet when moving around inside the booth and outer areas. Versa sunless formulations are not a sunscreen or a substitute for proper sun protection.
-
Page 7: Table Of Contents
Table of Contents 1. Introduction 1.1. Welcome!! ..................... 1.2. Features! ....................1.3. Specifications! ..................2. Getting to Know Your Versa 2.1. How it Works! ..................2.2. Key Component Illustrations! ..............2.3. Plugging in and Turning on Your Versa ! ......12 2.4. - Page 8 6.6. HVLP Blower Filter Cleaning!.............4 6.7. Sump Pump Basin Cleaning!..............4 6.8. Cleaning and Purging Solution Lines!..........6.9. Nozzle Cleaning!................. 6.10. Powering Down Booth!..............6.11. Turning of Water Supply to Booth! ............. 6.12. Ordering Replacement Parts! ............7. Advanced Touchscreen Controller Functions 7.1.
-
Page 9: Introduction
Welcome to Versa Heated Sunless Spa Series. Designed with a multitude of industry-first features that can turn even the newest employees into true sunless professionals, beginning with a revolutionary touchscreen that allows you to formulate flawless, customized applications with the swipe of a finger. - Page 10 Section 1! Introduction • • • Three Revolutionary HVLP Spray Nozzles Re-engineered, and better than ever. Our redesigned HVLP trio of spray nozzles ensures complete, accurate coverage for all body types. • Built-In Solution Reservoir The built-in Versa solution reservoirs allow you to completely utilize every ounce your Bag-in-Box has to offer, while also ensuring seamless solution changing.
-
Page 11: Specifications
Section 1! Introduction 1.3 Specifications • • 92” 233.7 cm • Electrical Service: 230VAC, 30 AMP, Single Phase, Nema L630 outlet for U.S installations, see Figure C below. International installations: The Versa shall be hardwired into a disconnect box according to local electrical codes. See Figure D below for reference only. - Page 12 Section 1! Introduction cold mixed together greatly increases cleaning efficiency and also customer experience. The following is required: •Hot and cold water service is required with a minimum of 40 psi (276 kPa) and a maximum of 100 psi (689 kPa), and capable of 8 GPM (30 LPM). The cold water supply needs to be within 4 feet (122 cm) of the back of the Versa standard U.S.
-
Page 13: Getting To Know Your Versa Pro Tm
2.1 How it Works The Versa Heated Sunless Spa Series is an HVLP Automatic Skin Treatment System that mixes air and one of four treatment solutions into a fine mist. The mist is then sprayed using 3 HVLP spray nozzles onto the body to produce an even, whole-body application. - Page 14 Section 2! Getting to Know Your Versa Upper Spray Column Cover Lifetime Exhaust Filter HVLP Blower Filter Lower Spray Column Cover Figure 2 Incoming Water Sump Pump Connection Box Outlet Connection Serial Number Tag Incoming Water Hose RCBO/ Main Main Power Cord 220V Figure 3...
- Page 15 Section 2! Getting to Know Your Versa Second Stage Filter Exhaust Column Access Panels Figure 4 Heat Ports 3 Each Spray Nozzles 3 Each Height Figure 5 Detection Sensor (Nozzle Housing)
- Page 16 Section 2! Getting to Know Your Versa LED Lighting Speakers Wash-down Tubing Figure 6 Green Start Button Figure 7...
- Page 17 Section 2! Getting to Know Your Versa Sump Pump Check Valve Sump Pump Figure 8 Sump Pump Filter Basket Figure 9...
- Page 18 Section 2! Getting to Know Your Versa Smart Container Sensors Solution Vent Tubes Precision Solution Pumps Figure 10 Solution Reservoirs...
- Page 19 Section 2! Getting to Know Your Versa Drive Motor Assembly Linear Slide Assembly Hose and Cable E-Chains Control Box Assembly: HVLP Blower Filter Lower Cover Shown Removed HVLP Hoses: Blue for Nozzles, Orange for Heaters Figure 1 Electric Brake Clutch Drive Motor Drive Motor Figure 1...
-
Page 20: Plugging In And Turning On Your Versa Pro Tm
Section 2! Getting to Know Your Versa 2.3 Plugging in and turning on Your Versa First plug the Versa power cable into the approved outlet as defined in Section 1.3. The outlet is a twist-lock type. Orient the plug so that the terminals match with the outlet receptacles. -
Page 21: Understanding Your Touchscreen Controller
Your Versa is equipped with the most advanced and easy to use interface in the industry, powered by Sunless Inc. OS. From the Home Screen, shown above, everything you need to set your preferences, run sessions, and troubleshoot your unit is just a few touches and swipes away. - Page 22 Section 2! Getting to Know Your Versa • Open Dashboard: The Dashboard is the place to go to customize all Salon Settings, Machine Settings, Admin Settings, open the solution drawer, wash down the booth, diagnose machine components, connect to wi-fi, get tech support, view statistics, etc. To access the Dashboard, it will prompt you for your 4 digit PIN.
- Page 23 Section 2! Getting to Know Your Versa Enter Password Screen Dashboard Main Screen Salon Setup General Settings Salon Setup Machine Settings...
-
Page 24: Tmax And Salon Timer Systems
Section 2! Getting to Know Your Versa Advanced Touchscreen Functions are outlined in Section 7 of this manual. 2.5 TMax and Salon Timer Systems Your Versa can be set to run sessions in various ways. The Session Builder and Favorites method can be accessed from the Home Screen only if Remote Control Mode is disabled in the Dashboard Machine Settings section. - Page 25 Section 2! Getting to Know Your Versa Hybrid Timer Mode: this mode is for use with non-Tmax timer systems that simply apply a closed contact between two leads connected to the unit. When time is sent to the unit and the contacts are closed, it allows the salon staff to create and initiate a session using the Session Builder or Favorites functions from the Home Screen.
-
Page 26: Setup
Your Versa has built in Wifi functionality that allows your unit to communicate with your own Dashboard on Sunless Inc.’s Cloud Service and will also allow you to receive automatic over-the-air updates. Further, you can also send tech support requests directly from the touchscreen controller to Sunless Inc.’s Tech Support Department. -
Page 27: Registering Your Versa Pro Tm
first box. Enter the Booth Location Enter your Sunless Inc. Customer ID Number. This is the same number you use when ordering on the Online Marketplace. The booth serial number should already be filled in. -
Page 28: Setting Passwords And Access Type
Section 3! Setup Admin Setup 3.4 Setting Passwords and Access Type Your Versa allows you to set three different levels of access to the control system. The three levels are: 1. Admin: All functions, settings, and parameters are accessible. The default code is 0000. - Page 29 Section 3! Setup Manage Passcodes Screen Available Admin Functions Available Manager Functions Available Staff Functions...
-
Page 30: Smart Container System
Section 3! Setup 3.5 Smart Container System Your Versa utilizes a Smart Container System. This innovative system reads information from each Bag-In-Box solution container to automatically set your machine to the factory recommended settings for each type of solution. In addition the Smart Container System provides the following benefits: Expired Solution: Since the manufacture date and expiration date are stored on each container, the unit will warn you if you insert an expired container. -
Page 31: Setting Session Parameters
Section 3! Setup Slot #1 Slot #2 Slot #3 Slot #4 3.7 Setting Session Parameters All Session Parameters can be modified from the Dashboard in the Salon Setup Screen. A Manager or Admin password is required to access the Salon Setup Menu. The names of each solution in all four slots will be displayed and selecting the name will highlight it and allow the parameters for that solution to be modified. - Page 32 Section 3! Setup • Volume Per Pass: This is the amount of solution in milliliters that will be sprayed in one full pass from top to bottom. If a solution is set to 4 passes, and the volume per pass is 20ml, the complete session will spray 80ml of solution. •...
-
Page 33: Customizing Machine Settings
Section 3! Setup 3.8 Customizing Machine Settings Basic Machine Settings can be viewed and modified in the Machine Settings tab of the Salon Setup Screen. Below is a view of the Machine Settings Screen and a list of each setting and its description: •... - Page 34 Section 3! Setup Tmax timer systems that simply apply a closed contact between two leads connected to the unit. When time is sent to the unit and the contacts are closed, it allows the salon staff to create and initiate a session using the Session Builder or Favorites functions from the Home Screen.
-
Page 35: Using Your Versa Pro Tm
• See Preface Section of this document for additional Warnings/Cautions before using the Versa booth. • FDA Recommendation on DHA: The active ingredient most often used in all sunless tanners including tinted moisturizers, self-tanners, and spray tan solution is called DHA or dihydroxyacetone. DHA is a carbohydrate (monosaccharide sugar) com- pound approved by the FDA for use in externally applied sunless tanning solutions. - Page 36 Section 4! Using Your Versa Included on the base of the Versa are two foot locators, each having the numbers 1,2,3 and 4. To simplify the process during the spray session, the automated voice instructions will tell you what number your toes should be on and what number your heels should be on.
- Page 37 Section 4! Using Your Versa Step 8. After the first misting and drying cycle is complete, follow the voice guided instructions and move to the position 2 stance (see Position #2 figure below) and stand with your toes on #2 and your heels on #4. It will now spray you on the way down, pause, and then dry you while the nozzles are moving back up.
- Page 38 Section 4! Using Your Versa Position #1 Position #2 Position #3 Position #4...
- Page 39 Section 4! Using Your Versa 2-Position Stance Step 1. Once in the Versa application area, make sure the unit is properly reset by visually checking that the green start button (located on the spray nozzle column inside the Versa spray booth) is blinking slowly. If the green start button is not blinking slowly, notify salon operator.
- Page 40 Section 4! Using Your Versa Step 12: Get dressed, put all jewelry back on if necessary, and start enjoying your beautiful Versa application. Note: The Versa you are using may have a different sequence for the dry passes where it will perform all misting passes first, then perform all drying passes at the end.
-
Page 41: Setting Your Favorites
Section 4! Using Your Versa 4.2 Setting Your Favorites Your Versa makes it easy to create and use Favorites. Favorite Sessions are a group of back-to-back treatments. There can be up to four treatments and each treatment can use any of the 4 available solutions, at any of the 4 levels, and for either a body, face or leg area. - Page 42 Section 4! Using Your Versa Favorite Select Screen Edit Shown Button Favorite Details TMax Shown Code Shown Here Favorite Screen #1 Selected Favorite Name Edit...
- Page 43 Section 4! Using Your Versa Adding Favorites To add a Favorite: 1. Go to the Dashboard on the Touchscreen Controller. 2. Input your Admin Password. 3. Select the Manage Favorites Button. 4. Select the Create New Favorite Button at the top. 5.
-
Page 44: Starting A Session Using Favorites
Section 4! Using Your Versa 4.3 Starting a Session Using Favorites If you are not using a remote timer such as TMax, select the Favorites Button from the Home Screen. There will be 6 Favorites listed per screen and you can swipe left or right to navigate through the different Favorite screens. -
Page 45: Starting A Session Using Session Builder
Section 4! Using Your Versa 4.4 Starting a Session Using Session Builder If you are not using a remote timer such as TMax, select the Create A New Session button from the Home Screen. Building a custom session is similar to creating a Favorite as described earlier. -
Page 46: Starting A Session Using Tmax
Section 4! Using Your Versa 4.5 Starting a Session Using Tmax If you are using a TMax and it is set up properly as described in Section 2.5, and your Salon Management Software is set up with the proper codes and pricing, simply enter the time code in your Salon Software that corresponds to the desired session on the Versa . -
Page 47: Starting A Session Using A Closed Contact Timer
Section 4! Using Your Versa 4.6 Starting a Session Using a Closed Contact Timer If you are using a non-TMax timer system, it is still possible to use your timer as a security mechanism to activate your Versa . Basically, when time is sent to the machine, it will allow you to select a Favorite Session or Create A New Session as described in Sections 4.3 and 4.4. -
Page 48: Adding And Changing Solutions
Section 5! Adding and Changing Solutions 5.1 Replacing an Empty Solution Container With the Same Type Your Versa and its Smart Container System instantly recognizes when a solution container is removed or inserted into any of the 4 solution slots. If you remove an empty solution container, the controller will sound an audible “beep”, signaling it has recognized the container is removed. - Page 49 Section 5! Adding and Changing Solutions Unlock Drawer Button Solution Removed Message Main Dashboard: Unlock Drawer Reservoir Fill Complete Solution Added Message...
-
Page 50: Changing Solution Types
Section 5! Adding and Changing Solutions 5.2 Changing Solution Types If you wish to change the type of solution in any of the 4 solution slots, it will be necessary to completely purge the internal solution reservoir and solution lines so that there is no cross-mixing of the old solution with the new solution. - Page 51 Section 5! Adding and Changing Solutions Press the fill reservoir button to fill the reservoir with the new solution. When it is finished the following message will be displayed, then utton.
- Page 52 Section 5! Adding and Changing Solutions...
-
Page 53: Maintenance And Cleaning
Section 6! Maintenance and Cleaning 6.1 Automatic Washdown It is recommended that the Versa washdown be ran after every session as it will clean the walls, the floor, the exhaust filter, and the inside of the exhaust column. Auto Washdown can be enabled in the Machine Settings Tab of the Salon Setup Menu (see Section 3.9) Also the washdown can be manually activated from the main Dashboard screen. -
Page 54: Secondary Exhaust Fan Filter Cleaning
Section 6! Maintenance and Cleaning 6.4 Secondary Exhaust Fan Filter Cleaning There is a secondary exhaust fan filter on the right side or your Versa that will trap any excess mist that passes through the primary filter. This foam filter is recommended to be cleaned weekly. -
Page 55: Hvlp Blower Filter Cleaning
Section 6! Maintenance and Cleaning 6.6 HVLP Blower Filter Cleaning There is a single filter that cleans the intake air for both the Nozzle HVLP Blower and the Heater HVLP Blower on the left side of the spray column. This foam filter is recommended to be cleaned monthly or more often at high usage salons. - Page 56 Note: Another way to help keep your sump pump clean is to use Bio-Pure, an enzyme cleaner that you mix with water and pour into your sump pump through the filter area. You can order Bio-Pure from Sunless, Inc.’s online marketplace. Spray Column...
-
Page 57: Cleaning And Purging Solution Lines
Maintenance and Cleaning 6.8 Cleaning and Purging Solution Lines It may be necessary to use Sunless, Inc.’s Purge Solution to help clean out solution lines if a machine has been sitting for a long period of time or for periodic maintenance. -
Page 58: Advanced Touchscreen Controller Functions
Your Versa has built in Wifi functionality that allows your unit to communicate with Sunless, Inc.’s Cloud Service and will also allow you to receive automatic over-the- air updates. Further, you can also send tech support requests directly from the touchscreen controller to Sunless, Inc.’s Tech Support Department. -
Page 59: Salon Setup
• Close Dashboard: Selecting this will close the Dashboard. • Technical Support: Selecting this will bring up a window that will allow you to fill in some basic information and send a support request directly to Sunless, Inc.’s Technical Support Department. -
Page 60: General Settings
You will need to follow the instructions to receive a password from Sunless Inc. in order to disable this feature. All of the functions that rely on the Smart Container System will no longer be available with this disabled. -
Page 61: Machine Settings
Section 7! Advanced Touchscreen Functions faster service response times should there be an issue with your machine. WiFi must be enabled and connected for this to function. • Use 24-Hour Time Format: When enabled your system will use and display the time in the 24-hour format. -
Page 62: Component Settings
7.3.3 Component Settings: The settings in this section control important components of your machine. Use care when adjusting these settings. Consult a Sunless, Inc. Tech before making any modifications to the settings in this section. • Audio Blower Level: This value is a percentage of the nozzle and heater blower levels and will reduce these levels by this percentage when any audio prompts are playing. -
Page 63: Session Parameters
Section 7! Advanced Touchscreen Functions • Heater Blower Spray Level: This level adjusts the heater blower speed while solution is being sprayed. • Heater Dry Level: This level adjusts the heat intensity during a dry pass. • Heater Blower Dry Level: This level adjusts the heater blower speed during a dry pass. -
Page 64: Wifi
Section 7! Advanced Touchscreen Functions 7.3.5 WiFi: This section allows you to connect to your salon’s WiFi network and view the IP address of your current connection. See Section 3.2 of this manual for complete instructions. Salon Setup WiFi Tab View 1 Salon Setup WiFi Tab View 2 Showing Available Networks Connecting to a Network... -
Page 65: Manage Passcodes
Section 7! Advanced Touchscreen Functions 7.4 Manage Passcodes: Your Versa allows you to set three different levels of access to the control system. The three levels are: 1. Admin: All functions, settings, and parameters are accessible. The default code is 0000. 2. -
Page 66: Manage Favorites
Section 7! Advanced Touchscreen Functions 7. Manage Favorites: Refer to Section 4.2 of this manual for details on managing, creating, and deleting Favorites. 7. Diagnostics: The Diagnostics section of the Main Dashboard is used for testing and troubleshooting individual components of your machine and is organized into eight main categories: •... - Page 67 Section 7! Advanced Touchscreen Functions Discreet Outputs Screen 1 Discreet Outputs Screen 2 • Slide Motor: Allows you to test the function of the Slide Motor by moving it up or down at a given speed. You can also select to move it a set distance or all the way up or down to its limits.
- Page 68 Section 7! Advanced Touchscreen Functions Slide Motor Test Screen Slide Motor Results Screen Slide Encoder Test Screen Slide Encoder Results Screen...
- Page 69 Section 7! Advanced Touchscreen Functions • Solution Pumps: Allows you to test the function any of the four solution pumps. After selecting the Pump #, the Pump Volume of solution to be dispensed, the Nozzle Blower Level (can be set to zero to watch the streams of solution), and the Run Time, a results page will be displayed.
- Page 70 Section 7! Advanced Touchscreen Functions • Read Container: Selecting this option allows you to view all of the information stored on your Smart Container. Select which container you wish to view and an information screen will appear showing all of the data. Read Container Screen Read Container Results Screen...
- Page 71 Section 7! Advanced Touchscreen Functions Height Detect: Selecting this option allows you to test the Height Detection system built into the nozzle housing assembly. After selecting the desired Travel Speed and Overshoot Distance you will need to have someone stand in the booth in Position 1 and push the Green Start Button.
-
Page 72: View Statistics
7. Check For Updates: Selecting this option allows your machine to communicate with Sunless, Inc’s Cloud Server to see if your software is up to date. If it is, it will display a message saying “No Updates Available At This Time”. If there is an available update, it will guide you through downloading and installing it. - Page 73 All of this information should be filled out at installation by a certified Sunless, Inc. Tech. The Info Tab also includes options to Reset, Import, and Export Favorites. If you wish to Reset your Favorites to the factory default, select this option.
-
Page 74: Admin Setup
Section 7! Advanced Touchscreen Functions Admin Setup Info Screen Admin Setup Reset Favorites Screen Admin Setup Import Favorites Screen Admin Setup Export Favorites Screen... - Page 75 Section 7! Advanced Touchscreen Functions • Admin Service Tab: In this area, any service done to your machine should be entered and logged. This is helpful for future troubleshooting and to keep track when key components have been replaced. When entering a service event, fill in the Completed By section with name of the person performing the service, enter any custom comments about this event, and select a component that was serviced or replaced by pushing the Add Component Service Item button and selecting the...
- Page 76 Section 7! Advanced Touchscreen Functions • Admin Metrics Tab: This area shows how many cycles or how much time each critical component on your machine has been run. This will help when troubleshooting or determining if any pro-active preventive maintenance should be completed. Admin Metrics Screen...
-
Page 77: Troubleshooting
Push plug into outlet and turn clockwise to lock into outlet RCBO has tripped Turn power switch to off position, then turn power switch back to on position Defective RCBO - Contact Sunless, Inc. Technical Support Faulty 24 Volt Power Supply Contact Sunless, Inc. Technical Support Touch screen is blank Contact Sunless, Inc. - Page 78 Troubleshooting Remove air cap, collar and nozzle tip Check nozzle tip for debris and clean as necessary If still not even, contact Sunless, Inc. Technical Support Solution reservoir check valve may be stuck or defective Contact Sunless, Inc. Technical Support...
- Page 79 Inspect for jams in the E-chain or sections dislodged Inspect motor Test slide motor in Diagnostics Contact Sunless, Inc. Technical Support Spray boom bounces on way down (Contact Sunless, Inc. Technical Support) Slip clutch loose Spray boom possibly rubbing on cabinet E-chain binding...
-
Page 80: Appendix A - Tmax Codes
Appendix A! TMax Codes !!!! C97[!"-K&'\!0C7T$7A$ UV44!>#$?!0ST]4%!CA%7C9%TC!#HCS#T0! 0%00S#T!@ !"#$% $&'()*+,*-.!/0-12,*-.34&5&16 7)&8 4&5&1 0-12,*-. 9-*',!#.1: 9-*',2)*<&)!= >#$? !!!HA#!0#4VCS#T!CA7?!H#0SCS#T!/4&M,!,-!A*L^,6 >)-.<&)!@ >#$? >A! 04#C 0#4VCS#T! "#$% >)-.<&)!; >#$? >A HA#!>A#T_%A >A >)-.<&)!= >#$? >A HA#!"4%7A "4 >)-.<&)!B >#$? >A C8.!#.1: HA#!9#S0CVAS_%A "1&8)!@ >#$? "4 HA#!0VT4%00!HA%H "1&8)!;... - Page 81 Appendix A! TMax Codes MO44!;#$@!JO4NPDNA%7NJ%QN!#LNP#Q0!L4O0!4%B0 0%00P#Q!= 0%00P#Q!C 0%00P#Q!G 0%00P#Q!9 !"#$% $&'()*+,*-.!/0-12,*-.34&5&16 7)&8 4&5&1 0-12,*-. 7)&8 4&5&1! 0-12,*-. 7)&8 4&5&1 !0-12,*-. 7)&8 4&5&1 !0-12,*-. ;)-.<&!=!>!;)-.<&!4&?'! ;#$@ ;)-.<&!C!>!;)-.<&!4&?'! ;#$@ ;)-.<&!G!>!;)-.<&!4&?'! ;#$@ ;)-.<&!9!>!;)-.<&!4&?'! ;#$@ N8.!>!4&?' "1&8)!=!>!"1&8)!4&?'! ;#$@ "4 "4! "1&8)!C!>!"1&8)!4&?'!! ;#$@ "4 "4! "1&8)!G!>!"1&8)!4&?'!! ;#$@ "4...
-
Page 82: Appendix
Appendix ! - Page 83 Appendix !
- Page 84 Appendix !
Need help?
Do you have a question about the VersaSpa Pro and is the answer not in the manual?
Questions and answers
How to reprogram my versaspa professional skincare