Table of Contents
Advertisement
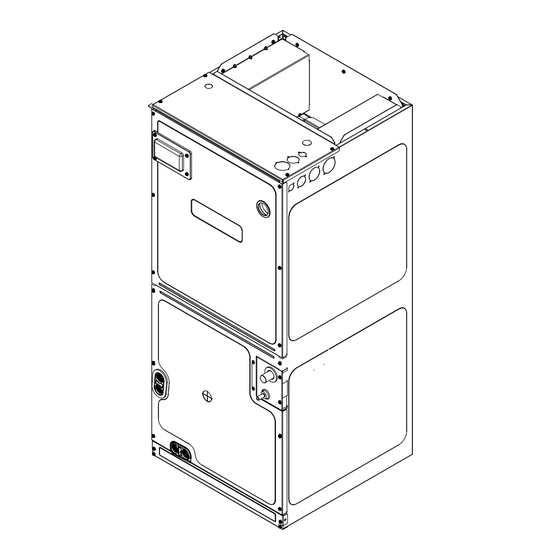
AMST***U1300**
AIR HANDLERS INSTALLATION &
OPERATING INSTRUCTIONS
Only personnel that have been trained to install, adjust,
service, maintenance or repair (hereinafter, "service")
the equipment specified in this manual should service the
equipment.
This equipment is not intended for use by persons
(including children) with reduced physical, sensory or
mental capacities, or lack of experience and knowledge,
unless they have been given supervision or instruction
concerning use of the appliance by a person responsible
for their safety.
Children should be supervised to ensure that they do not
play with the equipment.
The manufacturer will not be responsible for any injury
or property damage arising from improper supervision,
service or service procedures. If you service this unit, you
assume responsibility for any injury or property damage
which may result. In addition, in jurisdictions that require
one or more licenses to service the equipment specified in
this manual, only licensed personnel should service the
equipment. Improper supervision, installation, adjustment,
servicing, maintenance or repair of the equipment specified
in this manual, or attempting to install, adjust, service
or repair the equipment specified in this manual without
proper supervision or training may result in product
damage, property damage, personal injury or death.
Do not bypass safety devices.
RECOGNIZE THIS SYMBOL
AS A SAFETY PRECAUTION
NOTE: SPECIFICATIONS AND PERFORMANCE DATA LISTED HEREIN
ARE SUBJECT TO CHANGE WITHOUT NOTICE
NOTE: THIS EQUIPMENT IS ONLY APPROVED FOR USE WITH R-32
REFRIGERANT
WARNING
WARNING
is a registered trademark of Maytag Corporation or its related companies and is used under license. All rights reserved.
©2023- 2024 Daikin Comfort Technologies Manufacturing, L.P.
19001 Kermier Rd., Waller, TX 77484
www.goodmanmfg.com -or- www.amana-hac.com
P/N: IO-4011B Date: May 2024
1 Important Safety Instructions ................................... 2
2 Wiring Diagrams ....................................................... 3
3 Electrical and Control Wiring ................................... 8
3.1 Building Electrical Service Inspection .................... 8
3.2 Wire Sizing ............................................................ 8
3.3 Maximum Overcurrent Protection (MOP) .............. 8
3.4 Wiring .................................................................... 8
3.5 Electrical Connections - Supply Voltage ............... 8
3.5.1 Air Handler Only (Non-Heat Kit Models) ............. 9
3.5.3 Air Handler With Circuit Breaker Heat Kit ........... 9
3.6 Low Voltage Connections ...................................... 9
3.6.1 Thermostats ........................................................ 9
3.7 Speed Tap Adjustment ........................................... 9
3.7.1 Selecting Speed Taps 1-5 ................................... 9
3.7.2 Selecting Speed Taps 6-9 ................................... 9
3.7.3 AMST60DU1300** (ONLY) ................................ 10
4 Electric Heat .............................................................. 11
5 Airflow Data ............................................................... 13
6 Shipping Inspection ................................................. 15
6.1 Parts ..................................................................... 15
6.2 Handling ............................................................... 15
6.3 Shipping Material Removal................................... 15
6.3.1 Blower Support Bracket Removal ..................... 15
7 Codes & Regulations ............................................... 15
8 Replacement Parts ................................................... 15
9 Pre-Installation Considerations .............................. 16
9.1 Preparation ........................................................... 16
9.2 System Matches ................................................... 16
9.3 Interconnecting Tubing ......................................... 16
9.4 Clearances ........................................................... 16
9.5 Horizontal Applications ......................................... 16
9.6 Access .................................................................. 16
10 Installation Location ................................................. 16
10.1 Upflow Installation .............................................. 17
10.1.1 Motor Orientation ............................................. 17
10.2 Horizontal Left Installation .................................. 18
10.3 Horizontal Right Installation/Downflow Installation 18
10.4 Humid Environment Installations ........................ 19
10.4.1 All Installations - Humid Environments ........... 19
11 Refrigerant Lines ..................................................... 20
11.1 Tubing Size ......................................................... 20
11.2 Tubing Preparation ............................................. 20
11.3 Tubing Connections ............................................ 20
Contents
Advertisement
Table of Contents

Subscribe to Our Youtube Channel
Related Manuals for Maytag Amana AMST U1300 Series


Summary of Contents for Maytag Amana AMST U1300 Series
-
Page 1: Table Of Contents
11.1 Tubing Size ............20 11.2 Tubing Preparation ..........20 11.3 Tubing Connections ..........20 11.4 Thermal Expansion Valve System Adjustment ... 22 is a registered trademark of Maytag Corporation or its related companies and is used under license. All rights reserved. -
Page 2: Important Safety Instructions
12 Condensate Drain Lines ......... 24 WARNING 13 Ductwork ..............25 13.1 Return Ductwork ..........25 A REFRIGERANT LEAK DETECTION SYSTEM IS INSTALLED. 14 Return Air Filters ............. 26 THE UNIT MUST BE POWERED ON AT ALL TIMES EXCEPT 15 Achieving 1.4% Low Leakage Rate ....... 26 FOR SERVICE. -
Page 3: Wiring Diagrams
2 Wiring Diagrams HIGH VOLTAGE! ISCONNECT ALL POWER BEFORE SERVICING OR INSTALLING THIS UNIT ULTIPLE POWER SOURCES MAY BE PRESENT AILURE TO DO SO MAY CAUSE PROPERTY DAMAGE PERSONAL INJURY OR DEATH #18 GA. 4 WIRES WITH COOLING 3 WIRES WITHOUT AIR HANDLER TO CONDENSING UNIT 24V CONNECTION... - Page 4 2 Wiring Diagrams HIGH VOLTAGE! ISCONNECT ALL POWER BEFORE SERVICING OR INSTALLING THIS UNIT ULTIPLE POWER SOURCES MAY BE PRESENT AILURE TO DO SO MAY CAUSE PROPERTY DAMAGE PERSONAL INJURY OR DEATH SEE NOTE #4 #18 GA. 7 WIRE AIR HANDLER BL BL HEAT PUMP UNIT WITH OPTIONAL HEAT KITS OF 10 kW AND BELOW SEE NOTE #4...
- Page 5 2 Wiring Diagrams AMST**U1300** (1.5T - 4T) Wiring is subject to change. Always refer to the wiring diagram on the unit for the most up-to-date wiring.
- Page 6 2 Wiring Diagrams AMST60DU1300** Wiring is subject to change. Always refer to the wiring diagram on the unit for the most up-to-date wiring.
- Page 7 2 Wiring Diagrams 3 Phase Heat Kit HIGH VOLTAGE! ISCONNECT ALL POWER BEFORE SERVICING OR INSTALLING THIS UNIT ULTIPLE POWER SOURCES MAY BE PRESENT AILURE TO DO SO MAY CAUSE PROPERTY DAMAGE PERSONAL INJURY OR DEATH Wiring is subject to change. Always refer to the wiring diagram on the unit for the most up-to-date wiring.
-
Page 8: Electrical And Control Wiring
3 Electrical and Control Wiring 3.3 Maximum Overcurrent Protection (MOP) Every installation must include an NEC (USA) or CEC (Canada) approved overcurrent protection device. Also, IMPORTANT: The appliance shall be installed in check with local or state codes for any special regional accordance with national wiring regulations. -
Page 9: Air Handler Only (Non-Heat Kit Models)
3.5.1 Air Handler Only (Non-Heat Kit Models) with a 60 second off time delay. For details, refer to the IMPORTANT: Installation of Air Handler must follow any specification sheet applicable to your model. local codes/regulations. The manufacture recommends that when a heater kit is not installed, a field supplied 3.7.1 Selecting Speed Taps 1-5 (Not applicable to disconnect switch or breaker should be installed in the AMST60DU1300**) -
Page 10: Amst60Du1300** (Only)
BK jumper used to select speed Taps 6-9. (example Speed Tap 8 is selected) To 75V Transformer G W1 W2 Y1 O DH 1 2 3 4 5 To blower motor To Alternate Control Relay To Molex plug To Nighthawk To Alternate Control Relay Mini PCB Speed Taps 6-9 Wiring... -
Page 11: Electric Heat
4 Electric Heat HEAT KIT NOMINAL kW Refer to the installation manual provided with the electric 15 19/20 25 heat kit for the correct installation procedure. All electric heat must be field installed. Transformer must be detached during heater kit installation process. If installing this option, the ONLY heat kit that is permitted to be used is HKTS* 1000 series. - Page 12 Model Heater Kit (kW) AMST24BU1300 AMST30BU1300 1050 AMST36CU1300 1170 1170 1170 1170 1170 1345 1345 AMST42CU1300 1170 1170 1170 1170 1170 1345 1345 AMST48CU1300 1170 1170 1170 1170 1170 1345 1345 AMST60DU1300 1590 1590 1590 1590 1590 1715 1715 1930 *Airflows shown are to be considered the absolute minimum allowable for the Air handler and Heat kit combination.
-
Page 13: Airflow Data
5 Airflow Data CFM @ STATIC PRESSURE (IN W.C.) Speed Model AMST24BU1300 1045 1025 1100 1080 1035 1020 1030 1005 1215 1195 1155 1145 1105 1095 1045 1040 1070 1050 1005 AMST30BU1300 1185 1165 1125 1115 1070 1060 1015 1010 1070 1050 1005... - Page 14 NOTE: 1. Airflow data indicated is at 230V without air filter in place. 2. Static on table includes static from media filter. Motor Speed Tap should be selected with media filter included in static value. 3. The chart is for information only. For satisfactory operation, external static pressure must not exceed value shown on rating plate. 4.
-
Page 15: Shipping Inspection
6 Shipping Inspection Always transport the unit upright; laying the unit on its side or top during transit may cause equipment damage. The installer should inspect the product upon receipt for shipping damage and subsequent investigation is the responsibility of the carrier. The installer must verify the model number, specifications, electrical characteristics, and accessories are correct prior to installation. -
Page 16: Pre-Installation Considerations
WARNING HOMEOWNER SUPPORT DAIKIN COMFORT TECHNOLOGIES THE ONLY AUXILIARY DEVICES APPROVED BY THE APPLIANCE MANUFACTURING, L.P. MANUFACTURER OR DECLARED SUITABLE WITH THE 19001 KERMIER ROAD REFRIGERANT SHALL BE INSTALLED IN CONNECTING WALLER, TEXAS 77484 DUCTWORK. (855) 770-5678 The unit clearance from a combustible surface may be 9 Pre-Installation Considerations 0”. -
Page 17: Upflow Installation
downflow, horizontal left or horizontal right orientations as shown in Figures 10, 11, 12 and 13. The unit may be Drain Port Plug installed in horizontal left orientation as shipped (refer to Kit Number Description Application specific sections for more information). DPK1 Side Drain Port Plug All Models... -
Page 18: Horizontal Left Installation
DRIP SHIELD BRACKET 1. Before inverting the air handler, remove blower DRAIN PAN DRIP SHIELD access panel and coil access panel. The coil access EXTENSION panel and tubing panel may remain screwed together during this procedure. Refer to Figure 7. Remove and SIDE DRAIN PAN retain the seven (7) screws securing the coil access panel to the cabinet and the six (6) screws securing... -
Page 19: Humid Environment Installations
10.4 Humid Environment Installations NOTE: Each service kit mentioned in this instruction is available through your local distributor. The kits are not supplied with the air handler and must be used to assist with condensation management in humid environment applications. The individual installation instructions provided with each kit must be followed. -
Page 20: Refrigerant Lines
11 Refrigerant Lines Before breaking into the refrigerant circuit to make repairs – or for any other purpose – conventional procedures shall be WARNING used. Additionally, the following procedure shall be adhered DO NOT USE MEANS TO ACCELERATE THE DEFROSTING PROCESS OR TO CLEAN, OTHER THAN THOSE RECOMMENDED 1. - Page 21 Upper Tie Plate Control Deck Center Support Blower Screw Access Downflow Panel Bracket Blower Access Coil Panel Access Panel Tubing Panel Filter Bracket Coil Access Filter Panel Access Panel Tubing Panel External Part Terminology Internal Part Terminology Exploded view of external part Figure 15 Figure 14 Terminology for upflow...
-
Page 22: Thermal Expansion Valve System Adjustment
5. Insert liquid line set into liquid tube expansion and of at least 0,25 times the maximum allowable pressure. No slide grommet about 18” away from braze joint. leak shall be detected. (Should be leak tight) 6. Insert suction line set into suction tube expansion and slide insulation and grommet about 18”... - Page 23 The following information for the indoor unit should be Superheat Adjustments (Only if necessary) verified before attempting to charge system or adjust TXV if necessary. 1. Attach a pipe clamp thermometer near the suction line service valve at the outdoor unit. 1.
-
Page 24: Condensate Drain Lines
SATURATED SUCTION PRESSURE SATURATED LIQUID PRESSURE SUCTION PRESSURE SATURATED SUCTION SATURATED LIQUID LIQUID PRESSURE PSIG R-32 TEMPERATURE °F PSIG R-32 Table 15 Table 16 SUBCOOL FORMULA = 12 Condensate Drain Lines SAT. LIQUID LINE TEMP. - LIQUID LINE TEMP. SUPERHEAT FORMULA = The coil drain pan has a primary and a secondary drain SUCT. -
Page 25: Ductwork
If the secondary drain line is required, run the line necessary. This condensate pump should have provisions separately from the primary drain and end it where for shutting off the control voltage should a blocked drain condensate discharge can be easily seen. occur. -
Page 26: Return Air Filters
DO NOT LOCATE THE RETURN DUCTWORK IN • Auxiliary drain is installed when necessary and AN AREA THAT CAN INTRODUCE TOXIC, OR pitched to allow for drainage. OBJECTIONABLE FUMES/ODORS INTO THE • Unit is protected from vehicular or other physical DUCTWORK. - Page 27 send signals for the unit to perform these actions: LEAK DETECTION SYSTEM INSTALLED. UNIT MUST BE 1. Turn off the Thermostat POWERED EXCEPT FOR SERVICE. 2. Turn on the blower for air circulation RED LED'S STATUS (REFER I/O FOR RECOMMENDED ACTION) 3.
- Page 28 RED LED'S STATUS MODE Definition LED Flashing Pattern Recommended actions Notes: Slow LED flashing pattern Normal Operation No faults to report No action (2 seconds on and 2 seconds off) R32 leak is The controls and sensor are working R32 Leak Alarm currently being Fast LED Flashing Pattern properly.
- Page 29 AIR HANDLER AIR HANDLER HOMEOWNER’S ROUTINE MAINTENANCE RECOMMENDATIONS Replace or Clean Filter UV-C Part Numbers Models Lamp IMPORTANT NOTE: Never operate unit without a filter UC18S15-24 UCP-16013 installed as dust and lint will build up on internal parts UC18S15-24B UCP-16012 resulting in loss of efficiency, equipment damage and possible fire.
- Page 30 Motors several minutes on hot days. If you wait several minutes, the unit may begin operation on its own. Indoor and outdoor fan motors are permanently lubricated • Check the electrical panel for tripped circuit and do not require additional oiling. breakers or failed fuses.
-
Page 31: Start-Up Checklist
19 Start-Up Checklist Air Handler / Coil Model Number Serial Number ELECTRICAL Line Voltage (Measure L1 and L2 Voltage) L1 - L2 Secondary Voltage (Measure Transformer Output Voltage) R - C Blower Amps Heat Strip 1 - Amps Heat Strip 2 - Amps BLOWER EXTERNAL STATIC PRESSURE Return Air Static Pressure IN. - Page 32 You can also scan the QR code on the right for the product brand you purchased to be directed to the Product Registration page. AMANA BRAND ® is a registered trademark of Maytag Corporation or its related companies and is used under license. All rights reserved.
Need help?
Do you have a question about the Amana AMST U1300 Series and is the answer not in the manual?
Questions and answers
David DiMattia