Philips CDR 930 Manual
Audio cd-recorder
Hide thumbs
Also See for CDR 930:
- Specifications (2 pages) ,
- Service manual (98 pages) ,
- Service manual (98 pages)
Table of Contents
Advertisement
Quick Links
700+ series CD player
Technical Specifications CDR 930
General
• System
• Number of channels
• Applicable supply
• Power consumption
• Operating temperature
• Weight
• Dimensions
Audio
• Digital frequency range
• Playback S/N
• Playback dynamic range
• Play back total harmonic distortion
+ noise
• Recording S/N (Analogue)
• Recording S/N (Digital)
• Recording dynamic range
• Recording total harmonic distortion
+ noise
Output
• 1x Analogue line output
• 1x Digital coaxial output
Input (level adjustment)
• Direct line recording (bypass SRC) for 44.1 kHz +/- 100 ppm
• 1x Digital coaxial input (SRC)
• 1x Digital optical input (SRC)
• 1x Analogue input
Recording functions
• Recording on CD-R & CD-RW disc
• Records from all home stereo analogue and digital sources
• Auto start recording per disc, track
• Soft mute insert function
• Multi track erase (CD-RW disc)
• Erase disc (CD-RW disc)
• Auto finalise / unfinalise disc (CD-RW disc)
• Manual / Auto track increment
• Remaining recording time display
• Double speed finalising (make disc compatible to CD-player)
• SCMS (Serial Copy management system)
• RID code (Recorder Unique identifier)
Playback functions
• Plays all Audio CD's
(120 mm + 80 mm discs)
• Play - Introscan - Pause - Stop
• Direct track selection
• Track selection with easy jog
• Search forward / reverse
• Repeat (all / per track)
• Program play (99 tracks)
• Time display switching
• Permanent text option
Compact disc digital Audio (CD-recorder)
2 (stereo)
Multi voltage 100V -240V 50-60 Hz (/00 only) 117V (/17)
15W (<= 6W in standby)
5-35°C
4 kg
264 x 305 x 86 mm (w x d x h)
2 Hz - 22,05 kHz
100 dB (A- weighted)
95 dB
91 dB (0,0039%)
98 dB (A- weighted)
Recording quality equal to Source
92 dB
85 dB (0,0079%)
2 Vrms +/- 2 dB / 0.2 kΩ
0.5 V(pp) / 75Ω
12 - 56 kHz / 0.5Vrms / 75Ω
12 - 56 kHz
500 mVrms / 50 kΩ = 0 dB
Accessories
• Remote control + batteries
(DR570 only)
• Audio cable (x2)
• Digital coaxial cable (x1)
• AC mains cord
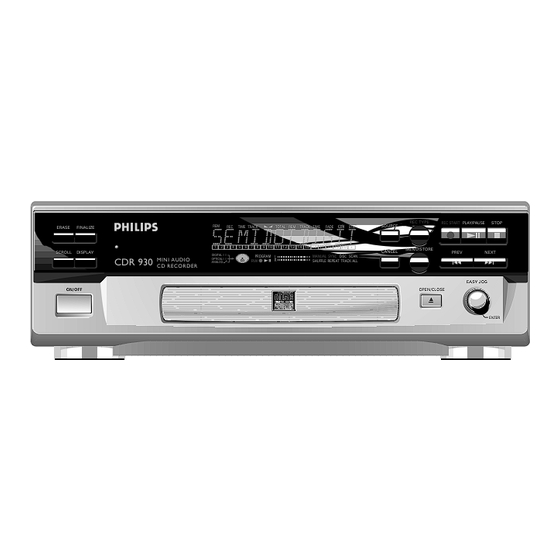
Audio CD-Recorder
CDR 930
REC TYPE
REM
REC
TIME
TRACK
TOTAL
REM
TRACK
TIME
FADE
STEP
SOURCE
ERASE
FINALIZE
1
2 3 4
5
6
7 8
9
10 11 12 13 14 15 16 17 18 19 20 +
MENU/STORE
SCROLL
DISPLAY
CANCEL
DIGITAL
I I
PROGRAM
MANUAL
SYNC
DISC
SCAN
CDR 930
MINI AUDIO
OPTICAL
I I
ANALOG
CD
RW
SHUFFLE REPEAT
TRACK
ALL
CD RECORDER
ON/OFF
Recordable
REC START
PLAY/PAUSE
STOP
PREV
NEXT
EASY JOG
OPEN/CLOSE
ENTER
Advertisement
Table of Contents

Related Manuals for Philips CDR 930


Summary of Contents for Philips CDR 930
- Page 1 700+ series CD player Audio CD-Recorder Technical Specifications CDR 930 CDR 930 General • System Compact disc digital Audio (CD-recorder) • Number of channels 2 (stereo) • Applicable supply Multi voltage 100V -240V 50-60 Hz (/00 only) 117V (/17) • Power consumption 15W (<= 6W in standby)
- Page 2 00/COVER 12T 09-08-1999 12:54 Pagina 2 GENERAL INFORMATION LASER Type Semiconductor laser GaAlAs Wave lenght 775~795 nm (at 25° C) Advarsel: Output Power 2,5 mW (Read) Usynlig laserudstråling ved åbning når sikkerhedsafbrydere er 35 mW (Write) ude af funktion. Undgå udsættelse for stråling. Beam divergence 60 degree.
- Page 3 00/COVER 12T 09-08-1999 12:54 Pagina 3 CONTENTS English ............5 Français..........27 Español ..........49 Deutsch..........71 Nederlands ...........93 Italiano..........115 Svenska..........137 Dansk ..........159 Suomi..........181 Português..........203 ŒÏÏËÓÈο .........225 Polski...........247...
- Page 4 00/COVER 12T 09-08-1999 12:54 Pagina 4 NOTES...
-
Page 5: Table Of Contents
TABLE OF CONTENTS Table of contents GENERAL INFORMATION AND DISCS Welcome ..............6 About this manual............6 Technical data ..............6 Discs for recording............7 Discs for playback............7 Maintenance ..............7 Accessories ..............7 CONTROLS AND CONNECTIONS Controls on the front............8 Connections at the back ..........8 DISPLAY DISPLAY indications.............9 DISPLAY messages ............9... -
Page 6: Welcome
Welcome ! Thank you for buying this Philips Compact Disc Recorder. In the eighties Philips invented a new audio system - the CD. The CD (compact disc) revealed to you the new dimensions of digital sounds and added to the pleasures of audio. -
Page 7: Discs For Recording
CDRW compatible CD players and ReWritable cloth. Do not use any cleaning recorders. In the course of 1999 most Philips CD players and agents as they may have a corrosive recorders will be CDRW compatible. effect. -
Page 8: Controls And Connections
CONTROLS AND CONNECTIONS 11 12 13 14 15 16 17 18 ENTER MAI NS OU T AN ALO G OU T DIG ITA L OPT ICA L ENTER (push) ....- plays selected tracks Controls on the front - selects settings in Menu mode - programs track numbers 1 ON/OFF ......turns the CD recorder ON and OFF ( OPEN/CLOSE /..opens/closes disc tray... -
Page 9: Display
DISPLAY DISPLAY indications DISPLAY messages Messages, as listed and explained here, may appear on the display for your guidance. TIME TRACK TOTAL TRACK TIME FADE STEP General READING......reading disc information 2 3 4 9 10 11 12 13 14 15 16 17 18 19 20 OPEN........during tray opening DIGITAL PROGRAM... -
Page 10: Menu Messages
DISPLAY FINALIZED CD ....when trying to record on a MENU messages - See Menu mode finalized CDR or a prerecorded CD UNFINALIZE/ ....when trying to record on a PRESS ENTER finalized CDRW TIME TRACK TOTAL TRACK TIME FADE STEP PROF SOURCE ....when a professional source is connected 2 3 4 9 10 11... -
Page 11: Installation
We have described the most common ways of connecting the amplifier e.g. TAPE IN, CDR or AUX. CD recorder. If you still have difficulties with the connections you can always contact the Philips Consumer Service desk in Note: Never use the PHONO input. your country. -
Page 12: Digital Coaxial Connections
INSTALLATION Digital coaxial connections Digital optical connections Digital coaxial connection is only required in case you wish to Digital optical connection is only required in case you wish to record from a CD player with a digital coaxial output. record from a CD player with a digital optical output. C D R E C C D R E C O R D E R... -
Page 13: Power Supply
INSTALLATION Power supply Inserting batteries in the remote control 1 Plug the power cord supplied into the MAINS connector on the CD recorder, then into a mains socket. 2 Press ON/OFF. The recorder is now in Standby mode. 1 Open the battery compartment cover. 3 Press any key to activate the recorder. -
Page 14: Remote Control
• If a CDR(W) is finalized it will show on the display. CDR ........selects CD recorder CD ........selects CD player, can be used to • If CD-text is available the TITLE/ARTIST will scroll by. control a separate Philips CD player 2 ........starts CD(RW) play TIME TRACK TOTAL... -
Page 15: Recording
RECORDING Remarks about recording Recording modes You will soon discover how easy it is to make your own CDs. Your recorder offers several recording modes. Nevertheless, it is advisable to use a CDRW disc for your first - RECORD DISC - to make a synchronized recording of the try. -
Page 16: Autostart Recording
RECORDING Start autostart recording Autostart recording 1 To start recording, press PLAY on the selected source. The CD recorder automatically starts to record and d lights continuously. • If, however, you start the source during a track, recording starts at the beginning of the next track or after 2.7 seconds of silence in analog recordings. -
Page 17: Manual Recording
RECORDING 3 With the recorder stopped, press REC TYPE three times to Manual recording enter the Manual Record standby mode. starts to flash and the display shows REC MANUAL MANUAL. TOTAL FADE TIME TRACK TRACK TIME STEP ENTER DIGITAL PROGRAM MANUAL SYNC SCAN... -
Page 18: Finalizing Cdr & Cdrw Discs
RECORDING Important: Unfinalizing CDRW discs If you want to play the recorded CDR disc on any regular CD player, it must first be finalized. See For CDRW discs only. finalizing discs. If you want to make more recordings (or erasures of tracks) on a finalized disc you must unfinalize it first. -
Page 19: Erasing Cdrw Discs
RECORDING To erase the entire disc: Erasing CDRW discs 1 Press ERASE twice. The display shows the number of tracks and their total playing time. ERASE DISC and PRESS RECORD light up. • If the disc is finalized, appears on the display after ENTER inserting a CDRW in the recorder. -
Page 20: Playing
PLAYING Selecting a track when CD play is stopped Playing a CD 1 Turn the EASY JOG/ENTER key until the required track number appears on the display. 2 Press EASY JOG/ENTER or ENTER on the remote control to confirm or press PLAY/PAUSE 2 ; to start playing. ENTER 1 Key in the required track number using the numerical keys on the remote control. -
Page 21: Shuffle (Random Order) Play
PLAYING PROGRAMMING Shuffle (random order) play Remarks about programming 1 Press SHUFFLE on the remote control before or during CD • You can program up to 99 tracks to play in any desired play to start shuffle play. sequence. The tracks on the CD (or program if set) play in random order. -
Page 22: Menu Mode
PROGRAMMING MENU MODE Clearing a program Remarks about Menu mode 1 Press STOP 9 if necessary to stop programmed play. 2 Press STOP 9 again to clear the program. disappears from the display. PROGRAM • The program is also cleared if you open the disc tray. MENU/ PROG. -
Page 23: Text Settings
MENU MODE 4 Press EASY JOG/ENTER or ENTER on the remote control to Text settings confirm. The display will ask you to reconfirm your selection. Storing names 5 Press EASY JOG/ENTER or ENTER on the remote control to 1 Select the TEXT EDIT submenu. reconfirm. -
Page 24: Recording Settings
MENU MODE Recording settings Auto track increment Balance (Only active in Record/Standby mode) 1 Select the SET BALANCE submenu. 1 Select the AUTO TRACKING sub menu. AUTO TRACK appears on the display. SET BALANCE appears on the display. 2 Press EASY JOG/ENTER or ENTER on the remote control to 2 Press EASY JOG/ENTER or ENTER on the remote control to confirm. -
Page 25: Fixing Problems
FIXING PROBLEMS Will not record TROUBLESHOOTING • clean the disc • check if CDR(W) is an unfinalized disc If your CD recorder is defective, it is wise to check this list • check that the disc is recordable and replace first.
Need help?
Do you have a question about the CDR 930 and is the answer not in the manual?
Questions and answers