Table of Contents
Advertisement
Quick Links
XPD-724
Operations
Manual
Operations and Maintenance Methods
• Unauthorized copying or duplication of the whole or part of the contents of this manual is prohibited.
• Every care has been taken in writing the contents of this manual, but please contact STS or the dealer you purchased the
product from if you find any unclear, erroneous or otherwise unsatisfactory content in the manual.
• Please be aware that STS will not be liable in any way for failures or accidents that result from handling or operating the
printer according to any procedures other than those set forth in this manual.
• Company names and product names that appear in this manual are registered trademarks of the respective companies.
Advertisement
Table of Contents

Related Manuals for STS XPD-724

Summary of Contents for STS XPD-724
- Page 1 • Please be aware that STS will not be liable in any way for failures or accidents that result from handling or operating the printer according to any procedures other than those set forth in this manual.
- Page 2 Warranty Limitations • STS Inks warrants part repair or replacement as a sole measure only if a failure is found in the system or in the materials and workmanship of the product the seller produced. However, if the cause of failure is uncertain, decide the action after due mutual consultation.
-
Page 3: Table Of Contents
Contents Chapter 1 Basic Operations Introduction............. 6 Name of each part . - Page 4 Chapter 3 Maintenance Maintenance ............44 Checking ink and replacing ink cartridge .
- Page 5 Displaying the Printing Preferences screen of printer driver ....8 MSM Setup XPD-724....................9 Powering ON/OFF ..........14 Turning the power ON.
-
Page 6: Introduction
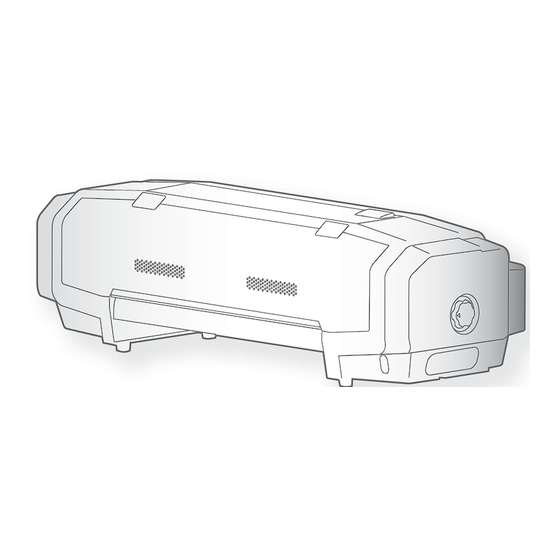
Introduction Introduction Name of each part Printer’s main body Media fixing knob Front cover Open when mounting media Turn when mounting and or during maintenance. removing media. Media pressure arm Carriage Hold media to the platen. It A print head and cutter are links with the media fixing built-in. -
Page 7: System Configurations Of This Product
9 kg or less Cautions when handling film • Please use recommended film. Contact STS sales for recommended film. • Be cautious of expansion and contraction of media from temperature and humidity. After opening an unopened media, leave the media for approximately 30 minutes to adjust to environments. -
Page 8: Displaying The Printing Preferences Screen Of Printer Driver
Cautions in using this product Please use this product periodically It is recommended to use this product once a week. When left unused for a long time, the print head nozzles can get clogged causing damage. Conduct periodic maintenance This product requires daily maintenance. •... -
Page 9: Mutoh Status Monitor Setup
MSM Setup / Initial Registration Upon the initial launch of MSM (formerly VSM) you will be faced with the following screen. 1. Click Start to commence, and untick the ValueJet Club Service. - Page 10 2. Click Save 3. If you did not previously register a printer you may do so now...
- Page 11 4. Click Add+ 5. Click Search Printer...
- Page 12 6. Enter a printer name, select the printer and then click Enter 7. Click Yes to register 8. Click OK to complete the registration / XPD-724 / XPD-724...
- Page 13 9. Click End to finish the setup MSM will now open.
-
Page 14: Powering On/Off
Powering ON/OFF Powering ON/OFF Turning the power ON Close the front cover. Press the power button of this product to turn the power ON. Press! • The blue light becomes ON. • This product starts its initialization operations. Turning the power OFF Make sure printing is finished. -
Page 15: Printing
Printing Printing Setting up media Remove the 3 inches adaptor and media stopper (movable) from the scroller. Note When using a roll media with 3 inches paper tube diameter, leave the 3 inches adaptor on. Attach a roll media to the scroller. Note •... - Page 16 Let the roll media pass through the paper feed slot. • Open the front cover. • Pull out the media roller from the front side of the product. Note If the media gets loose, rewind the scroller to correct the looseness. Turn the media fixing knob to lock.
-
Page 17: Adjusting Image Quality
Adjusting image quality For the following cases, please conduct this adjustment. • Using this product for the first time. • Changing a media type. For any other cases, please proceed to "Nozzle check and cleaning" on page This adjustment corrects print shifting that can be generated during bidirectional printing per media type. Bidirectional printing The print head goes back and forth on media during printing. - Page 18 Display the Printing Preferences screen of printer driver. "Displaying the Printing Preferences screen of printer driver" on page 8 Click the [Adjustment] tab under the [Utility] tab. Click [Adjust Print] • The remote panel of XPD-724 Status Monitor (MSM) launches. Note MSM can be launched directly.
- Page 19 Enter [Thickness] ([µm]) in [1. Media thickness], and click [Setting]. • Enter the thickness of a set media. Checking picture quality Click [Start] in [2. Confirmation]. • Patterns are printed. Check from Pattern A to Pattern F, and if there are shifting problems, proceed to "Rough adjustment"...
- Page 20 Rough adjustment Click [Start] in [3-1 Pattern Print] of [3. Rough Adjustment]. • Patterns are printed. Look for and mark a number printed under a pattern that has least shifting in Pattern A. • The same pattern (A to F) is printed repeatedly in the center and both edges of media. Bi-dir Low H.
- Page 21 Micro adjustment Click [Start] in [4-1 Pattern Print] of [4. Micro Adjustment]. • Pattern A to Pattern F are printed. Similar to “2. Rough adjustment”, mark a number printed under the pattern that has the least shifting. • Mark on Pattern A to Pattern F. Bi-dir Low H.
-
Page 22: Correcting Paper Feed
Correcting paper feed For the following cases, please conduct this adjustment. • Using this product for the first time. • Changing a media type. For any other cases, please proceed to "Nozzle check and cleaning" on page A ruler is used for this adjustment. Please prepare a commercially available ruler. Note When the following defects are found in printing results, they may improve by conducting a paper feed correction. - Page 23 Click [Start] in [PF Adjust] of the [Media Setting] tab. • The [PF Adjust] window opens. Select the length ([mm]) of [1-1 Pattern Print] in [1. Initial Adjust], and click [Start]. • Select a length that can be measured with a prepared ruler. When a pattern is longer, a precision level improves. •...
- Page 24 Enter a measured length to the length ([mm]) of [1-2. Initial Change], and click [Start]. • The initial change value is saved. • Please proceed to "Confirming adjustment" on page Confirming adjustment In [2. Confirm Adjust], select a length ([mm]) of [2-1. Pattern Print] from the dropdown menu, and click [Start]. •...
- Page 25 Using a ruler, measure the length between “+” in the pattern. • In the example below, the measured place is shown in blue dotted lines and arrows (the blue parts are not actually printed). Confirm the measured length. • If the measured length matches the length selected in Step 1, proceed to "Micro adjustment"...
- Page 26 Enter the checked value in Step 2 to [3-2. Micro Change], and click [Start]. • The micro change value is saved. • This completes the paper feed correction. Note The micro change value saved in Step 3 becomes the pattern’s standard value. For example, if “-0.50”...
-
Page 27: Nozzle Check And Cleaning
Display the Printing Preferences screen of printer driver. "Displaying the Printing Preferences screen of printer driver" on page 8 Click [Nozzle Check] in the [Utility] tab under the [Utility] tab. • The “XPD-724 window opens. Note The same can be also done with the remote panel of MSM. - Page 28 Cleaning steps Click [Cleaning] in the [Utility] tab under the [Utility] tab. • The [Head Cleaning] window opens. Note The same can be also done with the remote panel of MSM. Select [Normal] and click [Start]. • A cleaning starts. Conduct a nozzle check, again.
-
Page 29: Starting Printing
Starting printing In this section, a method to print from the printer driver is explained. Open printing data from application software to execute printing. Open the print setup screen of the XPD-724 printer driver from the application software. Conduct print setup. -
Page 30: Pausing/Restarting Printing
Pausing/Restarting printing During printing, short press the operation key on the operation panel. • The printing pauses. Press! • Press the operation key again to restart the printing. Note • In this operation, printing data sent to the product are not deleted. •... -
Page 31: Forwarding/Rewinding Media
Forwarding/Rewinding media Forwarding/Rewinding media Forwarding/rewinding media from printer driver/MSM Display the Printing Preferences screen of printer driver. "Displaying the Printing Preferences screen of printer driver" on page 8 Click [Media Feed] in the [Printer Control] under the [Utility] tab. • The remote panel of MSM launches. -
Page 32: Cutting Media
Cutting media Cutting media Cutting from the operation panel Check printing is done. Press and hold the operation key on the operation panel for 2 seconds or more. Press! • The built-in cutter in the product cuts the media. Cutting from printer driver/MSM Check printing is done. -
Page 33: Cutting By Hand
Cutting by hand For media that cannot be cut with the built-in cutter in the product, please cut following the next steps. Check printing is done. Feed the media to a position where printing results can be cut. "Forwarding/Rewinding media" on page 31 Open the front cover, and cut the media with a commercial available cutter. -
Page 34: Cutting Automatically
Cutting automatically In this product, a setup is possible to cut media automatically after printing is done. Refer to the setup methods described below. "Setting auto cut" on page 38... -
Page 35: Chapter 2 Advanced Operations
Chapter 2 Advanced Operations Changing head height ......... . 36 Releasing pressure arms individually . -
Page 36: Changing Head Height
Changing head height Changing head height If media is lifted or when printing that use a large amount of ink is conducted, the media rubs against the print head and becomes dirty. In such a case, it may improve by setting the print head height high. When the print head height is changed, always conduct image quality adjustment. -
Page 37: Releasing Pressure Arms Individually
Releasing pressure arms individually Releasing pressure arms individually When printing on thin media or media without stiffness, the media rubs against the print head and becomes dirty. In such a case, it may improve when releasing the pressure arms holding both sides of media. When releasing the pressure arms individually, always conduct paper feed correction. -
Page 38: Advanced Settings
Advanced settings Advanced settings Settings in this product can be changed to match your usage. Only a part of functions is introduced here. For usage functions of software, please refer to help or manual of software. "Displaying Help or Manual" on page 11 Setting auto cut It can be set to cut media automatically, when printing is done. - Page 39 Select a cut method from the [Method of Cut] menu. There are following modes in the [Method of Cut] menu. Single Cut - 2 steps Cut with fewer steps than “Single Cut - 3 steps”. Suitable for media with narrow width. Single Cut - 3 steps By default, this cut method is used.
-
Page 40: Setting The Vacuum Fan
Setting the vacuum fan When printing on thin media or media without stiffness, it can prevent wrinkles or media jamming, if the vacuum fan is set to Low. Steps Display the Printing Preferences screen of printer driver. "Displaying the Printing Preferences screen of printer driver" on page 8 Click [Advanced...] in the [Basic] tab. -
Page 41: Setting The Heater
Setting the heater Functions of the heater are to warm up media before and after printing to improve print quality and promote fast drying. If the heater setting is changed matching the thickness or material of media, better results can be obtained. Steps Display the Printing Preferences screen of printer driver. - Page 43 Chapter 3 Maintenance Maintenance ........... 44 Checking ink and replacing ink cartridge .
-
Page 44: Maintenance
"Inside cleaning" on page 57 When not used for a week or more Weekly "Head cleaning" on page 51 Important! Since a service technician has to handle following cases, please contact your local STS dealer. • Emergency mode is happening repeatedly. -
Page 45: Checking Ink And Replacing Ink Cartridge
Checking ink and replacing ink cartridge Checking ink and replacing ink cartridge Checking ink level Display the Printing Preferences screen of printer driver. "Displaying the Printing Preferences screen of printer driver" on page 8 Click the [Utility] tab under the [Utility] tab. Click [Status Monitor]. -
Page 46: When It Becomes Time To Replace Ink Cartridge
When it becomes time to replace ink cartridge When the ink level becomes low, the error LED of the operation panel flashes and a buzzer sounds. Steps Short press the operation key on the operation panel. Press! • The buzzer stops. Check the ink cartridge that needs to be replaced. -
Page 47: Replacing Ink Cartridge
Replacing ink cartridge When ink level becomes low, the error LED of the operation panel flashes and a buzzer sounds. Printing pauses temporarily. It restarts after changed with a new ink cartridge. Steps Short press the operation key on the operation panel. Press! •... - Page 48 Important! • Do not replace ink cartridge when the power of this product is OFF. Ink level cannot be detected correctly. • If ink cartridge is moved from cold to warm place, leave it at least 3 hours. WARNING Leave ink cartridges away from fire or high temperature objects. It may cause fire.
-
Page 49: Emptying Waste Ink Tank
Emptying waste ink tank Emptying waste ink tank When a certain amount of ink is used, the error LED in the operation panel of this product becomes ON, and a buzzer sounds. Pour waste ink inside the waste ink tank to PET bottle, and discharge. CAUTION •... - Page 50 Pull out the tip of the waste ink tube. • Insert the waste ink tube into a container. • Turn the valve so it's aligned in the direction of the tube to open. • Pour waste ink into the container. •...
-
Page 51: Cleaning Each Part
Cleaning each part Cleaning each part To use this product always in its best condition, please clean periodically. Head cleaning When nozzle clogging is found in nozzle check, conduct head cleaning. Head cleaning consumes ink. There are several cleaning modes in this product. Please use them accordingly based on your usage condition. Short cleaning Consumes less ink than Normal cleaning. - Page 52 Conduct Nozzle Check. • If nozzle clogging still remains, repeat cleaning and nozzle check. Note • When nozzle clogging remains even after repeating normal cleaning several times, conduct Long cleaning. • When nozzle clogging remains even after repeating Long cleaning several times, conduct clean wiper blades and print head circumference •...
-
Page 53: Cleaning Of Cleaning Wiper
Cleaning of cleaning wiper Cleaning period: • Weekly • When print blurring and dot missing remain after head cleaning is done. Preparation: • Cleaning stick Steps Display the Printing Preferences screen of printer driver. "Displaying the Printing Preferences screen of printer driver" on page 8 Click the [Utility] tab under the [Maintenance] tab. - Page 54 Short press the operation key on the operation panel. • The carriage moves to the maintenance position inside the front Press! cover. Open the front cover. Important! When cleaning the cleaning wiper, please note the followings. • Use a cleaning stick in dry condition. If moisten with water or solution, it can cause damage to the print head. •...
-
Page 55: Cleaning Of Print Head Circumference
Cleaning of print head circumference Cleaning period: • Weekly • When print blurring and dot missing remain after head cleaning is done. Preparation: Cleaning stick Important! During cleaning, please note the followings. • Use a cleaning stick in dry condition. If moisten with water or solution, it can cause damage to the print head. •... - Page 56 Click [Start]. Short press the operation key on the operation panel. • The carriage moves to the maintenance position inside the front Press! cover. Open the front cover. Look at the bottom side of the carriage and check if dusts and ink Print head circumference lump are adhered.
-
Page 57: Inside Cleaning
Inside cleaning Cleaning period: • Monthly Steps Check the power is OFF. Open the front cover. Important! Immediately after turning off the power, the temperature of the heater in this product is very high. Touch the platen or media guide and if it is too hot, wait for a while before starting cleaning. Brush off dusts on the pressure arms with a soft brush. -
Page 58: Replacing Consumable Parts
Replacing consumable parts Replacing consumable parts Replacing absorption material for the flushing box The flushing box is a part that keeps receiving ink discharged from the print head. Please replace the absorption material for the flushing box periodically. If used without replacing, it can cause damage to the print head. Cleaning period: •... - Page 59 Click [CR Maintenance]. • The MSM remote panel opens. Note • MSM can be launched directly. dire Click [Start]. Short press the operation key on the operation panel. • The carriage moves to the maintenance position inside the front Press! cover.
- Page 60 Close the front cover. [10] Short press the operation key on the operation panel. Press! • The carriage moves to the original position inside the front cover.
-
Page 61: Replacing Cutter
Replacing cutter When the cutter blade becomes dull, replace with a new cutter. • Do not push the knob of cutter or release suddenly. CAUTION Because there is a spring under the cutter, the cutter can jump out. • Do not touch the cutter blade. It may cause injury. -
Page 62: Transporting And Long-Term Storage
Transporting and long-term storage Transporting and long-term storage Please refer to this section when transporting or storing this product for a long time. Transporting When transporting this product, it is necessary to wash inside with cleaning cartridge, discharge waste ink and fixate the print head with packaging material. - Page 63 Click [Start] in the [Longstore] tab. • Conduct head cleaning following the screens. • After head cleaning is done, do not conduct re-launching and initial charging. Empty the waste ink tank. "Emptying waste ink tank" on page 49 Turn the power button of this product OFF. Press! •...
- Page 64 Repacking Remove all cables like power cable. Open the front cover. Attach the head fixing plate with screws. Move the paper guides to the center and place taping. Turn the media fixing knob to release the lock. Attach the roller protective sheet. Turn the media fixing knob to lock.
- Page 65 Close the front cover. Remove 2 media guides. × 2 [10] Remove 2 tying bands. [11] Attach protection materials, and place the product inside the package...
- Page 66 Reinstalling Referring to “Startup Guide” , unpack the product and assemble. • Conduct up to “Starting Setup” . Conduct initial charging. "Initial charging" on page 67...
-
Page 67: Initial Charging
Initial charging Turn the power button of this product ON. Press! • Blue light becomes ON. • The product starts initialization operations. Display the Printing Preferences screen of printer driver. "Displaying the Printing Preferences screen of printer driver" on page 8 Click the [Maintenance] tab under the [Utility] tab. - Page 68 When ink cartridges are inserted to the cartridge slots, remove them all. Insert cleaning cartridge to all cartridge slots. • The arrow should face up. • Insert all the way to the end. • Start charging cleaning fluid After cleaning fluid charging is done, remove all cleaning cartridges. •...
- Page 69 [11] Insert ink cartridge to this product. • Match the label of this product to the color of ink cartridge. slot 1 • The arrow should face up. slot 1 • Insert all the way to the end. Note • After all ink cartridges are inserted, this product starts ink charging. [12] IIn the [Finish] screen, click [Back].
-
Page 70: Storing For A Long Time
Storing for a long time When not using for a long time, conduct head washing and discharging of waste ink. "Transporting" on page 62 "Head cleanining and discharging waste ink" When used again, conduct initial charging. "Initial charging" on page 67... -
Page 71: Chapter 4 Appendix
Chapter 4 Appendix Troubleshooting ..........72 Handling messages/error messages. -
Page 72: Troubleshooting
Troubleshooting Troubleshooting Handling messages/error messages Checking message/error/warning MSM is used to check error/warning when problem happens and to check messages while the product is operating correctly. Launch MSM. "Launching MSM" on page 9 Check [Status Info.]. • Message/error/warning contents are displayed. •... - Page 73 Emergency mode When a serious error happens, the data LED and error LED in the operation panel flash simultaneously, and the buzzer sounds in a fixed interval. Short press the operation key on the operation panel, when the buzzer continues sounding. Press! •...
- Page 74 Checking failure contents of the emergency mode Launch MSM. "Launching MSM" on page 9 Check [Printer Information] and [Detail Info.]. • Contents of serious errors and countermeasures are displayed.
-
Page 75: Specifications Of This Product
Specifications of this product Specifications of this product Drawing area a=5 mm *1 *2 b=5 mm to 25 mm *3 c=5 mm d=5 mm to 25 mm *3 *1 After media initial and manual feedback, and pasting prevention process, printing starts at 15 mm. -
Page 76: List Of Specifications
List of specifications Model name XPD-724 Print method On demand piezo method Drive method Firmware servo/DC motor drive Paper feed method Horizontal conveyance, roll paper, set from the back of the product, front discharge paper with paper feed operation, limited to outward roll... - Page 77 Power supply Voltage AC 100 V to 120 V ±10 % or 200 V to 240 V ±10 % specifications Frequency 50 / 60 Hz ±1 Hz Capacity No less than 10 A Power consumption Power off AC100 V to 120 V, 1 W or below AC200 V to 240 V, 1.1 W or below.
Need help?
Do you have a question about the XPD-724 and is the answer not in the manual?
Questions and answers