
Related Manuals for Insignia MC-ID175


Summary of Contents for Insignia MC-ID175
- Page 1 FINAL FOR PRINT User Manual Product Name: Induction Cooker Model: MC-ID175, NS-IC2ZBK7 Manufacture: UL-CCIC Company Limited Before using your new product, please read these instructions to prevent any damage.
-
Page 2: Table Of Contents
Table of Contents Safety information Features Package contents Cooktop Control panel Cookware compatibility Assembling your cooktop Installing your cooktop Positioning your cooktop Installing your cooktop Using your cooktop Checking pan compatibility Using touch controls Cooking with your cooktop Using the timer Locking the control panel Cleaning and maintenance Troubleshooting... -
Page 3: Safety Information
Safety information Important - Save for the local electrical inspector's use. CAUTION RISK OF ELECTRIC SHOCK DO NOT OPEN This symbol indicates that dangerous voltage constituting a risk of electric shock is present within your cooktop. This symbol indicates that there are important operating and maintenance instructions in the literature accompanying your cooktop. - Page 4 10. To disconnect, turn any control to “off,” then remove the plug from the wall outlet. 11. Do not use the appliance for other than its intended use. 12. Do not attempt to modify or extend the power cord of this appliance. 13.
- Page 5 SAVE THESE INSTRUCTIONS WARNING Electric Shock Hazard Failure to follow these instructions can result in electric shock, fire, or death. Additional safety concerns 1. Never heat foods in sealed containers, such as compressed products, cans, or coffee pots, to avoid explosion caused by heat expansion. 2.
- Page 6 12. When using the cooktop, place it horizontally and allow at least 4.7 in. (12 cm) of free space between the sides and back of the cooktop and the wall. Do not use the cooktop in narrow spaces. To avoid overheating, do not cover the ventilation opening.
- Page 7 25. Warning: We suggest that you periodically check to make sure that there are no objects (glass, paper, or similar items) that could obstruct the inlet under your cooktop. 26. Warning: Keep electrical appliances out of reach from children or persons with reduced physical, sensory, or mental capabilities or lack of experience and knowledge.
-
Page 8: Features
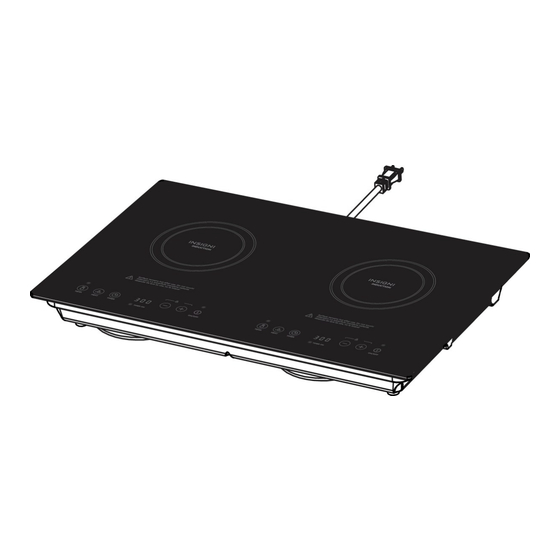
Features Glass cooktop evenly distributes heat 10-stage power levels and 3-hour timer for versatile use Feather-touch controls for easy operation Temperature protection and child lock provide added safety Package contents Induction Cooktop Fan covers (2) User Guide Cooktop www.insigniaproducts.com... -
Page 9: Control Panel
Control panel Cookware compatibility Hold a magnet to the bottom of your cookware. If it clings, it will usually work with your cooktop: Works Does not work Cast iron, iron, Glass, ceramic, aluminum, steel/stainless steel, copper, and other non- enameled iron magnetic materials Use a pan with a flat bottom. -
Page 10: Assembling Your Cooktop
Assembling your cooktop 1. Carefully turn the cooktop upside down. 2. Push the fan cover connectors into the holes next to the fans until you hear a click. Note The connectors are different sizes. If they don't fit in the holes, turn the fan cover 180°. -
Page 11: Installing Your Cooktop
Installing your cooktop Follow these instructions to install the cooktop into your counter. Make sure that your cooktop is properly installed by a qualified technician. Positioning your cooktop Before cutting, make sure that your cooktop will have: At least 30” (76.2 cm) between the cooktop and overhead surfaces At least 6”... -
Page 12: Installing Your Cooktop
Installing your cooktop Note When cutting, use tools that are appropriate for your counter and cupboard. 1. Cut a 23.3 × 14.2 in. (59.1 × 36.1 cm) hole into the top of your counter. 2. Cut a 8 × 1 in. (20.3 × 2.5 cm) hole into the front of your cupboard to vent your cooktop. - Page 13 3. Cut a 20 × 1.2 in. (50.8 × 3.0 cm) hole into the back wall of your cupboard to vent your cooktop. Make sure that the cut is centered and 1 in. (2.5 cm) from the surface of your counter. 4.
-
Page 14: Using Your Cooktop
IMPORTANT INSTRUCTIONS Using your cooktop Note After the first use, it is normal for white spots to appear on the bottom of your pan. See Cleaning and maintenance (on page 17) for more information. Checking pan compatibility Hold a magnet to the bottom of your cookware. If it clings, it will usually work with your cooktop. - Page 15 2. Plug the power cord into a power outlet. Note Do not use an extension cord to connect your cooktop. If the power cord is too short, have a qualified electrician or serviceman install an outlet near the appliance. 3. Place a pan on the cooktop. 4.
-
Page 16: Using The Timer
Using the timer Use timer mode with temperature or heat mode to select how long you want the cooktop to run. 1. While in temperature mode, press TIMER. The “timer” indicator lights up and “0:00” blinks on the screen. 2. Press to adjust the time duration. -
Page 17: Cleaning And Maintenance
Cleaning and maintenance Cleaning your pans After the first use, it is normal for white spots to appear on the bottom of your pan. To remove the spots, pour vinegar into your cookware, heat it to about 140-176°F (60-80°C), then wipe the spots away with a brush. Cleaning your cooktop Before cleaning, turn off the cooktop and wait until the cooktop is cool. - Page 18 Problem Solution Make sure that you are using a compatible pan. Cookware compatibility (on page 9). Make sure that the pan's bottom is flat, centered, and large enough for the cooking zone. The cooktop cannot detect smaller pans. Make sure that the pan's diameter is at least 4.7 in. (12 cm).
- Page 19 Problem Solution The main sensor has an open circuit. If the error persists, bring your cooktop to a repair technician to be fixed. The main sensor has short circuited. If the error persists, bring your cooktop to a repair technician to be fixed. The main sensor is too hot: If the cooktop is hot, wait for it to cool.
-
Page 20: Specifications
Specifications Dimensions 24.4 × 15 × 2.8 in. (62.0 × 38.1 × 7 cm) Weight 14.1 lbs. (6.4 kg) Voltage 12V AC, 60 Hz Left burner: 1440W Wattage Right burner: 1440W Both burners: 1440W Country of origin China Legal Notices FCC statement This equipment has been tested and found to comply with Part 18 of the FCC Rules. -
Page 21: One-Year Limited Warranty
Product is determined to be defective by an authorized Insignia repair center or store personnel, Insignia will (at its sole option): (1) repair the Product with new or rebuilt parts; or (2) replace the Product at no charge with new or rebuilt comparable products or parts. - Page 22 (burn-in). Damage due to incorrect operation or maintenance Connection to an incorrect voltage or power supply Attempted repair by any person not authorized by Insignia to service the Product Products sold “as is” or “with all faults” Consumables, including but not limited to batteries (i.e. AA, AAA, C etc.)
- Page 23 REPAIR REPLACEMENT AS PROVIDED UNDER THIS WARRANTY IS YOUR EXCLUSIVE REMEDY FOR BREACH OF WARRANTY. INSIGNIA SHALL NOT BE LIABLE FOR ANY INCIDENTAL OR CONSEQUENTIAL DAMAGES FOR THE BREACH OF ANY EXPRESS OR IMPLIED WARRANTY ON THIS PRODUCT, INCLUDING, BUT NOT LIMITED TO, LOST DATA, LOSS OF USE OF YOUR PRODUCT, LOST BUSINESS OR LOST PROFITS.
- Page 24 FCC Caution. This product has been tested and found to comply with the limits for Induction Cooker, pursuant to Part 18 of the FCC Rules. This product can radiate radio frequency energy, which could cause interference to such products as radio, TV, baby monitor, cordless phone, Bluetooth, wireless router, etc., which can be confirmed by turning this product off and on.
Need help?
Do you have a question about the MC-ID175 and is the answer not in the manual?
Questions and answers