Table of Contents
Advertisement
Advertisement
Chapters
Table of Contents

Related Manuals for Palfinger PK 32080

Summary of Contents for Palfinger PK 32080
- Page 3 Dear Customer, Many thanks for choosing to a PALFINGER product. We have done everything to ensure optimal and safe opera- tion in the design and production of your crane. To ensure that your crane works reliably and economi- cally for many years, please observe the following: •...
- Page 4 Inhalt...
- Page 5 Contents Inhalt Safety Instructions It is also in your own interest to observe these instructions very carefully. Before operation of the crane This chapter provides you with important safety instructions which must be followed each time before starting operation. Start operation of the crane This chapter gives you all the necessary information to properly start operation of your crane.
- Page 6 Inhalt...
-
Page 7: Table Of Contents
Safety Instructions Chapter 1 ONTENTS 1.1. VERVIEW OF DANGERS 1.1-1 ULES FOR THE AVOIDANCE OF DANGERS 1.2. REREQUISITES 1.2-1 SYMBOL 1.2-2 SSEMBLY ACCEPTANCE AND REGULAR INSPECTION OF THE CRANE UNIT 1.2-3 EQUIREMENTS FOR THE OPERATING PERSONNEL 1.2-4 AFETY DEVICES NOT TO BE TAMPERED WITH 1.2-5 RANE OPERATION IN ADVERSE OPERATING CONDITIONS 1.2-6... -
Page 8: Overview Of Dangers
Overview of dangers 1.1-1... -
Page 9: Rules For The Avoidance Of Dangers
Select the adequate control stand. Pick up and secure loads in the due and proper manner. Use of load lifting gear and ancillary equipment supplied by PALFINGER. Secure attachment of ancillary equipment. Adherence to the max. lifting capacity of the crane, ancillary equipment and load lifting gear. -
Page 10: Prerequisites
1.2-2 Assembly, acceptance and regular inspection of the crane unit The crane must be assembled according to the valid assembly rules of PALFINGER. The valid Installation Instructions may be obtained from the responsible general representative. After successful crane mounting the vehicle still has to be stable throughout the entire working area of the crane. -
Page 11: Requirements For The Operating Personnel
Prerequisites 1.2-3 1.2-3 Requirements for the operating personnel Operation of the crane requires skill, ability and experience. Therefore only entrust persons with the operation of the crane, • who are physically and mentally suitable (not tired, and not under the influence of alcohol, drugs or medication). -
Page 12: Use For Intended Purpose / Limits Of The Device
To attach loads to other positions on the crane than the intended ones. • Any excavating work with a grab. • To transport persons. Exception: Transporting persons in the PALFINGER workman basket. Local laws and regulations shall be observed. Matching workman baskets are available from all PALFINGER partners. -
Page 13: Safety And Health Standards
Safety and Health Standards 1.3-1 1.3. Safety and Health Standards 1.3-1 Avoid danger of crushing Avoid operating situations in which there is a risk of you or bystanders being crushed by the crane, the support system or load. The crush point is not regarded as a danger point for the body parts stated if the safety distances highlighted below are complied with and it is ensured that the next-biggest body part cannot penetrate. -
Page 14: Noise Emission
Safety and Health Standards 1.3-3 1.3-3 Noise emission Permanent low or short high noise emission levels endanger the health of operators and bystanders. Main source of noise: Vehicle motor. Protective measures: Ear protection. Operators have to comply with the relevant national noise control standards and laws. Measuring values On operating stands of loading cranes which are mounted to Diesel motor vehicles (also in case of remote control operation within 1 m from the vehicle) the sound pressure level depends on vehicle... -
Page 15: Keep Distance From Power Lines
Safety and Health Standards 1.3-4 1.3-4 Keep distance from power lines Keep the required minimum distances away from power lines. If this is not possible because of the particular work being carried out the lines must be disconnected (switched off). Neither the appearance nor the height of electric power lines indicates their voltage. -
Page 16: Action In The Event Of Flashover
Safety and Health Standards 1.3-5 1.3-5 Action in the event of flashover If the crane touches a power line only your correct reaction can prevent a serious accident. If you touch the crane, vehicle or load or if you try to leave your location you will put youself in acute danger of fatal injury. -
Page 17: Action In The Event Of Defects
Safety and Health Standards 1.3-6 1.3-6 Action in the event of defects Observe the crane during operation for any sudden signs of any defects. If you discover the following damage or defects to the crane, ancillary equipment, load lifting gear or the carrier vehicle you must stop crane operation immediately: •... - Page 18 Safety and Health Standards 1.3-6...
- Page 19 Before operation of the crane Chapter 2 Contents 2.1 Visual Inspections 2.1-1 Daily visual inspection 2.1-2 Daily functional tests of safety devices...
- Page 20 1.1-1 Visual Inspections...
- Page 21 2.1-1 Visual Inspections Visual Inspections Daily visual inspection Check the crane and its mounting once daily for visible defects, damages or alterations. Carry out this inspection very carefully every time: alterations or damages not detected because of carelessness or old habits are a major source of accidents. Carefully check: •...
- Page 22 1.1-2 Visual Inspections...
- Page 23 Starting up the crane Chapter 3 CONTENTS 3.1. N OVERVIEW OF THE CRANE Set Up 3.1-1 3.1-2 Controls 3.1-3 Cold start in low outside temperatures 3.1-4 Supporting the vehycle properly 3.1-5 Hydraulically extendable outriggers Putting crane into operating position 3.1-6...
- Page 24 3.1-1 An overview of the crane...
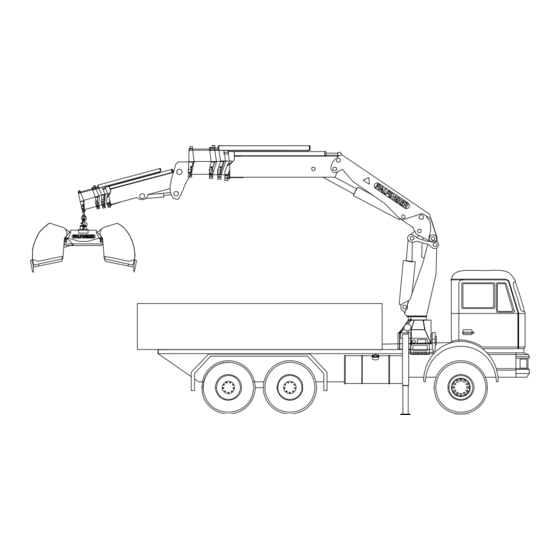
- Page 25 An overview of the crane 3.1-1 3.1. An overview of the crane 3.1-1 Set-up Controls (Crane) 10 Crane column Control valve 11 Main cylinder Slewing mechanism, limited 12 Hook Shackle bolts 13 Main boom Base 14 Outer boom cylinder Balance 15 Outer boom Support cylinder 16 Extension cylinder...
- Page 26 3.1-2 An overview of the crane 3.1-2 Controls The symbols for the controls are explained below. The sequence of crane functions (symbols) may deviate on your control stand from the example presented below. Observe, therefore, the symbol arrangement (crane functions) on the control stand of your crane. Floor control, raised-seat linear control, remote linear control Crane function: Slewing right...
- Page 27 An overview of the crane 3.1-2 Crane function: Outrigger on operator side retracting extending Crane function: Outrigger opposite operator side retracting extending Crane function: Support cylinder on operator side retracting extending Crane function: Support cylinder opposite operator side retracting extending...
- Page 28 3.1-2 An overview of the crane Crane function: extendable arm extending retracting Crane function: Ancillary grab opening closing Crane function: Ancillary rotator right left Crane function: Ancillary fly-jib arm lowering raising...
- Page 29 An overview of the crane 3.1-2 Crane function: Ancillary fly-jib extendable arm extending retracting Kranfunktion: Zusatzgerät Seilwinde down Switch between support operation, crane operation and emergency-Off: Crane operation Support operation...
- Page 30 3.1-2 An overview of the crane Display field with key switch for cranes with Paltronic 50 (Paltronic display on remote control panel) Emergency-Off Key-operated switch for switching OLP–button and for cranes with an between remote control console and outreach of more than 12 metres also manual operation (emergency control the warning horn.
- Page 31 An overview of the crane 3.1-3 3.1-3 Cold start in low outside temperatures In outside temperatures below freezing: • Switch on the pump unit at lowest motor speed. • Let the oil pump around without pressure for a few minutes so that it warms up a little.
- Page 32 An overview of the crane 3.1-4 Working in arm positions beyond 60° (near vertical arm position, rope winch operation, fly-jib operation) When working crane position beyond 60° the vehicle has to be completely levelled. The bubble must be within the inner circle. When the vehicle is more than 1,5°...
- Page 33 This will prevent the crane from sinking into the ground during loading or unloading work. Suitable supports can be obtained from PALFINGER. Other supports used by you must not break or sink under the loadings that occur when working with the crane. Supporting the vehicle on manhole covers is prohibited.
- Page 34 An overview of the crane 3.1-4 If the support width is inadequate or if the support sinks into the ground the danger of the vehicle tipping over is acute. In order not to add to the load on the support when loading the vehicle the support cylinders must be retracted as required.
- Page 35 An overview of the crane 3.1-5 3.1-5 Hydraulically extendable outriggers Before extending the outriggers ensure that there are no persons and no objects in the movement area of the outriggers and support cylinders (for minimum distances see Chapter 1.3). You have to extend the outriggers to the full bride, before supporting the crane (The yellow mark has to be full visible).
- Page 36 An overview of the crane 3.1-6 Pull the crane into working position: The main boom has to be pulled to steep position, before extend the boom extensions. It exist a critical life risk, if the boom extensions will be pulled out before the main boom is in steep position.
- Page 37 An overview of the crane 3.1-6 1. Extending crane without catch hook in the hinged arm (PK14080, PK18080, PK23080, PK32080): Fold the hinged arm a short amount inwards. Put the boom in steep position. Fold the hinged arm outwards until it is horizontal.
- Page 39 Crane operation Chapter 4 CONTENTS 4.1. URING CRANE OPERATION 4.1-1 ORKING AREA 4.1-2 ORKING POSITION CRANE 4.1-3 BEARING BOOM POSITIONS 4.1-4 ONITORING THE TEEP OSITION 4.2. OADING ACTIVITY 4.2-1 OADING ACTIVITY 4.2-2 BSERVE LOAD LIMITS 4.3. AVETY DEVICES 4.3-1 MERGENCY CUT FF BUTTON 4.3-2 50 –...
-
Page 40: During Crane Operation
4.1-1 During crane operation... -
Page 41: Working Area
During crane operation 4.1-1 4.1. During crane operation 4.1-1 Working area Select your working area so that: • you can complete the crane movements without being hindered by trees, masts, lines or other objects. • while you are working you are not hindered by any other work going on, and that you do not endanger other peoples’... -
Page 42: Working Position Crane
4.1-2 During crane operation 4.1-2 Working position crane Lifting capacity, life time and wear of a crane are also depending on the working position. When workingin inadequate working positions (e.g. steep boom angles) the bolts and bearings are under higher stress than in adequate positions. If the load or accessories rub on the load-bearing boom during operation, this will damage crane and ancillary equipment. -
Page 43: Load-Bearing Boom Positions
During crane operation 4.1-3 4.1-3 Load-bearing boom positions Lower limit range: When working with loads do not lower the main boom down to the lower stop. In this position the overload protection is not functional. Avoid working with main boom positions below 0° as working positions. Maximum load moment is not reached. - Page 44 4.1-3 During crane operation Position of load-arm boom over 60° to 80° (upper limit range, near-vertical position) If the load-arm is positioned in more than 60°: • jerky and quick crane movements • overstretching of outer boom or/and fly-jib may cause the load-arm to overextend (to the side or back). This implies risk of the load to dropp and risk of fatal injury for the operator and others.
- Page 45 During crane operation 4.1-3 Working with cable winch operation or long load attachments • If the load arm of the crane is in a near-vertical position, retract the hydraulic extension booms before picking up or setting down the load. • Lifting loads using the cable.
-
Page 46: Monitoring The Steepp
4.1-4 During crane operation 4.1-4 Monitoring the Steep Position Conditions for monitoring the steep position: 1. Crane with six or more boom extensions. 2. Crane with fly jib. Function If the outer boom and / or fly jib reaches an angle of: 60°... -
Page 47: Loading Activity
Loading activity 4.2-1 4.2. Loading activity 4.2-1 Loading activity Only use the crane for lifting loads and never for freeing, hitting, pulling (dragging) loads, pressing or driving against solid obstacles or for towing vehicles. Any angled hoisting is prohibited. Futhermore, the country-specific regulations for truck loading crane operation are to be observed. In a deviation from the set-up as a truck loading crane (e.g. -
Page 48: Observe Load Limits
4.2-2 Loading activity If the crane is operated with several functions at the same time, please note that if one function is switched off the working speed of the remaining functions can increase. When the main boom is below the horizontal line (area A) the maximum lifting power can not be reached. - Page 49 Loading activity 4.2-2 Never exceed the lifting capacities stated on ancillary equipment and on load lifting gear. When using sling ropes, sling chains and lifting straps observe the loading table of the respective manufacturer. In working with mechanical extensions the permissible lifting capacity of the extension used determines the maximum permissible lifting capacity.
-
Page 50: Savety Devices
4.3-1 Savety devices 4.3. Savety devices 4.3-1 Emergency cut Off button If the Emergency-Stop button is pressed because of a dangerous situation, all crane functions are stopped after 0.5 seconds (500 ms). Emergency cut-off button Should, a dangerous situation arise unexpectedly while operating the crane, push the emergency cut-off button immediately until it is arrested. -
Page 51: Overload Protections
Savety devices 4.3-2 4.3-2 Overload Protection System Paltronic 50 – crane control panel Different signallers notify the Paltronic system of an overload situation (overload crane, overload fly-jib, overload cable winch etc.) As soon as an overload situation arises and one of the prohibited functions is activated, the crane is blocked (depending on the crane’s position all functions that increase the load capacity are no longer possible). - Page 52 4.3-2 Savety devices Emergency stop If one of the emergency stop buttons on the crane is pressed, the power supply of the crane dump valve gets is cut and the crane cannot be operated anymore. To restart the crane, each function has to be in a neutral position. On/Off button Paltronic 50 should be connected to the power take off switch of the truck.
- Page 53 HPLS system (Only in combination with ground control) The PALFINGER HPLS increases the capacity of a crane by 10%. If your crane is equipped with an HPLS system this can be activated when required using the appropriate button on the Paltronic 50 control panel .
- Page 54 4.3-2 Savety devices Function „Danger Signal“ The crane can be fitted with a warning horn. How to give a signal: • press the OLP button more then half second. • the horn sounds until the button gets released again. Overload through peak pressure Whenever the main boom or the fly-jib is fully extended and thus the capacity limit is activated (the crane is not really in overload in this situation), the crane can be moved (all functions except extension of fhe crane and fly-jib) for 1.5 seconds by pressing the...
-
Page 55: Overload Protection Crane
Savety devices 4.3-3 4.3-3 Overload protection crane The overload protection on the crane is activated when the crane is in an overload situation, i.e. the pressure in the lifting cylinder exceeds its permissable level. The overload is shown on the control panel via a LED (red light). -
Page 56: The Logic Behind Locked Functions
4.3-5 Savety devices 4.3-5 The logic behind locked functions If the Paltronic systems registers danger (overload situation, electronic fault), various crane functions are locked depending on the situation. Reasons for locked functions A) Reaching adjusted limits • Crane or fly-jib reaches its full capacity. •... - Page 57 Savety devices 4.3-5 The following examples describe which functions are locked in an overload situation: Example for overload on the crane: • lower main boom • lower outer boom • extend extension boom Example for overload on the fly-jib: • lift main boom •...
-
Page 58: Transport Position Monitoring System
4.3-6 Savety devices Status indication The Paltronic 50 basic model includes a status display which permanently shows the current operating status on a 2-digit, 7-segment display. If there is an operational disruption, your service centre can determine the cause of the disruption from the code shown on this display. - Page 59 If the crane is in emergency operation status, you have the opportunity to put the crane into the transport position. (You must then visit an authorised PALFINGER workshop immediately). The equipment (bridging bolt) for putting the crane into emergency operation is always located on the Emergency-cut-off solenoid valve.
- Page 60 • Emergency off – the by-pass screw must be sealed again in the service centre. • Visit a PALFINGER service workshop immediately to have the fault repaired. It is not permissible to continue to operate the crane.
-
Page 61: Ancillary Equipment
Ancillary equipment 4.4-1 4.4. Ancillary equipment 4.4-1 Slew-angle dependent lifting capacity system SHB01 Paltronic attains a further load limit with the code SHB01 (slewing limitation system) which enables a reduced area of lifting power. SHB01 is necessary when the vehicle is unstable in some areas. This is set-up by the body-builder. Once the SHB load limit has been reached, the LED “overload reduced load limit”... - Page 62 4.4-2 Ancillary equipment 4.4-2 Slew-angle dependent lifting capacity system SHB07 With the code SHB07 (SHB slewing limitation) Paltronic has an additional load limit, which enables reduced lifting capacity. SHB07 is necessary when the vehicle is not stable in all areas. This is programmed into the system by the body-builder.
- Page 63 Ancillary equipment 4.4-2 Not supported vehicle If the vehicle is not supported, it may only function connected with the ISC system. Generally no loads can be lifted in such a state. It is however possible to lift the crane out of its transport position to make access possible for service repairs.
-
Page 64: Load Lifting Gear And Ancillary Equipment
In addition to the crane operating instructions, the operating instructions for load lifting gear or ancillary equipment used must be applied. For some ancillary equipment special tackle from PALFINGER must be used and mounted according to the following sketch, as otherwise damage in the area of load lifting cannot be excluded (loss of warranty!). -
Page 65: Hook
Check the hook for obvious damages or wear every time before use. • If the hook is damaged have it checked immediately in a PALFINGER service workshop. • Use only those crane hooks which are adjusted to crane and load. - Page 66 4.4-4 Ancillary equipment Working with hydraulic ancillary equipment A range of ancillary equipment (grab, rotator, etc.) is operated hydraulically. Before using ancillary equipment the respective maximum permissible operating pressure must be noted. The hydraulic system of the ancillary equipment is coupled to the crane’s hydraulic system with threaded couplings.
- Page 67 Ancillary equipment 4.4-4 Multifaster The plug, guide bolt and coupling have to be cleaned every time before starting the Multifaster. Connecting the Multifaster: • Switch off the pump. • Render lines pressure-free by operating the control lever. Open the protective lid (1) until it locks. Press the safety button (2) and open the tightening lever (3).
- Page 68 Inadequately secured mechanical extensions represent a danger of fatal injury to you and other people. Always use the bolts and spring pins provided by PALFINGER. The maximum load capacity of the crane is always determined by the weakest load taking element.
-
Page 69: Grab Operation
Ancillary equipment 4.4-5 Overload protection device for extensions: The overload protection device for extensions allows you to operate the mechanical extensions (two maximum) with the overload protection. Working with overload protection device for extensions: • Disassemble the crane hook. • Assemble the overload hook (secure with bolt). -
Page 70: Cable Winch
Whenever you use the crane in cable winch operation, the vehicle must be secured horizontally. Use only PALFINGER rope winches, ropes and winch components (deflecting rollers, pulley heads, attaching and safety material, etc.) for the rope winch operation. - Page 71 Ancillary equipment 4.4-6 Before start of work (load boom already in working position) install the rope winch components: If crane movements are operated accidentally and/or the safety distances are not kept there is acute danger of fatal injury. Operate the emergency-cut-off switch between one assembly step and the next one. Assemble the pulley head: Move the main boom in horizontal position and the outer boom in vertical position.
- Page 72 4.4-6 Ancillary equipment Winch components with plastic pulleys: When operating the winch with plastic pulleys the rope may tear off unexpectedly after longer times of operation. Falling down loads may cause acute danger of fatal injury. Always use minimum one steel pulley. When using plastic pulleys exclusively, the inner braid stands may break before the outer braid stands after longer times of use.
- Page 73 Ancillary equipment 4.4-6 When working with the rope winch without any overload protection make sure that: • Do not overload the rope winch with the lifting power of the crane. • Do not overload the crane components / accessory equipment such as hydraulic extendable arms, mechanic extensions, pulley head, etc.
- Page 74 4.4-6 Ancillary equipment • On a cable winch with safety device it is ensured that when the rope is wound off at least 3 turns remain on the drum and that the rope is not snapped by unintentional shortening (extending the extension booms).
- Page 75 Ancillary equipment 4.4-6 Loading and unloading work in rope pulley operation or with long load suspension (observe load limits): Use the rope winch only to lift loads. Any diagonal pull is prohibited. Always work with the lowest possible load moment also in rope pulley operation (long load suspension). This way you increase the safety of the loading or unloading procedure and the useful lifetime of your crane.
- Page 76 4.4-6 Ancillary equipment If the load arm of the crane is in a near-vertical position, retract the hydraulic extension booms before picking up or setting down the load. Lift the load without extending the extension booms. Lift the load only far enough so that it does not bump against the load arm.
-
Page 77: Rope Winch Maintenance
Ancillary equipment 4.4-7 On completing rope winch operation (load-bearing boom still in working position): • Lower the load-bearing boom to execute the following jobs. • Disassemble the bottom hook block and store it properly. • Unreeve the rope, shackle in the rope in the holder (on the knuckle boom), secure it properly. •... - Page 78 4.4-7 Ancillary equipment Rope discarding: If a rope is damaged so that it can be no longer used it must be discarded. Check the rope at the place where it is most damaged. Test length Number of visible wire breakages 6 * Rope diameter 30 * Rope diameter Also in the case of lasting deformations such as abrasion or necking (rope diameter minus 10%),...
- Page 79 Ending crane operation Chapter 5 CONTENTS 5.1. NDING CRANE OPERATION 5.1-1 UTTING CRANE IN TRANSPORT POSITION 5.1-2 ETRACTING THE SUPPORT 5.1-3 ETRACTING THE SUPPORT CYLINDERS 5.2. FTER CRANE OPERATION 5.2-1 ECURING AND TRANSPORTING THE LOAD...
-
Page 80: Ending Crane Operation Chapter
5.1-1 Ending crane operation... -
Page 81: Putting Crane In Transport Position
Ending crane operation 5.1-1 5.1. Ending crane operation 5.1-1 Putting crane in transport position In your activity observe all the safety instructions in Chapter 1. Cranes with floor control stand: cranes with floor control stand must be put into transport position from A control stand. - Page 82 5.1-1 Ending crane operation Putting crane in transport position: • Push the extensions in and secure them as described in Chapter 4. If extensions are not properly retracted and secured they can slide out of the hydraulic extendable arms and then represent a high risk of accident for you and others.
- Page 83 Ending crane operation 5.1-1 • Slew the crane across the direction of travel, observe the marking (retraction arrows) on the crane pillar and crane base. • Fold in the extendable arm until the load arm rests in the support for it on the crane base.
- Page 84 5.1-1 Ending crane operation Cranes without catch hook in the hinged arm: • Put the main boom in upright position. • Retract the extendable arms until they stop. • Fold in the hinged arm completely. • Slew the crane across the direction of travel, observe the marking (retraction arrows) on the crane pillar and crane base.
-
Page 85: Retracting The Support
Ending crane operation 5.1-2 5.1-2 Retracting the support Retract the support cylinders individually so that you always have the danger area in view. Lift any swivel supports and bolt and secure them properly. When retracting the support outriggers and when slewing the hinged supports upwards observe the minimum distances specified under 1.3-1. -
Page 86: After Crane Operation
5.2-1 After crane operation 5.2. After crane operation 5.2-1 Securing and transporting the load Secure the load in accordance with the regulations before starting the trip. Before starting to drive check: • if the hydraulic pump is off. • that the load is securely fixed and doesn’t protrude over the vehicle. •... - Page 87 Maintenance and service Chapter 6 CONTENTS 6.1. AINTENANCE 6.1-1 ARRANTY PROVISIONS 6.1-2 HECKING BOLTED CONNECTIONS 6.1-3 AINTENANCE SCHEDULE 6.1-4 UBRICATION 6.1-5 PERATING OURS OUNTER 6.1-6 YDRAULIC FLUIDS 6.1-7 IL CHANGE IL MAINTENANCE 6.2. ARE OF THE CRANE 6.2-1 LEANING AGENTS AND EQUIPMENT 6.2-2 EPAIRING PAINT DAMAGE 6.2-3...
-
Page 88: Maintenance
6.1-1 Maintenance... -
Page 89: Warranty Provisions
Maintenance 6.1-1 6.1. Maintenance 6.1-1 Warranty provisions Guarantee and service work (see service manual) may be performed solely by one of our authorized service centres. Maintenance work (see Operating Instructions Chapter 6) are performed by the customer (crane operator) every 50 hours and, additionally, by the service centre at every servicing. When performing the servicing, our service centres determine again and again that our recommendations regarding maintenance and lubrication of the crane are not followed at all or are followed carelessly. -
Page 90: Maintenance Schedule
6.1-3 Maintenance 6.1-3 Maintenance schedule Maintenance (by customer, crane operator) every 50 hours or after more than 3 months of non-operation and carried out during every servicing by an authorized service centre. Snap-on bolts, outrigger locking device Crane pillar bearing / Gear rack (360° swivel) Bearing of elevating and hinged cylinder, hinge pin Boom bearing Hinged arm bearing... - Page 91 Maintenance 6.1-3...
-
Page 92: Lubrication
6.1-4 Lubrication The following maintenance and care instructions apply to all Palfinger cranes. In this Chapter you will therefore find instructions which do not relate to your crane. Inadequate or incorrect lubrication leads to increased wear and therefore to unnecessary repairs (idle time) to the crane. - Page 93 Before lubricating the pillar bearing raise the boom to its full height so that the lubricaton grease can spread evenly in the bearings. The pillar bearing should be lubricated via the lubrication points provided by Palfinger. If you lubricate by means of central lubrication ensure that adequate lubrication takes place.
-
Page 94: Operating Hours Counter
6.1-5 Maintenance Surplus grease is a source of accidents caused by slipping and also contaminates the environment. As most of the lubrication points on the crane involve lubrication loss (grease is consumed or enters the environment), we recommend the use of biodegradable greases. -
Page 95: Hydraulic Fluids
• neutrality in contact with seals and hydraulic hoses. As the viscosity of hydraulic fluids changes considerably through fluctuations in temperature, compromises cannot be avoided in their selection. For your PALFINGER crane the following limit values apply: ISO standard temperature Temperature °C... -
Page 96: Oil Change / Oil Maintenance
6.1-7 Maintenance Owing to different basic products different service temperatures apply: • Fluids based on mineral oil: -30 bis +80°C • Biodegradable fluids: Fully synthetic ester: -30 bis +80°C Native ester: -20 bis +80°C Fluids based on rape oil: -20 bis.+65°C The ideal operating temperature of the hydraulic fluid is between 30°C and 60°C. -
Page 97: Care Of The Crane
Care of the crane 6.2-1 6.2. Care of the crane 6.2-1 Cleaning agents and equipment Regular expert care will serve to preserve the value of your crane. How often the crane needs to be washed depends on how frequently it is used, the season, weather influences. etc.. Road salt, oils, dust, etc. -
Page 98: Repairing Paint Damage
6.2-2 Care of the crane 6.2-2 Repairing paint damage If you discover paint damage on your crane, you must take care of it immediately. Damaged places must be sanded off and coated with a primer before painting. 6.2-3 Removal from service and disposal If the crane is taken out of service and dismantled from the vehicle its parts must be disposed of properly. - Page 99 Technical Description Chapter 7 Contents Specifications Lifting capacity diagrams Weights and centers of gravity Hydraulic diagrams Rope winch Risks and hazards...
- Page 100 Fehler! Kein Text mit angegebener Formatvorlage im Dokument.
Need help?
Do you have a question about the PK 32080 and is the answer not in the manual?
Questions and answers