Table of Contents
Advertisement
Available languages
Available languages
Advertisement
Table of Contents

Related Manuals for Kooper 5917144

Summary of Contents for Kooper 5917144
- Page 2 TRATTAMENTO DEL DISPOSITIVO ELETTRICO ED ELETTRONICO A FINE VITA INFORMAZIONE AGLI UTENTI PER IL CORRETTO SMALTIMENTO DEL PRODOTTO AL SENSI DELLA DIRETTIVA EUROPEA 2012/19/EU E DEL D.LGS N. 49/2014. CARO CONSUMATORE, È IMPORTANTE RICORDARTI CHE, COME BUON CITTADINO, AVRAI L’OBBLIGO DI SMALTIRE QUESTO PRODOTTO NON COME RIFIUTO URBANO, MA DI EFFETTUARE UNA RACCOLTA SEPARATA.
-
Page 3: Avvertenze Generali Di Sicurezza
AVVERTENZE GENERALI DI SICUREZZA • IL FABBRICANTE SI RISERVA IL DIRITTO DI APPORTARE AL PRODOTTO QUALSIASI MODIFICA CHE POSSA ESSERE RITENUTA NECESSARIA O UTILE, SENZA INFORMARNE IN QUESTA IFU. • PRIMA DI METTERE IN FUNZIONE LA SUA NUOVA LAVATRICE, LEGGA ATTENTAMENTE QUESTE ISTRUZIONI E LE CONSERVI PER RIFERIMENTI FUTURI. - Page 4 DA UNA PERSONA RESPONSABILE DELLA LORO SICUREZZA E SOLO DOPO ESSERSI ACCERTATI CHE ABBIANO COMPRESO I PERICOLI DERIVANTI DALL’ U SO. • I BAMBINI DEVONO ESSERE TENUTI SOTTO CONTROLLO PER EVITARE CHE GIOCHINO CON L’ A PPARECCHIO. PRECAUZIONI E RACCOMANDAZIONI GENERALI •...
- Page 5 • IL SIMBOLO SUL PRODOTTO, O SUI DOCUMENTI CHE ACCOMPAGNANO IL PRODOTTO, INDICA CHE QUESTO APPARECCHIO NON PUÒ ESSERE TRATTATO COME UN RIFIUTO CASALINGO, MA DEVE ESSERE CONSEGNATO AL PUNTO DI RACCOLTA DEDICATO PER IL RICICLAGGIO DELLE APPARECCHIATURE ELETTRICHE ED ELETTRONICHE. LO SMALTIMENTO DEVE ESSERE EFFETTUATO IN CONFORMITÀ...
- Page 6 PER TOGLIERE LA SPINA DALLA PRESA DI CORRENTE. • SVOLGERE COMPLETAMENTE IL CAVO DI ALIMENTAZIONE ELETTRICA PRIMA DI METTERE IN FUNZIONE L’ A PPARECCHIO. • NON EFFETTUARE COLLEGAMENTI TRAMITE PROLUNGHE O DOPPIE SPINE. • NON LASCIARE MAI SCORRERE IL CAVO DI ALIMENTAZIONE SUSPIGOLI TAGLIENTI;...
- Page 7 UMIDO. NONUSARE SOLVENTI O DETERSIVI ABRASIVI. PERICOLO LESIONI! • SE IL CAVO DI ALIMENTAZIONE È DANNEGGIATO, ESSO DEVE ESSERE SOSTITUITO DAL PRODUTTORE, DAL SUO SERVIZIO DI ASSISTENZA O DA PERSONALE QUALIFICATO AL FINE DI EVITARE SITUAZIONI OGNI RISCHIO. • SI DEVE UTILIZZARE IL NUOVO SET DI TUBI FORNITO IN DOTAZIONE CON L’...
- Page 8 GETTONI. • NON LASCIARE L’ A PPARECCHIO COLLEGATO QUANDO NON È IN USO. NON INSERIRE O DISINSERIRE MAI LA SPINA DALLA RETE ELETTRICA SE SI HANNO LE MANI BAGNATE. • CHIUDERE IL RUBINETTO QUANDO LA LAVATRICE NON È IN USO. •...
-
Page 9: Descrizione Delle Parti
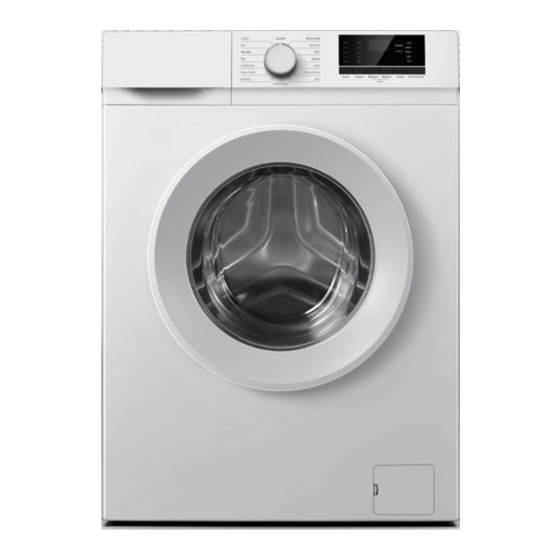
1. DESCRIZIONE DELLE PARTI Parti Pannello di controllo 1. Manopola di selezione dei programmi (posizione superiore on/of) 2. Display 3. Tasto smart 4. Spie avanzamento ciclo 5. Tasto avvio/pausa 6. Tasti funzioni ausiliarie 7. Tato di regolazione della centrifuga 8. Tasto di regolazione della temperatura... -
Page 10: Installazione
2. INSTALLAZIONE Per l’installazione del prodotto, rivolgersi al servizio di assistenza autorizzato più vicino. Per il corretto utilizzo della macchina, consultare il manuale. Prima di chiamare il servizio di assistenza autorizzato, assicurarsi che l’ e lettricità, l’ a cqua del rubinetto e i sistemi di drenaggio dell’ a cqua siano conformi all’installazione. - Page 11 2.3 Rimozione del rinforzo dell’imballaggio e dei bulloni di sicurezza di blocco cestello Attenzione: non rimuovere i bulloni di sicurezza di blocco cestello prima di aver tolto il rinforzo dell’imballaggio. EFFETTUARE QUESTA OPERAZIONE PRIMA DELLA RIMOZIONE DEI BULLONI DI SICUREZZA DI BLOCCO DEL CESTELLO. RIMOZIONE DEL RINFORZO DELL’IMBALLAGGIO.
- Page 12 tra 1 A 10 bar (0,1 - 1 MPa) Se la pressione dell’ a cqua dovesse essere superiore, installare un riduttore di pressione. Attenzione: i modelli con un unico ingresso per l’ a cqua non devono essere collegati al rubinetto dell’ a cqua calda. In tal caso, il bucato potrebbe rovinarsi oppure la lavatrice potrebbe passare in modalità...
- Page 13 • Per impedire il reflusso dell’ a cqua sporca all’interno della lavatrice ed agevolare lo scarico, non immergere il tubo nell’ a cqua sporca o non inserirlo per più di 15 cm nello scarico. • L’ e stremità del tubo non deve essere piegata, calpestata e non devono esserci schiacciamenti tra lo scarico e la lavatrice.
- Page 14 2.7 Collegamento elettrico Collegare il prodotto ad una presa a terra protetta da un fusibile di protezione 16 A. Acuna responsabilità sarà ascrivibile al venditore in relazione a danni causati dalla mancata messa a terra in conformità alle disposizioni normative. •...
-
Page 15: Primo Utilizzo
• Lavare i capi “lavabili in lavatrice” e “lavabili a mano” con il programma appropriato. • Non lavare capi bianchi e colorati insieme. I cotoni scuri nuovi rilasciano molto colore. Lavarli separatamente. • Le macchie difficile devono essere trattare appropriatamente prima del lavaggio. Se necessario controllare con la lavanderia. - Page 16 5.1 Corretta capacità di carico Attenersi alla massima capacità di carico del modello di lavatrice indicata sul presente manuale (6 kg). Può essere necessario non raggiungere il pieno carico in base alla quantità di sporco e dal programma di lavaggio che si desidera impiegare. La lavatrice regolerà in automatico la quantità d’...
- Page 17 • Se si utilizza un programma di lavaggio senza il prelavaggio non versare nessun detersivo nello scomparto del prelavaggio (scomparto nr. ” 1”). • In un programma con il prelavaggio non versare il detersivo nello scomparto del prelavaggio (scomparto nr. ” 1”). •...
- Page 18 Se il prodotto dispone di uno scomparto per il detersivo liquido (non rimovibile) • Se si intende utilizzare un detersivo liquido, tirare lo scomparto verso di sé. È necessario pulire lo scomparto con acqua quando è in posizione, o rimuovendolo. Se si utilizza detersivo in polvere, la linguetta protettiva deve essere posizionata nella posizione superiore, altrimenti in posizione inferiore.
-
Page 19: Consigli Per Un Lavaggio Efficace
6.CONSIGLI PER UN LAVAGGIO EFFICACE 6.1 Capi Capi chiari o bianchi (Intervallo di temperatura raccomandato in base al grado di sporco: 40-90 °c) Molto sporco (Macchie difficili come erba, caffè frutta e sangue) Potrebbe essere necessario pretrattare le macchie o eseguire un prelavaggio. Detersivi in polvere e liquidi specifici per i capi bianchi possono essere utilizzati nel dosaggio raccomandato per capi molto sporchi. - Page 20 Capi delicati/ Lana / Seta Molto sporco: preferire detersivi liquidi appositi per capi delicati. Capi in lana e in seta devono essere lavati con detergenti specifici per lana. Sporco normale: preferire detersivi liquidi appositi per capi delicati. Capi in lana e in seta devono essere lavati con detergenti specifici per lana.
- Page 21 cassetto del detersivo, in caso contrario questi potrebbero ostacolare la presa dell’ a cqua e quindi lo straripamento dell’ a cqua. • È bene scegliere il tipo di detersivo adatto per ottenere le massime prestazioni di lavaggio e il minimo consumo d’ a cqua. •...
- Page 22 consumo. Per maggiori dettagli sui programmi vedere” tabella dei programmi e dei consumi”. 8.3 Introduzione ai programmi A seconda del tipo di tessuto usare i seguenti programmi. • Cotone Usare questo programma per la biancheria in cotone (lenzuola, federe e piumini, asciugamani, accappatoi, intimo ecc.).
- Page 23 Il lavaggio a vapore produce vapore nel processo di lavaggio incrementando i risultati di pulizia ma allo stesso tempo previene le pieghe. • Rapido 15’ Il lavaggio rapido da 15’ è un lavaggio veloce adatto per una piccola quantità di biancheria poco sporca.
- Page 24 9. TABELLA DEI PROGRAMMI E DEI CONSUMI Funzioni ausiliarie Programma • • • Misto Freddo - 60 • • • Rapido 15’ Freddo Freddo - 30 • • • Seta Freddo Freddo - 40 • • • Lenzuola Freddo - 60 •...
- Page 25 e il timer comprensivo di lavaggio aggiuntivo sarà visibile sul display. Premendo nuovamente, la funzione lavaggio più verrà disattivata. • Risciacquo+ Premere il tasto doppio risciacquo in modalità stand by e si accenderà la spia di funzione. Si aggiungerà anche ulteriore tempo di risciacquo al processo di lavaggio e il timer comprensivo di doppio risciacquo sarà...
-
Page 26: Blocco Bambini
10. BLOCCO BAMBINI Utilizzare il blocco bambini per evitare che questi ultimi manomettano la lavatrice. In questo modo è possibile evitare che i programmi siano accidentalmente cambiati. Info: se la manopola di selezione viene girata mentre il blocco bambini è attivo, apparirà sul display “CL”. -
Page 27: Manutenzione E Pulizia
il livello va bene, la spia si illuminerà in maniera fissa dopo 1-2 minuti e la sportello di carico può essere aperta. Se il livello dell’ a cqua non va bene, la spia dello sportelo di carico si spegnerà e la sportello non potrà... - Page 28 sifone. 2. Pulire il cassetto del detergente e il sifone con acqua tiepida nel lavandino. Indossare dei guanti protettivi o usare una spazzola adatta in modo tale da evitare di toccare a pelle nuda i residui nel cassetto. 3. Reinserire il cassetto nella lavatrice ed assicurarsi che sia ben posizionato. Se il cassetto del detersivo è...
- Page 29 14.3 Pulizia della struttura e del pannello di controllo Pulire il corpo principale della lavatrice con acqua saponata o gel detergenti delicati se necessario. Asciugare con un panno morbido. Utilizzare un paio soffice umido per pulire il pannello di controllo. 14.4 Pulizia del filtro di approvvigionamento dell’acqua Nella parte posteriore della lavatrice all’interno di ogni valvola di approvvigionamento dell’...
- Page 32 sia appoggiata a nulla. La lavatrice si ferma subito dopo la partenza del programma La lavatrice si potrebbe essere temporaneamente bloccata a causa del basso voltaggio>>> riprenderà a funzionare quando il voltaggio tornerà a livelli normali. Il timer del programma non va avanti (nei modelli con display) •...
-
Page 33: Condizioni Di Garanzia
CONDIZIONI DI GARANZIA La presente garanzia si intende prestata al consumatore, intendendo per consumatore colui che utilizza il bene per scopi estranei all’attività imprenditoriale o professionale eventualmente svolta, e, pertanto, per uso domestico/privato. Inoltre non pregiudica in alcun modo i diritti del consumatore stabiliti dal DLGS 206/05. -
Page 34: Warranty Conditions
WARRANTY CONDITIONS This guarantee is intended to be delivered to the consumer, meaning by consumer the one who uses the good for purposes unrelated to any business or professional activity carried out, and, therefore, for domestic / private use only. Furthermore, it does not in any way affect the consumer’s rights established by Legislative Decree 206/05. - Page 35 USER INSTRUCTIONS ONLY FOR HOME USE. ATTENTION! READ THE INSTRUCTIONS GIVEN IN THIS HANDBOOK VERY CAREFULLY. IT SHOULD BE PUT ASIDE FOR FURTHER CONSULTATION DURING THE ENTIRE LIFECYCLE OF THE PRODUCT SINCE IT GIVES IMPORTANT INDICATIONS ON THE PRODUCT’S FUNCTIONS AND SAFETY DURING INSTALLATION, USE AND MAINTENANCE. GENERAL SAFETY INSTRUCTIONS •...
- Page 36 USE OF THE APPLIANCE BY A PERSON RESPONSIBLE FOR THEIR SAFETY AND HAVE BEEN GIVEN SUPERVISION OR INSTRUCTION CONCERNING USE OF THE APPLIANCE BY A PERSON RESPONSIBLE FOR THEIR SAFETY. • CHILDREN SHOULD BE SUPERVISED TO MAKE SURE THEY DO NOT PLAY WITH THE APPLIANCE.
- Page 37 • THE SYMBOL ON THE PRODUCT, OR ON DOCUMENTS ACCOMPANYING THE PRODUCT, STATES. THAT THIS EQUIPMENT CANNOT BE TREATED AS HOUSEHOLD WASTE, BUT MUST BE DELIVERED TO THE DEDICATED COLLECTION POINT FOR THE RECYCLING OF ELECTRICAL AND ELECTRONIC EQUIPMENT. THE DISPOSAL MUST BE PERFORMED IN ACCORDANCE WITH THE LOCAL ENVIRONMENTAL REGULATIONS FOR WASTE DISPOSAL.
-
Page 38: Operating The Appliance
OPERATING THE APPLIANCE. • DO NOT MAKE CONNECTIONS THROUGH EXTENSION CORDS OR DOUBLE PLUGS. • NEVER LET THE POWER CORD RUN ON SUSPIGENT SHARP EDGES, AVOID CRUSHING IT. • DO NOT LEAVE THE DEVICE EXPOSED TO THE ELEMENTS (RAIN, FROST, SUN, ETC.). •... - Page 39 INJURY HAZARD! • IF THE POWER CORD IS DAMAGED, IT SHOULD BE REPLACED BY THE MANUFACTURER, ITS SERVICE DEPARTMENT OR QUALIFIED PERSONNEL IN ORDER TO AVOID ANY RISK SITUATIONS. • THE NEW SET OF TUBES SUPPLIED WITH THE APPLIANCE SHOULD BE USED, AND THE OLD SETS OF TUBES SHOULD NOT BE REUSED.
-
Page 40: Burn Hazard
• TURN OFF THE FAUCET WHEN THE WASHING MACHINE IS NOT IN USE. • BEFORE ANY CLEANING AND MAINTENANCE, TURN OFF THE APPLIANCE OR DISCONNECT IT FROM THE MAINS. • NEVER FORCE OPEN THE DOOR OR USE IT AS A STEP. •... -
Page 41: Parts Description
1. PARTS DESCRIPTION 1.1 Parti 1.2 Control panel 1. Programme Selection knob (Uppermost position On / Off) 2 Display 3 Smart button 4 Programme Follow-up indicator 5 Start / Pause button 6 Auxiliary Function buttons 7 Spin Speed Adjustment button 8 Temperature Adjustment button 2. - Page 42 Agent. If they are not, call a qualified technician and plumber to have any necessary arrangements carried out. Preparation of the location and electrical, tap water and waste water installations at the place of installation is under customer’ s responsibility. Make sure that the water inlet and discharge hoses as well as the power cable are not folded, pinched or crushed while pushing the product into its place after installation or cleaning procedures.
- Page 43 2.3 Removing the transportation safety bolts and the transportation locks warning: Do not remove the transportation locks before taking out the packaging reinforcement. PERFORM THIS OPERATION BEFORE REMOVING THE BASKET LOCKING SECURITY BOLTS. REMOVAL OF THE PACKING REINFORCEMENT. Remove the packing reinforcement, getting help from another person, by tilting the washing machine as shown in the figure and pulling the tape coming out from the lower front of the...
- Page 44 2.4 Connecting water supply The water supply pressure required to run the product is between 1 to 10 bars (0.1 – 1 MPa). Attach a pressure reducing valve if water pressure is higher. warning:Models with a single water inlet should not be connected to the hot water tap. In such a case the laundry will get damaged or the product will switch to protection mode and will not operate.
- Page 45 • To prevent flowing of dirty water back into the machine and to allow for easy discharge, do not immerse the hose end into the dirty water or do not drive it in the drain more than 15 cm. If it is too long, cut it short.
- Page 46 2.7 Electrical connection Connect the product to a grounded outlet protected by a 16 A fuse. Our company shall not be liable for any damages that will arise when the product is used without grounding in accordance with the local regulations. •...
-
Page 47: Things To Be Done For Energy Saving
noise problem. • Put small size clothes such as infant’ s socks and nylon stockings in a laundry bag or pillow case. • Place curtains in without compressing them. Remove curtain attachment items. • Fasten zippers, sew loose buttons and mend rips and tears. •... - Page 48 Info: Use an anti-limescale suitable for the washing machines. Some water might have remained in the product due to the quality control processes in the production. It is not harmful for the product. 5.1 Correct load capacity The maximum load capacity of the washing machine model is indicated on this manual (6 kg). It may be necessary not to reach the full load according to the degree of soiling and the washing programme desired.
- Page 49 5.3.1 Detergent, softener and other cleaning agents • Add detergent and softener before starting the washing programme. • Never leave the detergent drawer open while the washing programme is running! • When using a programme without prewash, do not put any detergent into the prewash compartment (compartment nr.
- Page 50 5.3.5 Using liquid detergents If the product contains a liquid detergent cup: Make sure that you have placed the liquid detergent cup in compartment nr. “2”. • If the liquid detergent has lost its fluidity, dilute it with water before putting in the detergent cup. If the product is equipped with a liquid detergent part •...
-
Page 51: Tips For Efficient Washing
5.3.7 Using starch • Add liquid starch, powder starch into the softener compartment. • Do not use softener and starch together in a washing cycle. • Wipe the inside of the machine with a damp and clean cloth after using starch. 5.3.8 Using limescale remover When required, use limescale removers manufactured specifically for washing machines only. -
Page 52: Detergent Recommendation
Normal Soiled Liquid detergents suitable for colours and dark colours can be used at dosages recommended for normally soiled clothes. Lightly Soiled Liquid detergents suitable for colours and dark colours can be used at dosages recommended for lightly soiled clothes. _____________________________________________________________ Delicates/Woollens/Silks Recommended temperature range based on soiling level: cold -30 °C) Heavily Soiled Prefer liquid detergents produced for delicate clothes. - Page 53 avoid its inlet to get blocked before pouring it into the and thus cause a water overflow. • Please choose the suitable type of detergent to get a maximum of washing performance and a minimum of water and energy consumption •...
- Page 54 For futher programme details, see “Programme and consumption table” 8.3Program introduction Depending on the type of fabric, use the following main programmes. • Cotton Use this programme for your cotton laundry (such as bed sheets, duvet and pillowcase sets, towels, bathrobes, underwear, etc.).
-
Page 55: Programme And Consumption Table
Steam washing process is to produce steam in the washing process, improve the washing effect, and at the same time, steam iron the clothes to prevent wrinkles. • Quick 15’ Quick wash 15 is a fast washing program for a small amount of non dirty clothes. Its optional washing temperature range is narrow and the maximum speed of dehydration is low.. -
Page 57: Child Lock
Press the rinse Plus button in standby mode, and the rinse plus function indicator will be on. At the same time, add a rinse process in the washing process, and the time after adding the function will be displayed in the remaining time window. The rinse function will cancelled when it is pressed again, if it does not run to the rinse stage during operation, press the pause button, The rinsing button can be added or cancelled, and the rinsing function cannot be selected or cancelled during operation. -
Page 58: Progress Of Programme
Info: If the Programme Selection knob is turned when the Child Lock is active, “ ” appears on the display. The Child Lock does not allow any change in the programmes and the selected temperature, speed and auxiliary functions. Even if another programme is selected with the Programme Selection knob while the Child Lock is active, previously selected programme will continue running. -
Page 59: Maintenance And Cleaning
STARTED Switching the machine to pause mode Press the Start / Pause button to switch the machine to pause mode while a programme is running. The light of the step which the machine is in starts flashing in the Programme Follow-up indicator to show that the machine has been switched to the pause mode. - Page 60 14.1 Cleaning the detergent drawer Clean the detergent drawer at regular intervals (every 4-5 washing cycles) as shown below in order to prevent accumulation of powder detergent in time. 1. 1. Press the dotted point on the siphon in the softener compartment and pull towards you until the compartment is removed from the machine.
- Page 61 If the holes on the bellow shown in the figure is blocked, open the holes using a toothpick. INFO:Foreign metal substances will cause rust stains in the drum. Clean the stains on the drum surface by using cleaning agents for stainless steel. Never use steel wool or wire wool. warning: Never use sponge or scrub materials.
- Page 64 anything. Machine stopped shortly afler the programme started. Mach i ne might have stopped temporarily due to low voltage. > > > lt wi/1 resume running when the voltage restores to the normai leve/. Programme time does not countdown. (On models with display) •...
- Page 65 WARRANTY CONDITIONS This guarantee is intended to be delivered to the consumer, meaning by consumer the one who uses the good for purposes unrelated to any business or professional activity carried out, and, therefore, for domestic / private use only. Furthermore, it does not in any way affect the consumer’s rights established by Legislative Decree 206/05.
- Page 66 Le specifiche sono soggette a modifica senza preavviso. Tutti i diritti riservati...
Need help?
Do you have a question about the 5917144 and is the answer not in the manual?
Questions and answers