Advertisement
Quick Links
ORIGIN21 and logo design are trademarks or
registered trademarks of LF, LLC.
All rights reserved.
ATTACH YOUR RECEIPT HERE
Serial Number
Purchase Date
Thank you for purchasing this ORIGIN21 product.
Questions, problems, missing parts?
Before returning, contact us on:
888-251-1026, 8 a.m. - 8 p.m., EST, Monday-Sunday or ascs@lowes.com.
SS24003
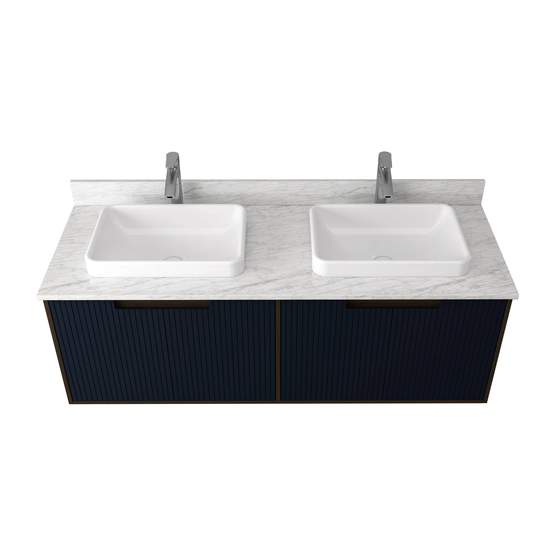
60" KELLEN VANITY
1
I TEM #5501914
#5530624
MODEL # TJ-0328V6022BLU
#TJ-0328V6022BR
WITH TOP
Advertisement

Related Manuals for Origin 21 KELLEN TJ-0328V6022BLU


Summary of Contents for Origin 21 KELLEN TJ-0328V6022BLU
- Page 1 I TEM #5501914 #5530624 MODEL # TJ-0328V6022BLU #TJ-0328V6022BR ORIGIN21 and logo design are trademarks or 60" KELLEN VANITY registered trademarks of LF, LLC. All rights reserved. WITH TOP ATTACH YOUR RECEIPT HERE Serial Number Purchase Date Thank you for purchasing this ORIGIN21 product. Questions, problems, missing parts? Before returning, contact us on: 888-251-1026, 8 a.m.
-
Page 2: Table Of Contents
TABLE OF CONTENTS Package Contents........................3 Hardware Contents..........................3 Safety Instruction......................3 Preparation.........................4 Assembly Instructions....................4 Care and Maintenance......................15 Warranty..........................15 Replacement Parts List......................16... -
Page 3: Package Contents
PACKAGE CONTENTS PART DESCRIPTION QUANTITY Vanity Vanity top Backsplash Sinks Sink templates Wall hanging cleats HARDWARE CONTENTS (not shown actual size) Ø5x60 mm Screw Qty. 16+2 extra SAFETY INSTRUCTION Please read and understand this entire manual before attempting to assemble, operate or install the product. -
Page 4: Preparation
PREPARATION Before beginning assembly of product, make sure all parts are present. Compare parts with package contents list and hardware contents list. If any part is missing or damaged, do not attempt to assemble the product. Estimated Installation Time: 85 minutes (24 hours for silicone caulk to dry). Tools Required for Assembly (not included): Wood stud finder, Phillips screwdriver, utility... - Page 5 ASSEMBLY INSTRUCTIONS 2. Installing the wall hanging cleats With the beveled edges facing up, attach the two wall hanging cleats (F) to the wall with the 1st and 3rd screw rows using the 8 screws (AA) provided. Use a level to ensure the cleats (F) is level.
- Page 6 ASSEMBLY INSTRUCTIONS 3. Hanging the vanity With help from another person, carefully hang the vanity (A) onto the wall hanging cleats.
- Page 7 ASSEMBLY INSTRUCTIONS 4. Reinforcing the vanity to the wall Open the doors. Use 8 screws (AA) provided to reinforce the vanity to the wall where the wood studs located. Hardware Used Ø5x60 mm Screw Being screwed Wood stud Wall Were screwed 8 Screws Option 1 is shown...
- Page 8 5. Installing the sink template Place two of the sink templates (E) on the vanity top (B). Align hole in sink template (E) with two of the holes in the vanity top (B). Make sure the sink template (E) is flush with the back edge of vanity top (B).
- Page 9 ASSEMBLY INSTRUCTIONS 8. Adjusting the doors up or down (step 8 -> 10) (optional) Loosen screws (a) on both hinges. 9. Adjusting door up or down. 10. Retightening screws (a).
- Page 10 ASSEMBLY INSTRUCTIONS 11. Adjusting the doors left or right (optional) Turn screws (b) on both hinges. 12. Adjusting the doors in or out (step 12 -> 14) (optional) Loosen screws (c) on both hinges. 13. Adjusting the doors in or out.
- Page 11 ASSEMBLY INSTRUCTIONS 14. Retightening screws (c). 15. Applying silicon to the Backsplash (step 15 -> 17) Apply silicone to the unpolished back side and bottom of the Backsplash (C). Place the Backsplash (C) on the vanity (A). Be sure to align the Backsplash (C) with the top (B) of the vanity (A).
- Page 12 ASSEMBLY INSTRUCTIONS 17. Needing time for silicon to be dried Let the vanity and backsplash sit for 24 hour before use. 18. Installing the faucet (not included in the package) Note: Make sure the thread of the faucet (L) is long enough to fix to the vanity top and connect the water system.
- Page 13 ASSEMBLY INSTRUCTIONS 20. Removing the top Use a screwdriver (not provided) to unscrew these 18 wood screws (d), and place them face up onto a scratch free surface such as a foam sheet that came in the packaging. Screws for fixing top layout (18 Screws) Top panel 21.
- Page 14 ASSEMBLY INSTRUCTIONS 22. Re-installing or replacing the top Use a screwdriver to secure (d) these 18 wood screws. Screws for fixing top layout (18 Screws) Top panel...
-
Page 15: Care And Maintenance
CARE AND MAINTENANCE Dust the vanity regularly with a soft, non-lint producing cloth or household dusting product. You can clean the vanity with a gentle, non-abrasive household cleaner. Make sure to dry the wood immediately with a soft cloth or towel. The stone top can be cleaned using standard marble cleaning agents available at your local supplier. -
Page 16: Replacement Parts List
REPLACEMENT PARTS LIST For replacement parts, call our customer service department at 888-251-1026, 8 a.m. - 8 p.m., EST, Monday - Sunday. You may also contact us at ascs@lowes.com. PART DESCRIPTION PART# Backsplash TJ-0328V6022-BL Sinks TJ-0328V6022-SK Wall hanging cleats TJ-0328V6022-WHC Royal blue left doors TJ-0328V6022BLU- LD G (1)
Need help?
Do you have a question about the KELLEN TJ-0328V6022BLU and is the answer not in the manual?
Questions and answers