Table of Contents
Advertisement
Available languages
Available languages
Quick Links
ORIGIN 21 and logo design are trademarks or registered
trademarks of LF, LLC. All rights reserved.
ATTACH YOUR RECEIPT HERE
Serial Number
Questions, problems, missing parts? Before returning to your retailer, call our customer service
department at (888) 251-1026, 8 a.m. - 8 p.m., EST, Monday - Sunday. You could also contact us at
partsplus@lowes.com.
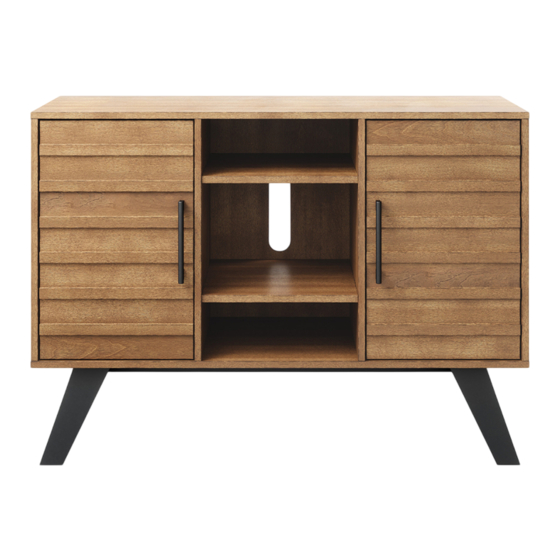
SLAT DOOR CONSOLE TABLE
Purchase Date
1
ITEM #4911620
MODEL #LWS42SDT
Français p. 13
Español p. 25
Advertisement
Chapters
Table of Contents

Related Manuals for Origin 21 LWS42SDT


Summary of Contents for Origin 21 LWS42SDT
- Page 1 ORIGIN 21 and logo design are trademarks or registered ITEM #4911620 trademarks of LF, LLC. All rights reserved. SLAT DOOR CONSOLE TABLE MODEL #LWS42SDT Français p. 13 Español p. 25 ATTACH YOUR RECEIPT HERE Purchase Date Serial Number Questions, problems, missing parts? Before returning to your retailer, call our customer service department at (888) 251-1026, 8 a.m.
-
Page 2: Table Of Contents
TABLE OF CONTENTS Hinge Adjustments....................... 2 Package Contents....................... 3 Hardware Contents.......................4 Safety Information....................... 5 Preparation ......................... 5 Assembly Instructions......................6 Care and Maintenance ....................... 10 Limited Lifetime Warranty....................10 Replacement Parts List ....................11 Hinge Adjustments How to adjust the European adjustable hinges on doors Shipping may cause doors to go out of alignment. -
Page 3: Package Contents
PACKAGE CONTENT PART DESCRIPTION QUANTITY PART DESCRIPTION QUANTITY Top Panel Right Door Side Adjustable Shelf Bottom Panel Middle Adjustable Shelf Side Panel Back Panel Partition Panel Left Door Metal Frame... -
Page 4: Hardware Contents
HARDWARE CONTENTS (shown not actual size) 1/4” x 32mm Bolt 1/4” Lock Washer 1/4” Flat Washer Qty. 26 Qty. 26 Qty. 26 M3.5 x 15mm M8 x 30mm M4 x 32mm Washer Head Screw Wood Dowel Screw Qty. 24 Qty. 16 Qty. -
Page 5: Safety Information
SAFETY INFORMATION Please read and understand this entire manual before attemting to assemble or install the product. 1. Please read the Assembly Instructions prior to assembling the unit. 2. To avoid damage, assemble the unit on a sturdy, level and non-abrasive surface. 3. -
Page 6: Assembly Instructions
ASSEMBLY INSTRUCTIONS 1. Insert the 30 mm Wood Dowels (DD) into the outer holes of the Partition Panels (D) and attach them to the Bottom Panel (B) with two 32 mm Bolts (AA), two Lock Washers (BB) and two Flat Washers (CC) in each. Hardware Used 1/4”... - Page 7 ASSEMBLY INSTRUCTIONS 4.1 Now, go back and tighten all bolts. Make sure that all the parts are tight and there are no gaps between the parts. This will help keep the unit square. Adhesive tape 4.2 Flip the assembled unit around at its front edges. faces outward Unfold the Back Panel (I) and position it onto the back edges of the assembly.
- Page 8 ASSEMBLY INSTRUCTIONS 7. Extend the Hinge Arms (NN) and rest the hinge cups onto the cutouts of each Door (E and F). Secure the Hing Arms (NN) in place by using two screws (OO) in each. Hardware Used Hinge arm M3.5 x 15mm Flat Head Screw...
- Page 9 ASSEMBLY INSTRUCTIONS 10. Insert four Shelf Supports (GG) into the desired holes inside each compartment. Make sure you place the 4 shelf supports at the same level so the shelf is not tilted. Tilt and rest the Adjustable Shelves (G and H) onto the Shelf Supports (GG).
-
Page 10: Care And Maintenance
CARE AND MAINTENANCE • Use a soft, clean cloth that will not scratch the surface when dusting. • Use of furniture polishes is not necessary. Should you choose to use polishes, test first in an inconspicuous area. • Using solvents of any kind on your furniture may damage the finish. •... -
Page 11: Replacement Parts List
REPLACEMENT PARTS LIST For replacement parts, call our customer service department at (888) 251-1026, 8 a.m. - 8 p.m., EST, Monday - Sunday. You could also contact us at partsplus@lowes.com or visit www.lowespartsplus. com. PART DESCRIPTION PART # Top Panel 00LWS42SDT-A Bottom Panel 00LWS42SDT-B... - Page 12 REPLACEMENT PARTS LIST Printed in Vietnam Date: 2022-02-16 Rev. 0001-A...
- Page 13 ORIGIN 21 ainsi que le logo sont des marques ou des ARTICLE N 4911620 marques déposées de LF, LLC. Tous droits réservés. TABLE CONSOLE AVEC PORTE À MODÈLE N LWS42SDT Français p. 13 Español p. 25 JOINDRE VOTRE REÇU ICI Date d’achat...
- Page 14 TABLE DES MATIÈRES Ajustements de charnière......................2 Contenu de l’emballage......................3 Contenu de la quincaillerie....................4 Consignes de sécurité......................5 Préparation..........................5 Instructions de montage......................6 Soin et entrtien........................10 Garantie limitée à vie......................10 Liste des pièces de remplacement..................11 Ajustements de charnière. Comment ajuster les charnières européennes ajustables sur les portes Le transport peut entraîner un désalignement des portes.
-
Page 15: Contenu De L'emballage
CONTENU DE L’EMBALLAGE PIÈCE DESCRIPTION QUANTITÉ PIÈCE DESCRIPTION QUANTITÉ Panneau Supérieur Porte droite Étagère réglable latérale Panneau Inférieur Étagère ajustable du milieu Panneau Latéral Panneau Arrière Panneau de Séparation Pied Porte Gauche Cadre Métallique... -
Page 16: Contenu De La Quincaillerie
CONTENU DE LA QUINCAILLERIE (non illustrée à la grandeur réelle) Boulon 1/4” x 32mm 1/4” Rondelle de blocage 1/4” Rondelle plate Qty. 26 Qty. 26 Qty. 26 M3,5 x 15mm M8 x 30mm M4 x 32mm Vis Vis à tête de rondelle Goujon en bois Qty. -
Page 17: Consignes De Sécurité
CONSIGNES DE SÉCURITÉ Lire et comprendre le présent guide avant de monter ou d’installer le produit. 1. Lire les Instructions de montage avant d’assembler l’unité. 2. Pour éviter les dommages, assembler l’unité sur une surface solide, de niveau et non abrasive. 3. -
Page 18: Instructions De Montage
INSTRUCTIONS DE MONTAGE 1. Insérez les Goujons en Bois de 30 mm (DD) dans les trous extérieurs des Panneaux de Séparation (D) et fixez-les au Panneau Inférieur (B) avec deux Boulons de 32 mm (AA), deux Rondelles de Blocage (BB) et deux Rondelles Plates (CC) dans chacune. - Page 19 INSTRUCTIONS DE MONTAGE 4.1 Maintenant, revenez en arrière et serrez tous les bou- lons. Assurez-vous que toutes les pièces sont serrées et qu’il n’y a pas d’espace entre les pièces. Cela aidera à Le ruban adhésif est orienté vers garder l’unité carrée. l’extérieur 4.2 Basculez l’unité...
- Page 20 INSTRUCTIONS DE MONTAGE 7. Étendez les Bras de Charnière (NN) et posez les coupelles de charnière sur les découpes de chaque Porte (E et F). Fixez les Bras de Charnière (NN) en place en utilisant deux vis (OO) dans chacun. Quincaillerie utilisée Bras de charnière...
- Page 21 INSTRUCTIONS DE MONTAGE 10. Insérez quatre Supports d’étagère (GG) dans les trous désirés à l’intérieur de chaque compartiment. Assurez-vous de placer les 4 supports d’étagère au même niveau afin que l’étagère ne soit pas inclinée. Inclinez et posez les étagères Ajustables (G et H) sur les Supports d’Étagère (GG).
-
Page 22: Soin Et Entrtien
SOIN ET ENTRETIEN • Utiliser un linge doux et propre qui ne rayera pas la surface lors de l’époussetage. • L’utilisation de poli à meuble n’est pas nécessaire. Le cas échéant, tester d’abord une surface peu visible. • L’utilisation de solvants de quelque nature que ce soit sur le meuble peut en endommager le fi ni. •... -
Page 23: Liste Des Pièces De Remplacement
LISTE DES PIÈCES DE REMPLACEMENT Pour obtenir des pièces de rechange, communiquez avec notre service à la clientèle au (888) 251- 1026, entre 8 h et 20 h (HNE), du lundi au dimanche.Vous pouvez également nous con- tacter à partsplus@lowes.com ou visiter www.lowespartsplus.com. PIÈCE DESCRIPTION DE PIÈCE... - Page 24 LISTE DES PIÈCES DE RECHANGE Date: 2022-02-16 Rév. 0001-A Imprimé au Vietnam...
- Page 25 ORIGIN 21 y el diseño del logotipo son marcas comerciales o ARTÍCULO #4911620 marcas registradas de LF, LLC. Todos los derechos reservados. MESA CONSOLA DE PUERTA DE TABLILLA MODELO #LWS42SDT Français p. 13 Español p. 25 ADJUNTAR SU RECIBO AQUÍ...
- Page 26 TABLAS DE CONTENIDOS Ajustes de bisagra....................... 2 Contenido del paquete......................3 Contenido de herraje......................4 Información de seguridad..................... 5 Preparación ......................... 5 Instrucciones de ensamblaje....................6 Cuidado y mantenimiento.....................10 Garantía limitada.........................10 Lista de piezas de repuesto....................11 Ajustes de bisagra Como ajustar las bisagras Europeas ajustables en las puertas El envío puede causar que las puertas se desalineen.
-
Page 27: Contenido Del Paquete
CONTENIDO DEL PAQUETE PARTE DESCRIPCIÓN CANTIDAD PARTE DESCRIPCIÓN CANTIDAD Panel superior Puerta derecha Repisa ajustable lateral Panel inferior Repisa ajustable media Panel lateral Panel posterior Panel divisor Pata Puerta izquierda Marco de metal... - Page 28 CONTENIDO DE FERRETERÍA (no mostradas en tamaño real) Perno de 1/4 de Arandela de presión Arandela plana de pulgada x 32mm de 1/4 de pulgada 1/4 de pulgada Qty. 26 Qty. 26 Qty. 26 Perno de cabeza de Clavija de madera Perno de M4 x 32mm arandela de M3.5 x 15mm de M8 x 30mm...
-
Page 29: Información De Seguridad
INFORMACIÓN DE SEGURIDAD Por favor lea y comprenda el manual entero antes de intentar ensamblar o instalar el producto. 1. Por favor, lea las instrucciones de ensamble antes de usar la unidad. 2. Para evitar daños, ensamble la unidad sobre una superfi cie fi rme, nivelada y no abrasiva. -
Page 30: Instrucciones De Ensamblaje
INSTRUCCIONES DE ENSAMBLAJE 1. Insertar las clavijas de madera de 30 mm (DD) en los agujeros exteriores de los paneles divisores (D) y adjuntar al panel inferior (B) con 2 pernos de 32 mm (AA), 2 arandelas de presión (BB) y 2 arandelas planas (CC) en cada uno. - Page 31 INSTRUCCIONES DE ENSAMBLAJE 4.1 Ahora, volver y apretar todas las tuercas de fijación y los pernos. Asegurar que todas las partes estén apre- tadas y de que no hay huecos entre las partes. Esto ayudara a mantener la unidad escuadra. El tape adhesivo 4.2 Voltear la unidad ensamblada sobre sus bordes apunta hacia afuera...
- Page 32 INSTRUCCIONES DE ENSAMBLAJE 7. Extender los brazos de bisagras (NN) y el resto de las copas de bisagras sobre los recortes de cada puer- ta (E y F). Asegurar los brazos de bisagra (NN) en su lugar usando 2 pernos (OO) en cada uno. Herraje Utilizado Brazo de bisagra Perno de cabeza...
- Page 33 INSTRUCCIONES DE ENSAMBLAJE 10. Insertar 4 soportes de repisa (GG) en los agujeros de- seados adentro de cada compartimiento. Asegurar de poner 4 soportes de repisa en el mismo nivel para que la repisa no este inclinada. Inclinar y descansar las repisas ajustables (G y H) sobre Herraje Utilizado Soporte de...
-
Page 34: Cuidado Y Mantenimiento
CUIDADO Y MANTENIMIENTO • Utilice un paño suave y limpio para que no se raye la superfi cie cuando limpia el polvo • El uso de ceras para muebles no es necesario. Si decide utilizar ceras, checar un área poco visible. -
Page 35: Lista De Piezas De Repuesto
LISTA DE PIEZAS DE REPUESTO Para obtener piezas de repuesto, llame a nuestro Departamento de Servicio al Cliente al (888) 251- 1026, de lunes a domingo de 8 a.m. a 8 p.m., hora estándar del este. También puedes ponerte en contacto con nosotros en partsplus@lowes.com o visitar www.lowespartsplus.com. - Page 36 LISTA DE PIEZAS DE REPUESTO Fecha: 2022-02-16 Rev. 0001-A Impreso en Vietnam...
Need help?
Do you have a question about the LWS42SDT and is the answer not in the manual?
Questions and answers