
Subscribe to Our Youtube Channel
Related Manuals for THERMOSTAHL PSH Series

Summary of Contents for THERMOSTAHL PSH Series
- Page 1 PELLET SPACE HEATER INSTALLATION AND USER MANUAL VERSION: UPDATE: 26.06.2021...
-
Page 2: Table Of Contents
Contents Warnings, Cautions and Notes ................3 1.1. Document information ..................3 Function principle ....................4 Working conditions ................... 4 Technical specifications ..................4 Chimney ......................5 Heater Air fan ....................5 Heater double aerostat ..................5 Installation ....................... 6 Electrical connections .................. -
Page 3: Warnings, Cautions And Notes
Warnings, Cautions and Notes • Read the safety instructions carefully before installation. Always follow the safety instructions during installation and during maintenance • Keep this manual so that it is accessible to professionals and future needs. • Installation and initial launch can only be completed by the authorized service team indicated by the manufacturer. -
Page 4: Function Principle
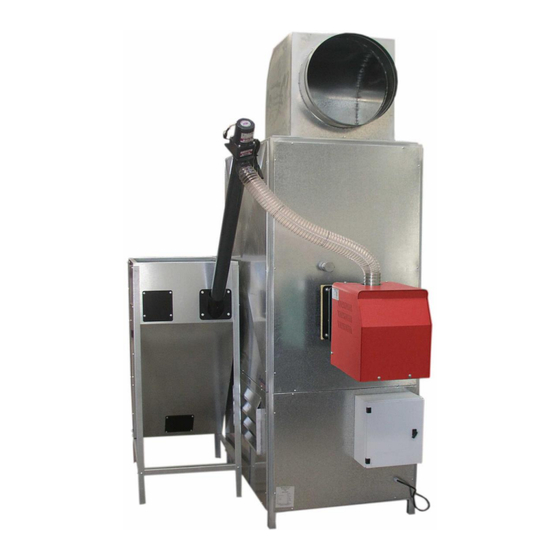
Function principle PSH space heater has been designed to work with MPB wood-pellet burner. The fire chamber of the space heater is made by stainless steel and the external covers are made by galvanised steel, which are electrostatic painted (optional). The upper part of the space heaters around the fire chamber is well insulated to eliminate the losses. -
Page 5: Chimney
Chimney We recommend that you have a local chimney sweeper or other corresponding authority make an inspection and provide advice and instructions on the chimney measurements in accordance with local codes and regulations. The chimney should then of a length and diameter that gives a draught of: •... -
Page 6: Installation
Installation Installation and initial launch can only be completed by the authorized service team indicated by the manufacturer. • The Space Heater must be placed on a hardened ground and be leveled. • Keep the appliance away from flammable material – there mustn’t be any flammable material in the room/heated space. -
Page 7: Controller
Controller 10.1. General description Description: • Diodes signalizing the status of outputs and the working mode of the driver, • LCD screen used for communication between the device and the user, • Buttons steering the driver's work. 10.2. Description of buttons Button Function Changes the burner's working mode –... -
Page 8: Operation Functions
Operation functions After switching the burner on, it is appeared on the LCD screen the program's logo defining the type of the driver and the version of the current software While activating, the burner carries out a test of the connected sensors. In case of one lacking, on the screen appears an appropriate message (---). -
Page 9: Parameters
FUNCTION'S NAME DESCRIPTION OF FUNCTIONS STOP Burner stopped. Filling the feeder. FEEDER FILLING Filling stops automatically after about 10 minutes. The burner is on Ignition process, which mean that has fed with ignition dose IGNITION of pellet, the heating element (igniter) and the air fan are working. The mode would be automatically changed after detecting a flame by the sensor. - Page 10 WUW BUFFER SETTINGS (B) – NOT USED IN THIS MODEL FUNCTION FUNCTION SETTING SETTING MANUFACTURER NAME UNIT RANGE SETTING WUW BUFFER ºC 20 - 80 TEMPERATUR WUW SURPLUS ºC 5 - 20 TEMPERATURE Yes/No PRIORITY BURNER SETTINGS (C) FUNCTION FUNCTION SETTING SETTING MANUFACTURER...
-
Page 11: Room Thermostat
Room thermostat The room thermostat (or a timer) can be connected on the connector which is at the back of the controller, by replacing the “bridge (or on the PINs 1&2 in the controller). It is forbidden to give voltage to room thermostat's connection (pin 1&2). The connection with the room thermostat must be only a “Cold junction”... -
Page 12: Stop Of The Burner
Stop of the burner The burner can be either at “Work” or “Maintain” or “standby” Press the button “MODE/ “continuously till “STOP MODE” appears on the screen. It is written “Burning off” till the photo sensor stops to detect fire (3-5 min) When the photo sensor stops to detect fire, “cleaning procedure takes place for few seconds. -
Page 13: Restart The Burner After An Error
Restart the burner after an error Turn off the burner by using the electric switch the burner is connected. Open the boiler's door and check the burner tube. 3. Remove any ashes and impurities from burner fire chamber. 4. Close the door and switch on the controller by using the electric switch the burner is connected By pressing the button “MODE/ “... -
Page 14: Errors
Errors Indication Description Solution / 1. The driver starts up relevant emergency procedures for every sensor in order to prevent CH:!!!! Malfunction water the boiler from working beyond the safe range WUW:!!!!!! temperature sensors for the installation of the central heating STOP 2. - Page 15 THERMOSTAHL ROMANIA HEATING SYSTEMS S.R.L. DRUMUL OSIEI 57-59, sector 6 Bucharest 062395, Romania www.thermostahl.ro...
Need help?
Do you have a question about the PSH Series and is the answer not in the manual?
Questions and answers