Table of Contents
Advertisement
Quick Links
Advertisement
Chapters
Table of Contents

Subscribe to Our Youtube Channel
Related Manuals for RCA RATR30824F


Summary of Contents for RCA RATR30824F
- Page 1 8" HD Tablet Android Tablet Model: RATR30824F...
- Page 2 Folio Case RCA is a registered trademark or trademark of RCA Trademark Management used under license by ESI Enterprises, Inc. Google, Android, Google Play and other marks are trademarks of Google LLC. The Android robot is reproduced or modified from work created and shared by Google and used according to terms described in the Creative Commons 3.0...
- Page 3 Notice The information in this user’s manual is protected by copyright laws, all parts of this manual, including the products and software described in it, can not be reproduced, transmitted, transcribed, stored in a retrieval system, nor translated into any language. THE MANUFACTURER OR RESELLER SHALL NOT BE LIABLE FOR ERRORS OR OMISSIONS CONTAINED IN THIS MANUAL AND SHALL NOT BE LIABLE FOR ANY CONSEQUENTIAL DAMAGES, WHICH MAY RESULT FROM THE PERFORMANCE...
-
Page 4: Table Of Contents
Table of contents Notice ............................. 03 Chapter 1: Preface ......................... 05 1.1 Regulations Information ....................06 1.2 FCC Information ....................... 07 1.3 RF Exposure Information ....................08 1.4 Safety Instructions ......................09 1.5 Conventions ........................10 Chapter 2: Getting to know the basics ................... 11 2.1 Product Specification ....................... -
Page 5: Chapter 1 Preface
Chapter 1 Preface... -
Page 6: Regulations Information
1.1 Regulations Information * CE compliance This device is classed as technical information equipment (ITE) in class B and is intended for living room and office use. The CE-mark approves the conformity by the EU-guidelines: - EMC Directive 2014/30/EU, - Low Voltage Directive 2014/35/EU(equals A2 : 2013) - RF Directive 2014/53/EU SAR/DAS refers to the rate at which the body absorbs RF energy. -
Page 7: Fcc Information
1.2 FCC Information FEDERAL COMMUNICATIONS COMMISSION INTERFERENCE STATEMENT This equipment has been tested and found to comply with the limits for a Class B digital device, pursuant to part 15 of the FCC Rules. These limits are designed to provide reasonable protection against harmful interference in a residential installation. -
Page 8: Rf Exposure Information
1.3 RF Exposure Information (SAR) FEDERAL COMMUNICATIONS COMMISSION INTERFERENCE STATEMENT This device meets the government’s requirements for exposure to radio waves. This device is designed and manufactured not to exceed the emission limits for exposure to radio frequency (RF) energy set by the Federal Communications Commission of the U.S. Government. The exposure standard employs a unit of measurement known as the Specific Absorption Rate, or SAR. -
Page 9: Safety Instructions
1.4 Safety Instructions Do not apply heavy pressure to the tablet or subject it to any form of strong impact as this can damage the tablet's components or otherwise cause it to malfunction. Never cover or block the air vents including those located at the base of the tablet. -
Page 10: Conventions
1.5 Conventions for this Manual Version Date Revision 05/2022 Initial release Author J. A. Mendez... -
Page 11: Chapter 2: Getting To Know The Basics
Chapter 2 Getting to know the basics... -
Page 12: Product Specification
2.1 Product Specification This User's Manual provides technical information of instructions and illustrations on how to operate this tablet for the customer. Please read this manual carefully before using this tablet. Physical Characteristics Dimension L 8.22" x W 4.93" x H 0.39" Support Processor Processor: Rockchip RK3566 Lithography: 22 nm... -
Page 13: Preparing Your Tablet
2.2 Preparing your tablet Make sure your tablet's battery is charged before use. Connect the AC adapter's DC output plug to the DC IN jack. Press the power button to turn on your tablet. -
Page 14: Product Overview
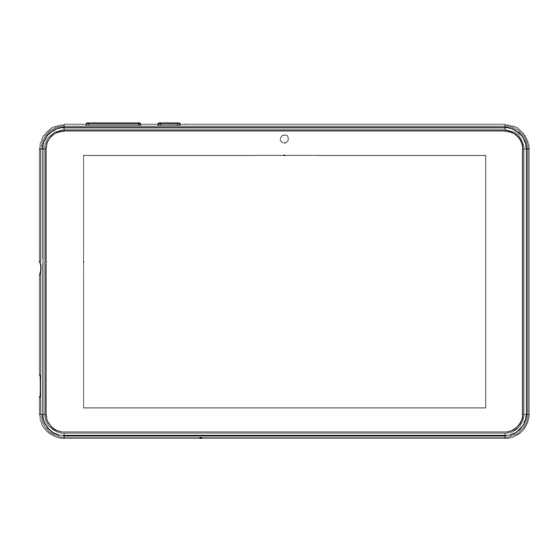
2.3 Product Overview Front View Camera A device that allows you to record or take photographs. Touch Screen Touch screen display used to navigate the graphic user interface. Backside View Rear Camera A device that allows you to record or take photographs. - Page 15 Top View Left Side View Volume Up/Volume Down Allows you to increase or decrease your speaker's volume. Power Button Used to power on or off your tablet. Reset Button Hidden button used to perform a factory reset. Headphone Port Used to connect headphones. Micro SD Slot Allows you to connect a Micro SD card to increase storage capacity.
-
Page 16: Chapter 3 Getting Started
Chapter 3 Getting started... -
Page 17: Ac Adapter
3.1 AC Adapter Please be noted that it is strongly recommended to connect the AC adapter and use the AC power while using this tablet for the first time. When the AC adapter is connected, the battery is being charged immediately. Attach the AC adapter when you need to charge the battery or you want to operate from AC power. - Page 18 Android 11 User Manual...
- Page 19 Content 1. Start up & Shut-down ......................2 2. HomeScreen ........................3 2.1 Taskbar Icons ......................3 3. All Apps Menu ........................4 3.1 System Settings ....................... 4 3.2 Date & Time ......................5-6 3.3 Brightness ........................ 6 3.4 Sleep Mode ......................7 3.5 Wireless Setup ......................
-
Page 20: Start Up & Shut-Down
1. Start-up and Shut-down Startup: Press and hold the power button to power on the device. Shutdown: During use, press and hold the power button for about 5 seconds to power off, a system window will appear. Select “Power Off” followed by “OK.” Device will shut down. -
Page 21: Homescreen
2. Home Screen Once the device has fully booted, you be taken to the Android home screen (below). By default, desktop will display a quick search bar, status bar, and menu label icon. All Apps Volume - Return Volume + Home Screen Task View The status bar (top of the screen) will display notifications and your tablet’s current status. -
Page 22: All Apps Menu
3. All Apps Menu Press the All Apps icon on the main menu. You’ll be given a list of all apps currently installed on your device. Here, you can run apps not currently on your home screen. You can also add shortcuts to your home screen by tapping and holding on an application and placing it anywhere on the desktop. -
Page 23: Date & Time
3.2 Date & Time In the settings menu, select “System”, then go to “Date & Time” to edit the date and time displayed on your device.By default, “Automatic Date & Time” is turned on. The device will automatically synchronize with an internet time server. “Automatic Date & Time” can be turned off if you choose to set the date and time manually. -
Page 24: Brightness
Select “OK” when finished. The device will use the new settings. 3.3 Brightness In the settings menu, select “Display” to edit the display settings on your device. Select “Brightness level” at the top of the menu and you’ll be given a sliding button to adjust screen brightness, shown below. -
Page 25: Sleep Mode
3.4 Sleep Mode You can set a timer for the device to enter sleep mode. If left inactive for a set period of time, the device will enter sleep mode automatically. In the settings menu, select “Display” to edit the display settings on your device. Then select “Screen timeout”. -
Page 26: Wireless Setup
3.5 Wireless Setup In the settings menu, select “Network & Internet.” You’ll be able to connect your device to a wireless network. Make sure Wi-Fi is set to “ON” and your device will scan and list all nearby wireless networks, as shown below: Select your wireless network and you may be prompted to enter your network’s password. -
Page 27: Third-Party Applications
3.6 Third-Party Applications While Android uses Google Play Store to download and install apps, you can also download apps you find on the internet. However, Android may deem them as “unsafe.” You can disable this by going into “Settings” - “Apps & notifications” - “Advanced” - “Special app access” - “Install unknown apps”, select your source, as shown below, and set “Allow from this source”... -
Page 28: Uninstalling Apps
3.7 Uninstalling Apps 1. Select “Settings”, followed by “Apps & notifications.” Click on see all apps and you will see a list of all installed apps. 2. Click on the app that you would like to uninstall. 3. Click Uninstall. The app will be deleted from the device. -
Page 29: Backup & Reset
3.8 Backup & Reset Click “Settings,” then select “System”, then go to “Backup” to backup your data to Google Drive. If your device is not performing well, click “Settings,” then select “System”, then go to “Reset options”, then select “Reset app preferences” or “Erase all data (factory reset)” and follow the instructions it provides to reset your device back to its original factory settings. -
Page 30: Storage
3.9 Storage Select “Settings” followed by “Storage” to manage your device’s storage space. [Note] If you have an SD-Card inserted, click on the Eject icon before disconnecting SD-Card from the device. -
Page 31: Languages & Input
3.10 Language & Input Click “Settings,” then select “System”, then Select “Languages & Input” to change your device’s language settings. You’ll be given the following options: Languages: Change to one of 54 different languages. You can also set your device to read multiple languages. -
Page 32: Files
3.11 Files From the “All Apps Menu”, you can manage your files and install/uninstall apps with “Files”. Tap the “Files” icon, and you’ll be able to manage all of your personal files. -
Page 33: Apk Files
3.12 APK Files Applications (including downloaded APK files), will be listed by selecting “Library” followed by “APP.” If you have any downloaded APK files, click them and select “Install”:... -
Page 34: Web Browser
4. Web Browser Google Chrome: Many of Google Chrome’s features are included in your device. -
Page 35: Photos & Video
5. Photos & Video Google Chrome: You can find the default photo and media player by opening the All Apps Menu and selecting the “Gallery” app. The device will scan both internal and external storage for photos, videos and screenshots. The “Gallery” app will sort your media based on the following. Photos and videos taken on your device’s camera will appear in the “Camera”... -
Page 36: Wallpaper
6. Wallpaper Your Gateway Device supports both static and 3D wallpapers. To change your wallpaper, tap on any empty area of the desktop for about 5 seconds, then tap on “Wallpapers” shown below: You’ll then be given a list of wallpapers currently installed on the device: You can select and preview your desktop wallpaper before setting. -
Page 37: Sound Recorder
7. Sound Recorder You can access the built-in sound recorder by selecting All Apps, followed by “Sound Recorder” shown below: You can select the Record button, to start recording Press stop when finished. You can press the Play button to preview your recording. Press “Done” to save it. You’ll be able to find your recordings by going into Settings and selecting “Storage settings, followed by “Explore”. -
Page 38: Camera
8. Camera Click on the Camera icon, from the desktop, to enter the camera app, shown below: Click on the shutter button (on the right side) to take pictures. You can also slide your finger to the right, from the left side of the screen to change from photos to videos. You can also access the camera settings, shown below:... -
Page 39: Email
9. Email Select Gmail from the All Apps menu, and you’ll be taken to the Gmail app. Before using, you will need to input your account information shown below: Make sure you have a stable connection, before using. Select “Add an email address”. (Follow the on screen instructions) -
Page 40: Usb Support
10. USB Support PC Connection: You can connect your device to a PC. By default, it’s set to charging mode. Tap the top of the touch screen of your device and slide towards the bottom. This will open the status menu. -
Page 41: Otg Support
11. OTG Support Tap on the option shown above, and you will be taken to a second menu. Select “File Transfer” and your PC will immediately download the drivers provided by the tablet. Once finished, you’ll be able to transfer files to and from your Gateway device. OTG Support You can connect a variety of USB plug-and-play devices to your tablet, using the provided OTG cable. - Page 42 12. Conventions Date Version Author 07-14-2022 J Mendez...
Need help?
Do you have a question about the RATR30824F and is the answer not in the manual?
Questions and answers