Advertisement
Advertisement
Table of Contents

Related Manuals for Safe Fleet FOCUS H2


Summary of Contents for Safe Fleet FOCUS H2
- Page 1 FOCUS H2 In-Car Video System Installation Guide Document Revision: 1.7 © Safe Fleet | All rights reserved JUL 2023 | R1.7...
-
Page 2: Table Of Contents
1.1 Purpose..................2 2. Installing FOCUS H2 In-car Video System.......3 2.1 Package Contents. -
Page 3: Introduction
1. Introduction 1. Introduction This document is intended for use with Safe Fleet FOCUS H2 In-Car Video System and contains instructions for using the Safe Fleet FOCUS H2. Safe Fleet manufactures state-of-the-art mobile data computers and digital video recording equipment for use in the public safety, utility and military community. -
Page 4: Installing Focus H2 In-Car Video System
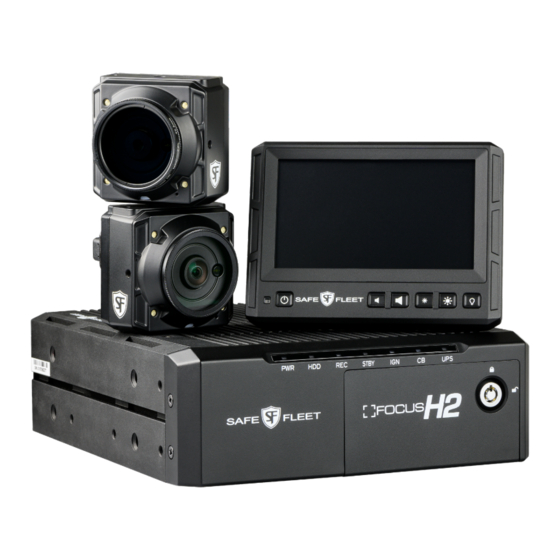
FOCUS H2 Installation Guide 2. Installing FOCUS H2 In-car Video System 2. Installing FOCUS H2 In-car Video System 2.1 Package Contents FOCUS H2 CPU Front Camera Rear Camera P/N: FOCUS-12-01 P/N: FOCUS-15-06-C-02 P/N: FOCUS-15-03-U-02 H2 Monitor Power Harness P/N: FOCUS-12-02... -
Page 5: Mounting Parts List
(Vehicle specific mounts are available for 2020+ Ford Explorer Utility, 2018-2020 Tahoe, and 2021+ Tahoe). 2.3 Mounting the FOCUS H2 CPU The following images show the front and the back of the FOCUS H2 CPU respectively. To mount the CPU, follow these steps: 1. Choose a dry location with air flow. - Page 6 FOCUS H2 Installation Guide 2. Installing FOCUS H2 In-car Video System a. If a rack is present, fasten the CPU mounting bracket to the rack with 4 x 1/4”-20 carriage bolts and nuts. b. If a rack is not present, fasten the CPU mounting bracket to the vehicle with 4x #10 self-tapping screws.
-
Page 7: Mounting The Monitor
To mount the FOCUS H2 monitor, follow these steps: 1. Attach the Swivel mount backing plate to the back of the FOCUS H2 monitor. Secure it via the center hole with a 1/4"-20 screw, 2 flat washers, and a split lock washer, and secure via the top-left hole with a #8-32 screw and 2 flat washers as shown in the figure below. -
Page 8: Mounting The Front Camera
FOCUS H2 Installation Guide 2. Installing FOCUS H2 In-car Video System 2.5 Mounting the Front Camera To mount the front camera, follow these steps: 1. Install the flat plate by removing the visor clip and placing the plate around the hole. Mark and drill pilot holes first to make the self-drilling screws easier to install. - Page 9 FOCUS H2 Installation Guide 2. Installing FOCUS H2 In-car Video System ii. Install the camera mount by inserting a carriage bolt into the hanging bracket with a set of white plastic washers, a split washer, and a locking nut as shown in the figure above.
- Page 10 FOCUS H2 Installation Guide 2. Installing FOCUS H2 In-car Video System NOTE: Upper and Lower Mounting Holes There are upper and lower mounting positions to choose from, depending on the agency's mounting policy. Lower mounting Upper position mounting position 4.
-
Page 11: Mounting The Rear Camera
FOCUS H2 Installation Guide 2. Installing FOCUS H2 In-car Video System 2.6 Mounting the Rear Camera Hardware provided for rear camera installation: (2) self-drilling screws, mounting plate, camera mount, hex head screw with lock washer, and pan head screw To mount the rear camera, follow these steps: 1. -
Page 12: Wiring The Focus H2
2.7 Wiring the FOCUS H2 2.7.1 Using the Power Harness for Wiring the CPU To wire the FOCUS H2 using the Power Harness, follow these steps: 1. Attach the BLACK wire of the POWER HARNESS to ground. 2. Take the inline fuse holder and release the clasp on the holder to remove the fuse. - Page 13 FOCUS H2 Installation Guide 2. Installing FOCUS H2 In-car Video System Connect the monitor extension cable (black) here NOTE: Orientation For proper orientation make sure the top flat side of the connector is facing up. 2.7.3 Wiring the Front Camera To wire the front camera, follow these steps: 1.
- Page 14 FOCUS H2 Installation Guide 2. Installing FOCUS H2 In-car Video System 2.7.4 Wiring the Rear Camera To wire the rear camera, follow these steps: 1. Run the camera extension cable (red) from the rear camera location to the CPU. 2. Connect the camera pigtail to the camera extension cable.
- Page 15 FOCUS H2 Installation Guide 2. Installing FOCUS H2 In-car Video System Input and Output Descriptions Pin # Connector Function Color DI - 1 Input Lightbar Black / yellow stripe DI - 2 Input Brake Black / white stripe DI - 3 Input...
-
Page 16: Connecting The Peripherals
FOCUS H2 Installation Guide 2. Installing FOCUS H2 In-car Video System 2.8 Connecting the Peripherals This section describes how you can connect the peripherals of the FOCUS H2 In-car Video System. 2.8.1 Connecting the GPS To wire the GPS, follow these steps: 1. - Page 17 FOCUS H2 Installation Guide 2. Installing FOCUS H2 In-car Video System The microphone has the following three buttons • Rec – larger button on top • PB1 – smaller button on top. This is a programmable function button. • PB2 – side button. This is a programmable function button.
- Page 18 FOCUS H2 Installation Guide 2. Installing FOCUS H2 In-car Video System Connecting the Microphone Receiver to the CPU Follow these steps to connect the microphone receiver to the CPU. To connect the microphone receiver to the CPU: 1. On the CPU, find the 15-pin port labeled "WMIC".
- Page 19 • Safe Fleet recommends routing this cable along the same route as the Safe Fleet color coded cables. • This accessory will be plugged into the back of the CPU, near the pig- tails, utilizing a RP SMA Male connector.
-
Page 20: Monitor Calibration
FOCUS H2 Installation Guide 3. Monitor Calibration 3. Monitor Calibration Upon bootup of the FOCUS H2 for the first time, it will ask for calibration of the monitor. Please follow the steps below for the monitor calibration procedure. NOTE: Monitor Compatibility Please note that you could not connect a FOCUS H1 monitor back to a FOCUS H1 device of v2.x if it was connected and... -
Page 21: Cpu Led Indicators
FOCUS H2 Installation Guide 4. CPU LED Indicators 4. CPU LED Indicators The following table describes each of the FOCUS H2 CPU LED indicators: LED Indicators Color Status Amber System powered ON Green Hard drive activity Recording STBY Green System is ready to power ON... -
Page 22: Service & Support
FOCUS H2 Installation Guide Service & Support Service & Support Documentation and Warranty Additional copies of this guide along with other documentation and product warranty can be found on the Safe Fleet Community website: https://community.safefleet.net Technical Support Phone: 1.800.336.8475 Email: SFLESupport@safefleet.net...
Need help?
Do you have a question about the FOCUS H2 and is the answer not in the manual?
Questions and answers
We install the focus h2, our display and camera have power but the display will not turn on. It also continues to power cycle every 30 seconds
The Safe Fleet FOCUS H2 display not turning on and power cycling every 30 seconds could be due to power-related issues. Possible causes include:
1. Insufficient Power Supply – The system may not be receiving stable power from the vehicle battery or UPS.
2. Loose or Faulty Connections – Check the power cables and connections to ensure they are secure.
3. UPS Battery in Use – If the UPS LED indicator is red, it means the system is running on battery power, which may not be sufficient for stable operation.
4. Ignition Off – If the ignition is off, the system may not receive power, causing it to cycle.
5. Hardware Failure – A malfunctioning power circuit or internal component may be preventing proper startup.
To troubleshoot, verify power connections, check LED indicators for power status, and ensure the vehicle ignition is on.
This answer is automatically generated