
Related Manuals for LLK LLKHDES250

Summary of Contents for LLK LLKHDES250
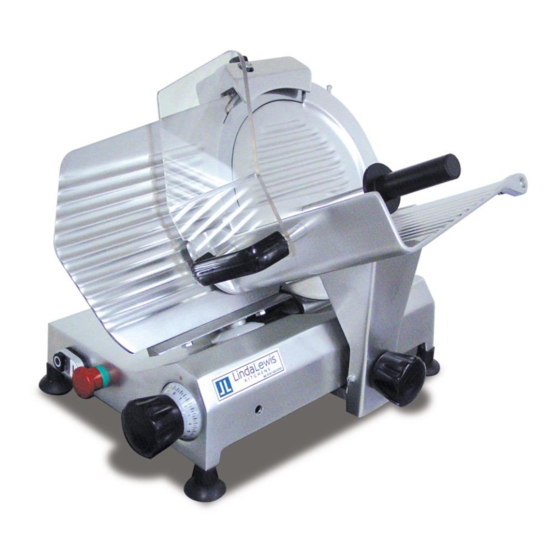
- Page 1 F250I Parts Manual & Instruction Manual LLKHDES250 Slicer Service@llkpizzapros.co.uk 0161 696 0052...
- Page 2 F250I Service@llkpizzapros.co.uk 0161 696 0052...
- Page 3 F250I Location Description Location Description BLADE REMOVAL TOOL F01.063 CASING F01.456 BEARING F01.308 GRUB SCREW F01.218 F01.464 GRUB SCREW F01.218 GRUBSCREW F01.454 F01.442 SPACER F01.216 SELF TAPPING SCREW F01.431 SPRING F01.235 STOP PLATE F01.432 GRUBSCREW F01.465 GRUB SCREW F01.218 BOLT F01.195 TIE ROD F01.208...
- Page 4 F250I Location Description Location Description SPACER F01.458 GRINDER COVER F01.449 BELT F01.184A BODY F01.453 PULLY ASSEMBLEY F01.038 SPACER F01.452 THREADED SPINDLE F01.419 WASHER F01.210 GRUBSCREW F01.218 BOLT F01.195 BLADE F01.201 SHARPENER PUSH BUTTON F01.332 SCREW F01.171 SPRING F01.235 BLADE GUARD F01.005 SCREWED ROD F01.118B...
- Page 5 F250I GRAVITY SLICERS F 195 S 220 F250 ES S 220 AF F 250 E F 250 I F 250 TSV F 275 E F 275 I F 300 E F 300 CL F 300 I F 330 I F 350 I NOTES FOR THE USER This manual consists of 28 pages as follows: Title page with notes for the user (back side not printed);...
-
Page 6: Table Of Contents
F250I CONTENTS FOREWORD........................2 SCOPE OF THIS MANUAL..................2 GENERAL INFORMATION.................... 2 LIMITS OF USE – SAFETY NORMS ................. 2 GENERAL SAFETY REGULATIONS ................ 2 MANUFACTURER'S WARRANTY AND LIABILITY ..........3 PLATES – CONFORMITY MARKS................3 ENVIRONMENTAL CONDITIONS OF USE .............. 3 PACKING ........................ -
Page 7: Foreword
F250I FOREWORD SCOPE OF THIS MANUAL This manual contains all the necessary information to install, use and service the gravity slicers for food (please see models in paragraph "Technical Description"). The scope of this document, hereinafter the "manual", is to permit users, and especially end users, to take all the cautions and provisions possible for using this machine safely and for a long time. -
Page 8: Manufacturer's Warranty And Liability
F250I MANUFACTURER'S WARRANTY AND LIABILITY The manufacturer's warranty covering the good functioning of the machines and their compliance to the service for which they have been designed depends on the correct application of the instructions contained in this manual. The Manufacturer assumes no liability either direct or indirect deriving from: Failure to comply with the instructions contained in this manual;... -
Page 9: Packing
F250I PACKING OPENING THE BOX On reception check packaging integrity, otherwise inform the forwarding agent or the area agent immediately. To unpack the machine, proceed as follows: Open the box and remove your copy of the manual of use and maintenance, then proceed according to the instructions found on that manual;... -
Page 10: Technical Description And Proposed Conditions Of Use
F250I TECHNICAL DESCRIPTION AND PROPOSED CONDITIONS OF USE GENERAL DESCRIPTION The machine is essentially made of a base supporting a circular blade mounted in tilted position. This blade is driven by an electrical motor to slice foodstuffs. The machine is equipped with a carriage holding a product tray and sliding on tracks mounted under the base top, parallel to the blade. -
Page 11: Dimensions
F250I DIMENSIONS F 195 S 220 F250 ES S 220 AF F 250 E F 250 I F 250 TSV F 275 E F 275 I F 300 E F 300 CL F 300 I F 330 I F 350 I Service@llkpizzapros.co.uk 0161 696 0052... -
Page 12: Main Technical Data
F250I MAIN TECHNICAL DATA GRAVITY SLICERS S220 F250E Version F195 F250I F275E F275I F300E F300I F300CL F330I F350I 220AF F250ES Motor HP 0,20 0,25 0,30 0,35 0,30 0,35 0,35 0,50 0,35 0,50 0,50 Blade Ø Min. slice thickness 0/15 0/15 0/16 0/16 0/16... -
Page 13: Supplied Literature And Accessories
F250I SUPPLIED LITERATURE AND ACCESSORIES If not otherwise defined at the moment of order, the machines are supplied together with the following: EU conformity declaration Instructions manual for installation, use and maintenance. PRODUCTS THAT CAN BE SLICED All types of cold cuts (raw, cooked, smoked); Meat without bone (raw or cooked, at a temperature not less than + 3 °... -
Page 14: Main Components I
F250I MAIN COMPONENTS I F 195 S 220 F250 ES STARTUP BUTTON (GREEN) 11. BLADE STOP BUTTON (RED) 12. PRODUCT GRIP HANDLE N.A. 13. MANUFACTURER IDENTIFICATION SLICE THICKNESS CONTROL KNOB PLATE, MACHINE DATA AND UE MARKS ADJUSTABLE FOOT 14. PRODUCT GRIP HAND PROTECTION CARRIAGE TRAY SUPPORT 15. - Page 15 F250I MAIN COMPONENTS S 220 AF F 250 E F 250 I F 250 TSV F 275 E F 275 I F 300 E F 300 CL F300 I F 330 I F 350 I STARTUP BUTTON 11. BLADE (WHITE OR GREEN) STOP BUTTON (RED 12.
-
Page 16: Machine Commissioning And Function Tests
F250I MACHINE COMMISSIONING AND FUNCTION TESTS INSTALLING THE MACHINE Position the machine on a well leveled, smooth and dry top suitably dimensioned to withstand the machine weight. ELECTRICAL CONNECTION Install the machine near a EU compliant outlet derived from a system meeting the current norms. -
Page 17: Commands
F250I COMMANDS START AND STOP BUTTONS Press the white or green button (1) to start running the blade. The light turns on to indicate that the machine works correctly. Press the red or black button to stop the blade. Slice thickness can be adjusted by turning the graduated knob (4) counterclockwise. -
Page 18: Using The Machine
F250I USING THE MACHINE LOADING THE PRODUCT ON THE TRAY AND SLICING Ascertain that the thickness control knob is correctly positioned to '0'. Draw back the carriage completely (towards the operator) to loading position. Lift the product grip by pulling it away by 10 cm from the blade and put it in rest position. -
Page 19: Cleaning The Slicer
F250I CLEANING THE SLICER GENERAL The machine must always be accurately cleaned at least once a day, and more often if necessary. Always use protective gloves. DISASSEMBLING THE MACHINE FOR CLEANING Disconnect the plug from the mains; Turn the gauge plate know to '0'; Remove the various components as described in the following paragraphs: Unscrew (counterclockwise) the blade guard rod;... -
Page 20: Reassembling The Machine
F250I REASSEMBLING THE MACHINE Proceed as indicated for the previous operations but in reverse order. MAINTENANCE GENERAL The operator is allowed to perform the following maintenance operations: Blade sharpening: regularly (intervals and duration obviously depend on the use of the machine, time of use and type of product sliced); Lubrication of carriage sliding guides: once a week. -
Page 21: Sharpening
F250I SHARPENING Models with separate sharpener 1. Clean the blade accurately using denaturized alcohol to degrease it. 2. Turn the graduated knob (1) towards the left to open completely. 3. Remove the sharpener from its box, unscrew the knurled knob and insert the threaded metallic pin inside the hole (2) provided for on the product tray so that the two emery wheels are turned towards the blade. - Page 22 F250I SHARPENING Versions with built-in sharpener To sharpen the blade periodically as soon as the cutting capacity decreases. Please proceed as per the following instructions: 1. After disconnecting form the mains, clean the blade accurately using denaturized alcohol to degrease it. 2.
-
Page 23: Lubrication
F250I LUBRICATION Carriage sliding guides product grip (once a week) Use only the oil provided, otherwise use white Vaseline oil. DO NOT USE VEGETAL OILS. Spread a small quantity of oil on the bar and move the assembly 3 or 4 times. -
Page 24: Adjusting The Motor Belt Tension
F250I ADJUSTING THE MOTOR BELT TENSION After a given period of service an unusual noise may occur because of the belt bedding. In this case, tighten the belt-stretcher on the side of the motor under the machine base. Service@llkpizzapros.co.uk 0161 696 0052... -
Page 25: Troubleshooting And Remedies
F250I TROUBLESHOOTING AND REMEDIES The table below indicates the most common problems that may arise during slicing and the necessary remedies. PROBLEM POSSIBLE CAUSE REMEDY The machine does not start No power supply Ascertain that the plug is is when the green button is correctly inserted. -
Page 26: Dismantling The Slicer
F250I DISMANTLING THE SLICER These machines are made of the following elements: Aluminium frame; Stainless steel fittings and others; Electrical parts and cords; Electrical motor; Plastic materials, etc. Whether dismantling is entrusted to third parties or done in-house (in that last case you will have to separate the various materials) please note that disposal of the materials can only be carried out by duly authorized businesses. -
Page 27: Electrical Diagram Sig. 97 (Versions 195-220-250 E)
F250I ELECTRICAL DIAGRAM SIG. 97 (versions 195-220-250 E) Service@llkpizzapros.co.uk 0161 696 0052...
Need help?
Do you have a question about the LLKHDES250 and is the answer not in the manual?
Questions and answers