
Related Manuals for LLK Verrocchio

Summary of Contents for LLK Verrocchio
- Page 1 Verrocchio GAS LIVING FLAME OVEN llk. 0161 696 0052 SERVICE@LINDA-LEWIS.CO.UK INSTRUCTIONS FOR INSTALLATION, USE AND MAINTENANCE...
- Page 2 INDEX 1 GENERAL WARNINGS 2 GENERAL INFORMATION 3 DECLARATION OF CONFORMITY 4 OVEN DIAGRAM 5 DIMENSIONS & WEIGHT 6 TRANSPORTATION, HANDLING & DELIVERY 7 POSITIONING 8 VENTILATION 9 INSTALLATION 10 START UP 11 USING THE OVEN 12 CONTROL PANEL 13 BURNER MAINTENANCE 14 BURNER FAULTS 15 BURNER SPARES 16 WARNINGS...
-
Page 3: General Warnings
1 | GENERAL WARNINGS Installation must be carried out by a In order to ensure the maintenance qualified personnel and according of your oven the following is to current regulations, following the essential: instruction provided a) to carry out periodic maintenance manufacturer. -
Page 4: General Information
2 | GENERAL INFORMATION • Some parts of the oven may Failure observe become hot. It is advisable to be instructions in this manual can careful not to touch the surfaces compromise safety. and not bring materials that may • The manual must be kept with be flammable. -
Page 5: Declaration Of Conformity
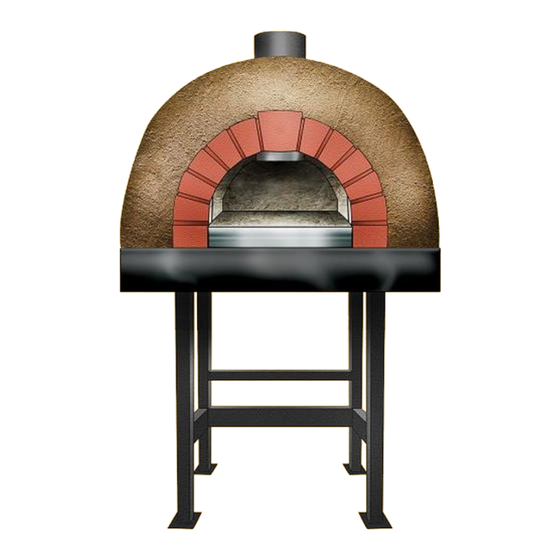
3 | DECLARATION OF CONFORMITY In accordance with the CPR 305/2011 (building products), with the Regolamento 1935/2004 (materials and articles which have to be in contact with food) the Directive 2004/108/CE (Electromagnetic Compatibility) and Directive 2006/95/CE (Low Tension). Equipment type: Gas pizza oven Manufactured in Italy for: Linda Lewis Kitchens Ltd... - Page 6 4 | VERROCCHIO DIAGRAM...
-
Page 7: Dimensions And Weight
5 | DIMENSIONS & WEIGHT MODEL LLKVR4 LLKVR7 LLKVR9 LLKVR13 LLKVR16 850 ∅ 1000 ∅ 1150 ∅ 1450 ∅ 1650 ∅ DIAMETER OF COOKING FLOOR THICKNESS OF 60-80 60-80 COOKING FLOOR EXTERNAL 1140 1450 1500 1800 2000 WIDTH AT WIDEST POINT EXTERNAL 1220 1550... - Page 8 7 | TRANSPORT, HANDLING & DELIVERY Transportation must be performed by Before starting the lift of the oven is qualified personnel. The oven must be necessary for the installer to conduct a transported in such a way as to avoid any stability control consisting of raising the damage to the parts.
- Page 9 When taking delivery of the oven: Check all outer packaging is in good condition and there are no obvious visual signs of damage in transit. Never remove packaging alone as some components may have shifted during transit. Remove outer packaging and cut strap holding the components of the oven together.
- Page 10 7 | TRANSPORT, HANDLING & DELIVERY The lower legs of the stand for the oven WARNING! If moving the oven mounted on are separate within the packaging. The the stand using a pallet truck, please be stand can be erected and attached to the aware the oven will be top heavy, you will oven before positioning.
- Page 11 7 | TRANSPORT, HANDLING & DELIVERY WARNING! Larger models may require the Pallets may be needed in order to lift the use of 2 x high lift pump trucks in order to lift oven high enough to fit the legs onto the the oven onto support stands.
- Page 12 8 | POSITIONING Issue 1 01.05.17...
- Page 13 All solid fuel ovens require a flue system that is appropriate for a solid fuel appliance and is independent from any existing extraction. LLK Ltd do not include flue systems in their pricing, therefore this must be supplied and installed independently by qualified personnel. Please contact us for a recommended supplier.
- Page 14 Existing electrical and gas supplies must 5. Safety distances: It is mandatory to comply with all safety regulations meet minimum safety distance according to the laws in the country of between the furnace and other equipment use. This includes health & safety flammable materials.
- Page 15 9 | INSTALLATION OF PROBES Ovens supplied with forced draft gas systems are supplied with probes that connect directly to the control panel. The forced draft burner will go in to stand by mode once the oven has reached required temperature.
- Page 16 9 | INSTALLATION OF CONTROL PANELS Control panel with timer and digital thermometer The use of components involving use of electrical (Img 32), and with rotating plate (Img 33). power requires observance of some fundamental The electrical safety is only guaranteed when it is rules: correctly connected to an effective grounding a) never touch the appliance with wet or damp...
- Page 17 10 | START UP IMPORTANT! After connecting the chimney and ensuring it is drawing sufficiently you can turn on the oven. Before proceeding to the normal use of the oven, it is essential to perform a series of small ignitions in order to be able to remove the residual moisture present in the structure.
-
Page 18: Using The Oven
11 | USING THE OVEN If the dome becomes fouled with WARNING! black, this indicates the oven is cold Failure to comply with the above and therefore is not ready for advice can result in serious damage to cooking. the oven and its structure. From cold the heating time of the oven is about 3-4 hours. -
Page 19: Control Panel
12 | CONTROL PANEL The digital control panel allows you to manage the temperature control of a cooking chamber of a pizza oven with its alarm management system. The working temperatures can be changed at any time by the user. They are detected and reported temperatures related to the cooking chamber of the oven, the hob or the control panel. - Page 20 12 | CONTROL PANEL General power on/off switch Control panel display on/off button. This button must be switched on to enable all functions of the control panel. Up and down arrows to set the temperature of the cooking chamber. Temperatures can be set between 100 °c and 450°c Up and down arrows to set cooking floor temperature.
- Page 21 12 | CONTROL PANEL: ALARMS AL1 : Oven chamber probe failure. Setting the temperature of the oven is always controlled through the control panel. AL1 will flash on the display and a buzzer will sound for 10 seconds. This warning will disrupt the working of the oven.
-
Page 22: Burner Maintenance
13 | BURNER MAINTENANCE Burner maintenance is advised to be carried out at least every 6 months in establishments with a high output. In order to carry out a deep clean of the burner, it is necessary to remove the burner from the oven and disconnect from any power. - Page 23 13 | BURNER MAINTENANCE Removing the filter -Check the filter at least once a year -Change the filter if the pressure difference between pressure connection 1 and 3 is > 10 mbar. -Change the filter if the pressure difference between pressure connection 1 and 3 is twice as high compared to the last check.
-
Page 24: Burner Faults
14 | BURNER FAULTS... - Page 25 14 | BURNER FAULTS Burner failure On the front part of the safety In the event of a defect the inflow of appliance is located fuel is a plexiglass lunette under which interrupted. When the block occurs there is the indicator disc of in the programme's progress.
- Page 26 16 | WARNINGS These devices are intended only for This equipment is not suitable for use industrial professional by people (including children) with cooking pizza or similar foods in the reduced physical, sensory or mental manner indicated in this instruction capabilities, reduced or lack of booklet.
-
Page 27: Maintenance
17 | MAINTENANCE A wood stove actually requires very little could trigger the spontaneous combustion maintenance. The checks to be carried out of the firewood that would cause a violent periodically are more or less the same as reaction with dangerous flare-ups. Flare- for an open fire: check and clean the flue, ups can leak from the oven also has a remove the residual ash, etc. -
Page 28: Warranty
LLK will not be held responsible for any be returned carriage free. incorrect installation. There will be no liability on the part of LLK in case of The warranty excludes all parts subject to wear and non compliance with the instructions for installation,...
Need help?
Do you have a question about the Verrocchio and is the answer not in the manual?
Questions and answers