
Related Manuals for Caroma SPA000252

Summary of Contents for Caroma SPA000252
- Page 1 ELECTRIC SCOOTER USER MANUAL Note: Please read through the user manual before using the scooter for the first time.
- Page 2 Company and have won high praises from customers. To ensure easy and safe use of the product, we've specially prepared this manual with which, you could understand CAROMA As a necessary product for traveling in the future, our products are electric scooter better.
-
Page 3: Table Of Contents
PRECAUTIONS FOR USERS ..........PACKING LIST ..............STRUCTURE DIAGRAM ............ OPERATOR'S PARAMETERS ..............MANUAL CHARACTERISTICS ............ TABLE OF CONTENTS INSTALL ATION ............INSTRUCTIONS FOR USE ............PRECAUTIONS ..............MAINTENANCE ..............TROUBLESHOOTING AND SOLUTIONS ......SPECIFICATIONS OF PARTS ..........AFTER-SALES SERVICES ............ - Page 4 01. PRECAUTIONS FOR USERS This manual contains important information about safety performance and service. Before using the product, please read the following warnings. For riding safety, please carefully read this manual before riding Please observe the local laws and regulations on electric and check whether the parts are intact.
- Page 5 1.13 Please keep the two keys properly. You would not be able to start 1.21 There are still other factors that may cause danger when using the electric scooter or change the battery once the exclusive key this product, even if following the instructions in this manual. is lost.
-
Page 6: Packing List
02. PACKING LIST Please carefully check the contents in package upon receiving the product. For any missing part or any damage, please timely contact us. Electric Scooter Slotted Head Screwdriver Tool kit Vegetable basket 0.12inch (3mm) 0.16inch (4mm) 0.20inch (5mm) 0.24inch (6mm) Allen Key Allen Key... -
Page 7: Structure Diagram
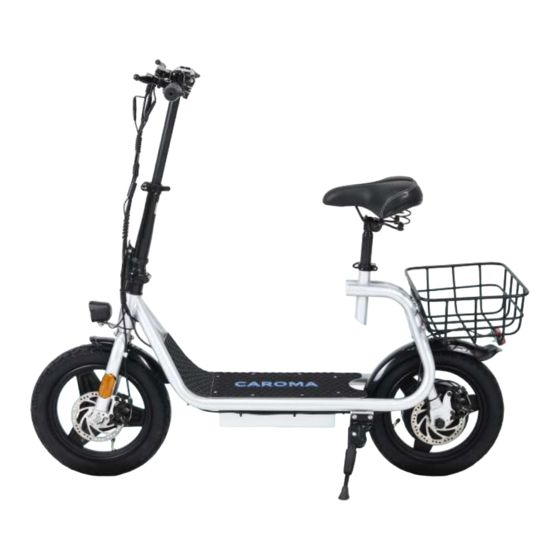
03. STRUCTURE DIAGRAM Knowing scooter parts well could facilitate its assembly, maintenance and troubleshooting. Color, style and parts of the scooter may be different. The physical product shall prevail. Throttle Handlebar Saddle Quick release LCD Display Quick release Luggage basket Bell Brake handle Taillight... -
Page 8: Parameters
04. PARAMETERS Please confirm the product model and find corresponding parameters. Performance Performance Items Parameters Items Parameters Indicators Indicators Dimensions 124*23*60 CM Rated power of motor 500W Motor parameters Wheel dimension 14" Motor type Brushless hub motor Basic Frame material Iron Input voltage 90-264V AC... -
Page 9: Characteristics
05. CHARACTERISTICS 06. INSTALLATION Three-dimensional body structure is designed according to After receiving the product, please carefully check it according to ergonomics, mechanics of materials and aesthetics, contributing the list of accessories. Pay attention to safety during installation and to the best riding effect. assemble the scooter according to the following steps. - Page 10 6.1 Install kickstand 6.2 Install handlebar vertical pipe Untighten the screw on kickstand with hex wrench. Put the vertical pipe vertically and lock the rubber ring and fixed structure in the middle of vertical pipe. Install the kickstand at the edge of pedal and fasten it with hex Install the scooter in straight vertical pipe and lock the fixed wrench.
- Page 11 6.3 Install saddle seat 6.4 Install luggage basket Insert saddle seat pipe at the back of saddle and fasten it with 14# Remove the 4 mounting screws for the luggage basket above the wrench. rear fender. Adjust the luggage basket and secure it in place with the screws Insert the well-assembled saddle into bar receiver, lock it with that were just removed.
- Page 12 Connect the tail light wires. 6.5 Adjust the angle of brake rod, instrument, gear lever, accelerator and bell on the handlebar, and tighten them with tools. Congratulations! You have assembled the whole electric scooter already.
-
Page 13: Instructions For Use
07. INSTRUCTIONS FOR USE 7.1.2 Introduction to instrument functions Operation process Press and hold button for 2 s to start it up. The default 7.1 Instrument value is Gear "1". 7.1.1 Introduction to Instrument Interface. To increase the electric and pedal assistance level, press “i” button. - Page 14 P05: Boost gear: 0: Gear 3 mode P14: Settings of controller current limit default 12A and range: 1-20A P06: Wheel diameter: Unit, inch; accuracy: 0.1 P15: Undervoltage value of controller P07: Number of speed measuring magnets: Scope: 1-255 P16: ODO clear settings Press and hold the plus key for 5 seconds to clear ODO P08: Speed limit: Range 0-100km/h, 100 means no speed limit P17: 0: Cruise not enabled, 1: Enable cruise;...
- Page 15 Modify values of parameters: Press button under one parameter 7.3.2 Key positions of battery state to switch parameters, press button to add or subtract Know the key port and battery power supply position before riding. values. After modification, press button to switch to the next As shown in the picture below, the key port aligns to the key position 1 and is consistent with the ON icon.
- Page 16 7.4.2 Power assist drive mode: Press and hold button to enter 7.5 Adjustment and use of brake into mode settings. Press button on the interface of settings 7.5.1 Adjustment of Brake to switch P10 parameters, press and hold button to switch Before aligning the mechanical disc brake, make sure that the brake functions of adding and subtracting of button, set the number...
- Page 17 7.5.2 Use of Brake 7.6 Charging: Safe operation guide The brake is used for speed control instead of stopping the scooter Please follow the instructions for use. Otherwise, user shall bear all alone. The maximum braking force of the wheel is available before the consequences arising therefrom.
-
Page 18: Precautions
08. PRECAUTIONS Please check whether the battery is fully charged before riding 8.1.5 each time. After starting the scooter, slowly accelerate to avoid excessive 8.1.6 The scooter is a kind of personal transportation tool with a limited starting current and electric energy waste due to instantaneous speed, which is strictly inspected during manufacturing process. - Page 19 Always lock the battery with the attached battery key and remove Be careful of obstacles and slippery roads. Do not ride on grass or 8.1.15 8.2.3 the key before riding the scooter. cobblestones. 8.1.16 The routine inspection before and after riding each time will help you maintain optimum electric scooter performance and find potential problems before they cause safety problems.
- Page 20 Do not ride to go up and down. Please pay attention to the obstacles above your head while 8.2.6 8.2.9 riding. Do not ride the scooter on highway. 8.2.7 Do not wear headphones and use cell phones while riding. 8.2.10 The scooter is a means of transportation for an individual and 8.2.8 cannot be used by multiple persons at the same time.
- Page 21 Do not use the scooter while charging or connecting to a charger 8.3.11 8.3 Precautions for charging in any case. During charging, keep the scooter beyond children's reach. 8.3.1 Be sure to lock the battery with the attached battery key and 8.3.12 pull out the battery key before using the scooter.
-
Page 22: Maintenance
09. MAINTENANCE 9.2 Instructions for maintenance and cleaning To avoid accident due to wetting of internal electronic parts and 9.2.1 wires, do not wash the scooter with water. Maintain the scooter regularly. Adjust scooter at a local scooter shop Do not fill oil into front/rear brake, rim or tire. twice a year. - Page 23 10. TROUBLESHOOTING AND SOLUTIONS Trouble code Meaning of fault Checking method Solution 1.Check whether the brake handle is reset after power failure. Brake reset Brake 2.Under normal conditions, the waterproof head of the power- off brake handle can be pulled out in turn for inspection. Measure the battery voltage.
-
Page 24: 1 Specifications Of Parts
11. SPECIFICATIONS OF PARTS Category Components Warranty period Appendix 1 Charger 12 months Tire: Model: SPA000252 Part 1 Battery bag 12 months Internal and external tire: 14×2.215IN A/V nozzle Part 2 Battery holder 12 months Part 3 Crank 6 months... - Page 25 Parts that are subject to natural wear under normal use, or the 12.1.3 circumstances inapplicable to the above warranty policy. Failure of correct change and maintenance or faults and 12.1.4 damage of other parts due to wear of consumables. The warranty card does not match the scooter model or the 12.1.5 scooter model is changed.
- Page 26 CARMOA reserves the final interpretation right of all terms and conditions in this manual. MADE IN CHINA...
Need help?
Do you have a question about the SPA000252 and is the answer not in the manual?
Questions and answers