
Subscribe to Our Youtube Channel
Related Manuals for Browning Strike Force HD Pro X BTC-5HDPX


Summary of Contents for Browning Strike Force HD Pro X BTC-5HDPX
- Page 1 All manuals and user guides at all-guides.com MODEL BTC-5HDPX PLEASE READ THIS MANUAL BEFORE USE...
- Page 2 All manuals and user guides at all-guides.com Thank you for purchasing a Browning Trail Camera. Our trail cameras are constructed of the finest workmanship and materials available. As hunters ourselves, we have designed our products to help you get the most of your time in the field.
- Page 3 QUICK START GUIDE All manuals and user guides at all-guides.com STEP 1 Press the battery tray eject button to release the battery tray. The tray will eject about 1/2”. Insert6 AA Alkaline Batteries and an SD card Battery I n s e r t into the camera.
-
Page 4: Table Of Contents
All manuals and user guides at all-guides.com TABLE OF CONTENTS Package Contents SD cards selection Camera Diagram Battery Installation Main Screen Time and Date Capture Mode Capture Delay / Picture Size Multishot Modes Video Quality / Video Length Smart IR / Adjustable IR Flash Timelapse Settings Temp Units / Info Strip / SD Management Motion Test / Camera Name... -
Page 5: Package Contents
1- Instruction Manual SD Card Selection Install a good quality memory card. The best brands of SD cards are Browning branded cards, Sandisk or Kingston branded cards. Your camera can operate on standard class 10 or higher SD cards ranging from 4-32 GB . -
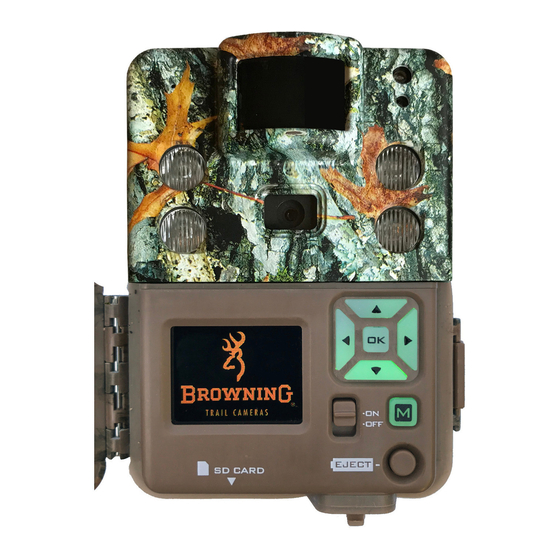
Page 6: Camera Diagram
All manuals and user guides at all-guides.com Gamera Diagram... -
Page 7: Battery Installation
Make sure you install the batteries with the correct polarity, following the markings on the battery tray. For opimtimal performance we recommend using Browning branded batteries,Energizer or Duracell. Slide the battery Battery tray into the Eject closed position. -
Page 8: Main Screen
All manuals and user guides at all-guides.com Main Screen Turn the camera’s power on by sliding the power switch to the ON position. The main screen displays the camera operation mode, pictures or videos taken, pictures or videos possible on the SD card, camera delay countdown and battery lifepercentage. -
Page 9: Time And Date
All manuals and user guides at all-guides.com Time and Date To Set the time and date: From the HOME screen, press the MODE button once. The SETUP screen will display showing your available camera settings options. The DATE option will be highlighted. Press the OK buttton to highlight the month Using the UP or DOWN arrows, select the current month. -
Page 10: Capture Mode
All manuals and user guides at all-guides.com Capture Mode To set the camera's capture Mode, use the DOWN arrow to highlight the MODE option. Using the RIGHT or LEFT arrow keys, select the operation mode for your key when finished. CAPTURE MODE OPTIONS: This setting will take still - STILL... -
Page 11: Capture Delay / Picture Size
All manuals and user guides at all-guides.com Capture Delay The capture delay sets the "timeout" in between motion activated images or videos. Highlight the CAPTURE DELAY option and use the RIGHT or LEFT buttons select the delay. Capture Delay options are 1, 5, 10, 20, 30, 60 seconds and 2, 5, 10, 30 or 60 minutes. -
Page 12: Multishot Modes
DOWN arrow button to highlight the Multishot option. Use the RIGHT or LEFT buttons to highlight a Multishot option. Your Browning Trail Camera can take multiple shots each time the camera is triggered. The default setting is 1 picture. Your options are as follows: -MULTI SHOT This is the default setting. -
Page 13: Video Quality / Video Length
All manuals and user guides at all-guides.com Video Quality VIDEO RESOLUTION The video options for your Browning trail camera are as follows: HIGH 1296 x 720p @ 30fps ULTRA 1600 x 900 @ 24fps Video Length VIDEO LENGTH You can select the length of your video clip as well in the VIDEO LENGTH window. -
Page 14: Smart Ir / Adjustable Ir Flash
All manuals and user guides at all-guides.com Smart IR Video Smart IR Video is a feature that will allow a daytime video clip to keep recording as long as the camera detects movement during filming. If the deer stands still in front of the camera and the camera does not detect movement, the camera will end the video clip.The maximum record time for a video... -
Page 15: Timelapse Settings
All manuals and user guides at all-guides.com Timelapse Settings Your Browning Trail Camera has the ability to function as a timelapse camera. This is useful if you want to view the entire activity in a given area such as a large field. -
Page 16: Temp Units / Info Strip / Sd Management
All manuals and user guides at all-guides.com Temperature Units Your temperature units can be displayed on the picture’s info bar in Fahrenheit or Celsius. To change the selection, Press the RIGHT arrows to make your selection. Info Strip Your trail camera has an information bar that is printed at the bottom of each photo taken. -
Page 17: Motion Test / Camera Name
All manuals and user guides at all-guides.com Motion Test Your trail camera is equipped with a MOTION TEST feature. This feature helps you aim the camera at your target area. With the motion test turned on, simply walk around in your target area. -
Page 18: Default Settings / Delete Images
All manuals and user guides at all-guides.com The following options can be changed by pressing the OK button to highlight the option, and changing the selection using the RIGHT or LEFT arrows. Remember to press the OK button to save your selection. -
Page 19: Image Retrieval
All manuals and user guides at all-guides.com Image Retrieval The most popular way to review the images on your SD card is to review the images on your home computer.The pictures can be viewed on both PC and Mac computers. Simply insert the SD card into the SD card slot on your desktop or laptop computer. -
Page 20: Timelapse Viewer Software
TO VIEW STILL PICTURES AND VIDEOS CLIPS. In order to playback your TIMELAPSE FILES, you need to install the Browning Buck Watch Timelapse Viewer software. This software will work on any PC running Windows XP or later version. The Buck... -
Page 21: Field Installation
All manuals and user guides at all-guides.com Field Installation TENSION KNOB Your camera has a built in adjustable tree mount bracket. After securing the camera to a tree, loosen the tension knob on the side of the camera. Position the camera at the correct angle, and re-tighten the tension knob. -
Page 22: Accessories
All manuals and user guides at all-guides.com Accessories We offer a full line of accessories for use with your new Browning Trail Camera. AA Batteries STEEL SECURITY BOXES SD CARDS BATTERY PACKS... -
Page 23: Warranty
All manuals and user guides at all-guides.com Warranty ONE YEAR LIMITED WARRANTY Your Browning Trail Camera warranty covers your trail camera for one year. We warrant that your camera will be free from defects in workmanship and materials when operated in normal use and conditions. -
Page 24: Fcc
All manuals and user guides at all-guides.com FCC Statement This equipment has been tested and found to comply with the limits for a Class B digital device, pursuant to part 15 of the FCC Rules. These limits are designed to provide reasonable protection against harmful interference in a residential installation. -
Page 25: Camera Specifications / Sd Card Size Chart
All manuals and user guides at all-guides.com C a m e r a S p e c i f i c a t i o n s PHOTOS Ultra 20MP High 12MP Medium VIDEOS High 1296 x 720 @30fps (720p) Ultra 1600 x 900 @ 24fps (900p HD+) Length... - Page 26 All manuals and user guides at all-guides.com Manufactured and Distributed by: Prometheus Group, LLC P.O. Box 130100 Birmingham, Alabama 35213-0100 1-888-618-4496 ©Prometheus Group, LLC Browning trademarks licensed from Browning...
Need help?
Do you have a question about the Strike Force HD Pro X BTC-5HDPX and is the answer not in the manual?
Questions and answers