Table of Contents
Advertisement
Quick Links
Advertisement
Table of Contents

Related Manuals for rada A-PC01

Summary of Contents for rada A-PC01
- Page 1 A-PC01 PanoCam USER MANUAL www.a-dena.com Adena Limited 2024...
- Page 2 This manual provides information relevant to the installation of the A-PC01 NoirCam, as well as its functions and control methods in detail. Please read this manual carefully before installing and using the camera. • A-PC01 PanoCam comes with its own power adapter. Power should not be extended from its jack, otherwise it may cause damage to the device.
-
Page 4: Product Overview
1. Product Overview 1.1 Physical Interface Description and Diagrams Front and Back Views of the Camera: Front View Side View -------------------------------- -------------------------------- 60mm 149mm 1. Camera lens. 76mm 2. Network port (supports PoE). 3. USB 2.0 Type-A. -------------------------------- 4. Line input. 5. -
Page 5: Bracket Installation
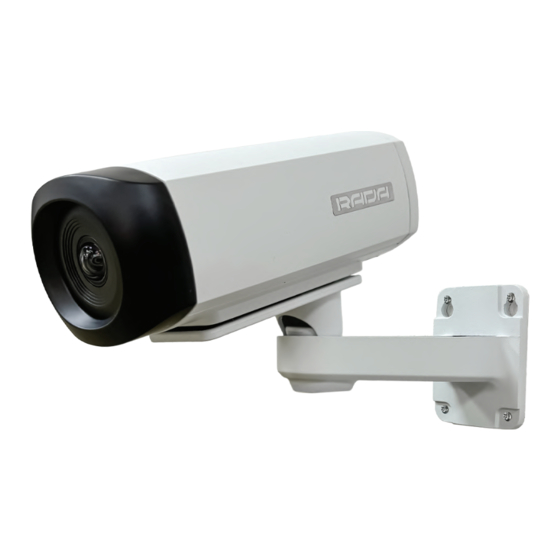
The bracket that comes with PanoCam is primarily designed to mount the camera on walls. Ceiling installation is possible, but the camera will have to be mounted at an angle. If you need the camera to be straight when mounted on a ceiling, we recommend using the RADA A-B02 bracket instead. - Page 6 1.3 How to Quickly Start Up the Camera The A-PC01 PanoCam can be used out of the box. To use it as a USB camera, simply connect it via any USB Type-A cable to your device. It will be recognised as the “RADA PanoCam”. You can then adjust its video parameters through your software or hardware.
-
Page 7: Web Interface Description
For more in-depth customisation, you can access the camera’s web interface. By default, its IP address is 192.168.1.179. PanoCam’s web interface username and password are as follows: Username: admin Password: admin123 If you do not know how to change the IP address of your computer to access the camera, please refer to the video №26 How to Change the IP Address of your AREC Device available on ADENA... - Page 8 • Video Config: lists settings related to the camera’s network streams’ encoding. • Media Config: controls the RTSP port number and the RTMP streaming from the camera. • Control Protocol Config: lists VISCA control settings. • System Config: controls the camera’s usernames, passwords, and network settings. This is also where you can update the camera’s firmware, reboot it, as well as reset it to factory settings.
- Page 9 PanoCam supports up to 255 presets. To set a preset, move the camera in your desired position, write a number from 0 to 255 in the preset field, and press “Set”. To call this preset, enter its number in the preset field and press “Recall”. Please note that the preset 0 is considered the “home”...
- Page 10 The OSD menu can be used to configure various lens parameters of the camera. You can also use it to adjust the maximum framerate of the camera. To do that, click on “Menu” -> “System” -> “Video Format” and use left or right arrows to change the mode. Press “Enter” to confirm changes. This will cause the camera to reboot.
-
Page 11: Manual Gain
<EXPOSURE> MODE AUTO ANTI FLICKER OFF, 50Hz, 60Hz MANUAL GAIN 0, 1, 2, 3, 4, 5, 6, 7, 8, 9, 10, 11, 12, 13, 14 SPEED 1/60, 1/75, 1/100, 1/120, 1/150, 1/215, 1/300, 1/425, 1/600, 1/1000, 1/1250, 1/1750, 1/2500, 1/3500, 1/6000, 1/10000 SHUTTER SPEED... - Page 12 <SYSTEM> VIDEO FORMAT 4KP30, 4KP25 LANGUAGE CHINESE, ENGLISH DZOOMLIMIT 2X, 3X, 4X, 5X, 6X, 7X, 8X DEFAULTS CONFIRM <DEVICE INFO> FIRM VERSION The camera’s image settings can also be accessed through other sections on the Live View page: “Image”, “Exposure”, “White Balance”.
- Page 13 You can customise PanoCam’s image in different ways using the Live View page and the OSD menu. Here is the description of each feature for your reference.
-
Page 15: Audio Config
2.1.2 Audio Config n the Audio Config page, you are able to customise the level of the 3.5mm device you are con- necting to the camera (Line or Mic), its sample rate and audio volume. Higher sample rate produc- es better audio quality, but may not be accepted by other devices. All AREC Media Stations support 44.1 and 48 KHz input frequencies, and thus if you are using PanoCam as an audio source on our devices, you can select the highest frequency rate. - Page 16 • All AREC Media Stations support VISCA-over-IP PTZ control, and so does the A-PC01 Pano- Cam. You can pull the camera’s main stream by selecting signal type “IP Source” and the RTSP protocol and control it by VISCA-over-IP if you select it in the “PTZ Control”.
- Page 17 2.1.4 Media Config / How to Set Up RTMP Streaming PanoCam can livestream two RTMP feeds simultaneously, and you are able to choose which streams to use for that. You can configure live streaming through the “Media Config” page of the camera.
- Page 18 In the page that opens, first, copy the “Stream URL” and paste it in the camera’s page. Add a forward slash “/” after it. Then, copy the “Stream key” and paste it in the same field. In the end, it should look like this: Press “Save”...
- Page 19 To add VISCA controls for the camera on AREC Media Stations, select the signal type “IP Source” with the RTSP protocol from the list (the default link is rtsp://ip address of the camera/ch1) and VISCA-over-IP protocol in the “PTZ Control”. Type the IP address of the camera in the “IP address” field as on the image below:...
-
Page 20: System Config
2.1.6 System Config System config consists of three subpages: • User Manage • Ethernet Config • Firmware Update To create a new user account for the camera, click on the “User Manage” page. Click on “Add User” to do so. You can also change passwords for already created accounts by pressing the “Change Password”...
Need help?
Do you have a question about the A-PC01 and is the answer not in the manual?
Questions and answers