Advertisement
Quick Links
For mounting the scanning head, please refer to the separate Instructions.
Für Montage des Abtastkopfes bitte separate Anleitung beachten.
Pour le montage de la tête captrice, veuillez tenir compte des instructions distinctes.
Per il montaggio della testina fare riferimento al relativo manuale.
Tener en cuenta las instrucciones suministradas por separado para el montaje de la regla.
www.heidenhain.de/documentation
Mounting Instructions
Montageanleitung
Instructions de montage
Istruzioni di montaggio
Instrucciones de montaje
LIF 401 R
Scale
Maßstab
Barreau de verre
Riga graduata
Regla
01/2021
Advertisement

Related Manuals for HEIDENHAIN LIF 401 R


Summary of Contents for HEIDENHAIN LIF 401 R
- Page 1 Montageanleitung Instructions de montage Istruzioni di montaggio Instrucciones de montaje LIF 401 R For mounting the scanning head, please refer to the separate Instructions. Für Montage des Abtastkopfes bitte separate Anleitung beachten. Scale Pour le montage de la tête captrice, veuillez tenir compte des instructions distinctes.
-
Page 2: Table Of Contents
Contents Page Seite Inhalt Warnings Warnhinweise Sommaire Items Supplied Lieferumfang Indice Mounting Procedure Hinweise zur Montage Mounting Montage Indice 18 Disassembly 18 Demontage Page Pagina Página Avertissements Avvertenze Advertencias Contenu de la livraison Standard di formitura Suministro Procédure de montage Avvertenze per il montaggio Indicaciones para el montaje Montage... -
Page 3: Avertissements
Warnings Warnhinweise Avertissements Avvertenze Advertencias Note: Mounting is to be conducted by a qualified specialist under compliance with local safety regulations. The system must be disconnected from power! Achtung: Die Montage ist von einer qualifizierten Fachkraft unter Beachtung der örtlichen Sicherheitsvorschriften vorzunehmen. Die Anlage muss spannungsfrei geschaltet sein! Attention : Seul un personnel qualifié... -
Page 4: Contenu De La Livraison
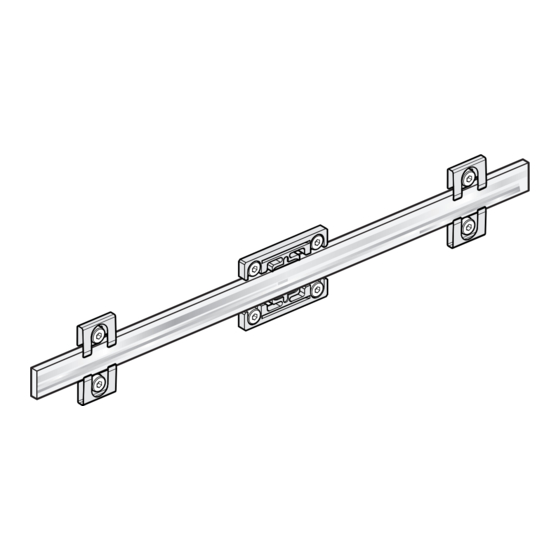
Items Supplied LIF 401 R linear scale. Lieferumfang Maßstab LIF 401 R. Contenu de la livraison Règle de mesure LIF 401 R. Standard di formitura Riga graduata LIF 401 R. Vacuum Suministro Escala LIF 401 R. Vakuum Vide Standard Vuoto Standard Vacío... - Page 5 To be ordered separately: a) Scale fastening clamps. Number depends on the ML. b) Fixed-point elements c) Spacer foils d) Dispensing nozzle and mixing tubes e) Adhesive 3M DP 460 EG Double-cartridge gun Separat bestellen: a) Pratzen zur Befestigung des Maßstabs. Anzahl je nach Messlänge. b) Fixpunktelemente c) Abstandsfolien ID 1176458-xx...
-
Page 6: Mounting Procedure
Mounting Procedure Hinweise zur Montage Procédure de montage Avvertenze per il montaggio Indicaciones para el montaje AK LIF 4xx Choose a mounting attitude such that the maximum traverse range is within the measuring length ML of the encoder. Protect the graduation from direct contamination. Anbau so wählen, dass der maximale Verfahrweg innerhalb der Messlänge ML des Messgerätes liegt. -
Page 7: Montage
Mounting (ML+10)±0.5 Montage (ML+10) / 2 Montage Montaggio 28±0.1 Montaje Mounting tolerances F = Machine guideway Anbautoleranzen ‡ 60 < 60 F = Maschinenführung Tolérances de montage F = Guidage de la machine Tolleranze di montaggio F = Guida della macchina Tolerancias de montaje F = Guía de la máquina The mounting surface must be free of paint, dust, or grease. - Page 8 Use stop pins. Empfohlener Recommended diameter: 3 mm Anschlagstifte verwenden. Empfohlener Durchmesser: 3 mm Utiliser des goupilles de butée. Diamètre recommandé : 3 mm Utilizzare spine di riferimento. Diametro consigliato: 3 mm Utilizar pasadores de tope. Diámetro recomendado: 3 mm...
- Page 9 Ensure correct position of the scale to the scanning head! Auf die richtige Lage Maßstab zu Abtastkopf achten! Veiller à la bonne position de la règle par rapport à la tête captrice! Prestare attenzione alla corretta posizione del supporto graduato rispetto alla testina! ¡Observar la posición correcta de la cinta respecto al cabezal captador! Always conduct the following mounting steps on both sides! Illustrations show only one side of the scale.
- Page 10 Remove protective film (standard only) Schutzfolie entfernen (nur bei Standard) Retirer le film de protection (en standard uniquement) Rimuovere la pellicola protettiva (solo versione standard). Retirar lámina de protección (sólo en estándar) Carefully place the scale onto the stop pins. Maßstab vorsichtig auf die Anschlagstifte legen.
- Page 11 Of the clamp pairs nearest to the stop pin, fasten the on the side opposite to the stop pin. To do so, insert the spacer foil between the clamp and the scale as shown in variant Ô or Õ. Align the clamp at a right angle to the scale and tighten. Do not remove the spacer foil until the mounting procedure is finished! Bei den Pratzenpaaren die am nächsten zu einem Anschlagstift liegen, die dem Anschlagstift gegenüberliegende Pratze befestigen.
- Page 12 Lightly press the fixed-point element onto the scale and fasten. Ensure parallelism! Fixpunktelement leicht an Maßstab andrücken und befestigen. Auf Parallelität achten! Exercer une légère pression sur l’élément du point fixe, sur la règle, puis le fixer. Veiller au parallélisme ! Premere leggermente l’elemento di fissaggio sulla riga graduata e fissare.
- Page 13 Tighten the screws of the clamp pairs at the remaining positions. Remember the following: - During mounting there must be a spacer foil between each clamp and the scale. - Always tighten the screws on both sides of a clamp pair. - Fasten the clamp last at the position across from the clamp fastened first (see illustration on page 14).
- Page 14 Example of the mounting sequence with a clamp pair number >4 Beispiel Montagereihenfolge bei Anzahl Pratzenpaare >4 Exemple de chronologie de montage en présence de plus de 4 paires de griffes de serrage Esempio della sequenza di montaggio con un numero di coppie di staffe >4 Ejemplo de una secuencia de montaje con un número de pares de garras >4 Mount the clamps in pairs with the inserted spacer foils, beginning on one side from the fixed point outwards (p.
- Page 15 Remove the stop pins and fasten the positions opposite to the clamps mounted first. Ensure that a spacer foil is used on both sides. Anschlagstifte entfernen und die gegenüberliegenden Positionen der zuerst montierten Pratzen befestigen. Darauf achten, dass beidseitig eine Abstandsfolie eingesetzt ist.
- Page 16 Apply a bead of adhesive with a double cartridge gun and a dispensing nozzle as shown in the illustration. Do not add to it afterwards! Be sure to comply with the work instructions in the accompanying documentation! Klebstoff mit einer Doppelkartuschenpresse und einer Dosiernadel in Raupenform, wie in der Abbildung gezeigt, aufbringen.
- Page 17 For an encoder usage temperature of –10 °C of +30 °C, a high fixed-point stiffness is ensured through hardening at a temperature of 22 °C over 24 hours. For high fixed-point stiffness over the complete temperature range up to 70 °C, we recommend high- temperature hardening at 80 °C over 3 hours.
-
Page 18: Desmontaje
• ¡Peligro por causa de astillas y aristas afiladas! • ¡Proteger las hojas de los datos de seguridad de los disolventes! Follow the Disassembly Instructions: Demontageanleitung beachten: Suivez les instructions de démontage: Regolazione errore di Moiré con spina: Consultar las instrucciones de desmontaje: www.heidenhain.de/documentation/infobase... - Page 20 1302939-01 *I1302939-01* 1302939-00-E-01 · Ver00 · 01/2021...
Need help?
Do you have a question about the LIF 401 R and is the answer not in the manual?
Questions and answers