Table of Contents
Advertisement
Available languages
Available languages
Quick Links
LUMIPLUS DESIGN PROJECTOR
PROJECTEUR LUMIPLUS DESIGN
PROYECTOR LUMIPLUS DESIGN
PROIETTORE LUMIPLUS DESIGN
STRAHLER LUMIPLUS DESIGN
PROJETOR LUMIPLUS DESIGN
LUMIPLUS DESIGN المصباح الكاشف
INSTALLATION AND MAINTENANCE MANUAL
MANUEL D'INSTALLATION ET D'ENTRETIEN
MANUAL DE INSTALACIÓN Y MANTENIMIENTO
MANUALE DI INSTALAZIONE E MANUTENZIONE
EINBAU-UND BETRIEBSANLEITUNG
MANUAL DE INSTRUÇÕES E MANUTENÇÃO
دليل التركيب والصيانة
Advertisement
Table of Contents

Related Manuals for Astralpool LUMIPLUS 59801


Summary of Contents for Astralpool LUMIPLUS 59801
- Page 1 LUMIPLUS DESIGN PROJECTOR PROJECTEUR LUMIPLUS DESIGN PROYECTOR LUMIPLUS DESIGN PROIETTORE LUMIPLUS DESIGN STRAHLER LUMIPLUS DESIGN PROJETOR LUMIPLUS DESIGN LUMIPLUS DESIGN المصباح الكاشف INSTALLATION AND MAINTENANCE MANUAL MANUEL D’INSTALLATION ET D’ENTRETIEN MANUAL DE INSTALACIÓN Y MANTENIMIENTO MANUALE DI INSTALAZIONE E MANUTENZIONE EINBAU-UND BETRIEBSANLEITUNG MANUAL DE INSTRUÇÕES E MANUTENÇÃO دليل...
-
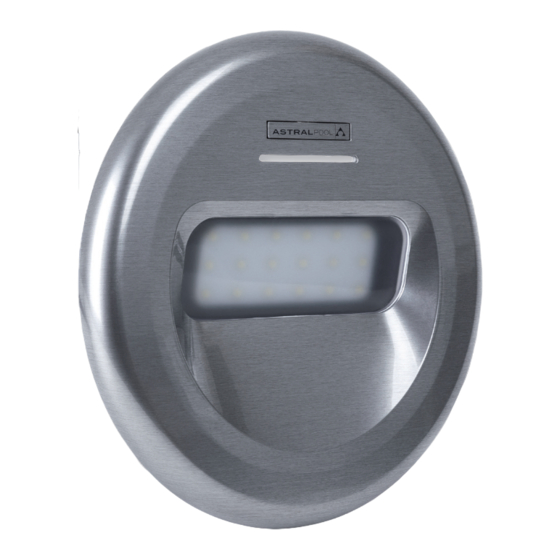
Page 2: Models Available
ENGLISH IMPORTANT: The instruction manual you are holding includes essential information on the safety measures to be implemented for installation and start-up. Therefore, the installer as well as the user must read the instructions before beginning installation and start-up. Keep this manual for future reference. To achieve optimum performance of the LumiPlus Design projector, follow the instructions provided below: 1. - Page 3 Prefabricated pool Fit the ring inside the niche using the appropriate screws for the niche, with “TOP” positioned in the upper section (Fig. 5). 3. Install the cable gland fitting “A” through the inside of the niche with the butt joint “B”. The screw can be reinforced with Teflon (Fig.
-
Page 4: Modèles Disponibles
FRANÇAIS IMPORTANT: le manuel d’instructions que vous avez entre les mains contient des informations de première importan- ce sur les mesures de sécurité à adopter au moment de l’installation et de la mise en service. Il est par conséquent indispensable que l’installateur et l’utilisateur lisent attentivement les instructions avant de commencer le montage et la mise en marche. - Page 5 2. En fonction du type de piscine: Piscine en béton Visser l’anneau de fixation “A” sur l’anneau de la niche “B” (Fig.3). Monter l’ensemble dans la niche avec l’indication “TOP” située dans la partie supérieure (Fig.4). Piscine préfabriquée Monter l’anneau dans la niche en utilisant les vis adaptées en fonction de la niche avec l’indication “TOP” située dans la partie supérieure (Fig.5).
-
Page 6: Instalación
ESPAÑOL IMPORTANTE: El manual de instrucciones que usted tiene en sus manos, contiene información fundamental acerca de las medidas de seguridad a adoptar a la hora de la instalación y la puesta en servicio. Por ello, es imprescindible que tanto el instalador como el usuario lean las instrucciones antes de pasar al montaje y la puesta en marcha. Conserve este manual para futuras consultas acerca del funcionamiento de este aparato. - Page 7 2. En función del tipo de piscina: Piscina hormigón Atornillar el anillo de fijación « A » con el anillo del nicho « B » (Fig.3). Montar el conjunto dentro del nicho con la indicación “TOP” situada en la parte superior (Fig.4). Piscina prefabricada Montar el anillo dentro del nicho utilizando la tornillería adecuada en función del nicho con la indicación “TOP”...
-
Page 8: Modelli Disponibili
ITALIANO IMPORTANTE: Il manuale d’istruzioni in suo possesso contiene informazioni fondamentali sulle misure di sicurezza da adottare per l’installazione e la messa in servizio. Per ciò è imprescindibile che sia l’installatore che l’utente leggano le istruzioni prima di iniziare il montaggio e la messa in servizio. Conservi questo manuale per poter consultare in futuro in merito al funzionamento di questo apparecchio. - Page 9 Piscina di cemento Avvitare la vite di fissaggio “A” all’anello della nicchia “B” (Fig. 3). Montare l’insieme nella nicchia assicurandosi che l’indicazione “TOP” sia situata superiormente (Fig. 4). Piscina prefabbricata Montare l’anello nella nicchia usando le viti adatte alla nicchia, assicurandosi che l’indicazione “TOP” sia situata superiormente (Fig.
- Page 10 DEUTSCH WICHTIG: Das Handbuch mit den Betriebsanleitungen, das Sie in Händen halten, enthält wichtige Information über die anzuwendenden Sicherheitsmaßnahmen für die Installation und Inbetriebnahme. Es ist daher unerläßlich, daß die An- weisungen vom Installateur und vom Benutzer vor der Montage und Inbetriebnahme aufmerksam durchgelesen werden. Bewahren Sie dieses Handbuch auf, falls Sie zu einem späteren Zeitpunkt Informationen über die Funktion dieses Apparates nachschlagen möchten.
-
Page 11: Sicherheits- Und Wartungshinweise
Vorgefertigtes Becken Montieren Sie den Ring im Einbaugehäuse anhand der passenden Schrauben für das betreffende Einbaugehäuse mit dem Hinweis „TOP“ nach oben (Abb. 5). 3. Installieren Sie den Stopfbuchsenkörper (A) im Inneren des Einbaugehäuses mit der Flachdichtung (B). Sie können die Schraubverbindung mit Teflon verstärken (Abb. - Page 12 PORTUGUÊS IMPORTANTE: O manual de instruções que você tem nas mãos contém informação fundamental sobre as medidas de segurança a tomar ao realizar a instalação e a colocação em funcionamento. Por isso, é imprescindível que tanto o ins- talador como o utilizador leiam as instruções antes de realizar a montagem e a colocação em funcionamento. Guarde este manual para futuras consultas sobre o funcionamento deste aparelho.
- Page 13 Piscina prefabricada Montar a anilha do nicho utilizando os parafusos adequados em função do nicho com a indicação “TOP” situada na parte superior (Fig. 5). 3. Instalar o corpo do bucim (A) pelo interior do nicho com a junta plana (B). Pode reforçar a rosca com teflon (Fig. 6 -7). 4.
- Page 14 العربية معلومات مهمة: يتضمن دليل اإلرشادات الذي بين يديك المعلومات المهمة بشأن تدابير السالمة الواجب تنفيذها ألغراض التركيب واالستخدام. ولذلك، يجب أن يقرأ .القائم بالتركيب وكذلك المستخدم هذه اإلرشادات قبل الشروع في التركيب واالستخدام .الرجاء االحتفاظ بهذا الدليل للرجوع إليه في المستقبل :،...
- Page 15 المسبح الجاهز سلف ً ا .)5 ضع الحلقة داخل الكوة باستخدام البراغي المناسبة للكوة مع جعل "أعالها" في القسم العلوي (الشكل .)6-7 3. ركب عروة ربط الكابل "أ" في الجزء الداخلي من الكوة مع وصلة القاعدة "ب". ي ُمكن تدعيم البرغي بالتيفلون (الشكل .)7 4.
- Page 16 KEY / SYMBOLOGIE / SIMBOLOGÍA / SIMBOLOGIA / SYMBOLE / SIMBOLOGIA / مفتاح Maximum assigned ambient temperature / Température ambiante assignée maximum / Temperatura ambiente asignada máxima / Massima temperatura ambiente assegnata / Maximale zugewiesene Umgebungstemperatur / أقصى درجة حرارة محيطة مسموح به Temperatura ambiente atribuída máxima / Under no circumstances should the luminaire be stared into for one minute or more at distances equal to or less than 20 cm.
- Page 17 400-700 mm FIG. 2 FIG. 1 CONCRETE POOL Ø ext. 25mm Ø int. 18/19mm 1,5 N.m 1,5 N.m DIN 7981 DIN 7981 FIG. 3 4,8 x 16 4,8 x 16 FIG. 4 PREFABRICATED POOL 1,5 N.m 59814 59815 DIN 7981 4,8 x 16 DIN 7985 M6 x 20 FIG.
- Page 18 0,7 N.m FIG. 7 FIG. 8 2,6 N.m 6 N.m FIG. 9 FIG. 10 FIG. 11...
- Page 19 ENGLISH Pos. Code Description Pos. Code Description 4403010039 INOX EFFECT COVER PLATE 4403010801 CABLE GLAND SET 4403010043 PURE WHITE COVER PLATE 4403010041 LumiPlus CABLE SET 4403010040 CABLE GLAND SET + FITTING 4403010042 MOUNTING RING FRANÇAIS Pos. Code Description Pos. Code Description 4403010039 ENJOLIVEUR INOX EFFECT 4403010801 ENSEMBLE PRESSE-ÉTOUPE...
- Page 20 ESPAÑOL Pos. Code Description Pos. Code Description 4403010039 EMBELLECEDOR INOX EFFECT 4403010801 CJTO. PRENSAESTOPAS 4403010043 EMBELLECEDOR PURE WHITE 4403010041 CJTO. CABLE LumiPlus 4403010040 CJTO. PRENSAESTOPAS + CUERPO 4403010042 ARO FIJACION ITALIANO Pos. Codice Descrizione Pos. Codice Descrizione 4403010039 COPRIFLANGIA INOX EFFECT 4403010801 INSIEME PREMISTOPPA 4403010043...
- Page 21 SACOPA, S.A.U. PRODUCTS: LUMIPLUS DESIGN PROJECTOR PRODUITS: PROJECTEUR LUMIPLUS DESIGN PRODUCTOS: PROYECTOR LUMIPLUS DESIGN PRODOTTI: PROIETTORE LUMIPLUS DESIGN PRODUKTE: STRAHLER LUMIPLUS DESIGN PRODUTOS: PROJETOR LUMIPLUS DESIGN العربية :المنتجات LUMIPLUS DESIGN المصباح الكاشف DECLARATION CE OF CONFORMITY The products listed above are in compliance with: Electromagnetic Compatibility Directive 2004/108/EEC.
- Page 22 DICHIARAZIONE CE DI CONFORMITÀ I prodotti di cui sopra adempiono alle seguenti direttive: Direttiva di compatibilità elettromagnetica 2004/108/CEE. Direttiva per gli apparecchi a bassa tensione 2006/95/CEE. 2011/65/CE Direttiva RoHS 2009/125/CE Direttiva eco-design 874/2012 Regolamento sull’etichettatura energetica delle lampade ed illuminazioni 1194/2012 Regolamento sul eco-design delle lampade direzionali e lampade LED EN 60598-1 Apparecchi di illuminazione.
- Page 23 بيان التوافق :المنتجات المبينة بعاليه تمتثل للتوجيهات والمعايير التالية .2004/108/CEE :التوجيه المتعلق بالتوافق الكهرومغناطيسي رقم .2006/95/CEE :التوجيه المتعلق بالفولتية المنخفضة رقم التوجيه RoHS 2011/65/EU التوجيه Ecodesign 2009/125/EU .فيما يخص ملصق الطاقة الخاص بالمصابيح ووحدات اإلنارة الكهربائية التوجيه 874/2012 .LED فيما يخص التصميم البيئي للمصابيح الموجهة ومصابيح التوجيه...
- Page 24 59809 59811 Made in Spain Sacopa, S.A.U. Pol. Ind. Poliger Sud – Sector I 17854 Sant Jaume de Llierca (Spain) ASTRALPOOL Avda. Francesc Macià, 60, planta 20 59803E201 08208 Sabadell (Barcelona) Spain Rev. 05 info@astralpool.com • We reserve to change all or part of the articles or contents of this document, without prior notice.
Need help?
Do you have a question about the LUMIPLUS 59801 and is the answer not in the manual?
Questions and answers