Table of Contents
Advertisement
Quick Links
Advertisement
Table of Contents

Subscribe to Our Youtube Channel
Related Manuals for ARIETE 9023


Summary of Contents for ARIETE 9023
- Page 1 SERVICE MANUAL PORTABLE AIR CONDITIONER 9023...
-
Page 2: Table Of Contents
CONTENTS 1. IMPORTANT NOTICE 2. IMPORTANT SAFEGUARDS 3. REFRIGERATION CYCLE DIAGRAM 4. PRODUCT DATA 5. PARTS & FEATURES 6. INSTALLATION INSTRUCTIONS 7.OPERATING INSTRUCTIONS CARE AND CLEANING 9.OPERATING FROM THE REMOTE CONTROL 10.WIRING DIAGRAM 11. EXPLOSION VIEW AND PARTS 12.TROUBLE SHOOTING 13.DISASSEMBLY PROCEDURE... -
Page 3: Important Notice
1. IMPORTANT NOTICE This service manual is intended for use by individuals possessing adequate backgrounds of electrical, electronic and mechanical experience. Any attempt to repair the appliance may result in personal injury and property damage. The manufacturer or seller cannot be responsible for the interpretation of this information, nor can it assume any liability in connection with its use. -
Page 4: Important Safeguards
2. IMPORTANT SAFE GUARDS DANGER WARNING CAUTION hazards or unsafe hazards or unsafe WARNING CAUTION Immedidte hazards DANGER which will result in severe practices which Could result in practices which Could result in personal injury or death severe personal injury or death minor personal injury IMPORTANT SAFETY INSTRUCTIONS WARNING... - Page 5 ● Do not clean the unit with water. Water can enter the unit and damage the insulation, creating a shock hazard. If water enters the unit, unplug it immediately and contact Customer Service. ● Utilize two or more people to lift and install the unit. ●...
- Page 6 CAUTION When using electrical appliances,basic safety precautions Should be followed,including the follwing According the EN standard: ● This appliance can be used by children aged from 8 years and above and persons with reduced physical, sensory or mental capabilities or lack of experience and knowledge if they have been given supervision or instruction concerning use of the appliance in a safe way and understand the hazards involved.
- Page 7 Specific information regarding appliances with R290 refrigerant gas ● Thoroughly read all of the warnings. ● When defrosting and cleaning the appliance, do not use any tools other than those recommended by the manufacturing company. ● The appliance must be placed in an area without any continuous sources of ignition (for example: open flames, gas or electrical appliances in operation).
- Page 8 ● Appliance should be installed, operated and stored in a room with a floor area larger than the one indicated in the chart: Quantity of R290 gas in charge (see rating label on the appliance) Minimum size of the site for use and storage (m²) m <...
- Page 9 4) Checking for presence of refrigerant The area shall be checked with an appropriate refrigerant detector prior to and during work, to ensure the technician is aware of potentially flammable atmospheres. Ensure that the leak detection equipment being used is suitable for use with flammable refrigerants, i.e.
- Page 10 Ensure that apparatus is mounted securely. Ensure that seals or sealing materials have not degraded such that they no longer serve the purpose of preventing the ingress of flammable atmospheres. Replacement parts shall be in accordance with the manufacturer’s specifications. NOTE: The use of silicon sealant may inhibit the effectiveness of some types of leak detection equipment.
- Page 11 13. Charging procedures(Annex DD.10) In addition to conventional charging procedures, the following requirements shall be followed. – Ensure that contamination of different refrigerants does not occur when using charging equipment. Hoses or lines shall be as short as possible to minimise the amount of refrigerant contained in them. –...
- Page 12 The recovered refrigerant shall be returned to the refrigerant supplier in the correct recovery cylinder, and the relevant Waste Transfer Note arranged. Do not mix refrigerants in recovery units and especially not in cylinders. If compressors or compressor oils are to be removed, ensure that they have been evacuated to an acceptable level to make certain that flammable refrigerant does not remain within the lubricant.
- Page 13 c) Repair • Portable equipment shall be repaired outside or in a workshop specially equipped for servicing units with flammable refrigerants. • Ensure sufficient ventilation at the repair place. • Be aware that malfunction of the equipment may be caused by refrigerant loss and a refrigerant leak is possible. •...
-
Page 14: Refrigeration Cycle Diagram
3. REFRIGERATION CYCLE DIAGRAM COOLING AND HEATING : COOLING ONLY :... -
Page 15: Product Data
4. PRODUCT DATA Model 9023 Power supply (V-Ph-Hz) 220-240V/50Hz Capacity Water reservoir Cooling Test Condition 35℃/24℃ Cooling Capacity(W) 4100 Cooling Input Power(W) 1520 Cooling Input Current(A) EER (W/W) 2.60 (A) Suitable area(m2) 16-27 Rated Power(W) 1650 Rated Current(A) Heat pump / Elecment... -
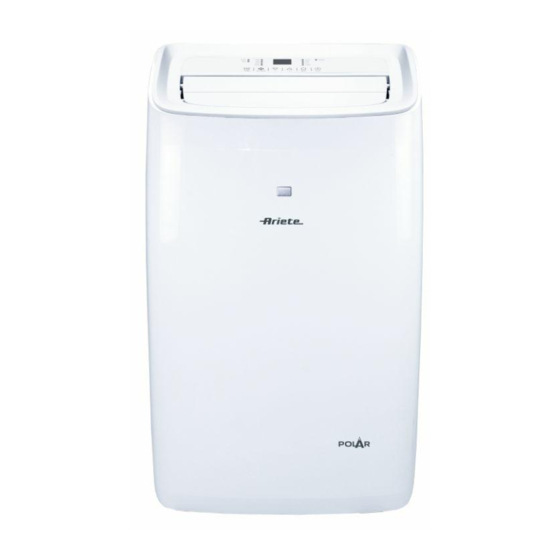
Page 16: Parts & Features
5.PARTS & FEATURES DESCRIPTION: Air exhaust hose Housing Control panel Plug holder Horizontal louver blade (automatic swing) filter (behind the grill) Remote control Handles (both sides) receiver Condensation drain Intake gril Bottom Castors(4) Condensation Drain Power cable ACCESSORIES: Hose inlet Air exhaust hose Hose outlet with grill(optional) -
Page 17: Installation Instructions
6.INSTALLATION INSTRUCTIONS LOCATION Your installation location should meet the following requirements: ●The unit should be placed on a firm foundation to minimize noise and vibration. For safe and secure positioning. place the unit on a smooth, level floor strong enough to support the unit. ●The unit has casters to aid placement, but it should only be rolled on smooth, flat surfaces. - Page 18 WINDOW SLIDER KIT INSTALLATION Your window slider kit has been designed to fit most standard “vertical” or “horizontal” window applications. However, it may be necessary for you to modify some aspects of the installation procedures for certain types of windows. The window slider kit can be fastened with screws. NOTE: A plastic locking screw is holding the window slider kit together during shipment.
- Page 19 EXHAUST HOSE INSTALLATION The air exhaust hose and hose inlet must be installed or removed from the portable air conditioner in accordance with the way it is being used: COOL, AUTO ,DEHUMIDIFY,HEAT (heat pump type): The air exhaust hose and hose inlet should be connected to the portable air conditioner FAN: The air exhaust hose and hose inlet should be disconnected to the portable air conditioner 1 .Extend either side of the hose...
-
Page 20: Operating Instructions
7.OPERATING INSTRUCTIONS Wi-Fi Indicator Light Indicator Light Optional) Display Area Optional) Sleep Tmier Fan Speed Selected Mode Indicator Light Indicator Light Indicator Light Indicator Light Tmier ON/OFF Button Button Decrease Increase Speed&UV(3s) Mode Temp Temp Selection Button Selection Button Button Button Picture are for illustration purpose only.Your model may or may not have all the features OPERATING FROM THE CONTROL PANEL... - Page 21 IncreaseTemp Button AND DecreaseTemp Button Used to adjust (increasing/decreasing) temperature settings in 1°C/1°F increments NOTE:The control is capable of displaying temperature in degrees Fahrenheit or degrees Celsius. To convert from one to the other, press and hold the IncreaseTemp Button AND DecreaseTemp Button at the same time for 3 seconds.
- Page 22 HEAT operation(available on HEAT models only) ●Press the “Mode” button until the “HEAT” indicator light comes on. ●Press the “Increase Temp Button” AND “Decrease Temp Button” to select your desired room temperature. The temperature can be set within a range of 13°C~27°C/55°F~81°F. ●Press the “Fan Speed”...
- Page 23 OTHER FEATURES AUTO-RESTART If the unit shuts off unexpectedly due to a power outage, it will restart with the previously set function automatically when the power resumes. WAIT 3 MINUTES BEFORE RESUMING OPERATION After the unit has stopped, it cannot be restarted until 3 minutes time has elapsed. This is to protect the unit. Operation will automatically resume after 3 minutes.
- Page 24 NOTE: Please be sure that the height of and section of the drain hose should not be higher than that of the drain outlet, or the water tank may not be drained WATER DRAINAGE(cont.) ●Continuous Draining for Dry Mode 1. Unplug the unit from the power source. 2.
-
Page 25: Care And Cleaning
8.CARE AND CLEANING WARNING: ● Always unplug the unit before cleaning or servicing. ● DO NOT use flammable liquids or chemicals to clean the unit. ● DO NOT wash the unit under running water. Doing so causes electrical danger. ● DO NOT operate the machine if the power supply was damaged during cleaning. A damaged power cord must be replaced with a new cord from the manufacturer. -
Page 26: Operating From The Remote Control
9.OPERATING FROM THE REMOTE CONTROL FUNCTION BUTTONS & REMOTE LED SCREEN INDICATORS Fan mode Heating mode Dry mode Smart mode Cooling mode Remote signal ℃/℉TEMP & Low fan speed Timer display Swing Medium fan speed Child lock Fan speed High fan speed Timer on/Timer off Turbo Sleep... - Page 27 OPERATING FROM THE REMOTE CONTROL (cont.) Battery installation ●Slide open the battery compartment cover. ●Insert 2דAAA” batteries as show. ●Slide back the battery cover. CAUTION Use 2 LRO 3 AAA (1.5V) batteries . Do not use rechargeable batteries . Replace the old batteries with new ones of the same type when the display is no longer legible. Do not dispose batteries as unsorted municipal waste.Collection of such waste separately for special treatment is necessary.
- Page 28 OPERATING FROM THE REMOTE CONTROL (cont.) Turn ON / Turn OFF the air conditioner ●Press the “On/Off button” to turn on or turn off the air conditioner. Switch the unit of the temperature ●When the appliance is powered on,press the “℃/℉ button”, then you can secect the unit of the temperature from Fahrenheit or Celsius.
- Page 29 OPERATING FROM THE REMOTE CONTROL (cont.) Fan mode(Not Fan speed button) Air ventilation only. ●To set the Fan mode, press “Mode button” until the symbol “Fan mode” appears in the display. ●Press the “Fan speed button” to select the fan speed:Low,Medium, High or Auto.
- Page 30 OPERATING FROM THE REMOTE CONTROL (cont.) Smart mode In Smart mode the air conditioner will make automatic selections base on room temperature. To set the Smart mode, press“Mode button” until the symbol ● “Smart mode” appears on the display. ●Press the “Fan speed button” to select the fan speed:Low,Medium, High or Auto.
- Page 31 OPERATING FROM THE REMOTE CONTROL (cont.) Sleep mode button Pre-setting automatic operating program. This function is useful for the night as it gradually reduces operation of the appliance. To set this function correctly: ●Select the cool,dry or heat mode as described above. ●Press the “Sleep button”...
- Page 32 OPERATING FROM THE REMOTE CONTROL (cont.) Chlid lock This function is used to prevent children from inadvertently Changing the setting by pressing the remote control buttons ●Press and hold the “Increase button” and “Decrease button” Simultaneously for at least 3 seconds to activate the child lock function.When it is activated the lock symbol will appear on the LED screen.Settings cannot be changed by pressing random bottoms on the remote.
- Page 33 FOLLOW ME(optional) The FOLLOW ME function allows the room to be cooled according to the room temperature,wherever the romote is located. The remote control serves as a thermostat allowing for the precise temperature control at its location. ●To activate the Follow Me function,point the remote control towards The appliance and press the “function button”...
-
Page 34: Wiring Diagram
10.WIRING DIAGRAM 9023... -
Page 35: Explosion View And Parts
11.EXPLOSION VIEW AND PARTS 9023... - Page 36 9023 CODE ENGLISH NAME QUOTA CODE ENGLISH NAME QUOTA 810702273BX Front panel 810900222 Fan motor capacitor 3μF 810700851D Take-over protection 810900458H Wi-Fi module 810900518 Receiver board 810701989 Right panel 810702929C Top panel 810701097 Cover of splash motor 810701012 Gear 810701035...
-
Page 37: Trouble Shooting
12.TROUBLE SHOOTING Malfunction Diagnosis Please check the machine according to the following table before calling for service: TROUBLE POSSIBLE CAUSE POSSIBLE REMEDY Unit does not turn on appears in the display window A. Drain the water. when pressing ON/OFF B. room temperature is lower than the set button temperature. -
Page 38: Disassembly Procedure
13. DISASSEMBLY PROCEDURE For your reference only Content Picture Remove grill of evaporator and condenser,then remove the cover of drainage hose and stopper Unscrew 6 screws... - Page 39 Remove rear panel Unscrew 6 screws Remove both right panel and left panel...
- Page 40 Unscrew 6 screws Remove both top\panel and front panel,then loose the connector Unscrew 4 screws Remove the cover of electrical box...
- Page 41 Loose all the connectors Unscrew 4 screws Unscrew 5 screws Remove the duct assembly...
- Page 42 Unscrew 4 screws Remove cover of cover and all the connectors,then remove capacitor Unscrew 5 screws Unscrew 2 screws...
- Page 43 Take off the wire and remove the tray Unscrew 3 screws Remove duct assembly Unscrew 1 screws then remove the...
- Page 44 Unscrew 1 screws then remove the centrifugal fan Recharge of gas Content Picture SUGGESTED TOOLS 1. manifold pressure gauge vacuum pump refrigeration copper charging valve,(brass access valve) 1.Break the pipe and release the refrigerant 2.Be sure no the refrigerant then remove the pipe...
- Page 45 Replace the“ refrigeration copper ” charging valve Connect the PAC with a vacuuming machine, to remove the air in the PAC.(Vacuity mus tlower than 30Pa) Recharge of gas Tighten the nut...
Need help?
Do you have a question about the 9023 and is the answer not in the manual?
Questions and answers