Quantum Q6 Edge 2.0 Owner's Manual
Hide thumbs
Also See for Q6 Edge 2.0:
- Basic operation instructions (20 pages) ,
- Owner's manual (29 pages) ,
- Basic operation instructions (20 pages)
Advertisement
Advertisement

Related Manuals for Quantum Q6 Edge 2.0


Summary of Contents for Quantum Q6 Edge 2.0
- Page 1 owner’s manual...
- Page 2 The intended use of this Pride Mobility Products device is to provide mobility assistance to persons with mobility A Quantum Rehab Provider or a qualified technician impairment who have the capacity to operate a motorized must perform the initial setup of this power chair and mobility power chair.
-
Page 3: Table Of Contents
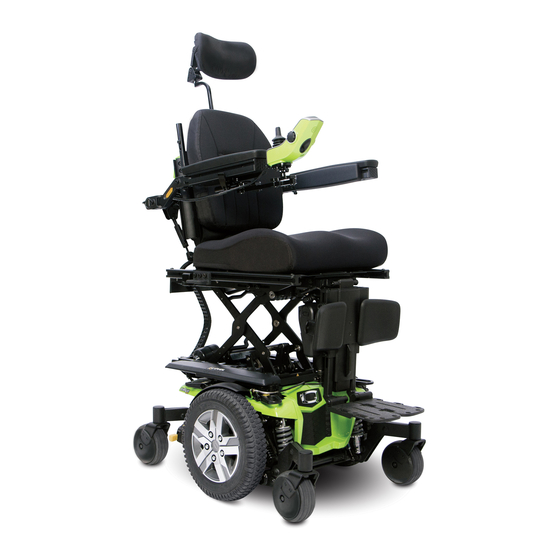
CONTENTS Table of Contents Language Usage This owner’s manual is intended for distribution in all English- speaking countries where our Power Chairs are sold. We Introduction .............. 5 have chosen to compose this manual using language and spellings common to the USA. Since we recognize that not all Safety ................ - Page 4 Q6 EDGE 2.0/2.0x/3/2.0HD SEAT ASSEMBLY Seatback Electronics Box Armrest Joystick Controller Rear Shroud Seat Base Seat Mount Interface Front Shroud Manual Freewheel Lever Drive Wheel Front Riggings (Foot Platform Shown) Spring Shock/ Gas Damper Location Caster Wheel POWER BASE ASSEMBLY...
-
Page 5: Introduction
Quantum to enhance or preserve the safe use of this product. -
Page 6: Safety
Check battery charge. See “Batteries and Charging.” Wire access point. For service use only. „ Ensure the manual freewheel levers are in drive mode before sitting on the power chair. NOTE: If you discover a problem, contact your Quantum Rehab Provider for assistance. - Page 7 To Battery Connectors drive wheels, four caster wheels, two batteries, and wiring To Motor Connectors harnesses. See Q6 Edge 2.0/2.0x/3/2.0HD (page 4) and Main Circuit Breaker figure 1. Electrical Components The electrical components consist of the controller assembly, the batteries, and the motors.
- Page 8 Your power chair may be equipped with the iLevel feature that will be used in conjunction with your seating system. The iLevel feature is mounted on a Quantum power base for maximum stability when the seating system is elevated. See figure 3.
- Page 9 Always fasten the positioning belt when operating the to a position that meets the needs of the demographic power chair. majority of users. Your Quantum Rehab Provider has evaluated your power chair and made any necessary Do not operate the iLevel or change the seat height in adjustments to suit your specific requirements.
- Page 10 YOUR POWER CHAIR Your power chair may be equipped with fender lights. The lights are composed of three white LEDs in the front and three red LEDs in the rear and are mounted on the fenders of your power base. See figure 4. NOTE: Prior to initial use, ensure that the fender light switch is connected.
- Page 11 Foot Platform Angle Adjustment through your Quantum Rehab Provider. Seat Installation It may be necessary to install the seat either prior to initial operation or after transporting your power chair. Contour...
-
Page 12: 12 Assembly
Wire Ties standard governing Wheelchair Tie-down and Occupant Restraint Systems (WTORS). NOTE: If using the tie-down method, please refer to Quantum Rehab's separate "Transit Securement Wire Ties Systems Guide." To Power Base 2. With a docking-type power chair and occupant-restraint system that has been tested and complies with ISO7176- Figure 8. - Page 13 If you are unable to identify or locate a symbol indicating OCCUPIED or UNOCCUPIED, please contact your Quantum Rehab Provider for assistance. In addition, before securing your power chair in a motor vehicle, you must read and...
- Page 14 14 ASSEMBLY Securement Brackets (2 of 4 Shown) Figure 12. Transit System Securement Brackets Front of vehicle Figure 13. Unoccupied Transit System Securement Points...
-
Page 15: Comfort Adjustments
WARNING! The center of gravity of your power chair was factory set to a position that meets the needs of the demographic majority of users. Your Quantum Rehab Provider has evaluated your power chair and made any necessary Hardware adjustments to suit your specific requirements. Do not change your seating configuration without first contacting Quantum Rehab or your Quantum Rehab Provider. - Page 16 COMFORT ADJUSTMENTS Seat Position You can move the seat forward or rearward by changing the extrusion mounting position. To change the position: 1. Turn off the power to the controller. 2. Make sure the power chair is in drive mode. Jam Nut 3.
- Page 17 COMFORT ADJUSTMENTS Foot Platform Height Adjustment The foot platform height is easily adjusted to several different heights. To raise or lower the foot platform: 1. Remove the hardware from the foot platform bracket. See figure 17. 2. Raise or lower the foot platform to the desired height. 3.
- Page 18 If you discover a problem, contact your with both pelvic and upper-torso belts must be used Quantum Rehab Provider for maintenance and repair. to protect the power chair occupant and minimize the likelihood of injury caused by contact with the vehicle...
-
Page 19: Batteries And Charging
WARNING! supplied with the battery charger before charging the batteries. Contact your Quantum Rehab Provider if you have any questions regarding the batteries in your power chair. WARNING! Explosive gases may be generated while charging the batteries. Keep the power... - Page 20 If the LED does not indicate that charging is complete within 24 hours, unplug the charger from the outlet and contact your Quantum Rehab Provider. Refer to the manual supplied with the charger for a complete explanation of these indicators.
- Page 21 8 to 14 hours after daily Fresh batteries arrive regularly at Quantum and are promptly use. We recommend that you charge the batteries for an shipped with a full charge. During shipping, the batteries additional 4 hours after the battery charger indicates that encounter temperature extremes that may influence initial...
-
Page 22: Care And Maintenance
ArmorAll®, or any product made for 4. If any inconsistencies are found, take your power glossy paint. chair to a Quantum Rehab Provider. Power chairs that WARNING! are frequently exposed to sources of water, such as incontinence, should be inspected often for corrosion... - Page 23 If a tire does not hold air, see your Quantum throughout periods of prolonged storage to ensure proper Rehab Provider for replacement of the tube.
- Page 24 CARE AND MAINTENANCE Cleaning and Disinfection WARNING! Precautions must be taken when cleaning medical Follow all safety instructions for the proper use of the equipment/devices to lower the risk of spreading infection. disinfectant and/or cleaning agent before applying it This is to limit the spread of illness and other potentially to your product.
- Page 25 Quantum Rehab Provider. WARNING! Wheel Hub The wheels on your power chair should only be serviced or replaced by a Quantum Rehab Provider or a qualified technician. Be sure that the controller’s power is turned off and the Lug Nut power chair is not in freewheel mode before performing this procedure.
- Page 26 CARE AND MAINTENANCE Battery Set Configuration: + = Positive (Red) Terminal Post - = Negative (Black) Terminal Post Connect Red wire to Red Positive (+) Terminal Posts. Connect Black wire to Black Negative (-) Terminal Posts. Front Cover Battery Wiring Diagram Label Release Handles Quick Release Battery Connectors...
- Page 27 Bent or broken wheel assemblies „ Does not power up The batteries in your power chair should only be „ serviced or replaced by a Quantum Rehab Provider or a Powers up, but does not move „ qualified technician. Loose seat or seating components Do not replace batteries when seat is occupied.
- Page 28 28 CARE AND MAINTENANCE...
- Page 29 CARE AND MAINTENANCE...
- Page 30 30 CARE AND MAINTENANCE...
- Page 32 Switzerland (Authorised CH Representative) 401 York Avenue SODIMED SA Duryea, PA 18642 Chemin Praz Devant 12 www.quantumrehab.com 1032 Romanel-sur-Lausanne Canada Italy 5096 South Service Road Via del Progresso, ang. Via del Lavoro Beamsville, Ontario L3J 1V4 Loc. Prato della Corte www.quantumrehab.ca 00065 Fiano Romano (RM) www.quantumrehab-italia.it...
Need help?
Do you have a question about the Q6 Edge 2.0 and is the answer not in the manual?
Questions and answers