Table of Contents

Related Manuals for SilverStone ML08


Summary of Contents for SilverStone ML08
- Page 1 Questo manuale d’istruzione è fornito da trovaprezzi.it. Scopri tutte le offerte per SilverStone ML08 cerca il tuo prodotto tra le migliori offerte di Case e Alimentatori Milo Series ML08 The perfect slim case for home and on the go...
- Page 3 The following manual and guides were carefully prepared by the SilverStone engineering team to help you maximize the potential of your SilverStone product. Please keep this manual for future reference when upgrading or performing maintenance on your system. A copy of this manual can also...
-
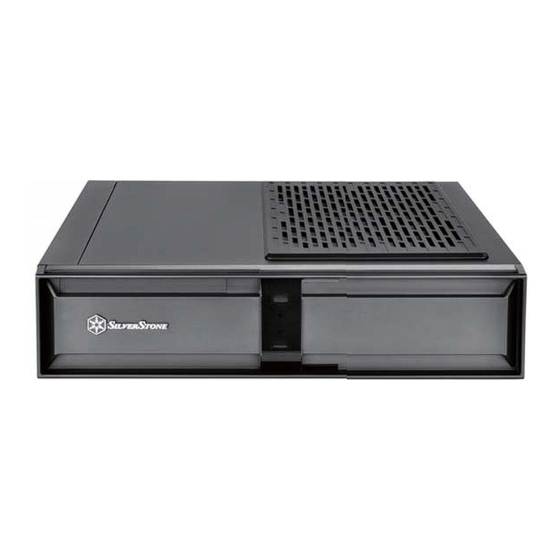
Page 4: Product Overview
With clever space utilization and engineering, two major heat sources are separated via the chassis’ main chamber so CPU and graphics card can each have their own airflow path. Despite its diminutive size, the ML08 is a remarkably versatile case that can be used anywhere from being a compact desktop workstation (in vertical orientation) to a living console or HTPC (in horizontal orientation). -
Page 5: Disassemble Chart
Milo Series ML08 Disassemble Chart ML08-H MODEL HANDLE W/O WINDOW TYPE ADD ON CARD (OPTION) CARD BKT 3.5” HDD (OPTION) OR FILTER 2.5” HDD (OPTION) SLOT COVER X 2 COVER SLIM ODD BKT 2.5” HDD BKT 2.5” HDD (OPTION) COVER WINDOW... -
Page 6: Installation Chart
Milo Series ML08 Installation Chart Before you begin, please make sure that you Have all components collected. Check that all components do not have compatibility problems with each other or with the case. If possible, assemble the components outside the case first to make sure they are working. - Page 7 Milo Series ML08 Installation Chart Install power supply and connect it to the power cord extension cable Netzteil installieren und mit dem Verlängerungskabel des Stromkabels verbinden Installez le bloc d'alimentation et raccordez-le au câble prolongateur du cordon d'alimentation Instale la fuente de alimentación y conéctelo al cable extensor del cable de potencia Installare l’alimentatore e collegarlo alla prolunga del cavo di alimentazione...
- Page 8 Milo Series ML08 Installation Chart Install power supply bracket Netzteilhalterung installieren Installez le support du bloc d'alimentation Instale el bracket de la fuente de alimentación Installare la staffa PSU Установите кронштейн блока питания 安裝電源固定支架 安装电源固定支架 電源ブラケッ トを取り付けます 전원 공급장치 브래킷을 설치합니다...
- Page 9 Milo Series ML08 Installation Chart Insert motherboard I/O plate then install motherboard into case Motherboard-I/O-Platte einsetzen, dann das Motherboard im Gehäuse installieren Insérez la plaque d'E/S de la carte mère puis installez la carte mère dans le boîtier Inserte la bandeja de E/S de la placa base y luego instale la placa base en la carcasa Inserire la piastra I/O della scheda madre, quindi installare la scheda madre nel case Установите...
- Page 10 Milo Series ML08 Installation Chart We recommend connecting all front I/O and motherboard power cables now mend connecting all front I/O and motherboard power cables now Wir empfehlen, nun sämtliche frontseitigen I/O- und Motherboard-Stromkabel anzuschließen Nous conseillons à ce stade de raccorder toutes les E/S de la face avant ainsi que les câbles d'alimentation de la carte mère...
- Page 11 Milo Series ML08 Installation Chart Remove optical drive slot cover and install optical drive Abdeckung des ODD-Fachs entfernen und das optische Laufwerk installieren Retirez le couvercle de l'emplacement du lecteur optique et installez le lecteur optique Retire la cubierta del zócalo del dispositivo óptico e instale el dispositivo óptico Rimuovere il coperchio dell’alloggio dell'unità...
- Page 12 Milo Series ML08 Installation Chart Squeeze the tool-less clips on both sides of the drive cage to open it, then insert 2.5” drive and close the cage Die werkzeuglosen Klemmen an beiden Seiten des Laufwerkkäfigs zum Öffnen zusammendrücken, dann 2,5-Zoll-Laufwerk einsetzen und den Käfig schließen...
- Page 13 Milo Series ML08 Installation Chart Install PCI Express riser card and secure with screws PCI-Express-Riserkarte installieren und mit Schrauben sichern Installez la carte adaptatrice PCI Express et fixez-la avec des vis Instale la tarjeta elevadora PCI Express y fíjela con tornillos Installare il riser scheda PCI Express e fissare con le viti Установите...
- Page 14 Milo Series ML08 Installation Chart Loosen the screws holding the expansion slot covers to remove them, then install expansion card into the PCI Express riser card Befestigungsschrauben der Erweiterungssteckplatzabdeckungen zum Entfernen lösen, dann Erweiterungskarte in der PCI-Express- Riserkarte installieren Desserrez les vis de maintien des couvercles de l'emplacement d'extension pour les enlever, puis installez la carte d'extension dans la carte adaptatrice PCI Express Afloje los tornillos que sujetan las cubiertas del zócalo de expansión para retirarlas, luego instale la tarjeta de expansión en la tarjeta...
- Page 15 Milo Series ML08 Installation Chart If needed, install expansion card brace for extra security Bei Bedarf Klammer für Erweiterungskarte für zusätzliche Sicherheit installieren Dévissez les deux vis fixant la barre centrale pour la retirer Si es necesario, instale el soporte de la tarjeta de expansión para seguridad extra Se necessario, installare il sostegno scheda di espansione per una maggiore sicurezza При...
- Page 16 Milo Series ML08 Installation Chart Connect all remaining cables and wires remaining cables and wires Alle verbleibenden Kabel und Drähte anschließen Branchez tous les câbles et les fils restants Conecte todos los cables restantes Collegare tutti i fili e cavi rimanenti Подключите...
- Page 17 Milo Series ML08 Installation Chart Reinstall both side panels Beide Seitenblenden wieder installieren Réinstallez les deux panneaux latéraux Reinstale ambos paneles laterales Reinstallare entrambi i pannelli laterali Установите на место боковые панели 裝回兩邊側板 装回两边侧板 両側のパネルを元に戻します 양쪽 패널을 도로 설치합니다...
- Page 18 Milo Series ML08 Installation Chart Depending on intended usage, use corresponding case stands for horizontal or vertical orientation Je nach vorgesehenem Einsatz entsprechende Gehäuseständer zur horizontalen oder vertikalen Aufstellung verwenden Selon l'utilisation prévue, employez les supports de boîtier correspondant à une orientation horizontale ou verticale Dependiendo del uso que se le quiera dar, use los soportes correspondientes de la carcasa para orientación horizontal o vertical...
- Page 19 Milo Series ML08 Installation Chart Secure handle bar with screws (ML08B-H, ML08B-HW) Handgriff mit Schrauben befestigen (ML08B-H, ML08B-HW) Fixez la barre de préhension avec les vis (ML08B-H, ML08B-HW) Fije la agarradera con tornillos (ML08B-H, ML08B-HW) Fissare con le viti l’impugnatura (ML08B-H, ML08B-HW) Закрепите...
-
Page 20: Connector Definition
Milo Series ML08 Connector definition (1) Fort panel connector installation Power switch and reset switch installation guide: Please refer to the motherboard manuals for the motherboard’s “Front Panel Connector” or “System Panel Connector” pin definition. Power switch and reset switch have no polarity, so they can be connected in any orientation. - Page 21 Milo Series ML08 Connector definition Please refer to the motherboard manuals for the motherboard’s “Front Panel Connector ” or “System Panel Connector” pin definition.; : the white/black wires are negative while other colors are positive wires. The Power LED wires are separate pins for compatibility with different motherboard so please make sure they are connected in the right polarity by referring to your motherboard manual.
- Page 22 A continuación se detallan los pines para conectores E/S frontales, compruebe también por favor el manual de su placa base para cotejar los pines E/S frontales de la misma. Los conectores E/S de SilverStone son del tipo bloque para simplificar la instalación.
-
Page 23: Component Size Limitations
Milo Series ML08 Component size limitations The ML08 was designed to be as small as possible while maximizing interior space usage, please refer to the : following guidelines for component selection and future upgrade considerations. (1) CPU Cooler limitation Height limitation: The ML08 has 58mm height limitation for CPU cooler. - Page 24 Anschluss. Das Verlängerungskabel darf die obere und untere Grenze nicht überschreiten. Le ML08 nécessite une alimentation standard SFX ou SFX-L avec une profondeur maximale de 130 mm. Dans l'illustration, l'unité d'alimentation est située dans la partie avant du châssis avec le câble d'extension et un connecteur de 90 degrés.
- Page 25 óptico. ML08 può supportare schede grafiche da 13” (330 mm) di livello consumer. Vi preghiamo di contattarci se si trova una scheda che non si adatta Se la scheda utilizzata è...
- Page 26 Milo Series ML08 Component size limitations B. Width limitation The standard width for graphics card is 4.38” With the graphics card holder installed, the maximum allowable width for graphics card is 4.78” Without the graphics card holder, the maximum allowable width for graphics card is up to 6.15”...
- Page 27 7,9mm. Si la ML08 se usa en orientación horizontal o se transporta a menudo, le recomendamos instalar el soporte de la tarjeta de expansión. Si la carcasa se usa en orientación vertical y no necesita moverse a menudo, podría optar por no instalar el soporte para cambios o reemplazos más rápidos de tarjetas de expansión/gráficas en el futuro.
- Page 28 (mitgeliefert) erforderlich. Bitte beachten Sie zur Installation die Abbildung. Le ML08 est uniquement compatible avec les lecteurs optiques fins Pour les lecteurs optiques fins de 12,7 mm de type slim, un type de chargement par fente ou par plateau peut être utilisé.
-
Page 29: Optimal Thermal Performance Layout
(1)Para mejorar el rendimiento de refrigeración de la CPU, le recomendamos disipadores como el SilverStone AR06. Ya que la carcasa está diseñada para una refrigeración pasiva, mientras más cerca esté el ventilador de la CPU de las aberturas del panel lateral, mejor. - Page 30 Optimal Thermal Performance Layout (3) Vertical/horizontal placement Because most vents are situated on the bottom, placing the ML08 vertically will result in better temperature than in horizontal position. When using the case horizontally, please be sure of adhering rubber stands to the bottom.
- Page 31 Milo Series ML08 Optimal Thermal Performance Layout (4) Cable routing The photo shows recommended cable routing paths Die Abbildung zeigt die empfohlenen Kabelwege La photo montre les chemins de passage de câbles recommandés La foto muestra los caminos de enrutado recomendados para los cables.
-
Page 32: Filter Removal
Milo Series ML08 Filter removal ML08B-H ML08B-HW As shown in illustration, filters on both sides can be removed for cleaning. (applicable to “window-less” SST-ML08B only) Wie in der Abbildung gezeigt, können die Filter an beiden Seiten zur Reinigung entfernt werden. -
Page 33: Protect Your Computer
ML08 Protect Your Computer A lock and cable can be purchased on the market for use with the Kensington security slot located on rear of ML08 to prevent removal of the entire computer or top cover. Caution: Please check for compatibility before purchasing the lock and cable for use with ML08’s Kensington security slot. - Page 34 Q: Le ML08 convient-il au Sugo Pack? Q: ML08相容於Sugo pack嗎? R: Oui, avec en plus de la place! A: 相容 P : ¿Encaja la ML08 en el Pack Sugo? Q. ML08は、 Sugoパックに入りますか? R : ¡Pues sí, con espacio de sobra! A. はい、 余裕で入ります !...
- Page 35 Replacement product will be warranted for remainder of the warranty period or thirty days, whichever is longer. All products should be sent back to the place of purchase if it is within 30 days of purchase, after 30 days, customers need to initiate RMA procedure with SilverStone Technology in USA by first downloading the “USA RMA form for end-users”...
- Page 36 G11224730...
Need help?
Do you have a question about the ML08 and is the answer not in the manual?
Questions and answers