Table of Contents
Advertisement
Quick Links
Advertisement
Table of Contents

Related Manuals for SilverStone ML07


Summary of Contents for SilverStone ML07
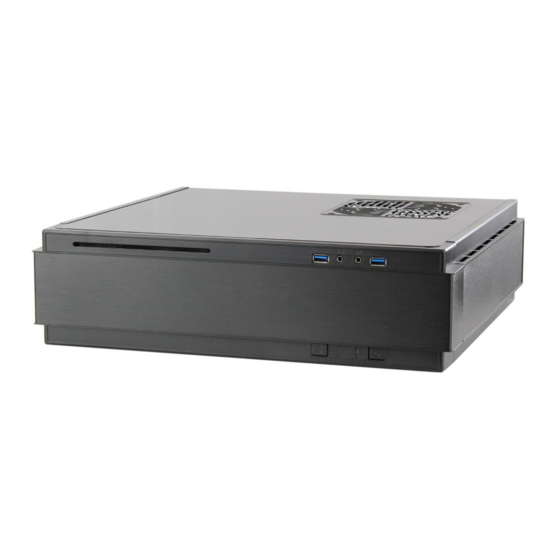
- Page 1 Milo Series ML07 Slim Mini-ITX case for gaming HTPC...
-
Page 3: Table Of Contents
The following manual and guides were carefully prepared by the SilverStone engineering team to help you maximize the potential of your SilverStone product. Please keep this manual for future reference when upgrading or performing maintenance on your system. A copy of this manual can also... -
Page 4: Product Overview
PC. For those looking to build a cleanly-styled HTPC with gaming or more powerful components in small form factor, the ML07 is the perfect solution. -
Page 5: Disassemble Chart
Milo Series ML07 Disassemble Chart SLOT-LOADING OPTICAL DRIVE (OPTION) CD & HDD CAGE 2.5” HDD X2 TOP COVER HDD CAGE 2.5” HDD X1 MINI-ITX (OPTION) 12015 FAN X1 USB 3.0 + SPK + MIC 3.5” HDD X1 POWER BUTTON POWER LED... - Page 6 Milo Series ML07 Installation Chart Before you begin, please make sure that you Have all components collected. Check that all components do not have compatibility problems with each other or with the case. If possible, assemble the components outside the case first to make sure they are working.
- Page 7 Milo Series ML07 Installation Chart Unscrew the screws from PSU Отвинтите винт кронштейна bracket then remove it. блока питания и извлеките его. Lösen Sie zum Abnehmen 鬆開電源架的螺絲, die Schraube an der 取下電源架 Netzteilhalterung. Dévissez les vis du support 松开电源架的螺丝, du bloc d'alimentation pour 取下电源架...
- Page 8 Milo Series ML07 Installation Chart Insert the I/O shield included Установите заглушку для разъёмов задней панели with your motherboard then материнской платы, install the motherboard into прилагаемую к материнской the chassis. плате, затем установите материнскую плату в корпус. Setzen Sie das mit Ihrem 將I/O彈片裝上機殼,裝上主機...
- Page 9 Milo Series ML07 Installation Chart Secure the PSU and the 3.5”HDD Закрепите блок питания и into the PSU bracket. 3,5-дюймовый жесткий диск на кронштейне крепления блока питания. Befestigen Sie Netzteil und 將電源與3.5”硬碟安裝上電 3,5-Zoll-Festplatte in der 源架 Netzteilhalterung. Attachez le bloc d'alimentation et 将电源与3.5”硬盘安装上电...
- Page 10 Milo Series ML07 Installation Chart Insert the PSU bracket into its Установите кронштейн блока original position and secure питания в исходное положение with screws. и закрепите винтами. Stecken Sie die Netzteilhalterung 將電源架推定位,鎖上螺絲 in ihre ursprüngliche Position und befestigen sie mit Schrauben.
- Page 11 Milo Series ML07 Installation Chart Included Foam Pad Depending on the design of your graphics cards, install and adjust the graphics card holder to a proper position to support your card. Adhere included rubber padding according to the height of graphics card’s backside, one (for 3mm thick backplate) or two (for no backside components).
- Page 12 Milo Series ML07 Installation Chart Install 2.5”HDD/SSD and slim Установите 2,5-дюймовый жесткий или твердотельный slot-loading optical drive onto the диск и тонкий оптический graphics card support bracket. привод с загрузкой через слот на крепежный кронштейн графической карты. Installieren Sie eine 2,5-Zoll- 將2.5”硬碟與薄型光碟機安...
- Page 13 Milo Series ML07 Installation Chart Make sure all the cables are Проверьте правильность properly connected. подключения всех кабелей. Achten Sie darauf, dass 確定所有線材都已正確的安裝 sämtliche Kabel richtig angeschlossen sind. Vérifier que tous les câbles 确定所有线材都已正确的安装 sont correctement branchés. Asegúrese de que todos los 全てのケーブルが確実に接続...
- Page 14 Milo Series ML07 Installation Chart Depending on requirement or preference, adhere four rubber stands for horizontal use or install the rubber pads for vertical use. Bringen Sie je nach Anforderungen oder Präferenzen vier Gummifüße zur horizontalen Nutzung auf oder installieren die Gummipolster zur vertikalen Nutzung.
-
Page 15: Installation Guide
Milo Series ML07 Connector definition (1) Fort panel connector installation Power switch and reset switch installation guide: Please refer to the motherboard manuals for the motherboard’s “Front Panel Connector” or “System Panel Connector” pin definition. Power switch and reset switch have no polarity, so they can be connected in any orientation. - Page 16 Milo Series ML07 Connector definition Please refer to the motherboard manuals for the motherboard’s “Front Panel Connector ” or “System Panel Connector” pin definition.; : the white/black wires are negative while other colors are positive wires. The Power LED wires are separate pins for compatibility with different motherboard so please make sure they are connected in the right polarity by referring to your motherboard manual.
- Page 17 A continuación se detallan los pines para conectores E/S frontales, compruebe también por favor el manual de su placa base para cotejar los pines E/S frontales de la misma. Los conectores E/S de SilverStone son del tipo bloque para simplificar la instalación.
-
Page 18: Component Size Limitations
C. Vordere Grenze: Der Abstand Richtung Vorderseite des Gehäuses beträgt 7 mm. A. Limitation de la hauteur : Le ML07 a une limitation de hauteur de 83mm pour le refroidisseur de CPU. B. Limite supérieure : Le refroidisseur peut dépasser de 11mm sur le bord supérieur de la carte mère. - Page 19 Das Verlängerungskabel darf die obere und untere Grenze nicht überschreiten. Le ML07 supporte une source d'alimentation SFX standard avec une profondeur de 130 mm. Dans l'illustration, l'unité d'alimentation est située dans la partie avant du châssis avec le câble d'extension et un connecteur de 90 degrés. Le câble d'extension ne doit pas dépasser la limite supérieure ou inférieure.
- Page 20 Das ML07 nimmt bis zu 330 mm lange Grafikkarten auf. Bitte wenden Sie sich an uns, falls Sie keine passende Karte finden können. Le ML07 peut supporter la plupart des cartes graphiques du marché de 13" (330mm). Veuillez nous contacter si vous trouvez une carte qui ne correspond pas.
- Page 21 Milo Series ML07 Component size limitations (i) Die Standardbreite bei Grafikkarten beträgt 11,13cm. (ii) Bei installierter Grafikkartenhalterung beträgt die maximal erlaubte Grafikkartenbreite 13,11 cm. (iii) Ohne installierte Grafikkartenhalterung beträgt die maximal erlaubte Grafikkartenbreite 14,93 cm. (i) La largeur standard pour les cartes graphiques est 4,38". (11,13cm) (ii) Avec le support de carte graphique, la largeur maximale permise pour les cartes graphiques est 5,16".
- Page 22 Milo Series ML07 Component size limitations C. Thickness limitation 1 2 3 4 Calculated from the bottom of the case to top of graphics card PCB, the total thickness limitation is 68mm. (ii) With the standard 34.8mm-thick dual slot graphics card installed, the maximum thickness of the fans is 32mm.
- Page 23 The ML07 supports only slim slot-loading optical drive. Das ML07 unterstützt nur schmale optische Laufwerke („Slot-In“). Le ML07 est compatible seulement avec le les lecteur optique slim sans tiroir (mange-disque aka “slot-loading”). La ML07 sólo acepta dispositivos ópticos delgados de carga mediante ranura.
-
Page 24: Optimal Thermal Performance Layout
ML07, no detectamos ninguna diferencia de rendimiento entre las diferentes orientaciones cuando se usó un CPU basado en LGA 115X 95W. Si está preocupado por la orientación de los tubos isotérmicos, la ML07 se puede colocar de forma vertical u horizontal para eliminar este problema potencial. - Page 25 E. In teoria, i tubi per lo scambio del calore di NT06-PRO potrebbero non funzionare in modo ottimale quando sono installati rivolti verso il basso. Tuttavia, durante la fase di test termico di ML07, non è stata rilevata alcuna differenza di prestazioni tra i vari orientamenti quando si utilizza una CPU 95W LGA115X.
- Page 26 Milo Series ML07 Optimal Thermal Performance Layout (2) If you use a high-end graphics card, installing case fans on the bottom vent below graphics card should provide plenty of cooling for them. If you use graphics card with omni-direction or open air cooler, we recommend having two case fans on the bottom vents.
- Page 27 A. ML07 è concepito come una piattaforma di gioco ad alte prestazioni, si consiglia di utilizzare SSD come dispositivo d’archiviazione principale in quanto sono più resistenti al calore. B. L'ML07 non prevede un raffreddamento attivo per i dischi rigidi 3,5”. Si consiglia di utilizzare dischi rigidi con RMP bassi, oppure modelli con una migliore resistenza al calore.
- Page 28 C. 放熱性能でご満足いただけない場合、ML07を縦置きで使用されるようお勧めいたします。 A. ML07는 고성능 게임 플랫폼이므로 내열성이 비교적 높은 SSD를 일차 저장 장치로 사용할 것을 권장합니다. B. 설계상 ML07에는 3.5" 하드 드라이브용으로 설계된 효과적인 냉각 시스템이 없습니다. RPM이 낮은 하드 드라이브 또는 모델을 사용할 것을 권장하는데, 이는 내열성이 높기 때문입니다.
- Page 29 B. Wenn Sie das Gehäuse horizontal verwenden, denken Sie bitte daran, die Gummifüße an der Unterseite anzubringen. A. Parce que la plupart des sorties sont situées en bas, le fait de placer le ML07 verticalement permettra d'obtenir une meilleure température que dans la position horizontale.
- Page 30 Milo Series ML07 Optimal Thermal Performance Layout (5) Recommendation for water cooling 29.35 A. When sufficient budget is allowed, we recommended using DIY water cooling. B. A Laing DDC pump can be mounted onto the center 2.5” brace. The mounting holes are shown in the illustration above.
- Page 31 Milo Series ML07 Optimal Thermal Performance Layout A. Lorsque le budget le permet, nous vous recommandons d'utiliser de l'eau pour le refroidissement. B. Une pompe Laing DDC peut être montée sur l'axe central 2,5". Les trous de fixation sont indiqués dans l'illustration ci-dessus.
- Page 32 Milo Series ML07 Optimal Thermal Performance Layout A. 对于预算充裕的玩家我们建议使用DIY的水冷 B. 中央的2.5”支架可以安装一颗Laing DDC帮浦,锁固孔如上图标示 C. 如果显示适配器区域有需要使用水冷排散热,我们建议您使用全覆盖式的水冷头以降低厚度 D. 如上图这种双层迭的电源接头可能会干涉水冷排,而下面的双层迭的影像输出接头则没影响 E. 如上图,双颗120风扇为紧靠,周边保留空间如图数字标示 F. 而CPU上方的风扇周边距离,如上图。与后方折边的距离,有另外保留上盖本身要导入的行程。CPU Cooler的高度限制是83mm,这个值在这边通常是将 水冷头风扇厚度与水冷排厚度相加。 A. 十分な予算がある場合、当社はDIYの水冷を使うようお勧めいたします。 B. レインDDCポンプは中央の2.5”ブレースに設置可能です。取り付け穴は上図に示されています。 C. グラフィックスカード領域で液冷ラジエターを使用される場合、全体的な厚みの減少に対応してフルカバー付きのウォーターブロックの使用をお 勧めいたします。 D. 写真例上部の丸で囲まれたようなデュアル・スタック電源コネクタハウジングは、水冷ラジエターの設置の妨げになる恐れがあります。一方、下 の丸で囲まれたようなデュアルスロットディスプレイ出力コネクタでは、妨げの問題はありません。 E. 上図に示された数字は、2台の120mmファンが設置された場合の許容範囲を示しています。 F. CPUエリア上方の許容範囲が上図に示されています。後方の許容範囲には上部カバー取り付けに必要なスペースが考慮されています。CPUクーラー の高さ限界は83mmで、液冷式のウォーターブロックおよびラジエータにも十分な数値です。 A.예산이 충분히 허용될 경우 DIY 수냉식 사용을 권장합니다.
- Page 33 Milo Series ML07 Optimal Thermal Performance Layout (6) Cable routing There is some space between the front panel and the side of the graphics card reserved for the cable routing. Es befindet sich zur Kabelführung etwas Platz zwischen der Frontblende und der Seite der Grafikkarte.
-
Page 34: Maintenance And Upgrade
Milo Series ML07 Maintenance and upgrade (1) Fan removal guide A fan can be mounted after removing the top cover. The graphics card holder needs to be removed before fans can be installed on the bottom vents. Ein Lüfter kann nach Abnehmen der oberen Abdeckung installiert werden. -
Page 35: Protect Your Computer
Note: Cable security lock is not included with ML07 A lock and cable can be purchased on the market for use with the Kensington security slot located on rear of ML07 to prevent removal of the entire computer or top cover. -
Page 36: Q&A
Q: Le ML07 convient-il au Sugo Pack? R: Oui, avec en plus de la place! Q: Est-ce que le NT06-PRO peut être utilisé sans ventilateur dans le ML07 ? R: Cela n'est pas recommandé. Q: Tout est installé correctement, pourquoi est-ce que rien ne démarre ? R: Si votre PSU dispose d’un commutateur de CA, assurez-vous que le commutateur est en position “ON”. - Page 37 A: PSUにACスイッチがある場合、スイッチが「オン」の位置にあることを確認してください。 Q: ML07가 Sugo Pack에 맞습니까? A: 예, 맞습니다. 그리고 여분의 공간이 있습니다! Q: ML07에서 팬 없이 NT06-PRO를 사용할 수 있습니까? A: 사용하지 않는 것이 좋습니다. Q:모든 것을 제대로 설치했는데 작동되지 않는 이유가 무엇입니까? A:PSU에 AC 스위치가 있는 경우, 스위치가 “ON” 위치에 있는지 확인하십시오.
-
Page 38: Warranty Information
Replacement product will be warranted for remainder of the warranty period or thirty days, whichever is longer. All products should be sent back to the place of purchase if it is within 30 days of purchase, after 30 days, customers need to initiate RMA procedure with SilverStone Technology in USA by first downloading the “USA RMA form for end-users”... - Page 40 G11221320...
Need help?
Do you have a question about the ML07 and is the answer not in the manual?
Questions and answers