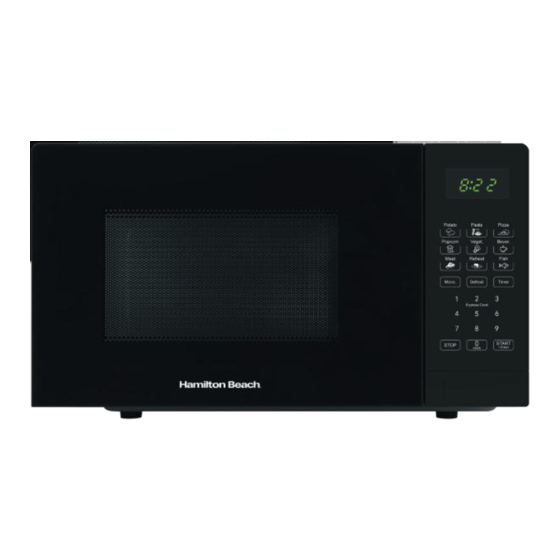
Summary of Contents for Hamilton Beach HB20P7PDB
- Page 1 INSTRUCTIONS HB20P7PDB HB20P7PDS HB20P7PDW ESSENTIAL Digital Microwave 20L Capacity www.hamiltonbeach.co.uk FOR DOMESTIC USE ONLY.
- Page 2 Scan QR code using mobile device WARRANTY REGISTRATION Thank you for choosing Hamilton Beach for your home appliances. As part of our commitment to quality, your appliance is covered by a 2-year warranty. To ensure that you enjoy the full benefits of this warranty, we encourage you to register your product after purchase.
-
Page 3: Table Of Contents
CONTENTS ....................Product Registration ......................Specifications .................... Important Safeguards ....................Product Overview ......................Control Panel ..................... Using Your Appliance ......................Utensil Guide ......................Cooking Tips ...................... Cleaning & Care ....................Troubleshooting ..................Disposing of the Appliance ....................Customer Support ....................Guarantee &... -
Page 4: Important Safeguards
Please read these instructions carefully before using the product. • WARNING: If the door or door seals are damaged, do not operate the oven until it has been repaired by a trained professional or contact Hamilton Beach Customer Services for assistance. • WARNING: Only a trained person should carry out service or repair operations involving the removal of covers providing protection against exposure to microwave energy. -
Page 5: Product Overview
PRODUCT OVERVIEW Product Features: Door Lock: Microwave oven door must be properly closed in order for it to operate. Viewing Window: Allows user to see the cooking status. Rotating Ring: The glass turntable is supported and balanced by the rings wheels. Rotating Axis: The glass turntable rotates on its axis, driven by the underlying motor. -
Page 6: Control Panel
CONTROL PANEL Before first use: Remove all packaging and safely remove any film covering the oven before use. Inspect for any damage, and if found, promptly notify the dealer or contact the manufacturer's service centre. Place the microwave oven in a dry, non-cor- rosive environment, away from heat sources and humidity, such as gas burners or water tanks. - Page 7 CONTROL PANEL 1. Before Cooking The display lights up when plugged in power supply, then enter the standby state and display shows 1:00. 2. Microwave Function There are ten microwave power levels, ranging from 100% to 10%. Press the 'Micro.' button continuously to select the desired power level.
- Page 8 CONTROL PANEL 3. Defrost There are two defrost modes, dEF1 and dEF2, respectively. dEF1 is for defrosting by weight, and dEF2 is for defrosting by time. Press the 'Defrost' button to select either defrosting by weight or time, and the display screen will show "dEF1" or "dEF2". Input the food weight or defrosting time using the 0~9 number buttons.
- Page 9 CONTROL PANEL Display Kind Method Potato The optional weights are 250g, 500g & 750g Pasta The optional weights are 50g, 100g & 150g Pizza The optional weights are 200g & 400g Popcorn The optional weight is 100g Vegetables The optional weights are 200g, 400g & 600g Beverage The optional weights are 1-3 cups -each one approx 250ml Meat...
-
Page 10: Using Your Appliance
USING YOUR APPLIANCE 7. Express Cook 7.1 In standby mode, you can directly press the 1~6 number buttons to start the microwave oven. The working time is 1~6 minutes, that is, press 1 to work for 1 minute, press 2 to work for 2 minutes, and so on. -
Page 11: Utensil Guide
UTENSILS GUIDE It is highly advised to use containers that are safe and suitable for microwave cooking. Typically, containers made of heat-resistant ceramic, glass, or plastic are appropriate for microwave use. Avoid using metal containers for microwave and combination cooking to prevent sparks. - Page 12 COOKING TIPS Allow Standing Time: Allow the food to remain in the oven for a sufficient duration after the cooking time elapses to complete its cooking cycle and facilitate a gradual cooling process. Whether The Food Is Done: The colour and firmness of the food aid in determining its oneness; these factors include: Steam coming out from all parts of food, not just the edge Joints of poultry can be moved easily Pork or poultry shows no signs of blood...
-
Page 13: Cleaning & Care
CLEANING & CARE Turn off the oven and unplug it from the wall socket before cleaning. Maintain the cleanliness of the oven interior by wiping off food splatters or spilled liquids with a damp cloth. If necessary, use a mild detergent for thorough cleaning. Avoid harsh cleaners, sprays, or substances that may stain, streak, or dull the door surface. -
Page 14: Troubleshooting
TROUBLESHOOTING Please check the following before contacting customer services; If the oven fails to operate: 1. Check to ensure that the oven is plugged in securely. If it is not, remove the plug from the outlet, wait 10 seconds, and plug it in again securely. 2. -
Page 15: Customer Support
CUSTOMER SUPPORT If you have any questions or concerns about your new product, please contact our helpful Customer Support Team. Please have your Model No. available. This can be found on the front cover of this instruction manual and on the appliance’s rating label. We’re here to help! 01274 752624 customerservice@hamiltonbeach.co.uk... -
Page 16: Guarantee & Service
GUARANTEE & SERVICE Register your purchase www.hamiltonbeach.co.uk/registermywarranty Scan QR code using mobile device To make a warranty claim, do not return this appliance to the store. Please call 01274 752624 or email customerservice@hamiltonbeach.co.uk. For faster service, locate the model number on the rating label on your appliance. Alternatively, please scan the QR code above to be directed to our warranty registration page. - Page 17 Illustrations may differ from actual product. We are consistently striving to improve our products, therefore all specifications contained herein are subject to change without notice. ©2023 Hamilton Beach® Brands, Inc. Trademarks by Hamilton Beach® Brands, Inc. All rights reserved. Hamilton Beach® is a registered trademark of Hamilton Beach Brands, Inc. used under license by EPE International Limited.


Need help?
Do you have a question about the HB20P7PDB and is the answer not in the manual?
Questions and answers