Table of Contents
Advertisement
Quick Links
Advertisement
Table of Contents

Related Manuals for Boss Audio Systems BV9968MB


Summary of Contents for Boss Audio Systems BV9968MB
-
Page 2: Table Of Contents
Congratulations on your purchase of a Boss Audio Systems Multimedia Receiver. It has been designed, engineered and manufactured to bring you the highest level of performance and quality, and will offer you years of entertainment pleasure. Specifications....................1 Safety Notice.....................2 Accessories.......................3 Unit Installation....................3... -
Page 3: Specifications
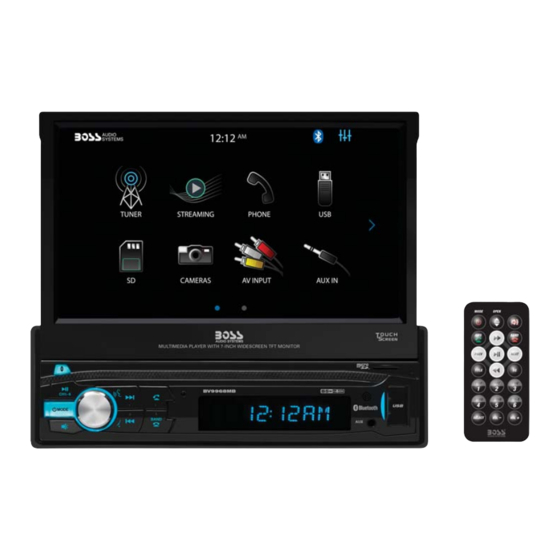
Model No. BV9968MB Fixed front panel with 7” motorized TFT screen FM/AM Radio RBDS A-Link (Screen Mirroring) USB Charging (1A) General Front USB and Micro SD support features Bluetooth audio stream and hands-free phone call Push-To-Talk (PTT) AUX input AV input... -
Page 4: Safety Notice
Please read and understand the following safety information before operating this unit. WARNING! To ensure safety while driving and to comply with laws, drivers should not watch video or operate the video device while driving. The unit is suitable for 12V power supply (requires grounding). Do not connect it to 24V power supply in trucks or buses, or else it will be damaged. -
Page 5: Accessories
ACCESSORIES/INSTALLATION ACCESSORIES ‡ 1x Remote control ‡ Head unit mounting kit 1x Plain washer ‡ 1x Wire hanress 1x Mounting sleeve 1x Spring washer ‡ 1x Hands-free microphone 1x Mounting strap 2x Release keys ‡ Microphone mount kit 1x Tapping screw 1x Sticker 1x Hex bolt 1x Clip... -
Page 6: Wire Connection Description
WIRE CONNECTION DESCRIPTION Description of the Input/Output Interface Microphone Input (connects to the supplied hands-free microphone) Fuse (10A) AV Inputs and Outputs Wire Harness Connector FM/AM Antenna Jack (connects to the supplied wire harness) Audio/Video Inputs and Outputs 1. R.CAM ..Rear Camera Input (Yellow) 7.V-OUT ..... -
Page 7: Panel Introduction
6 7 8 10 11 ‡ 1 OPEN During media play, press to skip to the previous or next track; hold down ‡ Press to slide the screen out. to fast search forward or backward. ‡ Repeatedly press to tilt the screen up or down. -
Page 8: Remote Control Introduction
6 PREV NEXT ‡ In radio mode, press briefly to tune to a station; press and hold to to enter manual seeking mode to fine tune frequencies. ‡ During media playback, skip to the previous or next track. TITLE During video playback, enter title list. Numeric buttons: In radio mode, ‡... -
Page 9: Main Menu Operation Instruction
MAIN MENU OPERATION INSTRUCTION MAIN MENU 1 1. T uner Interface 10:30 2. Bluetooth Streaming Interface 3. Bluetooth Phone Interface 4. USB Interface TUNER STREAMING PHONE 5. Micro SD Interface 6. Front/Rear Camera Interface CAMERAS AV INPUT AUX IN 7. AV INPUT Interface 8. -
Page 10: Access Setup Interface
Camera SETTINGS-Menu 2 Camera Trigger Rear Rear Camera Delay Rear Camera Rear Cam Pwr Front Camera Front Cam Pwr 1. Camera Trigger: Touch to select Front/Rear/Off. Select to display the front or rear camera view, or no camera view when reversing. 2. -
Page 11: Controls Color Settings
1. Touch to select whether to output sound from an external amplifier. 2. 3. Startup volume & Starup voice: Set a default volume. If the volume at the last shutdown is less than this volume, the volume at the last shutdown will be used when rebooting; If the volume at the last shutdown is greater than this volume, this default volume will be used when rebooting. -
Page 12: About Settings
TUNER OPERATION About SETTINGS –Menu 8 1. Calibrate the touch screen to improve responsiveness and accuracy. Touch the crosshair on the screen each time it appears to calibrate the screen. 2. View version numbers of this product 3. Restore the product to factory settings. 4. -
Page 13: Usb/Micro Sd Playback
USB/MICRO SD PLAYBACK d. PTY (Programming Type) Touch an on-screen button to select a program type. The unit will search for the selected program and broadcast it. NOTE: If RBDS is turned OFF, CT/TA/AF/PTY will not function. USB/MICRO SD MUSIC/VIDEO/PICTURE OPERATION Touch the USB/SD icon in the main menu to enter the USB or Micro SD playback interface. -
Page 14: Music Operation
USB/MICRO SD PLAYBACK MUSIC OPERATION /D:// Another Way.mp3 Avenue.mp3 All By Myself.mp3 Gill In the Mirror.mp3 08/29 Show the music’s ID3 information. 2. Skip to the previous song. 3. Change play mode: repeat all, repeat single, sequential play and shuffle play. 4. -
Page 15: Bluetooth Operation
0000. When prompted for password, input 0000 on your mobile phone for Bluetooth connection. e.Bluetooth name for this unit: BOSS AUDIO BV9968MB 2. Function area: a.Touch to see the dialing keypad. Users can dial phone numbers and make calls. -
Page 16: Bluetooth Phone Book
BLUETOOTH PHONE BOOK 1. Touch to search for a name or phone number. 2. Touch to sync phonebook. 3. Contact list. BLUETOOTH PHONE CALL HISTORY 1. Touch to sync phone call history. 2. Touch to show missed calls. 3. Touch to show the dialed phone numbers. -
Page 17: A-Link(Screen Mirroring) Operation
A-LINK(SCREEN MIRRORING) OPERATION A-LINK App allows you to mirror the screen of certain Android smartphones on the screen of this unit. Scan either of the QR codes to download the “A-LINK” App in Amazone App Store or Google Play Store and install it to your smartphone. -
Page 18: Steering Wheel Control (Swc)
STEERING WHEEL CONTROL (SWC) SWC INTRODUCTION Steering Wheel Control (SWC) function allows you to operate this unit via an external device (steering wheel control). A third-party adapter must be used in order for this unit to be compatible with your OEM steering wheel controls. -
Page 19: Troubleshooting
General Problem Cause Corrective Action Unit’s fuse is blown. Install a new fuse with right rating. Unit not Install a new fuse with right rating. Car battery fuse is blown. powered on Illegal operation. Press the Reset button to reset. Calibrate the screen (SETTINGS Insensitive Place of touch screen is offset.
Need help?
Do you have a question about the BV9968MB and is the answer not in the manual?
Questions and answers