Table of Contents
Advertisement
Quick Links
Advertisement
Table of Contents

Related Manuals for Tobii Pro Spark

Summary of Contents for Tobii Pro Spark
- Page 1 Tobii Pro Spark User Manual ...
- Page 2 Tobii Pro Spark User Manual v. 1.2 September 2023 All rights reserved. Copyright © Tobii AB (publ) The information contained in this document is proprietary to Tobii AB. Any reproduction in part or whole without prior written authorization by Tobii AB is prohibited. Products that are referred to in this document may be either trade- marks and/or registered trademarks of the respective owners. The publisher and the author make no claim to these trademarks. While every precaution has been taken in the preparation of this document, the publisher and the author assume no responsibility for errors or omissions, or for damages resulting from the use of information contained in this document or from the use of programs and source code that may accompany it. In no event shall the publisher and the author be liable for any loss of profit or any other commercial damage caused or alleged to have been caused directly or indirectly by this document. Content subject to change without notice. Please visit Tobii Connect for updated versions of this document.
-
Page 3: Table Of Contents
3.7 Electricity 3.8 Environment 3.9 Power supply 3.10 Third party 4 Compliance declaration 4.1 EU Compliance 4.1.1 CE statement 4.1.2 Other EU directives and regulations 4.2 UKCA Statement 4.2.1 Other UK Legislation 4.3 FCC interference statement 4.4 ISED s tatement 4.5 Australia and New Zealand compliance 4.6 Japan compliance 4.7 Korea compliance 4.8 Safety compliance 4.9 EMC compliance 4.10 RoHS compliance 4.11 Waste disposal and recycling 5 Overview of Tobii Pro Spark 5.1 Tobii Pro Spark versions 5.2 How Tobii Pro Spark works 5.3 What is in the Tobii Pro Spark box 5.4 How to use the USB Type-C male to Type-A female adapter 5.5 Tobii accessories 6 Set up your Tobii eye tracker 6.1 Download and install Tobii Pro Eye Tracker Manager 6.2 Install Tobii Pro Spark in Tobii Pro Eye Tracker Manager 6.3 Mount the eye tracker on a laptop or monitor 6.4 Display setup in Tobii Pro Eye Tracker Manager 6.5 Calibration Tobii Pro Spark User Manual v. 1.2... - Page 4 7 Display setups 7.1 Standard setup 7.2 User coordinate system 7.3 Advanced setup 7.4 Setup with Tobii Pro Tripod Stand 8 Start experimenting 8.1 Start eye tracking 8.2 Tobii Pro Lab 8.3 Keep your eye tracker software updated 8.4 Keep your display setup updated 9 Product care 9.1 Operational environment 9.2 Transportation and storage 9.3 Cleaning 9.4 Disposal of the eye tracker 9.5 Limitation of liability 10 Technical specifications 10.1 Eye tracking specifications 10.2 Setup 10.3 Software and framework compatibility 10.4 Hardware versions 10.5 Tobii Pro Spark technical specifications Appendix A Customer Care, training, and warranty A1 Customer Care A1.1 Get help A2 Training and education services A3 Warranty information Appendix B Limitations and considerations B1 Intended use B2 Light conditions B3 Eyelashes B4 Droopy eyelids Appendix C Glossary Tobii Pro Spark User Manual v. 1.2...
-
Page 5: 1 Introduction
1 Introduction Tobii Pro Spark is a compact, high-performance data collection solution that you can take into the field. Use Tobii Pro Spark when your research takes you to locations and to subjects that would otherwise be hard to bring to the lab. You can collect data in classrooms, hospitals, libraries, and other locations where your subjects are easier to recruit. With sampling frequencies of up to 60 Hz, one eye tracking camera, and two pupil tracking modes (bright and dark pupil), Tobii Pro Spark enables you to adapt your data collection setup to dif- ferent research populations and scenarios. Use Tobii Pro Spark for studies on: Windows, macOS, and Linux laptop and desktop computers 27″ (16:9) monitors or smaller Real-world setups such as physical objects and social interactions (using the Tripod Stand) Projections, simulators, and larger screens (using the Tripod Stand) Mobile devices, with our Mobile Testing Accessory Tobii Pro Spark is primarily designed for use in indoor office environments with adult participants. 1.1 Symbols used in this document Three different symbols are used in this document: The Information symbol means something is important or needs special attention. The Tip symbol denotes additional information that can make a process or function easier. The Warning symbol means there is a possible risk of harm if the warning is ignored. 1.2 Tobii Pro Eye Tracker Manager Tobii Pro Eye Tracker Manager is free software available on Tobii Connect. Tobii Pro Spark User Manual v. 1.2... - Page 6 Tobii Pro Eye Tracker Manager helps you manage your Tobii Pro eye tracker. It lets you see which eye tracker firmware and software versions you are running and also facilitates updates (where applicable). It provides: Drivers and Firmware installation or updates Display setup Eye tracking mode selection Positioning guide User calibration Gaze visualization Get diagnostics References in product documentation t o Tobii Pro Eye Tracker Manager refer to the latest version available on Tobii’s website. Gaze visualization in Tobii Pro Eye Tracker Manager lets you quickly evaluate the quality of the eye tracking data. The Gaze visu- alization overlaps data only on the Tobii Pro Eye Tracker Manager screen while Tobii Pro Eye Tracker Manager is open. Get diagnostics button enables you to collect an encrypted blob file with full frame images and eye tracker logs to send to Cus- tomer Care for assistance with troubleshooting. Tobii Pro Spark User Manual v. 1.2...
-
Page 7: 2 System Requirements
RAM: 2 GB RAM memory* *Software for eye tracking research may require higher RAM Port: USB port** Type-A or USB Type-C (with included adaptor) **The average power consumption during usage is 2.0W, but the eye trackers power consumption can peak up to 5-6W depending on the use case. For example, when the illuminators first turn on, the con- sumption can briefly spike (a matter of milliseconds) at around 5-6W. The Tobii Pro Spark officially works with USB 2.0 BC1.2 which can handle spikes up to 7.5W. 2.2 Additional software options Tobii Pro Lab Tobii Pro Lab is a comprehensive research software platform for eye tracking designed to meet the highest demands on different research scenarios with exact timing accuracy. This software offers an efficient workflow, making it easy to design experiments, record data, analyze and visualize eye tracking data, and to sync this data with other bio- metric data streams. Tobii Pro SDK Tobii Pro SDK offers a broad set of tools that makes it simple to develop a variety of niche applications or scripts across multiple plat- forms, using a wide range of programming languages. This SDK gives the researcher access to the full set of relevant gaze data streams, such as 3D eye coordinates, raw data, pupil data, etc. Third-party software This term refers to any application built on Tobii Pro SDK. Tobii Pro Spark User Manual v. 1.2... -
Page 8: 3 Safety Declaration
Mounting warning Tobii Pro eye trackers should be mounted according to the instructions of the approved mounts used. The mounting bracket is designed for adhesion to a wide variety of surfaces, such as monitors or laptop screens. It is also designed for clean removability. Failure to follow the recommended removal instructions can result in damage to both the mon- itor/laptop and the mounting bracket. Do not mount the eye tracker on monitors posi- tioned above the head or face of a user, as it might fall. 3.2 Emergency warning Tobii Pro eye trackers are designed to be used only for research purposes. Be aware that due to the low, but possible risk of failure or distraction, the eye tracker should not be relied upon or used in dangerous or critical situations. 3.3 Epilepsy warning Some people with photosensitive epilepsy are susceptible to epileptic seizures or loss of consciousness when exposed to certain flashing lights or light patterns in everyday life. This may happen even if the person has no medical history of epilepsy or has never had any epileptic seizures. A person with photosensitive epilepsy would also be likely to have problems with TV screens, some arcade games, and flickering fluorescent bulbs. Such people may have a seizure while watching certain images or patterns on a monitor, or even when exposed to the light sources of an eye tracker. It is estimated that about 3-5% of people with epilepsy have this type of photosensitive epilepsy. Many people with pho- tosensitive epilepsy experience an “aura” or feel odd sensations before the seizure occurs. If you feel odd during use, move your eyes away from the eye tracker. 3.4 Infrared warning When activated, the Tobii Pro eye tracker emits pulsed infrared (IR) light. Certain med- ical devices are susceptible to disturbance by IR light and/or radiation. Do not use the eye tracker in the vicinity of these kinds of susceptible medical devices, as their accur- acy or proper functionality could be inhibited. Do not stare into the LED lights at a close distance (<15cm). Tobii Pro Spark User Manual v. 1.2... -
Page 9: Magnetic Field Warning
Child safety A Tobii Pro eye tracker is an advanced computer system and electronic device. As such, it is composed of numerous separate, assembled parts. In the hands of a child, some of these parts have the possibility of being separated from the device, possibly resulting in a choking hazard or other danger to the child. Young children should not have access to, nor use of the device or its accessories without parental or guardian supervision. 3.7 Electricity Do not open the casing of the Tobii Pro eye tracker, this could expose you to poten- tially hazardous electrical voltage. The device contains no user-serviceable parts. Non- compliance will result in loss of warranty! Contact Tobii Customer Care if your eye tracker is not working properly. 3.8 Environment This eye tracker is designed for use in dry indoor environments. Avoid any exposure to direct sunlight as this will affect eye tracking quality and longer exposure can overheat the equipment. Avoid exposure to any liquids, gels, moisture, rain, sweat or other damp materials and environments. Do not use the eye tracker near water – the device is not water resistant. Keep the eye tracker in a clean and dust free environment. When using the equipment take adequate precautions against dust and dirt. Do not place or use the equipment in places that are subject to extreme temperatures and humidity, such as on top of and or near a heating element, in a hot or damp room, or in a hot automobile. 3.9 Power supply Only use the AC power adapter provided by Tobii AB to power your Tobii Pro eye tracker. If the AC power adapter is damaged, it should be replaced only by Tobii S er- vice Personnel. If damaged, do not use the AC power adapter until it has been replaced. Tobii Pro and its agents are not liable for any damages or injuries to a person or property due to incorrect use of the provided accessories. Tobii Pro Spark User Manual v. 1.2... -
Page 10: Third Party
3.10 Third party Any use of a Tobii Pro eye tracker outside the intended use and together with any third-party software or hardware that changes the intended use is a risk, and Tobii AB can not take any responsibility in these situations. Tobii Pro Spark User Manual v. 1.2... -
Page 11: 4 Compliance Declaration
2014/30/EU (EMC) — Electromagnetic Compatibility Directive. 2011/65/EU (RoHS) and (EU)2015/863 — Restriction of Hazardous Substances Directive. 4.1.2 Other EU directives and regulations Tobii AB and Tobii Pro Spark comply with the essential requirements of the following EU dir- ectives and regulations: 2012/19/EU (WEEE) — Waste Electrical and Electronic Equipment Directive. 1907/2006 EC (REACH) — Registration, Evaluation, Authorization and Restriction of Chem- icals. Furthermore, Tobii AB complies with applicable parts of the Directive 94/62/EC on packaging and packaging waste. Manufacturer Contact Information Tobii AB Karlsrovägen 2D S-182 53 Danderyd, Sweden 4.2 UKCA Statement Tobii Pro Spark is UKCA-marked, certifying compliance with the essential require- ments for health, safety, and environmental protection requirements for the GB mar- ket.Tobii Pro Spark complies with the following statutory instruments: The Electromagnetic Compatibility Regulations 2016. UK Statutory Instruments 2016 No. 1091. The Restriction of the Use of Certain Hazardous Substances in Electrical and Electronic Equipment Regulations 2012. UK Statutory Instruments 2012 No. 3032. Tobii Pro Spark User Manual v. 1.2... -
Page 12: Other Uk Legislation
Reorient or relocate the receiving antenna. Increase the separation between Tobii Pro Spark and receiver. Connect Tobii Pro Spark into an outlet on a circuit different from that to which the receiver is connected. Consult the dealer or an experienced radio/TV technician for help. Operation is subject to the following two conditions: (1) This device may not cause harmful inter- ference, and (2) this device must accept any interference received, including interference that may cause undesired operation. Modifications not expressly approved by Tobii AB could void the user’s authority to operate Tobii Pro Spark under FCC rules. U.S. Responsible Party Contact Information Tobii Technology, Inc. 12007 Sunrise Valley Dr # 400 Reston, VA 20191, USA 4.4 ISED s tatement This Class B digital apparatus complies with Canadian ICES-003. Cet appareil numérique de la classe B est conforme à la norme NMB-003 du Canada. Tobii Pro Spark User Manual v. 1.2... -
Page 13: Australia And New Zealand Compliance
Tobii Pro Spark is registered in the Australian National Equipment Registration Sys- tem. Tobii Pro Spark is RCM-marked which signifies compliance with the Australian and New Zealand product safety requirement for electrical and electronic equipment according to EESS and radio communication and electromagnetic compatibility according to ACMA. 4.6 Japan compliance Tobii Pro Spark is VCCI-marked which signifies Tobii Pro Spark is compliant with emission (inter- ference) standards in Japan. 4.7 Korea compliance Tobii Pro Glasses 3 is KC-marked which signifies compliance with Korea’s product safety requirements for electrical and electronic equipment. Certificate number: R-R-TBI-ET5 4.8 Safety compliance Tobii Pro Spark complies with the following standards: EN IEC 62471:2008, Photobiological safety of lamps and lamp systems. EN 62368-1:2014 +A11, Audio/video, information and communication technology equip- ment - Part 1: Safety requirements. IEC 62368-1:2018, Audio/video, information and communication technology equipment - Part 1: Safety requirements. Including national deviations for European Group, Australia, New Zealand, China, Japan, USA, and Canada. 4.9 EMC compliance Tobii Pro Spark complies with the following standards: Tobii Pro Spark User Manual v. 1.2... -
Page 14: Rohs Compliance
EN 55035:2017/A11, Electromagnetic compatibility of multimedia equipment - Immunity requirements. FCC 47 CFR Part 15, Subpart B, Class B. ICES-003 Issue 7 Class B, Information Technology Equipment ( including Digital Appar- atus). CISPR32:2015, Electromagnetic compatibility of multimedia equipment - Emission require- ments (International standard accepted in AS/NZS and Japan). KN32, Electromagnetic interference prevention test for multimedia equipment. KN35, Electromagnetic wave immunity test for multimedia devices. 4.10 RoHS compliance RoHS compliance for Tobii Pro Spark is achieved by following the standard: EN IEC 63000: 2018, Technical documentation for the assessment of electrical and elec- tronic products with respect to the restriction of hazardous substances. 4.11 Waste disposal and recycling Tobii AB is committed to reducing the environmental impact of our products throughout their life- cycle, from manufacturing to use and disposal. We are a member of various compliance schemes for collection, recycling and re-using of electronic waste, batteries, and packaging of our products. Tobii Pro Spark is marked with the crossed-out wheeled bin symbol, which indicates that it must not be disposed of with household waste. You can return your used Tobii Pro Spark to one of the municipality's recycling centers free of charge. For more information about the WEEE directive and recycling at Tobii AB, please visit: How we run our business Tobii Pro Spark User Manual v. 1.2... -
Page 15: 5 Overview Of Tobii Pro Spark
With sampling frequencies of up to 60 Hz, one eye tracking camera, and two pupil tracking modes (bright and dark pupil), Tobii Pro Spark enables you to adapt your data collection setup to dif- ferent research populations and scenarios. Use Tobii Pro Spark for studies on: Windows, macOS, and Linux laptop and desktop computers 27″ (16:9) monitors or smaller Real-world setups such as physical objects and social interactions (using the Tripod Stand) Projections, simulators, and larger screens (using the Tripod Stand) Mobile devices, with our Mobile Testing Accessory Tobii Pro Spark is primarily designed for use in indoor office environments with adult participants. 5.1 Tobii Pro Spark versions Tobii Pro Spark is available in only one product version: 60 Hz. 5.2 How Tobii Pro Spark works During tracking, Tobii eye trackers use infrared illuminators to generate reflection patterns on the corneas of the participant’s eyes. These reflection patterns, together with other visual data about the participant, are collected by image sensors. Sophisticated image processing algorithms identify relevant features, including the eyes and the corneal reflection patterns. Tobii Pro Spark is a mono camera system that cycles between dark and bright pupil tracking. Complex mathematics is used to calculate the 3D position of each eyeball along with the gaze point (where the participant is looking). 5.3 What is in the Tobii Pro Spark box Tobii Pro Spark ships with the following: Tobii Pro Spark User Manual v. 1.2... -
Page 16: How To Use The Usb Type-C Male To Type-A Female Adapter
Item Additional information Travel case Stores, protects, and carries Tobii Pro Spark eye tracker and the included accessories Tobii Pro Spark eye tracker Used for eye tracking Flex mount Tobii eye tracker mounting kit for curved monitors or mon- itors that have very slim bezels USB Type-C male to Type-A Used when the computer has a USB Type-C port female adapter plug Cleaning cloth For cleaning the surface of the eye tracker Four mounting brackets with Attaches Tobii Pro Spark to the screen bezel non-permanent adhesive USB extension cable USB 2.0 Type-A extension cable (1m) Two cleaning wipes Removes any dust and grease in the area around the screen before attaching a mounting plate Safety and Compliance Declar- Printed versions of important regulatory information ation 5.4 How to use the USB Type-C male to Type-A female adapter Tobii Pro Spark is connected to a computer via a standard USB Type-A interface. Tobii Pro Spark User Manual v. 1.2... -
Page 17: Tobii Accessories
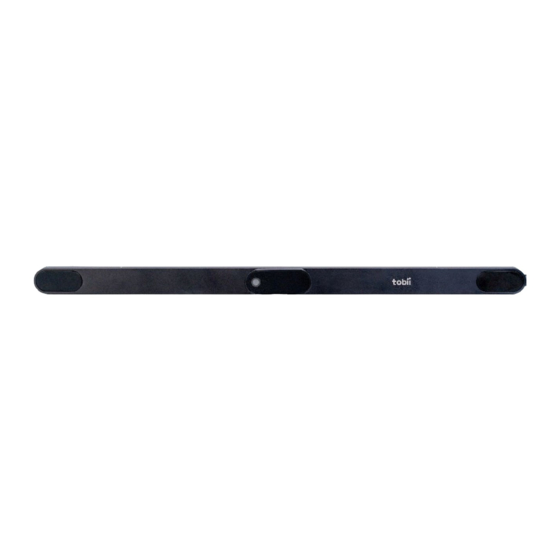
If your computer has a USB Type-C interface, you can use the included USB Type-C male to Type-A female adapter. Figure 2. Tobii Pro Spark cable and adapter 5.5 Tobii accessories Find out more about Tobii products and accessories on the Tobii product page. Tobii Pro Spark User Manual v. 1.2... -
Page 18: 6 Set Up Your Tobii Eye Tracker
2. Download Tobii Pro Eye Tracker Manager on Tobii Connect. 3. Open Tobii Pro Eye Tracker Manager and follow the prompts to finish installation. 6.2 Install Tobii Pro Spark in Tobii Pro Eye Tracker Manager Now it’s time to make sure your computer can communicate with your eye tracker. This is neces- sary for downloading the proper driver updates. 1. Open Tobii Pro Eye Tracker Manager, if it is not already open. 2. Connect Tobii Pro Spark's USB cable to a Type-A port in your computer or use the provided adaptor to connect to a Type-C port. Do not mount the eye tracker just yet to plug in the USB so you can make sure everything is working. 3. If your Tobii Pro Spark is connected to the USB port but does not appear in the list of con- nected eye trackers, select the plus (+) symbol in the upper right corner to install (or rein- stall in some cases) the required drivers. Sometimes removing the USB and plugging it in again is necessary. 4. Select Tobii Pro Spark and select Install. 5. Follow the prompts in Tobii Pro Eye Tracker Manager to finish the installation. 6.3 Mount the eye tracker on a laptop or monitor To ensure quality in eye tracking data, the Tobii Pro Spark hardware package includes several mounting brackets that can be affixed to a laptop or monitor. You can easily snap the eye tracker on and off the laptop using the magnetic mounting bracket. The mounting bracket sticks to the frame with a special adhesive that does not damage the underlying surface when the bracket is removed. For more information, read Detach the eye tracker. If the screen bezel is thinner than the height of the eye tracker, affix the mounting bracket as low as possible on the screen frame, or directly on the screen. DO not use this setup if you intend to show stimuli in the lower part of the screen, as they might be covered by the eye tracker. Tobii Pro Spark User Manual v. 1.2... - Page 19 1. Make sure the eye tracker is attached to the monitor and connected to your computer. Open Tobii Pro Eye Tracker Manager. You should be able to see and expand your eye tracker’s “card” in Tobii Pro Eye Tracker Manager. The serial number of your eye tracker should match the number displayed. 2. You can leave your eye tracker USB cable connected with the eye tracker to the side (for example on the table) or you can disconnect it while you attach the mounting bracket. 3. If you plan to attach the eye tracker to a laptop, make sure the laptop can close with the magnetic mounting bracket attached. Some laptops have very little space when closed. You can test whether you can close the laptop with the mounting bracket by pla- cing the mounting bracket (with the backing paper still attached) on the key- board side of the laptop and carefully closing the laptop lid. Watch for any potential interference between the screen, bracket, and keyboard. 4. Find the center of the screen and clean the bezel with one of the included cleaning wipes. 5. Peel the adhesive tape off the mounting bracket and mount it on the bezel so that your Tobii Pro Spark is as close to the bottom of the screen as possible without covering the screen. Press the bracket against the bezel for 30 seconds and wait one hour before attaching the eye tracker. Figure 3. Mounting brackets with non-permanent adhesive 6. Attach the eye tracker, making sure that it aligns properly with the mounting bracket. The magnet holds the eye tracker firmly in place when the slots are lined up correctly. 7. If it is not yet connected, plug in the eye tracker’s USB cable to the correct USB port in your computer. 8. Move to the next step. Tobii Pro Spark User Manual v. 1.2...
-
Page 20: Display Setup In Tobii Pro Eye Tracker Manager
6. Align the dotted blue lines on the screen with the two o uter white marks on the top of your Tobii Pro Spark. 7. Save your display by naming the setup and selecting Save. 8. To confirm that Tobii Pro Spark can detect your eyes, enable the Position Guide at the bot- tom left of Tobii Pro Eye Tracker Manager. Once activated, you should be able to see two “eyes” in a face contour. 9. Move to the next step. In the next section, you will test your setup by performing a cal- ibration. For more information, read Calibration. You can always return to Tobii Pro Eye Tracker Manager and use it when you change computers or screens or want to recalibrate. 6.5 Calibration When you are done configuring your eye tracker, you should run a calibration to test to see if the eye tracker is mapping the gaze points correctly to your display. How to test your eye tracking setup in Tobii Pro Eye Tracker Manager: 1. Make sure the eye tracker is attached to the screen bezel and connected to your computer. Open Tobii Pro Eye Tracker Manager. 2. By now you should have also tested your setup as described in Display setup in Tobii Pro Eye Tracker Manager. 3. Select Calibrate in Tobii Pro Eye Tracker Manager and follow the on-screen instructions. 4. Evaluate your calibration results. Large systematic errors i.e., a large distance between the average gaze point and the target gaze point may be indicative of a configuration error. No calibration feedback data on the targets located on the top of the screen may indicate that there is a mismatch between the screen size and eye tracker configuration. Select Recal- ibrate to improve an unsuccessful calibration (e.g., recalibrate points with missing data). Select Use Calibration when you are satisfied with the calibration. Tobii Pro Spark User Manual v. 1.2... -
Page 21: What Calibration Does
You can toggle on and off Gaze Visualization in the upper left corner of the Calibration Results window (or on the Overview tab). This can be used to confirm the participant’s calibration results. 6.5.1 What calibration does The human eye shows a natural individual variation in its shape and geometry. For example, the exact location of the fovea, the area responsible for the part of the visual field that we perceive in focus and full color, varies from individual to individual. Tobii eye trackers use an individual cal- ibration procedure to optimize their gaze estimation algorithms (i.e., the 3D eye model) and account for this variation. The end result of this optimization is a fully customized and more accur- ate gaze point calculation. Additionally, some Tobii eye trackers use the calibration procedure to select the detection mode (e.g. dark or bright pupil tracking) that provides the most accurate data. You can do basic calibration in Tobii Pro Tobii Pro Eye Tracker Manager. There is more func- tionality, including calibration validation, in Tobii Pro Lab. For more information, read the articles on eye tracker calibration and on how to calibrate and val- idate in Tobii Pro Lab. 6.6 Detach the eye tracker To temporarily remove the eye tracker, gently pull it away from the magnetic mounting bracket and leave the bracket in place. To permanently remove the mounting bracket, you must remove the non-permanent but strong adhesive that fastens your eye tracker mounting bracket to the screen bezel. Since it is fairly strong, you may not be able to take it away with only your fingers. If you want to remove it, we recommend using something very thin such as dental floss or a thin thread, a plastic guitar pick, or a credit card. Use this to slide between the mounting plate and the computer bezel (or whatever it is attached to). As you slide it behind the mounting plate, gently bend the mounting plate towards you so that it detaches. The mounting bracket adhesive should be removed carefully. If placed over a man- ufacturer logo on the bezel, removing the mounting bracket could damage the logo. You can purchase additional mounting plates. For more information contact your Tobii sales rep- resentative or authorized reseller for assistance. Tobii Pro Spark User Manual v. 1.2... -
Page 22: 7 Display Setups
7 Display setups 7.1 Standard setup The standard setup for using Tobii Pro Spark is with a screen of maximum size 27". The eye tracker is attached below the screen whether it is a laptop screen or separate monitor. For more information, read Display setup in Tobii Pro Eye Tracker Manager. 7.2 User coordinate system User Coordinate System (UCS): a coordinate system used to communicate 3D positions for gaze calculations. The origin of the UCS is located at the top (center) of the eye tracker. This is also the external reference point for physical measurements in advanced setups. Figure 4. Tobii Pro Spark origin of UCS For more information, read Coordinate Systems. 7.3 Advanced setup Advanced setups include using the Tripod Stand or other setups in which the eye tracker is not attached to the screen bezel. 7.4 Setup with Tobii Pro Tripod Stand Tobii Pro Spark mounts directly onto the Tripod Stand. The Tripod Stand is ideal in test situations in which the subject is sitting at a table in front of a monitor or projected screen larger than 27”. Using the Tripod Stand with Tobii Pro Spark is also useful in scene camera setups when studying physical objects and social interactions between people. For more information about the Tobii Pro Tripod Stand, visit the Tobii product page. Tobii Pro Spark User Manual v. 1.2... - Page 23 Figure 5. Tobii Pro Spark with the Tripod Stand and external, large-size monitor Figure 6. Tobii Pro Spark with the Tripod Stand and projected screen How to set up Tobii Pro Spark with a large monitor or projector screen: 1. Select a suitable location and set up the monitor/screen. 2. Set up the monitor/screen and connect it to the laptop. Tobii Pro Spark User Manual v. 1.2...
- Page 24 3. Mount the eye tracker on a separate tripod and connect it to the laptop. If the USB Type-A to Type-C adapter is needed, use it along with the AC power adapter. 4. Place the participant 50–80 cm from the eye tracker and use the Position Guide in Tobii Pro Eye Tracker Manager’s Overview to ensure that the eye tracker can detect the participant’s eyes. 5. Select New in the dropdown Display Setup menu. 6. Select Advanced setup and select Next. 7. Enter the width and height of your screen in millimeters. The width must be at least 10 mm. Select Next. 8. Enter the angle of your screen in degree and select Next. 9. Enter the height difference in millimeters between the top of the eye tracker and the bottom of your screen. Select Next. 10. Enter the position of the eye tracker in relation to the screen. Use the radio buttons to select whether the eye tracker is positioned under or over the screen and enter a measurement in millimeters. 11. Enter the angle of your eye tracker in degrees and select Next. 12. Save your display by naming the setup and selecting Save. Tobii Pro Spark User Manual v. 1.2...
-
Page 25: 8 Start Experimenting
In addition to offering powerful analysis tools, Tobii Pro Lab is also designed to work with other software commonly used for recording and analyzing data. This is done by synchronizing with recording software using TTL, as well as by enabling data exports in standardized formats, for example for Microsoft Excel, Matlab, and SPSS. 8.3 Keep your eye tracker software updated From time to time, Tobii releases updates for an eye tracker’s applicable driver and firmware in order to improve performance and/or introduce new functionalities. Please check the Tobii web- site regularly for news and information about updates about your eye tracker. We recommend that you leave updates and notifications in Tobii Pro Eye Tracker Manager activated. (They are activated by default and the sliders are colored blue.) How to activate notifications and updates in Tobii Pro Eye Tracker Manager: 1. Expand the dropdown list at the top of Tobii Pro Eye Tracker Manager. 2. Toggle the switches for notifications. Blue means they are activated. 3. If a software update is available, the available update has a clickable link. 4. Select an interface language. The default is English. 8.4 Keep your display setup updated Use Tobii Pro Eye Tracker Manager whenever you change computers or display setups. All references to Tobii Pro Eye Tracker Manager assume that you are using the latest version of this free software. Tobii Pro Spark User Manual v. 1.2... -
Page 26: 9 Product Care
Use the provided case when traveling with the eye tracker. For shipping and storage, use the ori- ginal packing. For transportation and storage, the recommended range for temperature and humidity for the device is as follows: Temperature: -40°C to 70°C (-40°F to 158°F) Humidity: 20% to 95% (no condensation on the device) Tobii Pro eye trackers are not waterproof or water resistant. The eye tracker should not be kept in excessively humid, damp or wet conditions. Do not submerge the eye tracker in water or in any other liquid. Be careful not to spill liquids on the device. 9.3 Cleaning Before cleaning your Tobii Pro eye tracker, unplug its USB cable and electrical cable if there is one. Use the included cleaning cloth and clean the eye tracker’s front gently. Avoid getting moisture in openings on the device. Do not use window cleaners, household cleaners, aerosol sprays, solvents, alcohol, ammonia, or abrasives. Scratches on the front surface of the eye tracker may impair its performance. 9.4 Disposal of the eye tracker Do not dispose of your Tobii Pro eye tracker in general household or office garbage recept- acles. Follow your local regulations for the proper disposal of electrical and electronic equip- ment. 9.5 Limitation of liability Except where prohibited by law, Tobii AB is not liable for any loss or damage arising from the use or misuse of a Tobii eye tracker or the mounting plate, whether direct, indirect, special, Tobii Pro Spark User Manual v. 1.2... - Page 27 Tobii Pro Spark User Manual v. 1.2...
-
Page 28: 10 Technical Specifications
Accuracy 0.45° in optimal conditions Binocular eye tracking Yes Eye tracker latency 1 frame (immediate) Blink recovery time 1 frame (immediate) Gaze recovery time 50 ms Data sample output Timestamp, Gaze origin, Gaze point, Pupil diameter Eye openness data Not available stream Eye image data Not available stream TTL input stream Not available Tracker and client time Integrated between the eye tracker time domain and the client com- synchronization puter time domain User calibration Binocular 10.2 Setup For definitions, see t he Tobii eye tracker glossary on Tobii Connect. Tobii Pro Spark User Manual v. 1.2... -
Page 29: Software And Framework Compatibility
The Mobile Testing Accessory enables research or usability tests on a mobile device. Participant setup Very simple and easy. Typically, less than 1 minute. 10.3 Software and framework compatibility Software and framework Tobii Pro Lab Tobii Pro Eye Tracker Manager compatibility Tobii Pro SDK Any application built on the Tobii Pro SDK Operating system Windows, macOS, Linux 10.4 Hardware versions Single product version: 60 Hz 10.5 Tobii Pro Spark technical specifications Dimensions 28.5 cm x 1.5 cm x 2.2 cm (11.2" x 0.59" x 0.47'') Weight 97 g (3.4 oz.) Connectors USB 2.0 Type-A, 80 cm (31") cable (USB Type-C male to Type-A female adapter included in the package) Tobii Pro Spark User Manual v. 1.2... - Page 30 Data processing 1 Tobii EyeChip™ ASIC with fully embedded data processing Eye tracking cameras 1 x Tobii EyeSensor™ modules Illuminators Dark pupiI illumination modules Bright pupil illumination modules Power consumption Typical power consumption < 2.0 W Max. rated power consumption: 6 W Power options Directly via USB Type-A connector (with or without the USB Type-C male to Type-A female adapter) Tobii Pro Spark User Manual v. 1.2...
-
Page 31: Appendix A Customer Care, Training, And Warranty
A1.1 Get help Many questions can be answered by visiting Tobii Connect. It contains the latest information about contacting Customer Care, helpful articles and FAQs, links to downloads, and much more. Log in or register to see information about your account and to reach Customer Care on Tobii Con- nect. A2 Training and education services If you are new to eye tracking, or want to extend your knowledge about eye tracking research, sign up for one of our online sessions, onsite trainings, Tobii Academy, and more on Training and education services. A3 Warranty information Read more online about Tobii limited warranty and Tobii Care (PDF download). Tobii Pro Spark User Manual v. 1.2... -
Page 32: Appendix B Limitations And Considerations
E yelashes Long eyelashes can be obstructive when the participant’s eyes are less open, espe- cially if the participant is wearing mascara. In rare cases, eyelashes may completely block the view of the participant’s pupils, making eye tracking impossible. B4 D roopy eyelids Droopy eyelids or otherwise obstructive eyelids can block the view of the participant’s pupils. In rare cases, such eyelids may completely block the view of the participant’s pupils, making eye tracking impossible. Tobii Pro Spark User Manual v. 1.2... -
Page 33: Appendix C Glossary
Appendix C Glossary For definitions of eye tracking terms used in this manual, see the Tobii eye tracker glossary on Tobii Connect. Tobii Pro Spark User Manual v. 1.2... - Page 34 Copyright ©Tobii AB (publ). Not all products and services offered in each local market. Specifications are subject to change without prior notice. All trademarks are the property of their respective owners. Support for your Tobii product Get help Visit Tobii Connect for help with your Tobii device. It contains the latest information about contacting Customer Care, documentation, courses, articles, and more. Contact your solution consultant or reseller For questions or issues with your product, contact your Tobii sales representative or authorized reseller for assistance. They are most familiar with your personal setup and can help you with tips and product training. ...
Need help?
Do you have a question about the Pro Spark and is the answer not in the manual?
Questions and answers