Table of Contents
Advertisement
Quick Links
Advertisement
Table of Contents

Related Manuals for TEKNIX FFH270X


Summary of Contents for TEKNIX FFH270X
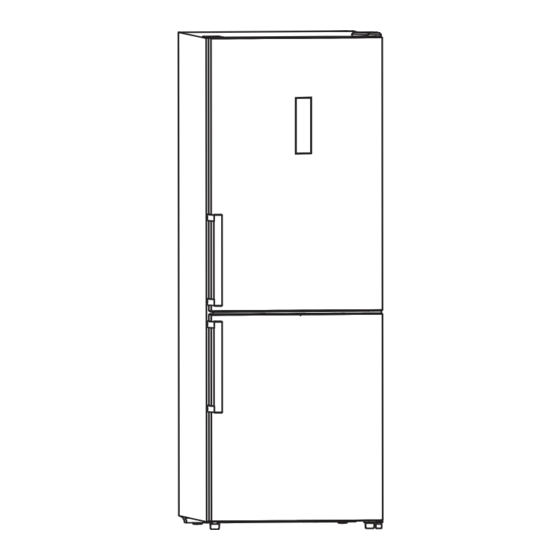
- Page 1 INSTRUCTION MANUAL FRIDGE FREEZER FFH270X...
- Page 2 We thank you for the confidence you have shown by purchasing our appliance which is designed to simplify your life. To make the use of the product easier, we have supplied detailed instructions for use. The instructions should allow you to learn about your new appliance as quickly as possible. We wish you find a lot of pleasure in its use.
-
Page 3: Table Of Contents
CONTENTS 4 IMPORTANT NOTES AND PRECAUTIONS 10 ADVICE FOR SAVING POWER WITH REFRIGERATION APPLIANCES 11 INSTALLATION AND CONNECTION 14 REVERSING THE DOOR 20 APPLIANCE DESCRIPTION 2 1 OPERATING THE APPLIANCE 24 APPLIANCE INTERIOR EQUIPMENT 28 HELPFUL HINTS AND TIPS 30 CLEANING AND CARE 32 TROUBLESHOOTING 34 DISPOSAL OF THE APPLIANCE... -
Page 4: Important Notes And Precautions
IMPORTANT NOTES AND PRECAUTIONS BEFORE USING THE APPLIANCE FOR THE FIRST TIME Before connecting the appliance to the power mains, please read carefully the instructions for use which describe the appliance and its correct and safe use. We recommend saving this instruction manual for future reference and attach it to the appliance if it is sold in the future. - Page 5 IMPORTANT SAFETY INSTRUCTIONS WARNING! Risk of fire/flammable materials. The appliance must be connected to the power mains and grounded in compliance with the effective standards and regulations. WARNING! Do not locate multiple portable socket- outlets or portable power supplies at the rear of the appliance.
- Page 6 Danger of frostbite Never put frozen food in your mouth and avoid touching frozen food as this may cause frostnip or frostbite. Safety of children and vulnerable persons The appliance is not intended for use by persons (including children) with reduced physical, sensory or mental capabilities, or lack of experience and knowledge, unless they have been given supervision or instruction concerning use of the appliance by a person...
- Page 7 and knowledge if they have been given supervision or instruction concerning use of the appliance in a safe way and understand the hazards involved. Children shall not play with the appliance. Cleaning and user maintenance shall not be made by children without supervision.
- Page 8 IMPORTANT INFORMATION ON THE USE OF APPLIANCE WARNING! This appliance is intended to be used in household and similar applications such as: – staff kitchen areas in shops, offices and other working environments; - farm houses and by clients in hotels, motels and other residential type environments;...
- Page 9 Technical information on the appliance Rating plate can be found in the appliance interior. It indicates data on voltage, gross and net volume, type and amount of refrigerant, and information on the climate classes. If the language on the rating plate is not the language of your choice or the language of your country, replace it with the one supplied.
-
Page 10: Advice For Saving Power With Refrigeration Appliances
ADVICE FOR SAVING POWER WITH REFRIGERATION APPLIANCES • Install the appliance as specified in the instruction manual. • Do not open the door more often than necessary. • Occasionally make sure air circulation underneath the appliance is unobstructed. • If the gasket is damaged or does not provide a perfect seal for any reason, have it replaced as soon as possible. -
Page 11: Installation And Connection
INSTALLATION AND CONNECTION SELECTING THE ROOM • Install the appliance in a dry and well ventilated room. The appliance will operate correctly if the environment temperature is in the interval specified in the table. The appliance class is indicated on the rating plate / label with the basic information on the appliance. - Page 12 APPLIANCE PLACEMENT • Before using the appliance for the first time, you should review the following tips. Ventilation of appliance In order to improve efficiency of the cooling system and save energy, it is necessary to maintain good ventilation around the appliance for the dissipation of heat.
- Page 13 LEVELING OF APPLIANCE • For sufficient leveling and air circulating in the lower rear section of the appliance, the bottom feet may need to be adjusted, You can adjust them by your fingers or a suitable spanner. • To allow the doors to self-close, tilt back the top backwards for abaut 10-15 A Adjustable bottom feet B Front roller C Rear roller...
-
Page 14: Reversing The Door
REVERSING THE DOOR OPENING DIRECTION The side at which the door opens can be changed, from the right side (as supplied) to the left side, if the installation site requires. Warning! When reversing the door, the appliance must not be connected to the mains. - Page 15 1. Stand the refrigerator upright. Open the door to take out all door racks (to avoid damage) and then close the door.. Caution! Please slightly squeeze the door rack from one side toward center, and then move it upward when taking out the door racks. 2.
- Page 16 4. Disconnect the connetor 1 and 2, then unscrew screws 3 by a 8mm socket driver or a spanner, and remove hinge 4. Then put the conector 1 and 5 into the hole. Please hold the door by hand when installing. 5.
- Page 17 8. Loose screw 3 and take down part 2 and part 1, Install replacement door stopper-left 4 and stop block-left 5 (provided in the plastic bag) to the left side with screw 3. Keep part 1 and part 2 with the appliance for future reference.
- Page 18 11. Change screw hole covers and screw on middle cover plate from left to right (as shown in figure below). 12.Lay the refrigerator on soft foam packaging or similar material. Remove both adjustable bottom feet parts 3, then remove the lower hinge part 1 by unscrewing screws 2.
- Page 19 15.Stand the refrigerator upright and carefully slot the lower door onto the lower hinge pin and hold in position. Install middle hinge-left (in the plastic bag) ensuring the lower door in secured in place. 16.Transfer the upper door to the appropriate position. Secure the door level, make the middle hinge axis into the lower hole of the upper door.Install the hinge 2 (provided in the plastic bag)by screws 1.
-
Page 20: Appliance Description
APPLIANCE DESCRIPTION Appliance interior equipment may change according to the appliance model. This product contains a light source of energy efficiency class (G). A Refrigerator 1 Control unit 2 LED lighting 3 MultiFlow column 4 Glass shelves 5 FreshZone drawer 6 CrispZone fruit and vegetables drawer 7 Door shelves... -
Page 21: 1 Operating The Appliance
OPERATING THE APPLIANCE Controlling the temperature We recommend that when you start your refrigerator for the first time, the temperature for the refrigerator is set to 4°C. If you want to change the temperature, follow the instructions below. Caution! When you set a temperature, you set an average temperature for the whole refrigerator cabinet. - Page 22 Fridge Press , when the light will turn on. Then press , you can set fridge temperature between 2°C and 8°C as needed, and display panel will display corresponding values according to the following sequence. Caution! When you set a temperature, you set an average temperature for the whole refrigerator cabinet.
- Page 23 Eco energy This function makes the freezer work in a power saving mode which is useful for reducing energy consumption when you are away. • You can press to get into economic energy mode. • When economic energy Mode is activated, the light will be illuminated. The freezer temperature will be set at -17°C and the fridge temperature will be set at 6°C.
-
Page 24: Appliance Interior Equipment
APPLIANCE INTERIOR EQUIPMENT Your appliance is supplied with a number of accessories and this section describes how best to use them. Door rack • It is suitable for the storage of eggs, canned liquid, bottled drinks and packed food, etc. Do not place too many heavy things in the racks. •... - Page 25 Freshzone drawer In the FreshZone compartment, food stays fresh longer than in a conventional refrigerator, retaining more flavour and nutrients. Decay and loss of mass are slowed down; therefore, fruit and vegetables remain fresh and natural longer. For optimum performance, the drawer should be fully closed.
- Page 26 To avoid contamination of food, please respect the following instructions • Opening the door for long periods can cause a significant increase of the temperature in the compartments of the appliance. • Clean regularly surfaces that can come in contact with food and accessible drainage systems.
- Page 27 ≤ –6 * – Seafood (fish, shrimp, shellfish), Freezer freshwater aquatic products and meat products (recommended time is 1 month – nutrition values and taste decrease with time). Not suitable for freeing fresh food. 0 star –6 Fresh pork, beef, fish, chicken, some packaged processed foods, etc.
-
Page 28: Helpful Hints And Tips
HELPFUL HINTS AND TIPS Energy saving tips We recommend that you follow the tips below to save energy. • Try to avoid keeping the door open for long periods. • Ensure the appliance is away from any sources of heat (Direct sunlight, electric oven or cooker etc.) •... - Page 29 Hints for freezing • When first staring-up or after a period out of use. Before putting the food in the compartment, let the appliance run at least 2 hours on the higher settings. • Prepare food in small portions to enable it to rapidly and completely frozen and to make it possible to subsequently thaw only the quantity required.
-
Page 30: Cleaning And Care
CLEANING AND CARE For hygienic reasons the appliance (including exterior and interior accessories) should be cleaned regularly (at least every two months). Warning! The appliance must not be connected to the mains during cleaning. Danger of electrical shock! Before cleaning switch the appliance off and remove the plug from the mains socket. - Page 31 sponge or cloth. Wipe completely dry before replacing the shelves and baskets. Thoroughly dry all surfaces and removable parts before putting them back into place. • Although this appliance automatically defrosts, a layer of frost may occur on the freezer compartment’s interior walls if the freezer door is opened frequently or kept open too long.If the frost is too thick, choose a time when the freezer is nearly empty and proceed as follow: 1.
-
Page 32: Troubleshooting
TROUBLESHOOTING If you experience a problem with your appliance or are concerned that the appliance is not functioning correctly, you can carry out some easy checks before calling for service, please see below. You can carry out some easy checks according to this section before calling for service. Warning! Don't try to repair the appliance yourself. - Page 33 Problem: Possible cause & Solution It is normal to frequently hear the sound of the motor, it will need to run more during following circumstances: • Temperature setting is set colder than necessary. The motor runs • Large quantity of warm food has recently been continuously stored within the appliance.
-
Page 34: Disposal Of The Appliance
DISPOSAL OF THE APPLIANCE It is prohibited to dispose of this appliance as household waste. Packaging materials Packaging materials with the recycle symbol are recyclable. Dispose of the packaging into a suitable waste collection container to recycle it. Before disposal of the appliance 1. - Page 35 We, Teknix, undertake that if within 24 months of the date of purchase this appliance or any part thereof is proven to be defective by reason of mechanical or electrical failure we will at our discretion repair or replace the same free of any charge for labour, materials or carriage on condition that: ·...
- Page 37 Your Teknix appliance comes with a 2 year parts and labour guarantee Please REGISTER your appliance on line at www.teknixwarranty.co.uk You also have the option to EXTEND YOUR WARRANTY To 5 years parts and labour To register your appliance or extend your warranty...
Need help?
Do you have a question about the FFH270X and is the answer not in the manual?
Questions and answers