Table of Contents
Advertisement
Advertisement
Table of Contents

Related Manuals for Zenith B25A24Z


Summary of Contents for Zenith B25A24Z
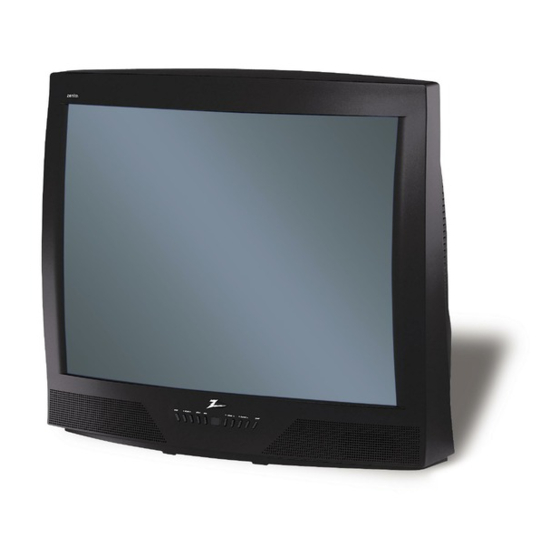
- Page 1 B 25 A 2 4 Z B 25 A 7 4 R e n j o y t h e Copyright 2000, Zenith Electronics Corporation. B 2 7 A2 4 Z B 3 2 A 24Z B3 6A24 Z B 2 7 A7 4 R...
- Page 2 Consult the dealer or an experienced radio/TV technician for help. • CAUTION: Do not attempt to modify this product in any way without written authorization from Zenith Electronics Corporation. Unauthorized modification could void the user’s authority to operate this product. Entertainment Machine is a trademark of Zenith Electronics Corporation.
-
Page 3: Important Safety Instructions
IMPORTANT SAFETY INSTRUCTIONS Important safeguards for you and your new product Your product has been manufactured and tested with your safety in mind. However, improper use can result in potential electrical shock or fire hazards. To avoid defeating the safeguards that have been built into your new product, please read and observe the following safety points when installing and using your new product, and save them for future reference. - Page 4 IMPORTANT SAFETY INSTRUCTIONS (Continued from previous page) 14. Outdoor Antenna Grounding If an outside antenna or cable system is connected to the product, be sure the antenna or cable system is grounded so as to provide some protection against voltage surges and built-up static charges.
-
Page 5: Hook-Up Directory
If you are using an antenna and no other equipment, go to ....page 6 Cable only If you have cable service or a cable box and no other equipment, go to ..page 7 Cable TV wall jack Cable box... -
Page 6: Hook Up Your Antenna To The Tv
Hook Up Your Antenna to the TV Connect an antenna to your Entertainment Machine. Locate the Antenna/Cable jack on the back of your Entertainment Machine. Connect the cable that runs from the wall directly to this jack, according to the diagram to the right. - Page 7 (usu- ally channel 3 or 4). Don’t worry, that’s all you need! Mini glossary CABLE SERVICE The wire that supplies all your cable TV (CATV) stations. 206-3479 Without Cable Box Cable TV...
- Page 8 300/75 ohm Adapter TV back RF coaxial wire (75 ohm) not included with TV Antenna Variable /Cable Audio Out TV back panel S-Video Video (expanded view) R-Audio L/Mono A/V cables not included with TV VCR with Antenna Antenna Wire VCR back AV panel...
- Page 9 Remove the back of the remote and put in two AAA batteries. back of remote Plug in your TV. Do not plug it into a switched outlet. Your Entertainment Machine is designed to operate on household current, 120-volt 60 Hertz AC do not attempt to operate it on DC Current.
- Page 10 Audio Out S-Video Video R-Audio L/Mono No S-Video cables are included with your Zenith Entertainment Machine but they can be purchased in most consumer electronics stores. Without an S-Video cable, you will not receive the Super VHS quality picture. VCR back...
- Page 11 Variable Audio Input jacks to the corresponding Left/Right jacks on the back of your TV. No Audio cables are included with your Zenith Entertainment Machine but they can be purchased in most consumer electronics stores. 206-3479 Stereo Amplifier back panel...
-
Page 12: Setup Menu
EZ Program on your screen. Press a RIGHT or LEFT arrow to reach the EZ Program screen. Using the UP/DOWN arrows, choose either Cable TV or Off-Air Antenna on your screen. When you have made your selection, press a RIGHT or LEFT arrow to begin EZ Program. - Page 13 PLAY REWIND FFWD STOP remote control part number MBR3447Z (124-233) POWER Turns TV On or Off LED INDICATOR LIGHT Lights when keys are pressed. CABLE/VCR/AUX/TV Selects remote operating mode. MUTE Turns sound Off and On while the picture remains. Press once to quiet sound, press again to mute, press again to restore sound.
-
Page 14: Front Panel Diagram
Front Panel Diagram There are three different front panel button styles used with this Operating Guide. Select the front panel that resembles the Entertainment Machine you are using and learn what each button operates and controls. Six Button Front Panel When using the on-screen menus, the buttons on the front panel of these models correspond to the remote control buttons as follows:-... -
Page 15: Basic Television Operation
Basic Television Operation Introducing you to the basics of your Entertainment Machine. Source On some models, the A/V input is designated as a channel that is one below the lowest/one above the highest. You’ll have to use the Channel Up/Down buttons to access it. The Time/Channel display will read “Video”... - Page 16 Setup Menu Here are descriptions of the menu options found in the Setup menu. Function What it does EZ Program Automatically finds and stores active channels to flip through using Channel Up/Down. Add/Del/Surf Manually pick and choose which active channels will appear when flipping through using Channel Up/Down.
- Page 17 Delete for that particular channel. To continue, select another channel and repeat step 4. If you are finished, press ENTER to return to TV viewing. You can add or delete a channel without the remote control. Please refer to page 14 on working the menus with the buttons on the front of your If you delete a channel, it isn’t gone for good.
- Page 18 Press the FLASHBK button to select AM or PM. Press ENTER to return to TV viewing. You can use the NUMBER key pad to simply insert the time (AM or PM is selected with the Flashback key).
- Page 19 206-3479 Setup Menu EZ Program Add/Del/Surf Clock Set Captions Caption/Text Language CABLE SURF VOLUME MENU RECORD PAUSE REWIND Mute POWER FLASHBK MUTE CHANNEL VOLUME CHANNEL ENTER QUIT TV/VCR TIMER SOURCE PLAY FFWD STOP P A G E 1 9...
- Page 20 Press a RIGHT/LEFT arrow to choose any of the following options: Caption 1, Caption 2, Caption 3, Caption 4, Text 1, Text 2, Text 3 or Text 4. Press ENTER to return to TV viewing. Captions come in handy when the television is on mute.
-
Page 21: Language Options
Using the UP/DOWN arrows on the remote control, select Language on your screen. Press a RIGHT/LEFT arrow to choose any of the fol- lowing options: English, Spanish, or French. Press ENTER to return to regular TV viewing. 206-3479 Setup Menu EZ Programac Agr/Bor/Surf Ajuste Reloj Subtít... - Page 22 Select EZ TIMER, using the UP/DOWN arrow keys. Press a RIGHT/LEFT arrows to choose the time (10 minutes up to 4 hours) that you want your TV to turn itself off. If you want the TV to turn on and off automatically every...
-
Page 23: Channel Labels
EZ Timer Ch Labels XDS Display Parental Ctrl EZ Demo CABLE SURF VOLUME MENU RECORD PAUSE REWIND Ch 5 None POWER FLASHBK MUTE CHANNEL VOLUME CHANNEL ENTER QUIT TV/VCR TIMER SOURCE PLAY FFWD STOP P A G E 2 3... - Page 24 On - - XDS Display will appear as channels are changed. Off - - XDS Display will not appear when channels are changed. Press QUIT to return to TV viewing. At the time of this printing, XDS data is only being carried by some broadcasting stations and as a result, is only available on some channels.
-
Page 25: Parental Control
Select a secret password or code, using the number keys on the remote control. Don’t forget the password. It is the only way you can access the Advanced TV Control menu and change the rating selections. It is also the only way you can turn the Advanced TV Control feature off. - Page 26 Restricted viewing NC-17 Restricted Viewing Hard Core Films Note: Zenith Electronics Corporation is not liable for any program content that appears when using this rating system; as always, user dis- cretion is advised. P A G E 2 6 Special...
-
Page 27: Xds Display
206-3479 Special Features EZ Timer Ch Labels XDS Display Parental Ctrl EZ Demo CABLE SURF FLASHBK CHANNEL VOLUME VOLUME CHANNEL ENTER MENU RECORD PAUSE TIMER PLAY REWIND STOP POWER MUTE QUIT TV/VCR SOURCE FFWD P A G E 2 7... -
Page 28: Audio Menu
TV program. • The Speakers feature allows you to switch the internal speakers of the TV On and Off. Many people who use a home stereo system with their TV use this feature. • EZ Sound allows you to choose an appropriate listening setting based on different audio options.They are: Custom,... -
Page 29: Video Menu
• Brightness: Increases or decreases amount of white in the TV picture. • Color: Adjusts levels of all colors in the TV picture. • Tint: Balance between amount of red and green in the TV picture. • Sharpness: Raise or lower the definition of the TV picture. The lower the level, the softer the images will appear. -
Page 30: Source Menu
Press ENTER to clear the screen. P A G E 3 0 Source Menu Main Source Video POWER CABLE SURF FLASHBK MUTE CHANNEL VOLUME VOLUME CHANNEL ENTER QUIT MENU TV/VCR RECORD PAUSE TIMER SOURCE PLAY REWIND FFWD STOP 206-3479... -
Page 31: Programming The Remote
Note: After programming, to operate the device you have just programmed, press the proper Mode button first. Programming your Zenith remote will allow you to use one remote to work up to 7 different devices! Not all devices will work with your Zenith remote control. -
Page 32: Amplifier Volume Override
If you can’t find the code for your amplifier, use the Auto Find feature on page 34. P A G E 3 2 CABLE SURF FLASHBK CHANNEL VOLUME VOLUME CHANNEL ENTER MENU RECORD PAUSE TIMER PLAY REWIND STOP POWER MUTE QUIT TV/VCR SOURCE FFWD 206-3479... - Page 33 Aim the remote at the device and press POWER. It should turn on. Repeat the steps for AUX+2, and AUX+3. Programming your Zenith remote will allow you to use one remote to work up to 7 different devices! Not all devices will work with your Zenith remote control.
-
Page 34: Remote Control Auto-Find
Press and hold the PRG key until the indicator light turns on. Press the key for the device you’re trying to program (CABLE, VCR, TV). Enter the code 0-0-0 (zero-zero- zero), then press the ENTER key right away. Aim the remote at the correct device and press the POWER button. -
Page 35: Programming Codes
XR 1000 ..121 Yorx ..119 Zenith ..101 149 175 Zenith TV/VCR . . . 153 154 172 Sharp . - Page 36 Video Way ..349 Viewstar ..354 355 372 Zenith ..301 353 374 Zenith Satellite . . 312 328 330 351 378 Yamaha .
-
Page 37: Zenith Product Codes
STOP VCR Stop FFWD VCR Fast Forward References: 124-212-37 and µP 221-952-02A Some of the functions, such as PIP, shown above, may not be available on your TV. 206-3479 VCR Mode Cable Mode Zenith Code 201 Zenith Code 353 VCR On/Off... - Page 38 This function lets you remove channels that you don't watch from the list you'll scroll through using your remote. Refers to the jack that receives a signal from a TV, VCR or other A/V device. A connection on the back of a TV, VCR, or any other A/V device.
-
Page 39: Troubleshooting
• The CC (closed caption) option may be in Text mode. Select OFF in the Captions/ Text menu. • Your program is in letterbox. This means that the shape of your TV is a square, but the program is a rectangle. Think of the bars as empty space the program doesn’t fill;... - Page 40 If you use an off-air antenna, you may also want to disconnect it from the back of your TV before leaving. If you unplug your Entertainment Machine, you may have to reset the clock using the Clock Set menu described earlier.
-
Page 41: Table Of Contents
XDS Display ......24 Zenith Product Codes ..... . 37... - Page 42 TELEVISION WALL MOUNTS Set up your game room or spare room in style!! Sturdy black wall mounts keep the TV off your furniture and in easy view. All mounts have 90 degree and 10 degree tilt angles. • ALGW27 fits most 25” to 27” TVs - ONLY $59.99 •...
- Page 43 Read your Operating Guide carefully so that you will understand the operation of your set and how to adjust the customer controls. Carry-In Service Models under 21” diagonal (U.S.A.) screen size must be taken to a Zenith authorized service center for warranty service and must be picked up by the owner.
Need help?
Do you have a question about the B25A24Z and is the answer not in the manual?
Questions and answers