Table of Contents
Advertisement
Available languages
Available languages
Quick Links
Advertisement
Chapters
Table of Contents

Related Manuals for Skandika Nordik K18-S


Summary of Contents for Skandika Nordik K18-S
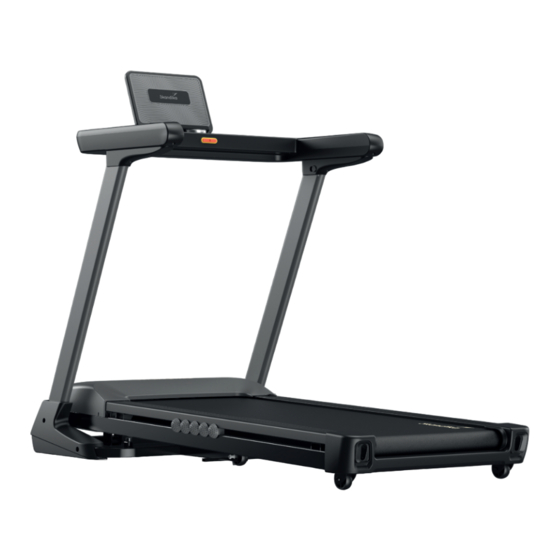
- Page 1 Nordik K18-S Art.Nr. SF-3270...
-
Page 2: Table Of Contents
Wilhelm-Beckmann-Str. 19, D-45307 Essen band Abbau sowie FAQ und die Artikelnummer | Name SF-3270 | Nordik K18-S Anleitungen zum Down- Klasse: HC | Standard: EN ISO 20957 loaden findest Du auf Spannung: 220-240 V | Frequenz: 50-60 Hz | Leistung: 920 W... -
Page 3: Sicherheitshinweise
SICHERHEITSHINWEISE WARNUNG Um die Verletzungsgefahr zu reduzieren, muss diese Anleitung vor dem Gebrauch vollständig gelesen und verstanden werden! Dieses Gerät ist ausschließlich für den Heimgebrauch in Über- einstimmung mit den Anweisungen in dieser Anleitung vorgesehen. Lesen Sie die Gebrauchsanlei- tung sorgfältig durch, bevor Sie das Gerät einsetzen und bewahren Sie die Gebrauchsanleitung für die weitere Nutzung auf. -
Page 4: Aufbauanleitung
SICHERHEITSHINWEISE / AUFBAUANLEITUNG WICHTIGE HINWEISE ZUR ERDUNG Dieses Gerät muss geerdet werden. Im Fall eines Defekts oder einer Betriebsstörung des Laufbands kann der elektrische Strom durch die Erdung über den Weg des geringsten Widerstands abfließen und dadurch die Gefahr eines Stromschlags reduziert werden. Dieses Produkt ist mit einem Kabel mit Er- dungsstecker ausgestattet. - Page 5 AUFBAUANLEITUNG SCHRITT 1 Nach dem Auspacken klappen Sie das vordere Gestänge des Hauptrahmens wie dargestellt nach oben. Achten Sie darauf, dass das Gestänge nicht versehentlich während der ersten beiden Schritte nach unten fällt, indem Sie immer eine Hand an den Rohren belassen. SCHRITT 2 Befestigen Sie nun die Schrauben (65) und (66) so- wie die Sicherheitsunterlegscheiben (61) auf beiden...
- Page 6 AUFBAUANLEITUNG SCHRITT 4 Befestigen Sie jetzt die Abdeckungen (26) und (27) wie abgebildet mit den Schrauben (79). SCHRITT 5 Platzieren Sie den Sicherheitsclip (38) auf der Kon- sole und verbinden Sie mit Hilfe des Stromkabels (48) das Gerät mit einer Steckdose. PRÜFEN SIE VOR DER BENUTZUNG, OB ALLE SCHRAUBEN UND MUTTERN FESTGEZOGEN SIND!
-
Page 7: Ein- Und Ausklappen / Transport
EIN- UND AUSKLAPPEN / TRANSPORT ZUSAMMENKLAPPEN Schalten Sie das Gerät aus und stellen Sie sicher, dass sich das Band nicht mehr bewegt, bevor Sie das Gerät zusammenklappen. Führen Sie das Laufdeck (A) nach oben, bis der Riegel (B) hörbar einrastet. AUSKLAPPEN Drücken Sie mit dem Fuß... -
Page 8: Computerbedienung
COMPUTERBEDIENUNG COMPUTERBEDIENUNG Die Anzeige: • Nach dem Einschalten erscheinen kurz alle Anzeigeelemente (siehe Abb. oben) und es wird ein Piepton ausgegeben. Der Anfangswiderstand wird auf Stufe 1 (leicht) gesetzt. Der Computer ist dann betriebsbereit. • Durch Druck auf den Computer läuft das Laufband nach einem Countdown von 3 Sekunden mit der niedrigsten Geschwindigkeit an. -
Page 9: Bluetooth-Brustgurt / Schnellwahltasten
OPTIONALER BLUETOOTH-BRUSTGURT Für die Verbindung zu einem Brustgurt für die Pulsmessung benötigen Sie einen optionalen, kompatib- len Brustgurt, beispielsweise den SKANDIKA Brustgurt (siehe QR-Code unten). Function Description of shortcut keys ncline (3,6,9): fast incline adjustment keys. Incline and incline : increase and decrease the ncline. -
Page 10: Reinigung & Allgemeine Wartung
REINIGUNG & ALLGEMEINE WARTUNG REINIGUNG & ALLGEMEINE WARTUNG Ziehen Sie vor jeder Wartung und Reinigung immer den Netzstecker, damit das Gerät stromlos ist. Das Gerät sollte in regelmäßigen Abständen gereinigt werden, um die Lebensdauer und die Betriebsfä- higkeit zu fördern. Achten Sie darauf, dass Sie die freiliegenden Teile auf beiden Seiten des Laufbandes sauber halten, um die Ansammlung von Schmutz unter dem Laufband zu verringern. -
Page 11: Verbindung Zur Kinomap-App
Tippen Sie nun auf OK und kehren Sie zum Hauptmenü zurück. Sie können nun einen Kurs auswählen (je nach Art Ihres KinoMap-Kontos). Drücken Sie auf Start und beginnen Sie mit dem Training! Nordik K18-S 4. Skandika auswählen 5. Das Gerät auswählen... -
Page 12: Fehlerbehebung / Trainingstipps
FEHLERBEHEBUNG / TRAININGSTIPPS FEHLERBEHEBUNG 1. Erscheint „E01“ auf dem Display, liegt ein Kommunikationsfehler vor. Überprüfen Sie die Kabelver- bindungen soweit möglich. 2. Erscheint „E02“ auf dem Display, liegt eine elektrische Überschwingung vor (sprunghafte Änderung der Eingangsgröße). Elektrische Teile des Geräts könnten defekt sein oder der Stecker wurde nicht in eine Steckdose mit passender Ausgangsspannung gesteckt. -
Page 13: Laufbandjustierung
LAUFBANDJUSTIERUNG Sie können die Bandspannung und die Bandspur Ihres Laufbandes nachjustieren. Dies kann z. B. nötig werden, wenn es nach längerer Benutzungsdauer „flatterig“ wird oder zu weit rechts oder links läuft. Grundsätzlich empfehlen wir, das Gerät nach ca. 1,5 Stunden Dauerbe- nutzung für mindestens 10 Minuten abkühlen zu lassen. -
Page 14: Explosionszeichnung
EXPLOSIONSZEICHNUNG... -
Page 15: Teileliste
TEILELISTE Teil Nr. Bezeichnung Menge Teil Nr. Bezeichnung Menge Hauptrahmen Unteres Kabel Basisrahmen Oberes Kabel Steigungsrahmen Linke Platine 4 L/R Linke und rechte Stütze je 1 Rechte Platine Computerstütze Computer/Schalter Führungsstange Linker Handpulssensor 1 Set Vordere Rolle Rechter Handpulssensor 1 Set Hintere Rolle Klammer Gasdruckfeder... -
Page 16: Auf- Und Abwärmen
AUF- UND ABWÄRMEN Auf- und Abwärmen Ein erfolgreiches Trainingsprogramm besteht aus einer Aufwärmphase, einer Trainingsphase und dem Ab- kühlen. Die Trainingshäufigkeit sollte für Anfänger bei 2- bis 3-mal die Woche angesetzt werden, immer mit mindestens einem Tag Pause zwischen den Trainingseinheiten. Nach einigen Monaten kann die Häufigkeit auf 4- bis 5-mal wöchentlich gesteigert werden. -
Page 17: Garantiebedingungen
Altgerät umschlossen sind, sowie Lampen, die zerstörungsfrei entnommen werden können und führen diese einer separaten Sammlung zu. Diese können giftige Schwermetalle enthalten und unterliegen der Sondermüllbehandlung. Im Zuge ständiger Für Ersatzteile kontaktieren Sie bitte folgende E-Mail-Adresse: service@skandika.de Produktverbesse- Der Service erfolgt durch: MAX Trader GmbH, Wilhelm-Beckmann-Straße 19, 45307 Essen,... - Page 18 Wilhelm-Beckmann-Str. 19, D-45307 Essen band Service portal on our Artikelnummer | Name SF-3270 | Nordik K18-S website for setup & help Klasse: HC | Standard: EN ISO 20957 videos, FAQs and downloa- Spannung: 220-240 V | Frequenz: 50-60 Hz | Leistung: 920 W dable instructions.
-
Page 19: Safety Precautions
SAFETY PRECAUTIONS WARNING To reduce risk of injury, read and understand this instruction manual before using the device! This machine is intended for home use only in accordance with the instructions provided in this manual. Read the instruction manual carefully before using this device and keep the instruction manual for future use. SAFETY PRECAUTIONS •... -
Page 20: Set-Up Instructions
SAFETY PRECAUTIONS / SET-UP INSTRUCTIONS IMPORTANT NOTES ON GROUNDING This product needs to be grounded. If the treadmill’s electrical system should malfunction or break- down, grounding provides a path of least resistance for electric current, reducing the risk of electric shock. - Page 21 SET-UP INSTRUCTIONS STEP 1 After unpacking, fold up the front linkage of the main frame as shown. Make sure that the boom does not accidentally fall down during the first two steps by always keeping one hand on the tubes. STEP 2 Now fix the screws (65) and (66) and the safety washers (61) on both sides of the base as shown.
- Page 22 SET-UP INSTRUCTIONS STEP 4 Now fix the covers (26) and (27) with the screws (79) as shown. STEP 5 Place the safety clip (38) on the console and use the power cable (48) to connect the unit to a power socket.
-
Page 23: Folding And Transportation
FOLDING AND TRANSPORTATION FOLDING Switch off the unit and make sure that the belt is no longer mo- ving before folding the unit. Guide the running deck (A) upwards until the latch (B) audibly engages. UNFOLD Press on the tube with your foot to release the latch and carefully guide the running deck (A) down from above with both hands. -
Page 24: Computer Operation Manual
COMPUTER OPERATION MANUAL COMPUTER OPERATION MANUAL The display: • After switching on, all display elements appear briefly (see fig. above) and a beep is emitted. The initial resistance is set to level 1 (light). The computer is then ready for operation. -
Page 25: Bluetooth Chest-Belt / Quick Selection Keys
OPTIONAL CHEST-BELT To connect to a chest-belt for heart rate measurement, you need an optional, compatible chest-belt, such as the SKANDIKA chest-belt (see QR code below). Function Description of shortcut keys ncline (3,6,9): fast incline adjustment keys. Incline and incline : increase and decrease the ncline. -
Page 26: Cleaning And General Maintenance
CLEANING AND GENERAL MAINTENANCE CLEANING AND GENERAL MAINTENANCE Always unplug the appliance from the mains before any maintenance or cleaning so that the appli- ance is without electrical power. The unit should be cleaned at regular intervals to promote durability and operability. Be sure to keep the exposed parts on both sides of the treadmill clean to reduce the accumulation of dirt under the tre- admill. -
Page 27: Connecting To Kinomap App
Now tap on OK and return to main menu. You can now choose a course for your exercise (depending on your type of KinoMap account maybe only some free courses). Press Start and begin to exercise! Nordik K18-S 4. Select Skandika 5. Select device... -
Page 28: Troubleshooting / Training Hints
TROUBLESHOOTING / TRAINING HINTS TROUBLESHOOTING 1. If „E01“ appears on the display, there is a communication error. Check the cable connections as far as possible. 2. If „E02“ appears on the display, there is an electrical overshoot (abrupt change in the input value). Electrical parts of the unit may be defective or the plug may not have been plugged into a socket with a suitable output voltage. -
Page 29: Adjustments
ADJUSTMENTS You can readjust the belt tension and the belt track of your treadmill. This may be necessary, for example, if it becomes „fluttery“ after a long period of use or runs too far to the right or left. As a general rule, we recom- mend that you allow the unit to cool down for at least 10 minutes after approx. -
Page 30: Explosion Drawing
EXPLOSION DRAWING... -
Page 31: Parts List
PARTS LIST Part no. Description Part no. Description Main frame Lower cable Base frame Upper cable Incline frame Left board 4 L/R Left and right support each 1 Right board Computer support Computer/Switch Guide rod Left hand pulse sensor 1 set Front roller Right hand pulse sensor 1 set... -
Page 32: Warm-Up And Cool-Down
WARM-UP AND COOL-DOWN WARM-UP and COOL-DOWN A successful exercise program consists of a warm-up, aerobic exercise and a cool-down. Exercise for at least two or preferably three times a week, resting for a day between workouts. After several months, you may increase the frequency to four or five times per week. -
Page 33: Guarantee Conditions
Ask at your council about the respective local disposal sites. In accordance with our policy of continual product impro- For spare parts please contact: service@skandika.de vement, we reserve the right Service centre: MAX Trader GmbH, Wilhelm-Beckmann-Straße 19, 45307 Essen,... - Page 34 Wilhelm-Beckmann-Str. 19, D-45307 Essen band démontage ainsi que la Artikelnummer | Name SF-3270 | Nordik K18-S FAQ et les instructions de Klasse: HC | Standard: EN ISO 20957 téléchargement sur notre Spannung: 220-240 V | Frequenz: 50-60 Hz | Leistung: 920 W page de service Skandika.
-
Page 35: Informations De Sécurité
INFORMATIONS DE SÉCURITÉ AVERTISSEMENT Pour réduire les risques de blessures, veuillez lire attentivement ce mode d’emploi avant d‘utiliser l’appareil ! Cet appareil est uniquement destiné à une utilisation domestique conformément aux instructions contenues dans ce mode d’emploi. Lisez attentivement le mode d’emploi avant d’utiliser l’appareil et conservez bien ce mode d’emploi. -
Page 36: Instructions De Montage
INFORMATIONS DE SÉCURITÉ / INSTRUCTIONS DE MONTAGE REMARQUES IMPORTANTES SUR LA MISE À LA TERRE Cet appareil doit être mis à la terre. En cas de panne ou de dysfonctionnement du tapis de course, la mise à la terre permet au courant électrique de s‘écouler par le chemin de moindre résistance, ce qui réduit le risque de choc électrique. - Page 37 INSTRUCTIONS DE MONTAGE ÉTAPE 1 Après le déballage, rabattez la rampe avant du cadre prin- cipal vers le haut comme indiqué. Veillez à ce que la rampe ne tombe pas accidentellement pendant les deux premières étapes en gardant toujours une main sur les tubes. ÉTAPE 2 Fixez maintenant les vis (65) et (66) ainsi que les rondelles de sécurité...
- Page 38 INSTRUCTIONS DE MONTAGE ÉTAPE 4 Fixez maintenant les caches (26) et (27) comme in- diqué à l‘aide des vis (79). ÉTAPE 5 Placez le clip de sécurité (38) sur la console et reliez l‘appareil à une prise de courant à l‘aide du câble électrique (48).
-
Page 39: Repliage Et Dépliage / Transport
REPLIAGE ET DÉPLIAGE / TRANSPORT REPLIAGE Éteignez l‘appareil et assurez-vous que la bande ne bouge plus avant de replier l‘appareil. Faites glisser le plateau de roulement (A) vers le haut jusqu‘à ce que le verrou (B) s‘enclenche de manière audible. DÉPLIAGE Appuyez sur le tube avec le pied pour libérer le verrou et faites descendre doucement le pont mobile (A) par le haut avec les deux... -
Page 40: Mode D'emploi De L'ordinateur
MODE D‘EMPLOI DE L‘ORDINATEUR UTILISATION DE L‘ORDINATEUR L‘affichage: • Après la mise en marche, tous les éléments d‘affichage apparaissent brièvement (voir illustration ci-dessus) et un bip sonore est émis. La résistance initiale est réglée sur le niveau 1 (léger). L‘ordinateur est alors prêt à fonctionner. •... -
Page 41: Ceinture Thoracique Bluetooth / Touches De Sélection Rapide
CEINTURE PECTORALE BLUETOOTH EN OPTION Pour la connexion à une ceinture pectorale pour la mesure du pouls, vous avez besoin d‘une ceinture pectorale compatible en option, par exemple la ceinture pectorale SKANDIKA (voir le code QR ci-des- sous). Function Description of shortcut keys ncline (3,6,9): fast incline adjustment keys. -
Page 42: Nettoyage Et Entretien Général
NETTOYAGE ET ENTRETIEN GÉNÉRAL NETTOYAGE ET ENTRETIEN GÉNÉRAL Débranchez toujours l‘appareil avant toute opération d‘entretien ou de nettoyage afin de le mettre hors tension. L‘appareil doit être nettoyé à intervalles réguliers afin de favoriser sa durée de vie et sa capacité de fon- ctionnement. -
Page 43: Connexion À L'application Kinomap
Vous pouvez main- tenant sélectionner une distance pour votre entraînement (en fonction du type de compte, le cas échéant, uniquement certains itinéraires gratuits). Appuyez sur « START » (Démarrer) ! Nordik K18-S 4. CHOISIR 5. Sélectionner l‘appareil „SKANDIKA“... - Page 44 DÉPANNAGE / CONSEILS D‘ENTRAÎNEMENT DÉPANNAGE 1. Si „E01“ apparaît sur l‘écran, il y a une erreur de communication. Vérifie les connexions de câbles dans la mesure du possible. 2. Si „E02“ apparaît sur l‘écran, il y a une suroscillation électrique (changement brusque de la grandeur d‘entrée).
-
Page 45: 45 Réglages
RÉGLAGES Vous pouvez réajuster la tension et l‘écartement de la bande de votre tapis de course. Cela peut être néces- saire, par exemple, s‘il devient „flottant“ après une longue période d‘utilisation ou s‘il tourne trop à droite ou à gauche. En principe, nous recommandons de laisser refroidir l‘appareil pendant au moins 10 minutes après environ 1,5 heure d‘utilisation continue. -
Page 46: Vue Éclatée
VUE ÉCLATÉE... -
Page 47: Liste Des Pièces
LISTE DES PIÈCES Pièce no. Description Qté Pièce no. Description Qté Cadre principal Câble inférieur Cadre de base Câble supérieur Cadre de pente Platine de gauche 4 L/R Supports gauche et droit Platine de droite Support d'ordinateur Ordinateur/commutateur Barre de guidage Capteur de pouls manuel gauche 1 kit Galet avant... -
Page 48: Echauffement Et Récupération
ÉCHAUFFEMENT ET RÉCUPÉRATION ÉCHAUFFEMENT et RÉCUPÉRATION Un programme d‘exercices réussi consiste en un échauffement, un exercice aérobique et une récupération. Entraînez-vous de préférence au moins deux ou trois fois par semaine, avec une pause d’un jour entre les séances d‘entraînement. Après plusieurs mois, vous pouvez augmenter la fréquence à quatre ou cinq fois par semaine. -
Page 49: Conditions De Garantie
Dans le cadre du travail Pour d’accessoires ou de pièces de rechange, veuillez contacter : continu d’amélioration des service@skandika.de produits, nous nous réser- Centre de service clients : MAX Trader GmbH, Wilhelm-Beckmann-Str. 19, 45307 Essen, vons le droit de procéder à... - Page 50 NOTES ________________________________________________________________________________ ________________________________________________________________________________ ________________________________________________________________________________ ________________________________________________________________________________ ________________________________________________________________________________ ________________________________________________________________________________ ________________________________________________________________________________ ________________________________________________________________________________ ________________________________________________________________________________ ________________________________________________________________________________ ________________________________________________________________________________ ________________________________________________________________________________ ________________________________________________________________________________ ________________________________________________________________________________ ________________________________________________________________________________ ________________________________________________________________________________ ________________________________________________________________________________...
- Page 51 NOTES ________________________________________________________________________________ ________________________________________________________________________________ ________________________________________________________________________________ ________________________________________________________________________________ ________________________________________________________________________________ ________________________________________________________________________________ ________________________________________________________________________________ ________________________________________________________________________________ ________________________________________________________________________________ ________________________________________________________________________________ ________________________________________________________________________________ ________________________________________________________________________________ ________________________________________________________________________________ ________________________________________________________________________________ ________________________________________________________________________________ ________________________________________________________________________________ ________________________________________________________________________________...
- Page 52 Vertrieb & Service durch / Sales & Service by Ventes et services par MAX Trader GmbH Wilhelm-Beckmann-Straße 19 45307 Essen Germany SF-3270 DE_GB_FR 12/2023 Ver. 1.1...
Need help?
Do you have a question about the Nordik K18-S and is the answer not in the manual?
Questions and answers