Ryobi P3100 - 18 VOLT 45 WATT HYBRID SOLDERING STATION Manual
- Operator's manual (28 pages)
Advertisement
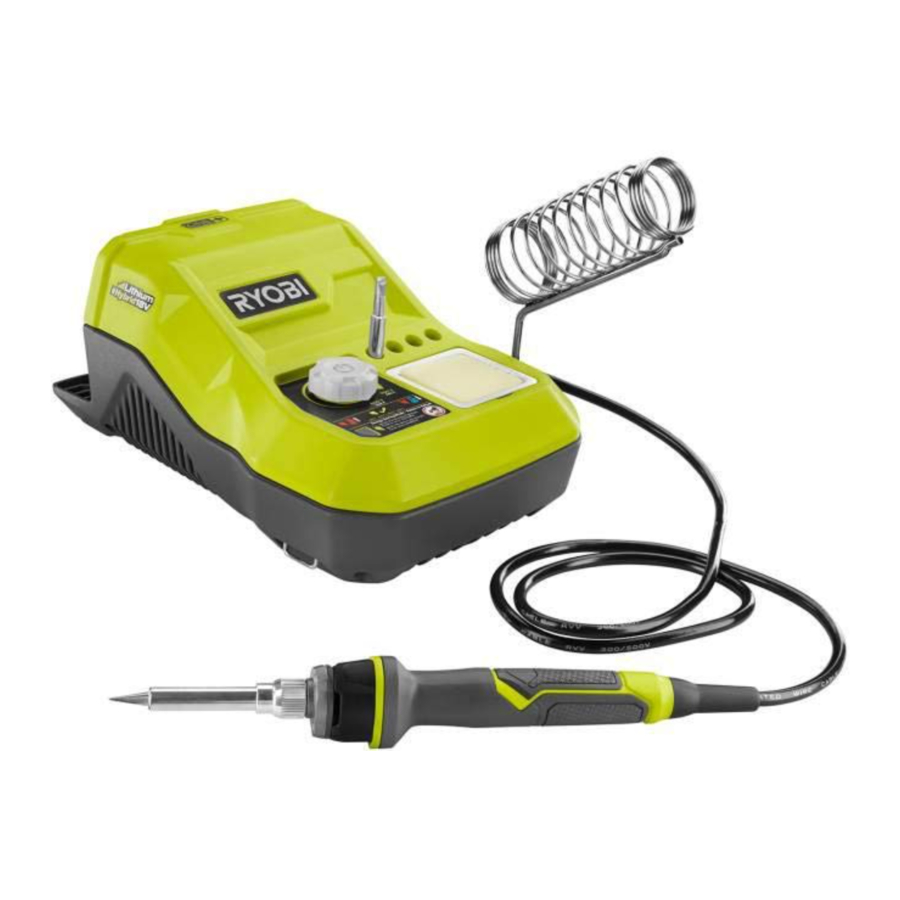
INCLUDES
Soldering Station, Pen Holder, Operator's Manual
IMPORTANT SAFETY INSTRUCTIONS
 WARNING
READ ALL INSTRUCTIONS. Failure to follow the warnings and instructions may result in electric shock, fire and/or serious injury.
- Know your product. Read operator's manual carefully. Learn its applications and limitations, as well as the specific potential hazards related to this product. Following this rule will reduce the risk of electric shock, fire, or serious injury.
- Always wear eye protection with side shields marked to comply with ANSI Z87.1 when assembling parts, operating the product, or performing maintenance. Following this rule will reduce the risk of serious personal injury.
- Do not lay a hot soldering iron on its side.
- Do not touch the heated tip of the soldering iron.
- Use the soldering iron in a well-ventilated area to avoid breathing fumes.
- Do not point the tip of the soldering iron at another person.
- Do not place your hands or fingers near the tip of the soldering iron.
- Never leave the soldering iron unattended while it is in the on position.
- Keep work area clean and well lit. Cluttered or dark areas invite accidents.
- Do not operate battery products in explosive atmospheres, such as in the presence of flammable liquids, gases or dust. Battery products create sparks which may ignite the dust or fumes.
- Keep children and bystanders away while operating this soldering iron. Distractions can cause you to lose control.
- Do not allow children to use the soldering iron. It is not a toy.
- Always assume that the soldering iron tip is hot.
- Do not solder live circuits.
- Do not disassemble the tool.
- The soldering iron tip is sharp. Do not touch the tip or allow it to come in contact with anything other than soldering wire and the workpiece material.
- Hold soldering iron by insulated gripping surfaces, when performing an operation where the tip may contact hidden wiring. Tips contacting a "live" wire may make exposed metal parts of the soldering iron "live" and could give the operator an electric shock.
- Avoid body contact with earthed or grounded surfaces such as pipes, radiators, ranges and refrigerators. There is an increased risk of electric shock if your body is earthed or grounded.
- Do not expose soldering station to rain. Water entering a power tool will increase the risk of electric shock or malfunction. These fluids can cause battery pack failure including short-circuit resulting in smoking, fire and/or serious personal injury.
- To reduce the risk of electrical shock, do not put tool or charger in water or other liquid. Do not place or store appliance where it can fall or be pulled into a tub or sink.
- Use this product only with batteries and chargers listed in tool/appliance/battery pack/charger correlation supplement 987000-432.
- Stay alert, watch what you are doing and use common sense when operating a battery product. Do not use the product while you are tired or under the influence of drugs, alcohol or medication. A moment of inattention while operating battery products may result in serious personal injury.
- Prevent unintentional starting. Ensure the switch is in the off position before connecting to power source and/or battery pack, picking up or carrying the product. Carrying battery products with your finger on the switch or energizing battery products that have the switch on invites accidents.
- Do not overreach. Keep proper footing and balance at all times. Do not use on a ladder or unstable support. This enables better control of the battery product in unexpected situations.
- Do not wear loose clothing or jewelry. Contain long hair. Loose clothes, jewelry, or long hair can contact a heated nozzle.
- Do not use the battery product if the switch does not turn it on and off. Any battery product that cannot be controlled with the switch is dangerous and must be repaired.
- Remove the battery pack from the product before making any adjustments, changing accessories, or storing the product. Such preventive safety measures reduce the risk of starting the product accidentally.
- Store idle products out of the reach of children and do not allow persons unfamiliar with the product or these instructions to operate the product. Battery products are dangerous in the hands of untrained users.
- Maintain battery products. Check for misalignment or binding of moving parts, breakage of parts and any other condition that may affect the product's operation. If damaged, have the product repaired before use. Many accidents are caused by poorly maintained battery products.
- Use the battery product, accessories and tool bits etc. in accordance with these instructions, taking into account the working conditions and the work to be performed. Use of the product for operations different from those intended could result in a hazardous situation.
- Recharge only with the charger specified by the manufacturer. A charger that is suitable for one type of battery pack may create a risk of fire when used with another battery pack.
- Use battery products only with specifically designated battery packs. Use of any other battery packs may create a risk of injury and fire.
- When battery pack is not in use, keep it away from other metal objects, like paper clips, coins, keys, nails, screws or other small metal objects, that can make a connection from one terminal to another. Shorting the battery terminals together may cause burns or a fire.
- Under abusive conditions, liquid may be ejected from the battery; avoid contact. If contact accidentally occurs, flush with water. If liquid contacts eyes, additionally seek medical help. Liquid ejected from the battery may cause irritation or burns.
- Battery products do not have to be plugged into an electrical outlet; therefore, they are always in operating condition. Be aware of possible hazards when not using your battery product or when changing accessories. Following this rule will reduce the risk of electric shock, fire, or serious personal injury.
- Do not place battery products or their batteries near fire or heat. This will reduce the risk of explosion and possibly injury.
- Do not crush, drop or damage battery pack. Do not use a battery pack or charger that has been dropped or received a sharp blow. A damaged battery is subject to explosion. Properly dispose of a dropped or damaged battery immediately.
- Batteries can explode in the presence of a source of ignition, such as a pilot light. To reduce the risk of serious personal injury, never use any cordless product in the presence of open flame. An exploded battery can propel debris and chemicals. If exposed, flush with water immediately.
- Do not charge battery tool in a damp or wet location. Do not use, store, or charge battery packs or products in locations where the temperature is less than 50°F or more than 100°F. Do not store outside or in vehicles.
- Under extreme usage or temperature conditions, battery leakage may occur. If liquid comes in contact with your skin, wash immediately with soap and water. If liquid gets into your eyes, flush them with clean water for at least 10 minutes, then seek immediate medical attention. Following this rule will reduce the risk of serious personal injury.
- Have your battery product serviced by a qualified repair person using only identical replacement parts. This will ensure that the safety of the battery product is maintained.
- When servicing a battery product, use only identical replacement parts. Follow instructions in the Maintenance section of this manual. Use of unauthorized parts or failure to follow Maintenance instructions may create a risk of shock or injury.
- Save these instructions. Refer to them frequently and use them to instruct others who may use this tool. If you loan someone this tool, loan them these instructions also.
ELECTRICAL
DOUBLE INSULATION
Double insulation is a concept in safety in electric products, which eliminates the need for the usual three-wire grounded power cord. All exposed metal parts are isolated from the internal metal components with protecting insulation. Double insulated products do not need to be grounded.
WARNING:
The double insulated system is intended to protect the user from shock resulting from a break in the product's internal wiring. Observe all normal safety precautions to avoid electrical shock.
NOTE: Servicing of a product with double insulation requires extreme care and knowledge of the system and should be performed only by a qualified service technician. For service, we suggest you return the product to your nearest authorized service center for repair. Always use original factory replacement parts when servicing.
ELECTRICAL CONNECTION
This is a hybrid product capable of operating on alternating current (AC) through an extension cord or direct current (DC) through a battery pack. If the product does not operate when an extension cord or battery pack is installed, double-check the power supply.
- To use alternating current, connect the product to apower supply that is 120 volts, AC only (normal household current), 60 Hz.
- To use direct current, install amanufacturer-recommended 18 volt battery pack only.
NOTE: Do not operate this product on direct current through an extension cord. Doing so would cause a substantial voltage drop, which will cause a loss of power and could cause the product to overheat.
EXTENSION CORDS
When using a product at a considerable distance from a power source, be sure to use an extension cord that has the capacity to handle the current the product will draw. An undersized cord will cause a drop in line voltage, resulting in overheating and loss of power. Use the chart to determine the minimum wire size required in an extension cord. Only round jacketed cords listed by Underwriter's Laboratories (UL) should be used.
When using this product outdoors, use an extension cord that is designed for outside use. This type of cord is designated with "WA" or "W" on the cord's jacket.
Before using any extension cord, inspect it for loose or exposed wires and cut or worn insulation.
| **Ampere rating (on product data plate) | ||||||
| 0-2.0 | 2.1-3.4 | 3.5-5.0 | 5.1-7.0 | 7.1-12.0 | 12.1-16.0 | |
| Cord Length | Wire Size (A.W.G.) | |||||
| 25´ | 16 | 16 | 16 | 16 | 14 | 14 |
| 50´ | 16 | 16 | 16 | 14 | 14 | 12 |
| 100´ | 16 | 16 | 14 | 12 | 10 | — |
**Used on 12 gauge - 20 amp circuit
NOTE: AWG = American Wire Gauge
WARNING:
Keep the extension cord clear of the working area. Position the cord so that it will not get caught on lumber, tools, or other obstructions while you are working with this product. Failure to do so can result in serious personal injury.
WARNING:
Check extension cords before each use. If damaged replace immediately. Never use a product with a damaged cord since touching the damaged area could cause electrical shock resulting in serious injury.
SYMBOLS

OVERVIEW

- Pen holder
- Soldering pen
- Tip storage
- Sponge tray
- Sponge
- Grounding loop
- LED indicator
- On/off temperature control switch
- Battery port
- Power cord port
ASSEMBLY
UNPACKING
This product requires assembly.
- Carefully remove the tool and any accessories from the box. All items listed in the Includes section must be included at the time of purchase.
WARNING:
Items in this Assembly section are not assembled to the product by the manufacturer and require customer installation. Use of a product that may have been improperly assembled could result in serious personal injury.
- If any parts are damaged or missing, please call 1-800-525-2579 for assistance.
WARNING:
If any parts are damaged or missing do not operate this product until the parts are replaced. Use of this product with damaged or missing parts could result in serious personal injury.
WARNING:
Do not attempt to modify this product or create accessories or attachments not recommended for use with this product. Any such alteration or modification is misuse and could result in a hazardous condition leading to possible serious personal injury.
INSTALLING PEN HOLDER

- Pen holder
- Hole

- Pen holder
- Tab
- Insert the pen holder into the hole on the base as shown.
- Rotate and press the pen holder under the tab until it locks into place.
OPERATION
WARNING:
Do not allow familiarity with this product to make you careless. Remember that a careless fraction of a second is sufficient to inflict serious injury.
WARNING:
Always remove battery pack from the tool when you are assembling parts, making adjustments, cleaning, or when not in use. Removing battery pack will prevent accidental starting that could cause serious personal injury.
WARNING:
Always wear eye protection with side shields marked to comply with ANSI Z87.1. Failure to do so could result in objects being thrown into your eyes and other possible serious injuries.
WARNING:
Do not use any attachments or accessories not recommended by the manufacturer of this product. The use of attachments or accessories not recommended can result in serious personal injury.
WARNING:
Do not hold the soldering iron pen with your fingers near any metal part of the tool. The tip of the tool reaches working temperature within seconds. Always assume that the soldering tip is hot. Touching a hot soldering tip can result in serious personal injury.
WARNING:
Do not use or store the soldering iron near flammable or combustible materials or liquids. These materials may ignite when exposed to the high temperatures created by the tip.
APPLICATIONS
You may use this product for the purposes listed below:
- Soldering circuits and electrical connections
- Soldering of jewelry, stained glass, and other crafts
WARNING:
Battery tools are always in operating condition. Place the switch in the off position and remove the battery pack when the product is not in use or when carrying at your side.
INSTALLING/REMOVING BATTERY PACK

- Battery pack
- Depress latches to release battery pack
- Make sure the on/off switch is in the off position.
- Insert the battery pack into the product as shown.
- Make sure the latches on each side of the battery pack snap into place and that the battery pack is secured in the product before beginning operation.
- Depress the latches to remove the battery pack.
For complete charging instructions, see the operator's manuals for your battery pack and charger.
INSTALLING/REMOVING POWER CORD

- Power cord
WARNING:
Do not route cord under carpets, rugs, runners, furniture, or appliances and always route cord away from traffic areas to prevent a tripping hazard.
- Remove the battery pack.
- Insert the female end of the power cord into the product as shown.
- Connect the male end of the power cord to the power source.
- Make sure the power cord is secured before beginning operation.
SPONGE TRAY AND SPONGE

- Sponge
- Sponge tray
- Base
- Insert sponge tray into the base as shown.
- For use, wet the sponge, squeeze out excess water, and place into tray.
NOTE: Remove the tray for easy cleaning.
ON/OFF/TEMPERATURE CONTROL SWITCH

- Cooler
- Warmer
- On/off switch
The LED indicator will light up when a charged battery pack is installed or an extension cord is connected and the switch is turned to the on position. If the indicator light is on, the tip is heating.
- Connect the product to an AC or DC power supply.
- Place soldering pen in holder.
- Press the on/off/temperature control switch to turn on the soldering iron.
NOTE: The LED indicator will glow solid red until the tip has reached the selected operating temperature. Once the selected temperature is reached, the indicator will glow solid green. - Select desired temperature by rotating the on/off/temperature control switch.
NOTE: The temperature range can be adjusted from 400°F to 900°F. - Press the on/off/temperature control switch again to turn the soldering iron off.
NOTE: The LED indicator will flash slowly until the tip has cooled. Do not touch the tip while the LED indicator is solid or flashing.
AUTOMATIC SHUT-OFF
After 10 minutes of operation, the unit will automatically enter an energy saving mode and the LED will slowly fade green. To exit this mode, rotate the control slightly in either direction. After 20 minutes of being in the energy saving mode, the unit will turn off. This preserves the tip and prevents powering an unattended tool.
OPERATING THE UNIT

- Grounding loop
- ESD safe strap
- Always hold the soldering iron pen as shown. Apply solder with the tip of the pen.
NOTE: The hybrid soldering station features a grounding loop for use when soldering circuitry or other static- sensitive materials. It is recommended an ESD safe strap (not included) be used when soldering sensitive electronics. - Apply the tip of the soldering iron at the point where the soldering wire touches the workpiece.
- After soldering, return the pen to the pen holder. Press firmly to make sure it is secure.
- Press the on/off/temperature control switch to turn the soldering iron off.
NOTE: The LED indicator will flash until the tip has cooled. Do not touch the tip while the LED indicator is flashing. - Clean the soldering tip as described in the Maintenance section of this manual.
WARNING:
Always place the pen back into the holder so that the tip does not come in contact with anything while it is heating or when not in use. Following this rule will reduce the risk of damage to items, burns, fire, or serious personal injury.
- Always allow 30 minutes for the soldering iron to cool before storing the tool.
MAINTENANCE
WARNING:
When servicing, use only identical replacement parts. Use of any other parts could create a hazard or cause product damage.
GENERAL MAINTENANCE
Avoid using solvents when cleaning plastic parts. Most plastics are susceptible to damage from various types of commercial solvents and may be damaged by their use. Use clean cloths to remove dirt, dust, oil, grease, etc.
While the tip is hot, wipe the tip against a damp sponge or a metallic wool pad to remove debris. Keeping a clean tip is important to extend the life of the tip and will improve solder melting and flow during use.
REPLACING SOLDERING TIPS

- Nut
- Sleeve
- Tip
- Ceramic heating element
- Soldering pen
WARNING:
Always allow the soldering tip to cool for a minimum of 30 minutes before removing the tip. Touching a hot soldering tip can result in serious personal injury.
- Remove the battery pack from the tool or disconnect from the power supply.
- Loosen the nut by turning counterclockwise and remove from tip.
- Remove the sleeve by sliding off the pen.
- Pull to remove the tip and insert a replacement tip. Push the new tip onto the ceramic heating element.
- Hold the body of the pen and slide the sleeve over the new tip.
- Reinstall the nut.
STORAGE
Always remove the battery pack and allow the soldering iron to cool completely before storing.
WARNING:
Always remove the battery pack before storage to ensure the product is off. Allow a minimum of 30 minutes of cool-down time before storage. Storing a soldering iron with a hot tip can cause serious burns and/or ignite combustible objects.
REGISTER YOUR TOOLS
http://register.ryobitools.com
1-800-525-2579
Documents / Resources
References
Download manual
Here you can download full pdf version of manual, it may contain additional safety instructions, warranty information, FCC rules, etc.
Download Ryobi P3100 - 18 VOLT 45 WATT HYBRID SOLDERING STATION Manual
Advertisement


Need help?
Do you have a question about the P3100 and is the answer not in the manual?
Questions and answers