Table of Contents
Advertisement
Quick Links
Advertisement
Table of Contents

Subscribe to Our Youtube Channel
Related Manuals for Riels RIL400


Summary of Contents for Riels RIL400
- Page 1 RIL400 - 405 - 410 - 415 - 420 -425 Operating Instruction...
- Page 2 INDEX: About this document pag. 3 For your safety pag. 4 Product description pag. 5 Product Overview pag. 6 The Installation Requirements pag. 7 Structure Drawing pag. 14 Technical Parameters pag. 16 Meter Linearity pag. 17 Electrical Connection pag. 18 Operation Instructions pag.
-
Page 3: About This Document
1.3 Symbols used Document ID This symbol on the front page of this instruction refers to the Document ID. By entering the Document ID on www.riels.com you will reach the document download. 1.4 Information, tip, note This symbol indicates helpful additional information. -
Page 4: For Your Safety
2.6 Warranty Products supplied by Riels Instruments srl are guaranteed for a period of 12 (twelve) months from delivery date according to the conditions specified in our sale conditions document. Riels Instruments srl can choose to repair or replace the Product. If the Product is repaired it will maintain the original term of guarantee, whereas if the Product is replaced it will have 12 (twelve) months of guarantee. -
Page 5: Product Description
Fig. 1: Layout of the type label (example) 1 Instrument type 2 Product code 3 Working temperature 4 Working pressure 5 Output signals 6 Power supply 7 Measuring range 8 Degree protection 9 serial number 10 Logo riels instruments 11CE logo RIL405 | Radar Level transmitter... -
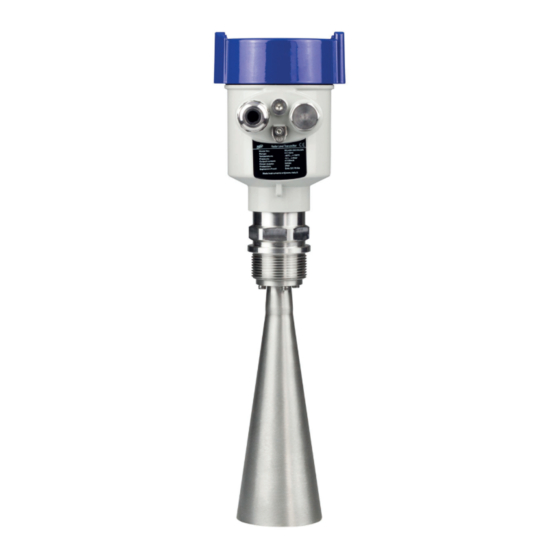
Page 6: Product Overview
4. Product Overview This series of radar level meter adopted 26G high frequency radar sensor, the maximum measurement range can reach up to 80 meters. Antenna is optimized further processing, the new fast microproces- sors have higher speed and efficiency can be done signal analysis, the instrumentation can be used for reactor, solid silo and very complex measurement environment. - Page 7 5.The Installation Requirements A Range setting B Min adjustment C Max adjustment D Near blanking A Range setting B Min adjustment C Max adjustment D Near blanking Note: The reference surface for measurement: the bottom surface of the thread or the sealing surface of the flange. When using radar level meter, make sure that the highest material level cannot enter the blind area of the measure- ment (the area shown in D(near blanking)in the figure).
- Page 8 5.1 Installation guide: The radar level transmitter has to be installed in the diameter of the 1/4 or 1/6. Note: The minimum distance from the tank wall should be Tank high 1/10 200mm. The Minimun Note: distance 200 mm ① datum plane ②The center of the container center or symmetrical The top plane of the conical tank can be installed in the middle of the tank top, It is guaranteed to measure to the bottom of...
- Page 9 False echo storage When there is a stirring blade in the tank that interferes with the radar measurement, if the stirring blade cannot be avoided, a false return is required. Wave storage eliminates interference signals generated by false waves. False Interference Echo Material Level Echo If you want to get the normal level echo, the false echo storage can store the echo signal between the envelope curve in the figure below, the storage is defined as a false signal, and a normal level echo...
- Page 10 Guide wave pipe installation Use guide wave pipe installation (guide wave pipe or by pass pipe), can avoid obstacles and foam influence on the measurement. Due to feeding, mixing or others process handling in the container, it will generate foam on the surface of some liquids, the signal will be attenuate.
- Page 11 Design requirements for guide wave pipe: • Metal material, smooth inside the tube; • Preferably stretched or longitudinal welded stainless steel pipe; • The weld must be as flat as possible and coaxial with the hole; • While using pre-welded flanges or extending the sleeves and using a ball valve, the transition pipe must be aligned on the inside and Fix after accurate matching;...
- Page 12 The meter cannot be installed in the middle of an arched or round tank top. In addition to generate indirect echo,but also influenced by the echo, multiple echoes may be larger than the signal threshold of true echoes, because they can be concentrated through the top. Therefore, it cannot be installed in the central location.
- Page 13 Height of nozzle: Adapter height requirements: it needs guarantee that the antenna extends into the tank at least 10mm. 80 mm (3”) 150 mm 100 mm (4”) 300 mm 150 mm (6”) 500 mm RIL405 | Radar Level transmitter...
- Page 14 6. Structure Drawing Model RIL400 Model RIL405 Bell The bell Flange Heigh Diameter D DN50 ø 46 DN80 ø 76 DN100 ø 96 Model RIL410 Bell The bell Flange Heigh Diameter D DN80 ø 76 DN100 ø 96 DN125 ø 121...
- Page 15 Model RIL415 Model RIL420 Flange The bell Bell Heigh Diameter D DN50 ø 76 DN80 ø 96 DN100 ø 121 Model RIL425 Flange The bell Bell PTFE Diame- Heigh plate ter D DN50 ø 46 DN80 ø 76 DN100 ø 96 RIL405 | Radar Level transmitter...
-
Page 16: Technical Parameters
1 second (depending on the parameter settings) Adjust the time about 1 second (depending on the parameter settings) Display resolution 1 mm Working storage and transportation -40°C...+100°C temperature Process temperature (the temperature of the antenna part) RIL400 -40°C...+130°C RIL405/410/415/420 -40°C...+250°C RIL425 -40°C...+150°C Pressure Max.4MPa Seismic Mechanical vibration l0 m/s², (10÷150) Hz... - Page 17 8. Meter Linearity Model RIL400 Emission angle 20° Precision See chart Model RIL405 Emission angle Depending on the size of the antenna ø 46 mm 18° ø 76 mm 12° ø 96 mm 8° ø 121 mm 6° Precision See chart...
- Page 18 Model RIL415 Emission angle Depending on the size of the antenna ø 196 mm 4° ø 242 mm 4° Precision See chart Model RIL420 Emission angle Depending on the size of the antenna ø 76 mm 12° ø 96 mm 18°...
-
Page 19: Electrical Connection
9. Electrical Connection 9.1 Supply Voltage Cable requirements The power supply cable can use ordinary two-core cables, and the outer diameter of the cable should be (8...12)mm to ensure the sealing of the cable entrance. If there is electromagnetic interference, it is recommended to use shielded cables. - Page 20 9.6 Safety Guidance Please comply with the requirements of local electrical installation regulations! Please abide by local regulations and requirements for personnel health and safety. All operations on the electrical components of the instrument must be completed by formal trained professionals. Please check the nameplate of the meter to ensure that the product specifications meet your requi- rements.
- Page 21 9.10 Computer Debugging Connect with computer via HART ① USB ② Radar level meter ③ HART adapter ④ 250Ω Resistor 9.11 HART Hand-held Programmer Programming ① HART handheld programmer ② Radar level meter ③ 250Ω Resistor RIL405 | Radar Level transmitter...
- Page 22 10. Operation Instructions 10. Basic Settings (1) Select menu From “RUN” mode press to enter the configuration menu. Press Confirm select and to confirm. The menu item number is always displayed on the top right corner. By selecting and confirming “Basic settings” in menu 1, Note-The menu item number is the display will show in sequence: displayed on the top right corner.
- Page 23 10.3.2 First echo (1.3.2) This parameter sets the first valid echo signal acceptance . Enter editing menu Press to enter parameter modification, press to enter the next sub- menu 1.3.3 (par.3.3.c). Go to next submenu 1.3.3. With you select the parameter setting, with you confirm your se- lection and go back to previous submenu: - Normal;...
- Page 24 10.3.4 Foaming (1.3.4) Enter editing menu Powder dust (1.3.4) Go to next submenu 1.3.5. This submenu is related to the previous selection in menu 1.3: by selecting “Liquid” in menu 1.3, the display will now show “Foamimg” Note - This window is diplayed In both cases the default setting is “No”.
- Page 25 10.3.6 Measure in tube (1.3.6) Enter editing menu This window is displayed only by selecting “Liquid” in menu 1.3. Go to next submenu 1.3.1. If the transmitter is installed into a calm or by pass pipe it is necessary to set “Yes”.
- Page 26 10.6 Scaled units (1.6) Press to enter parameter modification. Enter editing menu to go to next menu 1.7. Press Go to next submenu 1.7. The selectable options are: - Height; m, ft, in, cm, mm - Mass; Kg, t, lb Select parameter - Flow;...
- Page 27 11. DISPLAY (2) From “RUN” mode press to enter the configuration menu: the following menu will be displayed (1). Select menu Press to select the item and press to confirm. The menu item number is always displayed on the top right corner. Confirm By selecting and confirming ”Display”...
- Page 28 12.1 Peak values (3.1) In this menu are recorded the min. and max. distance values. They can be cleared to zero in menu 4.3. Go to the next menu 3.2. to enter the next menu 3.2. Press 12.2 Measuremerent status (3.2) The display shows the level of the receiving signal and the general status of to enter menu 3.3.
- Page 29 Press to select the zoom mode and press to confirm. The display will then show the curve. Select zoom mode Confirm and see the curve In case of “X-zoom” selection, you must proceed in the following way: Move the first zoom line - press to move right the first line (opening line) of the zoom window - press...
- Page 30 13.1 False echo (4.1) This function gets rid of interferring signals caused by obstacles placed Enter the editing menu between the sensor and the product surface (i.e. brackets, agitators or pi- pes). Go to the next menu 4.2. Press to enter the False echo storing/modifying mode, press to enter the next menu 4.2.
- Page 31 - Min. current; min.value of the signal (3.8mA or 4mA). Press to select the value and press to confirm and to go back to sub-menu 4.2 Select parameter Confirm and go to subme- nu 4.2. 13.3 Reset (4.3) to enter the next menu 4.4 Press to enter reset sub-menu, press Enter the editing menu...
- Page 32 13.7 Copy sensor data (4.7) Press to enter the copy sensor data menu: copy from sensor or copy to Enter the editing menu to enter the next menu 4.8 sensor. Press Go to the next menu 4.8. to select the operation: with “Copy from sensor”, it is possible to Press save the sensor settings;...
- Page 33 14.1 Sensor type / Serial number (5.1) to go to next menu 5.2. Press Go to the next menu 5.2. 14.2 Date of manuf./ Software version (5.2) to go back to menu 5.1 Press Go back to menu 5.1. RIL405 | Radar Level transmitter...
-
Page 34: Troubleshooting
11. Troubleshooting Error Code Error Solution Use a multimeter to check whether the power supply of the product is outside the normal use range, please make sure Err11 Power supply faulty that the power supply of the product is within the normal use range Check whether the load resistance (250 ohm) wiring is correct or not, and then check whether the communication... - Page 35 Riels instruments srl Viale Spagna, 16 35020 - Ponte San Nicolò (PD) - ITALY www.riels.it | info@riels.it | ph. +39 049 8961771...
Need help?
Do you have a question about the RIL400 and is the answer not in the manual?
Questions and answers