
Related Manuals for Daavlin ClearLink M Series


Summary of Contents for Daavlin ClearLink M Series
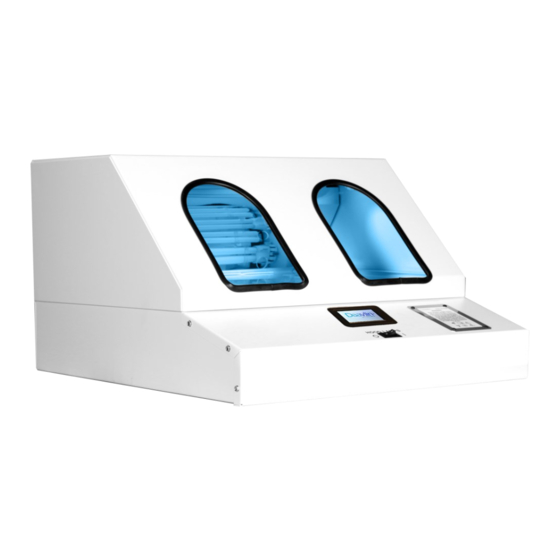
- Page 1 ClearLink™ Home-Control Operation Manual Modes of Operation • Guided Mode • Dosimetric Mode • Timed Mode...
-
Page 2: Table Of Contents
Table of Contents Control Type Indications for Use Delivery and Inspection Site Selection Electrical Requirements Unpacking and Assembly Lamp Inspection Lamp Specification Guide Precautions and Warnings Operating Specifications Labels and Symbols General Instructions (All Modes of Operation) Pre-treatment Preparations Hood Lamps Unlocking the Device Positioning Yourself Common ClearLink™... -
Page 3: Control Type
Dear Valued Customer Thank you for selecting a Daavlin M Series phototherapy unit. The use of light for the treatment of photoresponsive skin disorders has been our business since 1981. We are proud of our tradition of innovation in the field of phototherapy and are honored that you have chosen us for your phototherapy needs. -
Page 4: Delivery And Inspection
All M Series devices are equipped with an onboard fuse. The fuse-holder is a part of the power cord receptacle which is located on the back of the unit. Should an onboard fuse fail, call Daavlin’s service department to determine an appropriate replacement. -
Page 5: Lamp Inspection
Lamp Specification Guide (see Section 6.1 Lamp Specification Guide.) If there is any question that your device is not equipped with the lamps that you have been prescribed, contact Daavlin immediately. Lamps code numbers are generally located at the base of the lamp. - Page 6 EMC Precautions. If the device continues to malfunction cease operation and contact the Daavlin Service Department. •...
-
Page 7: Operating Specifications
• Only original components and accessories should be used with the device to avoid damage. • Before opening the device casing to perform maintenance or service, disconnect the device from the power source. • The device must never be directly exposed to flowing or splashing liquids of any kind. If the device is inadvertently exposed to liquid, it must be tested for safe function before being placed in operation again. -
Page 8: Labels And Symbols
Labels and Symbols A removable label (Figure 1 Unlocking Code) located near the screen provides information on how to unlock the unit. Figure 1 Unlocking Code If the unit is equipped with FlexRx™ exposure limiting software, there will be a label similar to the one shown in Figure 2 FlexRx Label informing you that your unit has been equipped with this feature. - Page 9 A warning label (Figure 3 Warning Label) is affixed to your Daavlin phototherapy device in a prominent and easily readable position. Please read the label carefully as it contains important safety information. Figure 3 Warning Label Figure 4 Identification Label The identification label (Figure 4 Identification Label) is located on the back of the unit near the power cord receptacle.
- Page 10 The following table lists all of the symbols affixed to the device along with their meaning: Table 1 Symbols SYMBOL DESCRIPTION DANGEROUS VOLTAGE NON-IONIZING RADIATION EARTH (ground) PROTECTIVE EARTH (ground) OPERATING INSTRUCTIONS KEEP DRY CAUTION, CONSULT ACCOMPANYING DOCUMENTS LAMPS/TIMER/TOGGLE LABELS LAMPS/TIMER/TOGGLE LABELS Type B applied part MEDICAL DEVICE...
-
Page 11: General Instructions (All Modes Of Operation)
(For example, forgot lip balm, put sunscreen on tender area, etc.) Note: A free printable treatment log is available for download at www.Daavlin.com. You will need to purchase lip balm and sunscreen with an SPF (Sun Protective Factor) of at least 30. -
Page 12: Common Clearlink™ Functions
horizontal center of the unit. Rings or other jewelry may cause scratching of the acrylic and should be removed Common ClearLink™ Functions The system beeps to signal the end of the treatment and will display the delivered dose along with the elapsed time. -
Page 13: Running A Treatment
Figure 12 Integrating dosimetry is a feature of the device which uses a built-in sensor to monitor the amount of light energy being produced by the device. The system then automatically adjusts the length of your treatment to account for variations in light output caused by changes in room temperature or aging of the lamps. -
Page 14: Dosimetric Mode
Put on your goggles and position yourself per the instructions in section Section Positioning Yourself 6. Press the Enter key to begin the treatment. After a 3 second countdown, the lamps will turn on and the screen will display your progress. The lamps will shut off when the treatment is over. -
Page 15: Timed Mode
Google Daavlin treatment time calculator and bookmark it on your phone. In that app, simply enter the time of your last treatment and the... -
Page 16: Care Of The Unit
For disinfection while the same patient uses the device, we have tested several cleaners that do not degrade the Acrylic and can be seen in Table 2 Daavlin Tested Cleaners. Contact Time... -
Page 17: 14.2.3 High-Level Disinfection
100 hours of use or whenever lamps are replaced, whichever occurs sooner. This involves taking an output reading with a handheld meter (available for purchase or rent from Daavlin) and checking it with the output reading from the Integrating dosimetry system. Please contact Daavlin for calibration assistance. -
Page 18: Range And Accuracy (Applicable To Guided And Dosimetric Units Only.)
It works just like a key. To remove the unlocking code feature or to change it to a number that is easier to remember, contact Daavlin’s service department at 1-800- 322-8546 for step-by-step instructions. Hours of operation are Monday through Thursday 7:30am - 8:00pm EST and Friday 8:30am - 5:00pm EST. -
Page 19: 14.8.2 Resetting Lamp Hours
14.8.2 Resetting Lamp Hours When changing lamps, it is important to reset the lamp age to zero so the new lamp’s operating hours can be tracked. Please contact the Daavlin service department for instructions on resetting the device’s lamp hours. - Page 20 Table 4 Electromagnetic Immunity Emissions Test IEC 60601 Test Level Actual Level +/- 8kV (conductive +/- 8kV (conductive surfaces, coupling planes) surfaces, coupling planes) Electrostatic discharge immunity test following IEC +/- 2kV, +/- 4kV, +/- 8kV, +/- 2kV, +/- 4kV, +/- 8kV, 61000-4-2 and +/- 15kV (non- and +/- 15kV (non-...
- Page 21 Table 5 Electromagnetic Immunity The device is intended for use in the electromagnetic environment specified below. The customer or the user of the device should assure that it is used in such an environment. Immunity IEC 60601 Compliance Electromagnetic environment - test test level level...
-
Page 22: Warranty
Acts of God. This Limited Warranty does not extend to repairs made necessary by use of parts or accessories not recommended by the manufacturer. Daavlin shall not be responsible for any indirect, incidental, special, punitive, or consequential damages of Purchaser. -
Page 23: Warranty Service
Daavlin’s authorization, Daavlin shall not be responsible or liable for any such work (in or out of warranty). Daavlin reserves the right to bill for labor, expenses, and services for requested "warranty" service trips which result in work not covered by this Limited Warranty. -
Page 24: Contact Information
Contact Information USA & Canada: 1-800-322-8546 Overseas: 1-419-636-6304 Fax: 1-419-636-1739 E-Mail: service@daavlin.com Website: www.daavlin.com Daavlin Distributing Company 205 W. Bement Street PO Box 626 Bryan, Ohio 43506 USA MNL-00005 [4] Proprietary and Confidential Page 24 of 24...
Need help?
Do you have a question about the ClearLink M Series and is the answer not in the manual?
Questions and answers