Advertisement
Quick Links
Advertisement

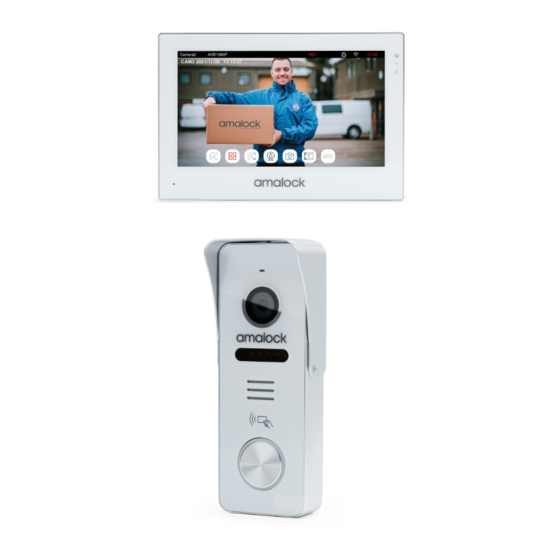
Summary of Contents for Amalock SV
- Page 1 SV—SMART VIDEO ENTRY INSTALLATION AND SET UP MANUAL SET UP WITHOUT LOCKING OPTIONS...
- Page 2 SET UP WITH LOCKING OPTIONS EXIT BUTTON N/0 GOING CLOSED FAIL SECURE LOCK FAIL SAFE LOCK INDEPENDENT PSU FOR LOCK...
- Page 3 SET UP WITHOUT LOCKING OPTIONS...
- Page 4 SET UP WITH LOCKING OPTIONS EXIT BUTTON N/0 GOING CLOSED FAIL SECURE LOCK FAIL SAFE LOCK INDEPENDENT PSU FOR LOCK...
-
Page 5: Getting Started
Getting Started Once your video kit is wired up correctly and power is applied then please follow the following steps, STEP 1 Tap anywhere on the home screen to unlock STEP 2 Click on settings STEP 3 Click on network... - Page 6 STEP 4 Tap on the arrow to change the net pairing mode to ‘AP MODE’ STEP 5 Tap on the back button at the bottom right hand corner and then click ‘Ok’. This will reset the system into AP mode. STEP 6 When the monitor has reset itself, go into settings >...
- Page 7 STEP 7 Open the AMALOCK app on your mobile phone. On the home page click on the ‘ + ‘ sign at the top of the screen and then click on add device. STEP 8 Down the left side click ‘Camera & Lock’ Then click on ’Smart Camera (Wi-Fi)’...
- Page 8 STEP 9 At the top right hand corner you will see it says ‘QR Code for Camera’ Click on that and change it to ‘AP MODE’ STEP 10 You can now see it has changed to ‘AP MODE’ in the red circle. Click on ‘Next Step’ and then click ‘Next’ in the orange box.
- Page 9 STEP 11 Input your WIFI name and then your WIFI password then click next STEP 12 Click on ‘Go to Connect. This will take you to your phone settings on your mobile phone.
- Page 10 STEP 13 Click on the WIFI in settings. STEP 14 Find the WIFI that starts with ‘Smartlife’. Make sure that it is the same WIFI name as the one on the monitor. As you can see on both pictures they are the same.
- Page 11 The password is 12345678 When it is connected you should see a blue tick next to the Smartlife WIFI. When that is complete go back onto the AMALOCK app.
- Page 12 STEP 16 When you open up the AMALOCK app it should take you to this page where it starts to connect to the monitor STEP 17 When it has connected you can edit the name of the device to what ever you want by clicking the...
-
Page 13: Changing The Master Code
SV—KEYPAD PROGRAMMING INSTRUCTIONS MASTER CODE The master code is used to put the keypad into programme mode, it will open the door. 123456 The default mastercode is CHANGING THE MASTER CODE 123456 then press ( you should hear 2 long beeps and the ring around the push button should start flashing) - Page 14 DELETE A PASSCODE 123456 then press ( you should hear 2 long beeps and the ring around the push button should start flashing) then ( you should hear 1 long beep and the flashing ring should flash faster) Enter the location slot of the passcode that needs to be deleted then press .
- Page 15 DELETE A CARD OR TOKEN 123456 then press ( you should hear 2 long beeps and the ring around the push button should start flashing) then ( you should hear 1 long beep and the flashing ring should flash faster) Enter the location slot of the card or token that needs to be deleted then press .
- Page 16 DELETE A FINGERPRINT 123456 then press ( you should hear 2 long beeps and the ring around the push button should start flashing) then ( you should hear 1 long beep and the flashing ring should flash faster) Enter the location slot of the fingerprint that needs to be deleted then press .
- Page 17 How to add groups and how to change members to administrator On The home page, select ‘ME’ at the bottom right hand corner Tap on ‘Home Management’...
- Page 18 Click on ‘create a home’ Set a name for the group in ‘Home Name’ section...
- Page 19 Unselect the rooms you do not need, or you can add a room by clicking on ‘Add Room’ After clicking save, click on the group you have created...
- Page 20 Tap on ‘Add Member’ to add a member to the group Before you add a member please make sure they have an account with amalock. Tap on ‘App Account’...
- Page 21 Input the name and the email address of the person you want to add to the group. Example to the right. The email is the same email they signed up with to the amalock app. To change the members permission, click on ‘Family Role’ box...
- Page 22 You should now have set the new member as an Administrator Finally click save at the top right hand side of the screen.

Need help?
Do you have a question about the SV and is the answer not in the manual?
Questions and answers