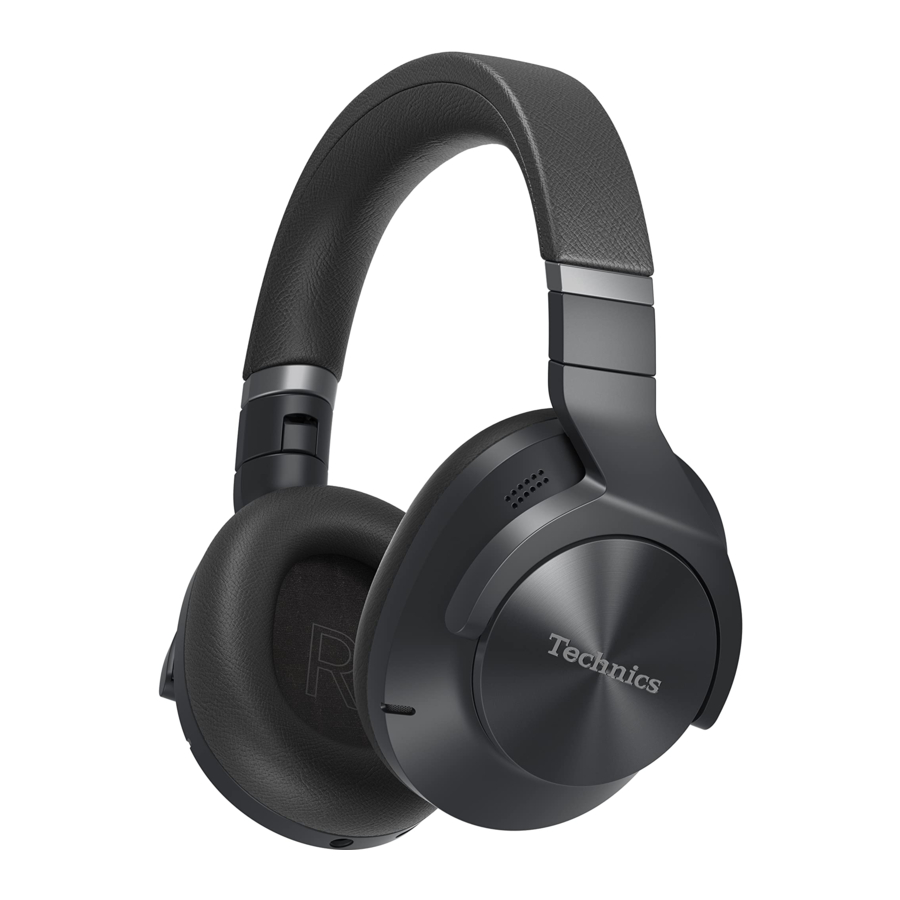
Technics EAH-A800 - Digital Wireless Stereo Headphones Manual
- Operating instructions manual (29 pages) ,
- Owner's manual (34 pages)
Advertisement
About Bluetooth
Panasonic bears no responsibility for data and/or information that is compromised during a wireless transmission.
Frequency band used
This unit uses the 2.4 GHz frequency band.
Restrictions of use
- Wireless transmission and/or usage with all Bluetooth equipped devices is not guaranteed.
- All devices must conform to standards set by Bluetooth SIG, Inc.
- Depending on the specifications and settings of a device, it can fail to connect or some operations can be different.
- This unit supports Bluetooth security features. But depending on the operating environment and/or settings, this security may not be sufficient. Transmit data wirelessly to this unit with caution.
- This unit cannot transmit data to a Bluetooth device.
Range of use
Use this unit at a maximum range of 10 m (33 ft).
The range can decrease depending on the environment, obstacles or interference.
Interference from other devices
- This unit may not function properly and troubles such as noise and sound jumps may arise due to radio wave interference if this unit is located too close to other Bluetooth devices or the devices that use the 2.4 GHz band.
- This unit may not function properly if radio waves from a nearby broadcasting station, etc. is too strong.
Intended usage
- This unit is for normal, general use only.
- Do not use this system near an equipment or in an environment that is sensitive to radio frequency interference (example: airports, hospitals, laboratories, etc).
Before use
Expressions used in this document
- The product illustrations may differ from the actual product.
Accessories
Please check and identify the supplied accessories.
To order accessories, contact the dealer from whom you have made your purchase.
1 x Carrying case
1 x USB charging cord
1 x Detachable cord
1 x Airplane adaptor
Only for U.S.A.:
To order accessories, refer to "Limited Warranty (ONLY FOR U.S.A.)" on "Safety Instructions".
Maintenance
Clean this unit with a dry and soft cloth.
- When the unit is very dirty, wipe off the dirt with a cloth that has been dipped in water and well wrung, then wipe with a dry cloth.
- Do not use solvents including benzine, thinner, alcohol, kitchen detergent, a chemical wiper, etc. This might cause the exterior case to be deformed or the coating to come off.
Keeping the battery performance.
- During the long period of disuse, full charge this unit once every 6 months to keep the battery performance.
Part names

- Touch sensor
- Touch this sensor to switch the external sound control mode.
- The touch sensor responds to operations only when this unit is worn.
- [+] button
- Multi function button
- You can perform a variety of operations by pressing this button.
- [-] button
- [
![]() ] button*1
] button*1 - LED indicator*2
- Lights or blinks to indicate the status of this unit.
- Charging terminal (DC IN)
- Connect the USB charging cord (supplied) to this terminal when charging. (See "Charging")
- Audio input terminal
- This unit can be used as normal headphones by connecting the detachable cord (supplied).
- Ear pads
- Raised dot indicating the left side
- Microphones for noise canceling
- Microphones for calls
*1  : Standby/ON
*2 Examples of lighting/blinking patterns
| Lighting (red) | Charging is in progress |
| Lighting alternately in blue and red | Bluetooth pairing (registration) standby |
| Blinking slowly (blue)*3 | Bluetooth connection standby |
| Blinking twice about every 2 seconds (blue)*3 | A Bluetooth pairing (registration) has been established or a call is in progress |
| Blinking (blue)*3 | A call is being received |
*3 The battery is low when it is blinking in red. (See "Battery level notification")
Preparation
Charging
The rechargeable battery (installed in the unit) is not charged initially. Charge the battery before using the unit.
- Proper charging is not possible if there is dust or droplets of water on the charging terminal of the headphones. Remove the dust or water droplets before charging.
- Be aware that this unit may get warm while charging or immediately after charging. Depending on your constitution and health status, putting the headphones on may trigger adverse reactions such as skin redness, itching, and rash if the headphones have just been disconnected from the power source and are still warm.

Use the USB charging cord (supplied) (  ) to connect this unit to a 5.0 V power source (1200 mA or higher) (
  ).
).
- LED indicator
- USB charging cord (supplied)
- Check the direction of the terminals and plug in/out straight holding onto the plug. (It may result in malfunction by the deforming of the terminal if it is plugged in obliquely or in wrong direction.)
- Power source (e.g., AC adaptor)
- Power source (e.g., AC adaptor) is indicated as AC adaptor in the text.
- The LED indicator lights in red when charging is in progress.
When charging is completed, the LED indicator will go out. - It takes approx. 3 hours to charge the battery from empty to full.
Note
- Charge in a room temperature between 10°C and 35°C (50°F and 95°F). Outside of this temperature range, charging may stop and the LED indicator may go out.
- It is not possible to turn the power on or connect to Bluetooth devices during charging.
- Do not use any other USB charging cords except the supplied one. Doing so may cause malfunction.
Turning the power on/off

In the power-off state, press and hold [ ] of this unit for approx. 2 seconds until the LED indicator lights for 1 second.
- [
![]() ] button
] button - LED indicator
- A beep will sound, and the LED indicator will blink slowly.
To turn the power off
Press and hold [ ] for approximately 2 seconds. A tone and English guidance message will be heard, and the power will be turned off.
Install the Technics Audio Connect app
By creating a Bluetooth connection with a smartphone or tablet installed with the "Technics Audio Connect" app (free of charge), you can enjoy a wide variety of features, such as the following:
- Software updates
- Change the functions assigned to the touch sensors (Customization of touch sensor)
- Customization of various settings (Connection mode setting/Auto power off setting/Guidance language setting, etc.)
- Check remaining battery charge
- Access to this document
Preparation
- Turn on the unit.
- Download the "Technics Audio Connect" app (free of charge) to the smartphone or tablet.
![]()

Android:
Google Play


iOS:
App Store


- Start up the "Technics Audio Connect" app.
- Follow the on-screen instructions to operate.
Note
- Always use the latest version of the "Technics Audio Connect" app.
- There may sometimes be changes made to the operating procedures, displays, etc., on the "Technics Audio Connect" app. Refer to the support site for details.
Connecting a Bluetooth device
Preparation
- Place the Bluetooth device within approx. 1 m (3.3 ft) from the unit.
- Check the device operation using its operation instructions as required.
- Using the "Technics Audio Connect" app (free of charge) makes connecting with Bluetooth simple.
When pairing your unit first time with a Bluetooth device
- In the power-off state, press and hold [Í/l] of this unit for approx. 2 seconds until the LED indicator lights for 1 second.
- The LED indicator will light alternately in blue and red.
Note: The LED indicator lights (Red/blue) to indicate that the unit is in pairing mode.
- The LED indicator will light alternately in blue and red.
- Turn on the power of the Bluetooth device, and enable the Bluetooth function.
- Select "EAH-A800" from the Bluetooth device's menu.
![]()
- A BD address (Bluetooth Device address: an alphanumeric character string that is displayed by and unique to the device) may be displayed before "EAH-A800" is displayed.
- If prompted for a passkey, input the passkey "0000 (four zeros)" of this unit.
- When the LED indicator blinks (blue)* twice at approximately 2 second intervals, pairing has been completed and connection has been established.
* The battery is low when it is blinking in red.
- Confirm that this unit and the Bluetooth device are connected.

Note
- If the connection with the device does not complete within 5 minutes, the pairing mode on this unit cancels and they transition to connection standby mode. Perform pairing again.
- This unit remembers the device lastly connected. The unit may connect automatically after turning on the power of this unit.
Connecting 2nd Bluetooth device
- In the power-off state, press and hold [
![]() ] for at least 7 seconds until the LED indicator lights alternately in blue and red.
] for at least 7 seconds until the LED indicator lights alternately in blue and red. - Wait about 5 seconds after you turn off the power of the unit.
- The LED indicator lights (Red/blue) to indicate that the unit is in pairing mode.
- Perform steps 2 and 3 of "When pairing your unit first time with a Bluetooth device".
- When the LED indicator (blue) blinks twice every approx. 2 seconds, pairing (registration) is completed. (Connection established)
Note
- You can pair a maximum of 10 Bluetooth devices with this unit. When you pair a device after the maximum has been exceeded, previous devices are overwritten. To use overwritten devices again, do the pairing again.
- It is easier to pair if you disable the Bluetooth function of the first device when pairing with a device after the first.
- If the connection with the device does not complete within 5 minutes, the pairing mode on this unit cancels and they transition to connection standby mode. Perform pairing again.
- This unit remembers the device lastly connected. The unit may connect automatically after turning on the power of this unit.
Operation
Listening to music
If the Bluetooth compatible device supports the "A2DP" and "AVRCP" Bluetooth profiles, music can be played back with remote control operations on the unit.
- A2DP (Advanced Audio Distribution Profile): Transmits audio to the unit.
- AVRCP (Audio/Video Remote Control Profile): Allows remote control of the device using the unit.
- Connect the Bluetooth device and the unit. (See "Connecting a Bluetooth device")
- Select and play the music or the video on the Bluetooth device.
- The unit's headphones will output the music or the audio of the video being played back.
- Operating time may become shorter depending on the usage conditions.
Attention
- The unit might leak sound depending on the volume level.
- When the volume is increased to near maximum level, music may sound distorted. Decrease the volume until the distortion is cleared.
Note
- Playback will pause when you take off this unit. Even after you take off the headphones, music playback will resume if you put it on again within 60 seconds.
Remote controlling
You can control the Bluetooth device using the unit.
- Depending on the Bluetooth device or the app, even if you press buttons on the unit, some functions may not respond or may operate differently from the descriptions below.

(Operation example)
| Function | Operation |
| Play / Pause | Press the Multi function button. (  ). ). |
| Increase the volume | Press [+] (  ). ).
|
| Decrease the volume | Press [-] (  ). ).
|
| Forward to the start of next track | Press the Multi function button twice quickly. |
| Return to the start of current track* | Press the Multi function button three times quickly. |
| Fast forward | Press the Multi function button twice quickly; hold the second press. |
| Fast rewind | Press the Multi function button three times quickly; hold the third press. |
* Depending on the Bluetooth device or app, this may return you to the previous track.
Note
- A beep sounds to indicate that you have pressed to reach either the maximum or minimum volume level.
Making a phone call
With Bluetooth enabled phones (cell phones or smartphones) that support the "HSP" or "HFP" Bluetooth profile, you can use the unit for phone calls.
- HSP (Headset Profile):
This profile can be used to receive monaural sounds and establish two-way communication using the microphone on the unit. - HFP (Hands-Free Profile):
In addition to the HSP functions, this profile has the incoming and outgoing calls function.
(This unit does not have a function that allows you to make phone calls independently of a Bluetooth enabled phone.)
- Connect the Bluetooth device and the unit. (See "Connecting a Bluetooth device")
- Press the Multi function button (
![]() ) on the unit and answer the incoming call.
) on the unit and answer the incoming call.
![]()
- During an incoming call, ringtone will sound from the unit and the LED indicator will blink.
- (HFP only) To reject the incoming call, press and hold the Multi function button for 2 seconds.
- If you answer a call using your iOS device, it may not be routed to EAH-A800 automatically. In this case, please review the instruction accessed by the QR code below.
 ) on the unit and answer the incoming call.

- Start talking.
- To mute the voice during a call, press the Multi function button twice quickly.
(To cancel muting, press the Multi function button twice quickly again while muting.) - To switch the noise level of the other party during a call, press the Multi function button 3 times quickly. Voices will be easier to hear when you reduce the audio noise from the other party.
This function is effective in reducing the noise heard from continuous sources (ventilation fans, etc.) in the vicinity of the other party. - The volume can be adjusted during a phone call. For setting instructions, see section above.
- To mute the voice during a call, press the Multi function button twice quickly.
- Press and hold the Multi function button to end the phone call.
- A beep will sound.
Note
- There may be instances when hands free setting needs to be done on the Bluetooth enabled phone.
- Depending on the Bluetooth enabled phone, you may hear incoming and outgoing call ringtones of the phone from the unit.
- You can have the Bluetooth enabled phone make phone calls by using the microphone of the unit and an app of the Bluetooth enabled phone. (See "Activating voice functions")
Using the external sound control
The external sound control function switches between Noise cancelling and Ambient sound.
- While wearing this unit, touch the touch sensor (
![]() ) Right (R) side twice quickly.
) Right (R) side twice quickly.
![]()
- The mode is switched each time you touch the touch sensor twice quickly. (A guidance message will notify you of the mode you switched to.)

- The default level setting is "Noise cancelling".
- When the "Technics Audio Connect" app is used, you can set to "OFF".
- The mode is switched each time you touch the touch sensor twice quickly. (A guidance message will notify you of the mode you switched to.)
- Adjust the volume of the playback device.
 ) Right (R) side twice quickly.

Noise cancelling
Reduces the sounds (noise) you can hear from outside.
- Noise cancelling can be optimized with the "Technics Audio Connect" app. Adjust it beforehand to achieve the best condition.
- While using the noise cancelling function, a very small amount of noise which is generated from the circuit that reduces noise may be heard, but this is normal and not indicative of any trouble. (This very-low-level noise may be heard in quiet places or in the blank parts between tracks.)
Ambient sound
You can hear ambient sound through the microphones embedded in this unit while enjoying music.
Note
- You can change the functions assigned to the touch sensors on the "Technics Audio Connect" app (free of charge).
(Customization of touch sensor) (See "Install the Technics Audio Connect app")
Useful functions
Using the Technics Audio Connect app
By creating a Bluetooth connection with a smartphone installed with the "Technics Audio Connect" app (free of charge), you can enjoy a wide variety of features, such as changing the settings on this unit. (See "Install the Technics Audio Connect app")
Activating voice functions
You can use the Multi function button on this unit to activate the voice functions (Amazon Alexa, Siri etc.) on your smartphone or similar device.
- Connect the Bluetooth device and the unit. (See "Connecting a Bluetooth device")
- Press and hold the Multi function button until the voice function is activated.
- The voice assistant function on the Bluetooth device is activated.
Note
- For details about voice function commands, refer to the operating instructions for the Bluetooth device.
- The voice function may not work depending on the smartphone, etc., specifications and the app version.
After doing Step 1 above, complete the setup below to use Amazon Alexa as your voice assistant.
- In the "Technics Audio Connect" app, select Amazon Alexa as your voice assistant.
- Follow the on-screen instructions to operate.
- After signing into Amazon, you will need to add headphones in the device setup.
- Install the latest version of the Amazon Alexa app.
- Alexa is not available in all languages and countries. Alexa features and functionality may vary by location.
- For more details, refer to the manuals or similar support materials of the apps.
Creating multi-point connections
A maximum of two Bluetooth devices can be connected at the same time.
The default setting is "OFF".
- When the "Technics Audio Connect" app is used, you can set to "ON".
For information about the connection and registration of Bluetooth devices and the unit (See "Connecting a Bluetooth device")
- Pair this unit with each of the Bluetooth devices.
- Connect the first Bluetooth device and the unit.
- Connect the second Bluetooth device and the unit.
Note
- For more details, including more specific setup instructions, refer to the operating instructions for the Bluetooth devices.
- This may not work with some apps and software.
- LDAC cannot be played back when this function is ON.
Battery level notification
- When the unit is turned off, an English guidance message will be heard indicating the battery level.
- When the battery level starts to run low, the blinking LED indicator will turn from blue to red, and as it drops further, you will be notified by one beep every 1 minute.
* When the battery runs out, a tone and a guidance message will be heard and the power will turn off.
* If you press [![]() ] twice quickly, an English guidance message will be heard and you can check the battery level.
] twice quickly, an English guidance message will be heard and you can check the battery level.
 ] twice quickly, an English guidance message will be heard and you can check the battery level.
Using the supplied detachable cord
While the power is turned off or the battery has no remaining charge, this unit can be used as normal headphones by connecting the detachable cord (supplied).
- Before connecting the detachable cord (supplied), lower the volume on the connected device.
- If you connect the detachable cord (supplied) when connected via Bluetooth, the Bluetooth connection will be lost.
- The Multi function button does not work even while the unit is turned on.
- Noise may occur due to dirt on the plug. Clean the plug with a soft dry cloth if this occurs.
- Do not use any other detachable cords except the supplied one.

To connect to an airplane audio system
- Connect the unit and the detachable cord (supplied). (
![]() )
) - Connect the input plug (
![]() ) of the detachable cord (supplied) to the airplane adaptor (supplied) (
) of the detachable cord (supplied) to the airplane adaptor (supplied) ( ![]() ).
). - Connect the airplane adaptor to the in-airplane audio system. (
![]() )
)
 )
) ) of the detachable cord (supplied) to the airplane adaptor (supplied) (
  ).
). )
)Note
- The airplane adaptor may not fit the jacks in some in-airplane audio systems.
Resetting the unit
This unit can be reset when all operations are rejected. To reset the unit, press and hold [Í/l] for 10 seconds or more. All the previous operations will be canceled. (The pairing device information will not be deleted.)
- The unit cannot be reset immediately after turning on the power of the unit. Wait about 30 seconds.
Other
Restoring to the factory settings
When you want to delete all pairing device information, etc. in this unit, you can restore this unit to the factory settings (original settings upon purchase).
- While the power is turned off, press and hold [
![]() ] for at least 7 seconds until the LED indicator lights alternately in blue and red.
] for at least 7 seconds until the LED indicator lights alternately in blue and red. - Release your finger from [
![]() ].
]. - Press and hold [
![]() ] and [+] for at least 5 seconds.
] and [+] for at least 5 seconds.
- The default settings will be restored after the LED indicator (blue) blinks fast and the unit turns off.
Attention
- When pairing a device again, delete the registering information (Device: "EAH-A800") from the Bluetooth device's menu, and register this unit with the Bluetooth device again. (See "When pairing your unit first time with a Bluetooth device")
- Some setting values, such as the language settings for voice prompts and Amazon Alexa, are kept.
Storage of the unit
Fold the unit as shown below when storing it in the carrying case.
- If the USB charging cord or the detachable cord (supplied) is connected, disconnect it from the unit.
- Do not rotate the housing forcibly over the rotation limit.
- Store the sliders.
![]()
- Rotate the housing on either side by approx. 90° (
![]() ) to fold it toward the headband side (
) to fold it toward the headband side ( ![]() ).
).
![]()
- Rotate the other housing by approx. 90° (
![]() ).
).
![]()
- Store the unit in the carrying case.

 ) to fold it toward the headband side (
  ).
).
 ).
).
Specifications
| |
| Power supply | DC 5 V, 1200 mA |
| Built-in battery | 3.7 V, Lithium polymer |
| Operating time*1 | Approx. 50 hours (Noise cancelling: ON, AAC) Approx. 60 hours (Noise cancelling: OFF, AAC) Approx. 50 hours (Noise cancelling: ON, SBC) Approx. 60 hours (Noise cancelling: OFF, SBC) Approx. 40 hours (Noise cancelling: ON, LDAC) Approx. 50 hours (Noise cancelling: OFF, LDAC) |
| Call time*1 | Approx. 30 hours (Noise cancelling: ON) |
| Waiting Time*1 | Approx. 60 hours (Noise cancelling: ON, Auto power off does not work) Approx. 120 hours (Noise cancelling: OFF, Auto power off does not work) |
| Quick charge Operating time*1 | 15 min. charge, 10 hours playback (Noise cancelling: ON, AAC) |
| Charging time*1 (25°C (77°F)) | Approx. 3.0 hours (Using the power source 1200 mA or higher) |
| Charging temperature range | 10°C to 35°C (50°F to 95°F) |
| Operating temperature range | 0°C to 40°C (32°F to 104°F) |
| Operating humidity range | 35 %RH to 80 %RH (no condensation) |
| Mass (Weight) | Approx. 298 g (10.5 oz) (without cord) |
| |
| Bluetooth system specification | Ver. 5.2 |
| Wireless equipment classification | Class 1 |
| Max RF Power | 8 dBm |
| Frequency band | 2402 MHz to 2480 MHz |
| Supported profiles | A2DP, AVRCP, HSP, HFP |
| Supported codec | SBC, AAC, LDAC |
| |
| Driver units | 40 mm (1 9/16 in) |
| Impedance | 34 Ω |
| Frequency response*3 | 4 Hz to 40 kHz |
| Microphone | Monaural, MEMS Mic |
| Charging terminal | USB Type-C Shape |
| |
| USB charging cord (Input Plug: USB Type-A Shape, Output Plug: USB Type-C Shape) | Approx. 0.5 m (1.6 ft) |
| Detachable cord | Approx. 1.0 m (3.3 ft) |
*1 It may be shorter depending on the operating conditions.
*2 The time required to charge the battery from empty to full.
*3 When the power is ON
- Specifications are subject to change without notice.
Troubleshooting
Before requesting service, make the following checks. If you are in doubt about some of the check points, or if the remedies indicated in the chart do not solve the problem, refer to "Customer Services Directory" on "Safety Instructions" if you reside in the U.S.A., or refer to "CONTACT INFORMATION" on "Safety Instructions" if you reside in Canada, or consult your dealer for instructions.
No sound
- Make sure that the unit and the Bluetooth device are connected correctly. (See "When pairing your unit first time with a Bluetooth device")
- Check if music is playing on the Bluetooth device.
- Make sure that the unit is turned on and the volume is not set too low.
- Pair and connect the Bluetooth device and the unit again. (See "When pairing your unit first time with a Bluetooth device")
- Check if the Bluetooth compatible device supports "A2DP" profile. For details on profiles, see "Listening to music". Also refer to the operating manual for the Bluetooth compatible device.
Low volume
- Increase the volume of the unit. (See "Remote controlling")
- Increase the volume on the Bluetooth device.
Sound from the device is cut off. / Too much noise. / Sound quality is bad.
- Sound may be disrupted if signals are blocked. Do not fully cover this unit with the palm of your hand, etc.
- The device may be out of the 10 m (33 ft) communication range. Move the device closer to this unit.
- Remove any obstacle between this unit and the device.
- Switch off any wireless LAN device when not in use.
The device cannot be connected
- You can pair a maximum of 10 Bluetooth devices with this unit. When you pair a device after the maximum has been exceeded, previous devices are overwritten. To use overwritten devices again, do the pairing again.
- Delete the pairing information for this unit from the Bluetooth device, then pair them again. (See "When pairing your unit first time with a Bluetooth device")
You cannot hear the person on the other end of the call.
- Make sure that the unit and the Bluetooth enabled phone are turned on.
- Check if the unit and the Bluetooth enabled phone are connected. (See "When pairing your unit first time with a Bluetooth device")
- If the volume of the other person's voice is too low, increase the volume of both the unit and the Bluetooth enabled phone.
Cannot make a phone call
- Check if the Bluetooth compatible device supports "HSP" or "HFP" profile. For details on profiles, see "Listening to music" and "Making a phone call". Also refer to the operating manual for the Bluetooth enabled phone.
- Check the audio settings on the Bluetooth compatible telephone, and if the setting does not allow communication with this unit, change the setting. (See "When pairing your unit first time with a Bluetooth device")
The unit does not respond
- This unit can be reset when all operations are rejected. To reset the unit, press and hold [
![]() ] for 10 seconds or more. (See "Resetting the unit")
] for 10 seconds or more. (See "Resetting the unit")
 ] for 10 seconds or more. (See "Resetting the unit")
Amazon Alexa is not responding
- Make sure that the Amazon Alexa app is activated.
- Make sure that the voice assistant is set to Amazon Alexa.
- Make sure that data communication is enabled on the mobile device.
- Make sure that the device is paired with the Amazon Alexa app.
Cannot charge the unit. / The LED indicator does not light during charging. / Charging takes longer.
- Is the USB charging cord connected firmly to the USB terminal of the AC adaptor? (See "Charging")
- Make sure to charge in a room temperature between 10°C and 35°C (50°F to 95°F).
- Make sure the computer is turned on and is not on standby or sleep mode.
- Is the USB port you are currently using working properly? If your AC adaptor has other USB ports, unplug the connector from its current port and plug it into one of the other ports.
- If the measures mentioned above are not applicable, unplug the USB charging cord and plug it in again.
- It takes approx. 3 hours to charge the battery from empty to full.
- If the charge time and operating time become shortened, the battery may have run down. (Number of charging times of the installed battery: Approximately 500)
- The LED indicator lights in red when charging is in progress. When charging is completed, the LED indicator will go out.
The power does not turn on. / The power turns off.
- Is the unit being charged? The power cannot be turned ON during charging. (See "Charging")
- The battery is low when the LED indicator is blinking in red. Charge the unit.
IMPORTANT SAFETY INSTRUCTIONS
Read these operating instructions carefully before using the unit. Follow the safety instructions on the unit and the applicable safety instructions listed below. Keep these operating instructions handy for future reference.
- Do not use this apparatus near water.
- Protect the power cord from being walked on or pinched particularly at plugs, convenience receptacles, and the point where they exit from the apparatus.
- Unplug this apparatus during lightning storms or when unused for long periods of time.
- Refer all servicing to qualified service personnel. Servicing is required when the apparatus has been damaged in any way, such as power-supply cord or plug is damaged, liquid has been spilled or objects have fallen into the apparatus, the apparatus has been exposed to rain or moisture, does not operate normally, or has been dropped.
- Clean only with dry cloth.
Safety precautions
Unit


To reduce the risk of fire, electric shock or product damage,
- Do not expose this unit to rain, moisture, dripping or splashing.
- Do not expose units containing batteries to excessive heat (e.g., from storage in direct sunlight, fire or the like).
- Use only manufacturer's recommended accessories.
- Do not disassemble the product.
- Do not repair this unit by yourself. Refer servicing to qualified service personnel.
Avoid the use in the following conditions
- High or low extreme temperatures during use, storage or transportation.
- Disposal of a battery into fire or a hot oven, or mechanically crushing or cutting of a battery, that can result in an explosion.
- Extremely high temperature and/or extremely low air pressure that can result in an explosion or the leakage of flammable liquid or gas.
- Do not place this unit near a heat source.
- Do not listen with this unit at high volume in places where you need to hear sounds from the surrounding environment for safety, such as at railroad crossings, and construction sites.
- Keep this unit away from something susceptible to the magnetism. Such devices as a clock may not operate correctly.
- When using this unit in an airplane, heed the instructions given by the airline company. Some airlines may forbid your using the unit. For further details, contact the airline you will be flying with.
- Do not wear the headphones while charging.
- Contains small parts which may be a choking hazard. Not suitable for children under age 3.
- This product contains magnetic material. Consult your physician on whether this might affect your implantable medical device.
- Keep the airplane adaptor out of reach of children to prevent swallowing.
- Proper charging is not possible if there is dust or droplets of water on the charging terminal of the headphones. Remove the dust or water droplets before charging.
- Be aware that this unit may get warm while charging or immediately after charging. Depending on your constitution and health status, putting the headphones on may trigger adverse reactions such as skin redness, itching, and rash if the headphones have just been disconnected from the power source and are still warm.
- Do not use any other USB charging cords except the supplied one.
- Do not use any other detachable cords except the supplied one.
Battery
- Do not heat or expose to flame.
- Do not leave the battery in a car exposed to direct sunlight for a long period of time with doors and windows closed.
- Battery mishandling can cause electrolyte leakage which can damage items the leaked fluid comes into contact with. If electrolyte leaks from the battery, consult your dealer. Wash thoroughly with water if electrolyte comes in contact with any part of your body.
- When disposing of the battery, please contact your local authorities or dealer and ask for the correct method of disposal.
Allergies
- Discontinue use if you experience discomfort with the ear pads or any other parts that directly contact your skin.
- Continued use may cause rashes or other allergic reactions.
Precautions for listening with the Headphones
- Excessive sound pressure from earphones and headphones can cause hearing loss.
- Do not use your headphones at a high volume. Hearing experts advise against continuous extended play.
- If you experience a ringing in your ears, reduce volume or discontinue use.
- Do not use while operating a motorised vehicle. It may create a traffic hazard and is illegal in many areas.
- You should use extreme caution or temporarily discontinue use in potentially hazardous situations.
- Do not use the headphones if they emit any loud unusual noise. If this happens, turn the headphones off and contact customer service.
- Remove headphones immediately if you experience a warming sensation or loss of audio.
- The headphones do not play audio while charging.
This unit may receive radio interference caused by mobile telephones during use. If such interference occurs, please increase separation between this unit and the mobile telephone.
Use only the supplied USB charging cord when connecting to a computer.
The symbols on this product (including the accessories) represent the following:
 : DC
: DC
 : Standby
I : ON
- Remove the left ear pad to view certification information.
![]()
- Certification information (
![]() ) is indicated on the speaker plate portion, which becomes visible when the left ear pad (L side) is removed.
) is indicated on the speaker plate portion, which becomes visible when the left ear pad (L side) is removed.
![]()
- To attach the ear pad, insert the clips
![]() into the matching parts
into the matching parts ![]() on the ear pad. (There are 6 clips)
on the ear pad. (There are 6 clips)
![]()

 ) is indicated on the speaker plate portion, which becomes visible when the left ear pad (L side) is removed.
 into the matching parts
  on the ear pad. (There are 6 clips)
If you pull the ear pad too much, the ear pad can tear.
Register online at http://shop.panasonic.com/support (U.S. customers only)
If you have any questions, visit:
In the U.S.A.:
http://shop.panasonic.com/support
In Canada:
www.panasonic.ca/english/support
Documents / Resources
References
![shop.panasonic.com]() Panasonic - Official Consumer Product Support
Panasonic - Official Consumer Product Support![www.panasonic.ca]() Panasonic - Official Consumer Product Support
Panasonic - Official Consumer Product Support![play.google.com]() Google Play
Google Play![itunes.apple.com]() Technics Audio Connect on the App Store
Technics Audio Connect on the App Store
Download manual
Here you can download full pdf version of manual, it may contain additional safety instructions, warranty information, FCC rules, etc.
Download Technics EAH-A800 - Digital Wireless Stereo Headphones Manual
Advertisement


Need help?
Do you have a question about the EAH-A800 and is the answer not in the manual?
Questions and answers